Home Blog

How Balance Bikes Help Children Learn Cycling Faster: A Parent’s Guide

0

How Balance Bikes Help Children Learn Cycling Faster: A Parent’s Guide

For generations, the standard rite of passage for learning to ride a bicycle involved a shiny bike equipped with two small, plastic training wheels. Parents would spend hours jogging alongside, holding the back of the seat, hoping their child wouldn’t tip over. However, a significant shift has occurred in the cycling world. The move from training wheels to balance bikes has revolutionized how children master the art of riding, turning what was once a source of anxiety into an intuitive, joyful experience.

The old-school approach of using training wheels is increasingly viewed as an unnecessary crutch. While they provide a temporary sense of security, they often delay the development of the most critical skill required for cycling: balance. In this comprehensive guide, we will explore why balance bikes are the gold standard for early childhood development and how they help children learn to ride faster and more confidently.

What is a Balance Bike and How Does It Work?

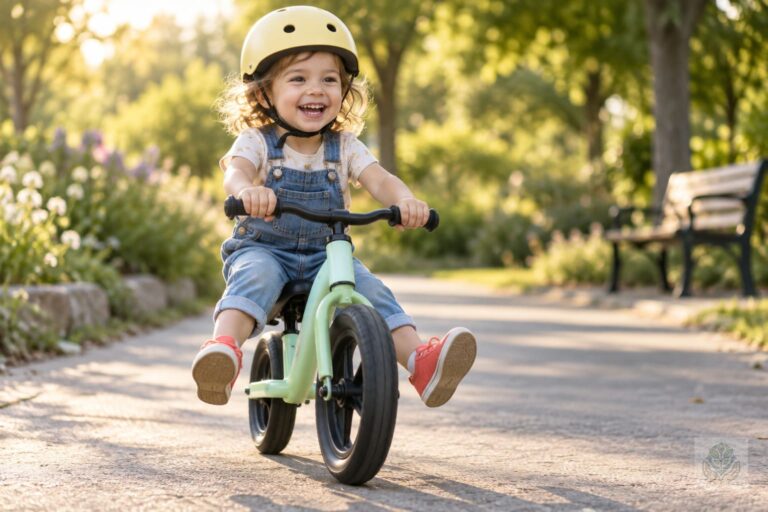
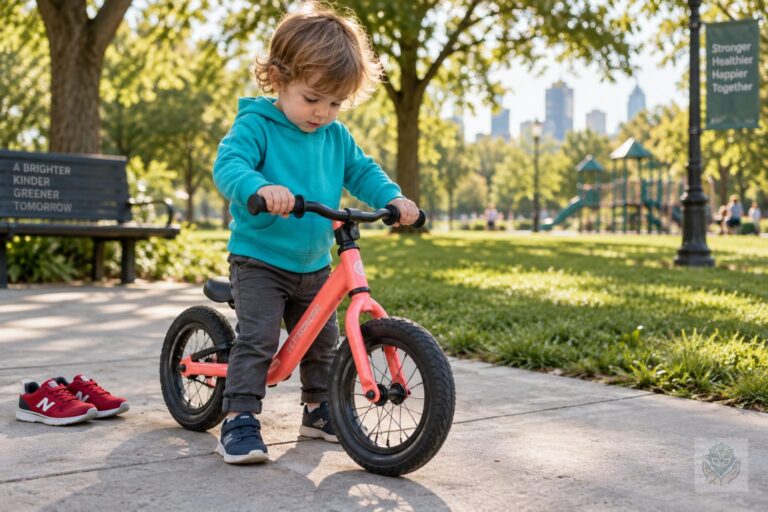
At its core, a balance bike is a simple, elegant machine. It is a pedal-less bicycle specifically designed for young children who are just starting their two-wheeled journey. Without a drivetrain, chains, or pedals to get in the way, the bike is incredibly lightweight and easy for a toddler to maneuver.

The mechanics are straightforward. Because there are no pedals to provide propulsion, the child naturally uses their feet to push off the ground. This action allows them to find their own center of gravity. By focusing purely on balance rather than the complex mechanics of pedaling, children gain an immediate sense of control. They learn how the bike responds to their body weight and how to shift their posture to stay upright.

Top 5 Ways Balance Bikes Help Children Master Cycling

Many parents wonder why removing the pedals is so effective. The answer lies in how the human brain learns physical tasks. Here are the five key ways balance bikes help your child master cycling faster:

  • Developing core balance and coordination: When a child sits on a balance bike, they must engage their core muscles to stabilize themselves. This builds foundational strength that is essential for riding a traditional bike later.
  • Building confidence through feet-down safety: The ability to put their feet flat on the ground at any moment provides a crucial safety net. This reduces the fear of falling, allowing children to experiment with speed and leaning without anxiety.
  • Mastering steering and directional control: Because they aren’t worried about pedaling, children can focus on using the handlebars to steer and navigate turns. This builds spatial awareness early on.
  • Removing the pedaling distraction: Pedaling is a complex motor skill. By separating the skills of balancing and pedaling, the child can master the hardest part—balance—before introducing the complexity of leg motion.
  • Improved spatial awareness and braking habits: Whether they use hand brakes or their feet, children on balance bikes learn how to stop their momentum safely and effectively long before they encounter the speed of a standard pedal bike. For younger riders, learning proper stopping techniques is crucial, as you can read more about in our guide on how to teach your child to brake safely on a bike.

The Science of Balance: Why Training Wheels Can Hinder Progress

There is a distinct scientific disadvantage to using training wheels. They create what experts call the crutch effect. When a bike has training wheels, it never actually leans or tilts, so the child never learns how to recover from a tilt. They essentially become dependent on the extra wheels to stay upright.

When you eventually remove those training wheels, the child often experiences a crisis of confidence. They realize they have no idea how to balance on two wheels, and they essentially revert to square one. Conversely, a child who graduates from a balance bike has already internalized the feeling of a moving two-wheeler. For them, adding pedals is simply a mechanical addition to a skill they already possess.

When Should Your Child Start Using a Balance Bike?

Most children are ready to begin their balance bike journey as soon as they can walk confidently and show an interest in movement. Generally, the ideal age range is between 18 months and 5 years. Look for the physical milestone of a child being able to sit on the seat with their feet planted flat on the ground while their knees are slightly bent.

It is important to remember that every child develops at their own pace. Some children might be ready at two, while others might not show interest until four. The goal is to make the experience fun, not forced, so they associate cycling with freedom and play. To keep them comfortable while they explore movement, consider pairing their early gear recommendations from our guide on how to choose flexible shoes for young children.

How to Transition from a Balance Bike to a Pedal Bike

The transition is almost always seamless. Often, the signs are clear: your child is consistently ‘gliding’ for long stretches with their feet up, steering confidently, and showing a desire to go faster. This is your cue to introduce a pedal bike.

When you make the switch, perform the ‘gliding test.’ Take the pedals off the new bike temporarily if possible, or simply ensure the seat is low enough. Let them get comfortable with the weight difference. When they are ready for the pedals, hold their shoulders rather than the bike seat. This forces them to maintain their own balance while you provide only the support they need to feel safe. For your next steps after mastering the transition, check out our helpful advice on how to choose the right bicycle size for your child.

Choosing the Right Balance Bike for Your Child

Not all balance bikes are created equal. When shopping, prioritize weight. A heavy bike is difficult for a young child to control. Look for lightweight frames, adjustable seat heights to grow with your child, and air-filled tires for better grip and shock absorption on varied terrain.

Safety gear is non-negotiable. Always ensure your child wears a properly fitted helmet. For younger riders, knee and elbow pads can offer extra comfort, turning small tumbles into learning experiences rather than reasons to quit. To keep their hands protected during early outdoor adventures, you may also want to look into the best bicycle gloves for young cyclists.

Conclusion

Choosing a balance bike is one of the best investments you can make in your child’s physical development and confidence. By prioritizing the natural development of balance over the artificial crutch of training wheels, you are setting them up for a lifetime of cycling enjoyment. The process is smoother, faster, and far more enjoyable for both the child and the parent.

Every child’s first ride is a memorable milestone. Embrace the learning process, keep the atmosphere light, and celebrate the small wins, like that first long glide with their feet off the ground. Do you have a story about your child’s first time on a bike? We would love to hear it in the comments below, or check out our collection of the best bags and storage accessories for family bike rides to find the perfect match for your little rider today.

Frequently Asked Questions

What is the main benefit of a balance bike?

A balance bike allows children to focus entirely on developing core balance, coordination, and steering without the distraction of pedals or the crutch of training wheels.

At what age can a child start using a balance bike?

Most children can start between 18 months and 5 years old, as soon as they can walk confidently and sit on the seat with their feet flat on the ground.

Why are training wheels discouraged by experts?

Training wheels prevent the bike from tilting, meaning children never learn how to recover from a lean, which often delays true balance development.

How do I know when my child is ready for a pedal bike?

Your child is ready when they consistently glide for long stretches with their feet off the ground, steer with confidence, and ask to go faster.

What should I look for when buying a balance bike?

Prioritize a lightweight frame, adjustable seat height for growth, and tires that offer good shock absorption and grip for your child.

How do children stop on a balance bike?

Children naturally use their feet to drag and stop their momentum, and many balance bikes also come equipped with child-safe hand brakes.
Choosing the Right Bicycle for a Young Child: The Ultimate Parent’s Guide

0

“`html

Choosing the Right Bicycle for a Young Child: The Ultimate Parent’s Guide

Buying your child their first bicycle is a monumental milestone. It is a rite of passage that promises summers filled with neighborhood adventures, newfound independence, and family memories. However, stepping into a bike shop or browsing online can quickly become overwhelming. With so many options available, choosing the right bicycle for a young child requires more than just picking their favorite color.

Getting the right size and type of bike is crucial for your child’s safety and long-term enjoyment of the sport. A bike that is too large or heavy can turn a fun activity into a frustrating experience, while the correct equipment can boost their confidence almost instantly. In this guide, we will walk you through the technicalities of sizing, the pros and cons of different training methods, and the essential safety features every parent should prioritize. For more specific sizing help, you can also read our guide on how to choose the right bicycle size for your child.

Why Size Matters: Understanding Bike Sizing

Many parents fall into the trap of buying a bike that is slightly too big, thinking their child will eventually grow into it. While this might save money in the short term, it is one of the biggest mistakes you can make when choosing the right bicycle for a young child. A bike that is too large is difficult to control, harder to balance, and significantly increases the risk of accidents.

Unlike adult bikes which are categorized by frame size, children’s bikes are primarily categorized by wheel diameter, typically ranging from 12 to 24 inches. However, wheel size alone does not tell the whole story. You must look at the stand-over height, which is the clearance between the ground and the top tube of the bike frame.

Your child should be able to comfortably stand over the top tube with both feet flat on the ground. If they are on their tiptoes or cannot clear the frame, the bike is too tall. A proper fit ensures that your child can easily mount and dismount, providing a critical safety cushion for when they need to stop suddenly.

Balance Bike vs. Training Wheels: The Great Debate

The method you choose to teach your child to ride can shape their entire relationship with cycling. For many years, training wheels were the gold standard. While they do provide stability, they often delay the development of the most important skill in cycling: balance.

Balance bikes have become increasingly popular because they remove the pedals entirely. By allowing children to scoot and glide using their feet, they naturally learn how to lean and balance the bike in motion. Once they are comfortable balancing, moving to a pedal bike is usually a seamless transition that happens in minutes rather than weeks.

If your child is already older or expresses a preference for pedals, training wheels are still a viable tool. However, it is important to adjust them so that they are slightly off the ground. This forces the child to use their own balance rather than relying on the wheels to keep the bike upright, effectively turning the training wheels into a safety backup rather than a crutch.

Step-by-Step: How to Measure Your Child for a Bike

To ensure you are choosing the right bicycle for a young child, you need accurate measurements. The most critical metric is your child’s inseam. This is not the same as their pant size. To measure correctly, have your child stand against a wall in their socks.

  1. Place a book between their legs, pushing it up gently as if they were sitting on a bike seat.
  2. Measure from the top edge of the book down to the floor.
  3. Compare this measurement against the manufacturer’s stand-over height specifications for the specific bike model.

Beyond the inseam, look for bikes that feature highly adjustable seat heights. Children grow quickly, and being able to raise the seat and handlebars as they get taller can extend the lifespan of the bike by a full season or two.

Key Features to Look For

When comparing models, the weight of the bike is often overlooked by parents but is arguably the most important factor for the child. A bike that weighs 40% of your child’s body weight will be incredibly difficult for them to pedal uphill or maneuver around obstacles. Look for lightweight aluminum frames whenever your budget allows.

Consider the braking system as well. Younger children often lack the hand strength required for effective hand brakes. Many starter bikes feature coaster brakes, which allow the child to stop by pedaling backward. As they graduate to larger bikes, look for a combination of hand brakes and coaster brakes to help them build the motor skills needed for more advanced riding. For guidance on teaching this crucial skill, check out our tutorial on how to teach your child to brake safely on a bike.

Finally, check the tires. Pneumatic, or air-filled, tires offer better traction and a smoother ride than hard plastic or foam tires. While they require the occasional pump, the difference in comfort and control is well worth the extra effort.

Safety Gear Essentials

Your child’s first bike is only as safe as the gear they wear. A high-quality helmet is non-negotiable. Always look for certifications from organizations like the CPSC or ASTM to ensure the helmet meets rigorous safety standards. A helmet should sit level on the forehead, not tilted back, and the straps should form a ‘V’ shape just below the ears. To protect their hands during rides or falls, consider picking up a pair from our recommended best bicycle gloves for young cyclists.

In addition to the helmet, consider adding high-visibility accessories. Reflective stickers, spokes lights, and a bell can help your child be seen and heard by drivers and pedestrians. Always insist that your child wears closed-toe shoes when riding. Sandals or flip-flops can easily slip off pedals or get caught in the drivetrain, leading to avoidable injuries.

When to Upgrade: Knowing When Your Child Needs a Bigger Bike

Even when you are successful in choosing the right bicycle for a young child, the time to upgrade will eventually come. You will notice the bike is too small if your child’s knees appear to come dangerously close to the handlebars when pedaling. If they look cramped or appear to be hunched over, their comfort and efficiency are compromised.

Another sign is a loss of confidence. If a child who was previously riding with ease suddenly starts struggling with steering or speed, it may be because the bike has become too small and twitchy for their growing body. When this happens, it is time to look for the next size up.

Conclusion

Selecting the perfect bike is a balance between safety, fit, and fun. By focusing on your child’s inseam measurement, prioritizing lightweight materials, and ensuring they have the right safety gear, you are setting them up for a lifetime of cycling enjoyment. Remember, the goal is to make riding an activity they look forward to, not a source of stress.

If you are still unsure about which model to pick, visit a local independent bike shop. The staff can provide professional fitting services that are invaluable for young riders. For more detailed reviews on top-rated children’s bikes, feel free to browse our recommended gear section to find the best options available on the market today. Once they are fully geared up, you might also want to explore our tips on the best bags and storage accessories for family bike rides or learn how to organize kids’ sports equipment at home once you return.

Frequently Asked Questions

What size bike does a young child need?

Children’s bikes are categorized by wheel diameter, usually ranging from 12 to 24 inches. The most important metric is the stand-over height, ensuring your child can comfortably stand over the top tube with both feet flat on the ground.

Are balance bikes better than training wheels?

Balance bikes help children naturally learn how to lean and balance without pedals. This often makes the transition to a regular pedal bike much faster and easier compared to traditional training wheels.

How do I measure my child for a bike?

Measure your child’s inseam by having them stand in socks against a wall. Place a book between their legs as if they were sitting on a saddle, then measure from the top of the book to the floor.

Why is bike weight important for kids?

A heavy bike is difficult for a young child to pedal or maneuver. Choosing a lightweight aluminum frame makes riding much easier, more enjoyable, and less exhausting for your child.

What safety gear does my child need for cycling?

Your child always needs a certified helmet that fits securely and sits level on their forehead. Additionally, they should wear closed-toe shoes and high-visibility accessories for better safety.

How do I know when my child needs a bigger bike?

You will know it is time to upgrade when your child’s knees come too close to the handlebars while pedaling, or if they appear cramped, hunched over, and struggle with steering.

25 Fun Park Activities for Toddlers and Preschoolers: Ultimate Guide

0

25 Fun Park Activities for Toddlers and Preschoolers: Ultimate Guide

Stepping out of the house and into a local park is one of the most rewarding parts of being a parent. Not only do 25 fun park activities for toddlers and preschoolers provide an excellent way to burn off energy, but they also serve as a vital classroom for early childhood development. When children play outside, they aren’t just having fun; they are building foundational skills that will serve them for years to come.

Outdoor play offers unique benefits that indoor environments simply cannot replicate. From the uneven terrain that challenges balance to the changing sunlight that promotes sensory exploration, parks are the perfect budget-friendly playground. Engaging in structured and unstructured play outdoors supports the development of gross motor skills, enhances sensory processing, and provides a natural space for vital social development as children learn to navigate sharing and taking turns with their peers. If you are looking for more ideas to keep them active at home, check out our guide on indoor activities that build gross motor skills for toddlers and kids.

Active & Gross Motor Park Games

Physical activity is essential for growing bodies. These games help toddlers and preschoolers refine their coordination while keeping the energy levels high.

  • Park Obstacle Course: Transform standard equipment into a race. Have your little one climb up the stairs, slide down, run around a specific bench, and hop back to the start.
  • Follow the Leader: Animal Edition: Instead of simple walking, turn it into a safari. Hop like frogs, stomp like elephants, or waddle like ducks through the park. You can find even more inspiration with these creative follow-the-leader games for kids at the park.
  • Toddler-Friendly Red Light, Green Light: This classic game helps with impulse control. Green light means go, red light means stop—perfect for developing listening skills.
  • Sidewalk Chalk Hopscotch: For older preschoolers, draw a simple hopscotch grid. It is an excellent way to practice jumping and counting simultaneously.
  • Park Freeze Dance: Bring a small speaker or just use your voice. Dance around the grass and freeze instantly when the music stops to improve motor control.

Sensory & Nature Exploration

Nature is a sensory playground. Allowing children to touch, look, and listen helps them connect with the world around them.

  • Nature Scavenger Hunt: Create a simple visual list with pictures of a leaf, a rock, a pinecone, and a flower. Let them search to check items off their list.
  • Leaf and Rock Rubbings: Bring paper and crayons. Place a leaf or rock under the paper and let your child rub the crayon over it to reveal the hidden texture.
  • Mud Kitchen Creation: Use the dirt and sand near the playground to make pretend soups, cakes, and teas. It is messy, but the sensory engagement is unmatched. For indoor messy play days, you might also enjoy these engaging water sensory play ideas.
  • Color Matching: Challenge your child to find items in nature that match specific colors, like finding something yellow, green, or brown.
  • Texture Walk: Encourage your child to safely touch different surfaces, such as smooth bark, rough rocks, and soft moss, to discuss how different things feel.

Creative & Imaginative Play

The park is a blank canvas for a child’s imagination. Use these activities to turn a simple afternoon into a magical story.

  • Picnic Pretend Play: Pack a light snack and a blanket. Role-play being at a fancy restaurant or hosting a teddy bear picnic in the shade.
  • Drawing in the Sand: Use a stick or finger to draw shapes, letters, or faces directly into the sand or loose dirt.
  • Storytelling under a Tree: Find a cozy spot under a canopy. Start a story and let your child finish the sentences to build narrative skills.
  • Cloud Watching: Lie on your backs and look up. Point out shapes you see in the clouds, like dragons, ships, or animals.
  • Flower Petal Soup: Collect fallen petals and leaves to create a colorful potion in a bucket or container.

Skill-Building & Focused Play

Even at the park, we can incorporate learning moments that feel like play rather than lessons.

  • Counting Park Features: Practice basic math by counting how many swings are in use or how many stairs lead up to the slide.
  • Simon Says: Use this to practice following directions, such as Simon says touch your toes or Simon says jump twice.
  • Duck, Duck, Goose: Gather a few friends for this timeless classic that teaches group participation and anticipation.
  • Playground Equipment I Spy: Play a game of I Spy focusing on colors and shapes found on the structures, like I spy a red circle or a blue square.
  • Rolling Balls Down Hills: Bring a few lightweight balls and test which ones roll faster down a grassy incline to learn basic physics concepts.

Quick & Easy Park Must-Haves

Sometimes the simplest tools make for the most memorable afternoons. Keep these in your park bag for spontaneous fun.

  • Bubble Time: Bubbles are universally loved. They encourage chasing and eye-tracking skills.
  • Sidewalk Chalk Art: Never leave home without it. You can draw targets, roads, or simply decorate the walkway.
  • Parachute Play: Use a lightweight blanket to lift up and down with your child, creating waves and air movement.
  • Animal Yoga Poses: Stretch into a cat pose, cobra pose, or downward dog right on the park lawn.
  • Park Clean-Up Challenge: End your play session by picking up litter. It teaches environmental stewardship and responsibility.

Parent Survival Tips for Park Days

A successful park outing requires a bit of strategy. First, pack your park bag with the essentials: water, high-protein snacks, sunscreen, baby wipes, and a basic first-aid kit. Staying hydrated is crucial, especially on sunny days, so offer water breaks frequently. For more tips on getting outdoors with younger kids, take a look at our guide on easy hiking adventures for families with young kids.

Safety is always the top priority. Always perform a quick check of the equipment for sharp edges or extreme heat before letting your child play. Finally, manage transitions by giving a five-minute warning before you leave. This helps children adjust to the idea that play is coming to an end, reducing the chance of a meltdown. If you need strategies for managing transitions and cooperation at home, you might find our article on setting clear rules without constant arguments helpful.

Conclusion

Implementing these 25 fun park activities for toddlers and preschoolers can transform a standard trip to the playground into a developmental milestone. Whether you are counting swings or hunting for leaves, the most important thing is the connection you build with your child. Embrace the dirt, enjoy the sunshine, and let your child lead the way. What is your favorite park activity to do with your little ones? Share your ideas in the comments below!

Frequently Asked Questions

What are some good park activities for toddlers?

Great park activities for toddlers include simple obstacle courses, animal-themed follow the leader, bubble time, drawing with sidewalk chalk, and sensory nature scavenger hunts.

How do outdoor park activities help preschoolers?

Outdoor park activities develop gross motor skills, enhance sensory processing, improve balance on uneven terrain, and support social development through sharing and taking turns.

What should I pack in my park bag for toddlers?

Always pack water bottles, high-protein snacks, sunscreen, baby wipes, a lightweight blanket, sidewalk chalk, bubbles, and a basic first-aid kit.

How can I keep my preschooler engaged at the playground?

Keep preschoolers engaged by playing structured games like I Spy, Red Light Green Light, or organizing a nature scavenger hunt with a simple picture checklist.

How do I handle meltdowns when leaving the park?

Manage park transitions effectively by giving your child a five-minute warning before it is time to leave, helping them adjust and reducing unexpected meltdowns.

Are park activities budget-friendly for parents?

Yes, local parks offer free or extremely low-cost environments for physical play, sensory exploration, and creative imagination using natural items like leaves and rocks.

25 Essential Safety Products for Baby and Toddler Rooms: The Ultimate Childproofing Guide

0

25 Essential Safety Products for Baby and Toddler Rooms: The Ultimate Childproofing Guide

As parents, our primary goal is to create a nurturing environment where our children can thrive, learn, and grow. Designing the nursery is an exciting milestone, but as your baby begins to crawl, climb, and explore, that dream room needs to double as a secure sanctuary. Understanding the transition from a stationary infant to a curious toddler is key to staying one step ahead of potential hazards.

Comprehensive childproofing is not just a project to complete once; it is a vital parenting priority that evolves as your child develops. By integrating these 25 essential safety products for baby and toddler rooms into your home, you can provide the freedom your child needs to explore safely while gaining the peace of mind every caregiver deserves.

The Foundation: Furniture and Anchor Safety

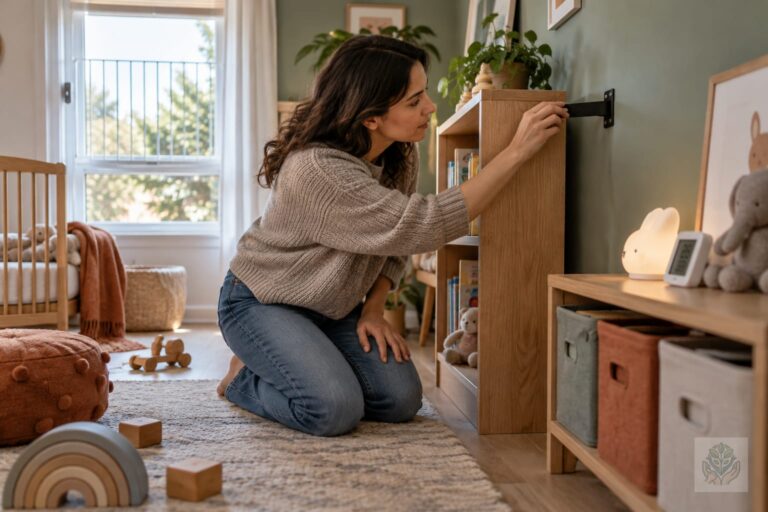
When children reach the mobility stage, they view furniture as climbing equipment. Heavy-duty furniture anchors are the most important investment you can make. Always secure dressers, bookshelves, and armoires to the wall using nylon straps or steel cables to prevent dangerous tip-overs. For more insights on securing your space, check out our guide on how to choose safe baby furniture for your home.

Beyond anchors, consider corner guards and edge bumpers for cribs, changing tables, and low-level nightstands. These soft, cushioned attachments protect little heads from painful bumps against sharp edges. Finally, use bookshelf stabilizers to ensure that even if a child attempts to pull on a shelf, the unit remains upright and stable.

Electrical and Cord Management Essentials

Curiosity often leads little fingers toward electrical outlets. Replace standard covers with sliding plug plates, which automatically close the outlet when a plug is removed, or use box-style outlet covers that hide the entire plug. These are far safer than plastic caps, which can pose a choking hazard.

Cord management is equally vital. Use cord shorteners and hidden cord management boxes to contain dangling lamp wires. Most importantly, install window blind cord cleats to wrap up long cords, eliminating the risk of strangulation. These small, inexpensive additions significantly improve the safety of your child’s room.

Window and Door Security

Windows should be beautiful but secure. Install window guards or restrictors that prevent the sash from opening more than four inches. For doors, install knob covers to prevent your toddler from wandering out of their room unattended. Hinge pinch guards are another unsung hero, as they prevent little fingers from getting crushed in the door gap.

For added protection, use door stoppers that prevent doors from slamming shut. By controlling the swing of the door, you protect your child from accidental finger injuries and ensure they do not become trapped in a closet or room during playtime.

Crib and Bedtime Safety

Sleep safety starts with the environment. Invest in a breathable crib mattress designed to allow for better airflow. Avoid traditional, thick bumper pads, which are a suffocation risk, and opt for mesh crib liners instead. These keep limbs inside the crib while maintaining proper ventilation. To learn more about setting up a secure sleeping space, read our crib safety essentials guide.

Modern technology can offer extra support, such as baby monitors with motion tracking that alert you to unusual activity. As your child grows, transition to bed rails during the toddler phase to prevent middle-of-the-night falls. These products create a secure environment where your child can rest peacefully.

Health and Air Quality Safety Products

The health of the room environment is just as important as physical safety. Smart air purifiers with HEPA filters help remove dust and allergens from the air, which is essential for developing lungs. A digital room thermometer and hygrometer will ensure the temperature and humidity levels remain optimal for sleep. You can also explore our guide on how to create a calm and comfortable sleep environment for kids for additional wellness tips.

Don’t overlook the flooring. Non-toxic rug pads provide an anti-slip surface that prevents heavy rugs from sliding when your toddler runs or jumps. Keeping the floor stable is a simple way to prevent slips, trips, and falls during active play.

General Room Hazard Prevention

Organizing a room is easier with toy organizers that feature soft-close lids; these prevent heavy tops from dropping suddenly on little fingers. Nightlights are essential, but choose cool-to-touch LEDs that do not pose a burn risk if handled by a child.

Safety gates are necessary if your child’s room leads to a hallway or stairwell. Additionally, consider baby-proof light switch extenders, which allow your child to reach the light switch safely, preventing them from trying to climb furniture just to reach the switch themselves.

The ‘Toddler-Proofing’ Evolution: What Changes?

As your baby turns into a toddler, the environment must change. You will likely replace nursery-specific items, like infant swings or changing pads, with toddler-safe alternatives like floor bookshelves and toddler-height toy bins. The focus shifts from passive protection—keeping them contained—to active hazard management, where you teach your child how to navigate their space safely. For creative ways to arrange these new items, take a look at our smart storage ideas for baby and toddler rooms.

Maintenance and Regular Safety Inspections

Safety is a journey, not a destination. Create a monthly safety check routine where you manually test every anchor, gate, and lock. Perform a floor-level audit by physically sitting on the floor to see what your child sees. From that vantage point, you might spot loose hardware, small items under the bed, or sharp corners you missed from your adult perspective.

Conclusion

Prioritizing the use of essential safety products for baby and toddler rooms allows you to create a space that is as stylish as it is secure. By systematically addressing potential hazards, you gain the confidence to let your child explore their world with curiosity and independence. Remember, you are your child’s first line of defense. Start your safety audit today, and don’t forget to download our printable safety checklist to keep your home in top shape.

Frequently Asked Questions

What are the most important safety products for a baby room?

Heavy-duty furniture anchors, sliding electrical outlet covers, window blind cord cleats, and window restrictors are among the most critical safety items.

When should I start childproofing my baby’s room?

It is best to complete major childproofing projects before your baby begins crawling and exploring, typically around six months of age.

Are plastic outlet caps safe to use?

Standard plastic plug caps can pose a choking hazard if removed. Sliding plug plates or box-style outlet covers are much safer alternatives.

How can I prevent furniture from tipping over?

Always secure dressers, bookshelves, and heavy armoires directly to the wall using heavy-duty furniture anchors like nylon straps or steel cables.

What is a floor-level safety audit?

A floor-level audit involves sitting physically on the child’s room floor to spot potential hazards, loose hardware, and sharp corners from a child’s perspective.

How often should I inspect childproofing products?

You should create a monthly safety check routine to manually test every anchor, safety gate, and lock to ensure they remain secure.

25 Beautiful Kids’ Room Decoration Ideas to Transform Their Space

0

25 Beautiful Kids’ Room Decoration Ideas to Transform Their Space

A child’s bedroom is more than just a place to sleep. It is a sanctuary for imagination, a hub for learning, and a private retreat where they can explore their personality. Creating a well-designed space is essential for childhood development, as it provides a sense of security and ownership. When you implement beautiful kids’ room decoration ideas, you are not just painting walls; you are crafting an environment that supports your child’s emotional and intellectual growth.

The secret to a successful room design is balancing aesthetics with functionality. While you want the room to look like it belongs in a magazine, it must also survive the realities of daily play. By focusing on smart storage and flexible layouts, you can ensure the room remains tidy without stifling your child’s natural desire to create and explore.

Choosing a Theme: Where to Start

Before diving into paint swatches and furniture catalogs, start by involving your child in the decision-making process. Children who help design their own rooms are more likely to take pride in their space and keep it organized. Ask them about their favorite colors, hobbies, or fictional characters. Even if their taste is unconventional, you can find a way to incorporate their vision tastefully.

When selecting a theme, consider the longevity of the design. While trendy themes are fun, they can be difficult to update as your child grows. A wise approach is to choose a timeless base—such as neutral walls or classic furniture—and use accessories, bedding, and artwork to introduce trending elements. This strategy allows for easy updates as your child’s interests shift from dinosaurs to space or from superheroes to sports. You can find inspiration for color schemes in our step-by-step nursery color theme guide.

25 Beautiful Kids’ Room Decoration Ideas

Here are 25 creative concepts to inspire your next room makeover, categorized to help you find the perfect fit for your home.

Whimsical & Imaginative

  • 1. Starry night ceilings using glow-in-the-dark decals for a cosmic bedtime routine.
  • 2. Indoor forts draped in fairy lights to create the ultimate secret reading nook.
  • 3. Large-scale wall murals featuring enchanted forests or underwater scenes to expand the visual depth of the room.
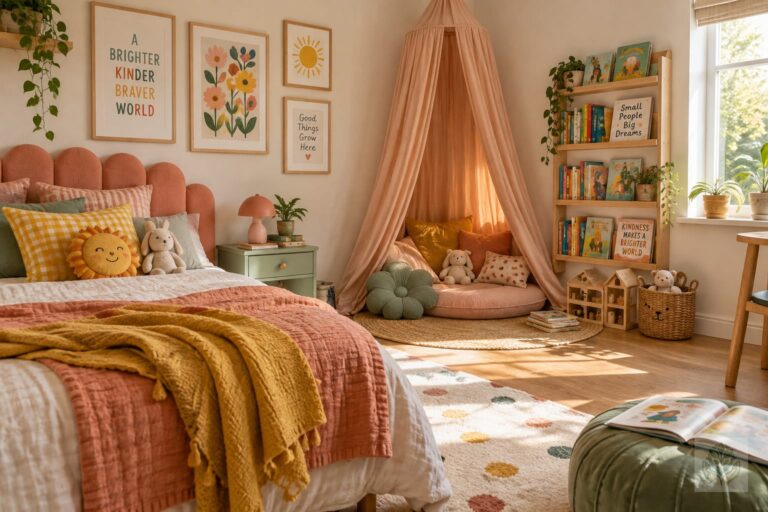
  • 4. Canopy beds or hanging tents that provide a cozy cocoon for quiet time.
  • 5. Floating bookshelves arranged in a creative pattern to make reading a focal point. Check out our guide on how to build a home library for young children for more tips.

Smart Storage Solutions

  • 6. Under-bed drawers that utilize wasted space for storing seasonal clothing or bulky toys.
  • 7. Vertical shelving units that reach to the ceiling, drawing the eye upward and keeping floor space clear.
  • 8. Labeled toy bins or clear acrylic containers to help children easily find and put away their belongings.
  • 9. Built-in window benches with hidden storage compartments beneath the seat.
  • 10. Wall-mounted pegboards for organizing craft supplies, accessories, or backpacks.

Modern & Minimalist

  • 11. Neutral color palettes, such as soft greys, creams, or muted greens, to create a calming atmosphere.
  • 12. Scandinavian-style furniture featuring clean lines and natural wood tones.
  • 13. Geometric wall decals that add visual interest without the need for busy patterns.
  • 14. Monochromatic color schemes that rely on varying textures like wool, linen, and cotton for depth.
  • 15. Minimalist platform beds that keep the silhouette of the room low and airy.

DIY & Personalized Touches

  • 16. A gallery wall showcasing your child’s own artwork in matching frames.
  • 17. Custom name signs made from wooden letters, neon lights, or wire art.
  • 18. DIY painted furniture, such as an old dresser transformed with bold colors or whimsical knobs.
  • 19. A growth chart ruler custom-built from reclaimed wood.
  • 20. Hand-painted wall borders that add a unique, artistic touch to the room.

Educational & Active Zones

  • 21. Chalkboard paint walls that encourage spontaneous drawing and learning without damaging the room.
  • 22. Magnetic wall surfaces for displaying educational posters or magnetic puzzles.
  • 23. A dedicated reading nook with floor cushions and a sturdy, accessible book display.
  • 24. A low-profile rock climbing wall or indoor balance beam to encourage physical activity, similar to the concepts in our indoor activities for gross motor skills guide.
  • 25. A dress-up station with a mirror and costume rack to foster imaginative roleplay.

Design Tips for Small Spaces

Small rooms often require more creativity, but they can be just as impactful as larger spaces. Start by using light, airy colors to make the room feel more expansive. White or pale pastel walls serve as a blank canvas that reflects natural light, making the space feel larger and cleaner.

Maximize vertical space whenever possible. Loft beds are excellent for small rooms, as they lift the sleeping area and create space underneath for a desk or a play area. Always opt for multi-functional furniture, such as ottomans with storage, tables with shelving, or desks that fold into the wall when not in use. You can also explore shelf organization ideas for children’s rooms to help reduce clutter.

Budget-Friendly Decorating Hacks

Transforming a room does not need to break the bank. You can achieve high-end results with simple DIY projects. Upcycling old furniture with a fresh coat of low-VOC paint or new hardware can give a piece a completely modern look for a fraction of the cost of new furniture.

Peel-and-stick wallpaper is another game-changer. It allows you to create an accent wall with bold patterns that can be easily removed when your child tires of the look. Additionally, try rotating your child’s toys and accessories. By storing half of them in a closet and swapping them out every few months, you keep the room feeling fresh, exciting, and less cluttered without spending a dime.

Safety Considerations for Kids’ Rooms

Beauty should never come at the expense of safety. Always anchor heavy furniture, such as dressers and bookshelves, to the walls to prevent tip-overs, much like the advice in our safe baby furniture guide. When choosing paints or finishes, look for non-toxic, low-VOC labels to ensure the air quality in your child’s room remains healthy.

Pay close attention to lighting and cords. Keep all lamp cords out of reach and hidden behind furniture or inside cord covers. Use age-appropriate lighting that is sturdy, and ensure that all electrical outlets are covered with safety plates.

Conclusion

Designing a space for your child is an rewarding process that yields long-term benefits. By using these beautiful kids’ room decoration ideas, you are creating a foundation for their creativity, rest, and personal growth. Remember that the best rooms are those that evolve alongside your child. Start with a solid plan, focus on safety, and don’t be afraid to let your child’s personality shine through.

We would love to see how you transformed your little one’s space! Share photos of your home projects on social media or subscribe to our newsletter for more expert decor tips, organizational hacks, and parenting inspiration delivered straight to your inbox.

Frequently Asked Questions

How do I choose a theme for a kids’ room?

Involve your child in the decision-making process by asking about their favorite colors, hobbies, or characters. Choose a timeless, neutral base for walls and furniture, and use easily replaceable accessories like bedding and artwork to introduce trending themes.

What are some smart storage solutions for small kids’ rooms?

Utilize under-bed drawers, vertical shelving units reaching to the ceiling, labeled toy bins, and built-in window benches with hidden storage compartments to keep the floor area clear and tidy.

How can I decorate a kids’ room on a budget?

Use budget-friendly hacks like upcycling old furniture with fresh paint, applying removable peel-and-stick wallpaper for an accent wall, and regularly rotating toys and accessories to keep the space feeling fresh without spending much.

How do I make a small kids’ room look bigger?

Use light, airy colors like white or pale pastels to reflect natural light. Maximize vertical space with loft beds or multi-functional furniture, and opt for pieces that fold away when not in use.

What are important safety considerations for a child’s bedroom?

Always anchor heavy furniture like dressers and bookshelves to the walls to prevent tip-overs. Use non-toxic, low-VOC paints, keep electrical cords hidden, and cover all outlets with safety plates.

How can I incorporate my child’s artwork into the room decor?

Create a stunning gallery wall showcasing your child’s creations in matching frames. This adds a personalized, artistic touch to the room while making your child feel proud of their work.

Essential Sleep Items Every Baby Nursery Needs: A Parent’s Checklist

0

Essential Sleep Items Every Baby Nursery Needs: A Parent’s Checklist

Preparing for a new arrival is an exciting time, but staring at an empty nursery can feel overwhelming. When it comes to your little one, the most important goal is creating a space that prioritizes rest and safety. Understanding the essential sleep items every baby nursery needs is the first step toward helping your infant establish healthy sleep habits from day one.

Why a dedicated sleep environment matters for your baby

Babies spend a significant portion of their first year sleeping. A dedicated nursery acts as a sensory-controlled environment that signals to your baby that it is time to wind down. By minimizing external disruptions and focusing on a consistent setup, you support your baby’s developing circadian rhythm. Learn how to shape this space further in our guide on how to create a safe and comfortable nursery for your baby.

The goal of this guide: Safety, comfort, and functionality

In this guide, we will break down exactly what you need to purchase and what you can safely leave off your registry. We focus on evidence-based recommendations, prioritizing the safe sleep guidelines set by pediatric organizations to ensure your peace of mind while your baby drifts off to sleep.

The Foundation: Safe Sleep Surfaces

The most critical element of your nursery is the surface where your baby rests. This is not the place to prioritize aesthetics over safety.

Choosing a firm, flat crib mattress

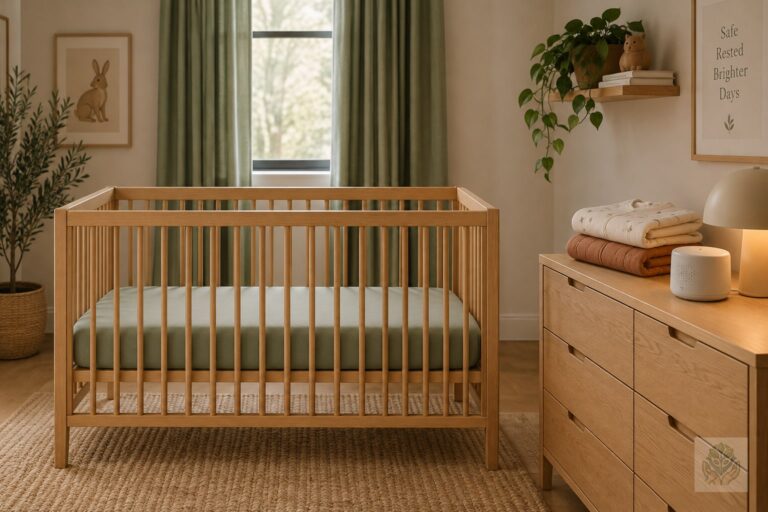
Always choose a crib mattress that is firm and fits snugly within the crib frame. There should be no gap between the mattress and the sides of the crib—if you can fit more than two fingers between them, the mattress is too small. A firm surface is essential to support your baby’s development and reduce risks during sleep.

Selecting a safety-certified crib or bassinet

Whether you choose a full-sized crib or a compact bassinet, ensure it meets current safety standards. Look for the JPMA certification seal and verify that the product has not been recalled. The slats on a crib should be no more than 2 3/8 inches apart to prevent entrapment. For more selection tips, review our parent’s safety checklist on how to choose a safe crib for your baby.

The importance of following SIDS prevention guidelines

Following safe sleep practices is non-negotiable. Always place your baby on their back to sleep on a flat, non-inclined surface. Keeping the sleep area free of clutter is the best way to prevent accidental suffocation and ensure your baby remains safe throughout the night.

Linens and Bedding: Less is More

It is tempting to decorate your baby’s crib with cute blankets and plush items, but the safest environment is actually the simplest one.

Why you only need fitted crib sheets

The only linen item you truly need for the crib itself is a tight-fitting crib sheet. Avoid decorative skirts or heavy covers. A fitted sheet stays securely in place and prevents any loose fabric from becoming a hazard. For guidance on quantities, check out our resource explaining how many crib sheets do you really need.

The dangers of loose blankets, pillows, and bumpers

Pediatricians strongly advise against using blankets, pillows, crib bumpers, or stuffed animals in the sleeping area. These items can block your baby’s airway or cause overheating. By keeping the crib completely bare, you eliminate the primary risks associated with sleep-related accidents.

Choosing breathable, organic materials

If you have the budget, prioritize natural, breathable fabrics like organic cotton or bamboo for your crib sheets. These materials help regulate your baby’s body temperature, keeping them comfortable without the risk of synthetic overheating.

Wearable Sleep Solutions

Since loose blankets are unsafe, parents need a way to keep their babies warm and secure. This is where wearable blankets come in.

Swaddles for newborns: Pros and cons

A swaddle mimics the feeling of the womb and helps suppress the startle reflex that often wakes newborns. However, once your baby shows signs of rolling over, you must stop swaddling immediately to allow them the freedom of movement they need to stay safe.

Transitioning to sleep sacks as baby grows

As your baby outgrows the swaddle, transition to a wearable blanket or sleep sack. These are essentially sleeveless sleeping bags that keep your baby warm without the danger of loose fabric. They are a staple of nursery sleep essentials for any parent.

Choosing the right TOG rating for your nursery temperature

Look for the TOG (Thermal Overall Grade) rating on sleep sacks. A lower TOG is perfect for warmer summer months, while a higher TOG provides extra warmth during winter. Matching the sack to your nursery’s climate ensures your baby is never too hot or too cold.

Creating the Perfect Sleep Environment

Even the best sleepers need a conducive environment. You can curate your nursery to maximize rest with a few smart additions.

Blackout curtains: The secret to better naps

Quality blackout curtains are a game changer. They block out sunlight during daytime naps and prevent streetlights or morning glare from waking your baby prematurely. This simple tool helps maintain a consistent sleep-wake schedule.

White noise machines: Blocking out household distractions

Household noises like the doorbell, talking, or pets can easily disrupt a baby. A white noise machine provides a consistent, soothing background hum that masks sudden sounds. Ensure you keep the volume at a moderate level—experts recommend keeping it under 50 decibels.

Managing room temperature and air quality

The ideal temperature for a baby’s room is typically between 68 and 72 degrees Fahrenheit. Use a nursery thermometer to monitor the room and consider a humidifier if the air is particularly dry, which can help your baby breathe easier while sleeping. For more comprehensive tips, read our guide on how to create a calm and comfortable sleep environment for kids.

Monitoring and Nighttime Care

Nighttime wake-ups are inevitable. Having the right tools on hand makes these transitions smoother for both you and your infant.

Baby monitors: Audio vs. video vs. smart sensors

Choosing a monitor depends on your preferences. Video monitors offer visual reassurance, while smart monitors can track breathing patterns. Regardless of the type, ensure the camera or monitor base is placed well away from the crib, with all cords kept strictly out of reach.

Dim lighting: Nightlights and dimmable lamps for low-stimulation feedings

Avoid turning on bright overhead lights for middle-of-the-night feedings or diaper changes. Use a warm-toned nightlight or a dimmable lamp to keep the environment quiet and sleepy. This helps your baby understand that the night is for resting, not for play.

What You Can Skip (The ‘Don’t Buy’ List)

The baby industry is full of products that look appealing but aren’t necessary—or worse, are unsafe.

Addressing common marketing traps in baby gear

You do not need expensive proprietary mattress pads, luxury bedding sets, or sleep positioners. Marketing often preys on parental anxiety, but your baby does not need a complex nursery to sleep well.

Items that compromise safety according to pediatricians

Avoid anything that claims to hold your baby in a specific position, such as wedges or sleep positioners. These are not recommended by pediatricians and can pose significant safety risks. If a product isn’t a firm mattress or a safe wearable blanket, think twice before adding it to your cart. Explore additional insights in our overview of how to choose safe baby furniture for your home.

Conclusion

When preparing for your new arrival, remember that the essential sleep items every baby nursery needs are fundamentally about simplicity. By focusing on a safe mattress, breathable sleep sacks, light control, and consistent routines, you are building the best possible environment for your baby’s growth and development.

Consistency is key to a restful nursery. Once you have your setup ready, stick to your chosen sleep routine to help your baby feel secure and comfortable. Do you have a favorite nursery item that helped your baby sleep? Share your thoughts in the comments or subscribe to our newsletter for more expert tips on navigating parenthood.

Frequently Asked Questions

What are the essential sleep items for a baby nursery?

The essential sleep items include a firm crib mattress, a safety-certified crib or bassinet, tight-fitting crib sheets, wearable sleep sacks or swaddles, blackout curtains, and a white noise machine.

Are pillows and blankets safe for a newborn in a crib?

No, pillows, loose blankets, bumper pads, and stuffed animals are unsafe and should be kept out of the crib to prevent the risk of suffocation and SIDS.

When should I transition my baby out of a swaddle?

You should stop swaddling your baby as soon as they show the first signs of trying to roll over, typically around two to four months of age.

What is the ideal room temperature for a baby nursery?

The ideal room temperature for a baby nursery is between 68 and 72 degrees Fahrenheit to ensure your infant stays comfortable and safe during sleep.

How do I choose the right sleep sack for my baby?

Choose a sleep sack based on the TOG (Thermal Overall Grade) rating, matching it to the ambient temperature of your nursery to keep your baby warm without overheating.

What baby sleep products should I avoid buying?

Avoid buying sleep positioners, wedge pillows, heavy quilts, decorative crib bumpers, and expensive luxury bedding sets that compromise safety guidelines.

Free Alphabet Printable Worksheets for Preschoolers: Fun Ways to Teach ABCs

0

Free Alphabet Printable Worksheets for Preschoolers: Fun Ways to Teach ABCs

Early letter recognition is the foundation of every child’s literacy journey. Before a child can read a sentence or write a story, they must first become familiar with the shapes and sounds of the alphabet. As parents and educators, finding ways to make this process both educational and enjoyable is key to long-term success. Free alphabet printable worksheets for preschoolers offer a perfect bridge between play and formal instruction.

Many parents struggle to balance screen time with educational engagement. By incorporating printable activities into your daily routine, you can transform what might have been passive time into an active, hands-on learning experience. These tools provide a structured yet flexible approach to teaching, allowing children to explore letters at their own pace.

The Benefits of Using Alphabet Printables for Preschoolers

Beyond simply keeping little hands busy, alphabet printables serve a crucial role in developmental growth. One of the most significant benefits is the development of fine motor skills. As children navigate a pencil or crayon through the curves and lines of a letter, they are strengthening the tiny muscles in their fingers and hands that are essential for future handwriting, which you can further support with fun pencil grip activities for toddlers and preschoolers.

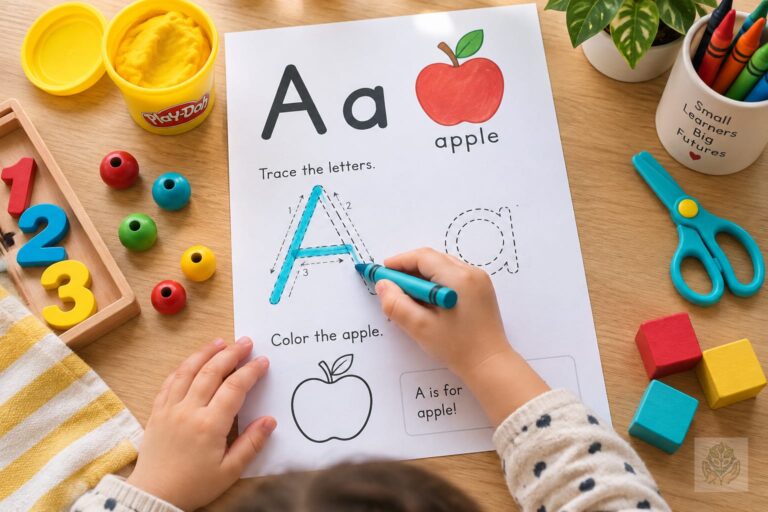
These worksheets also play a vital role in reinforcing letter-sound association. When a child identifies a picture of an apple next to the letter A, they are mentally linking the visual symbol to a phonemic sound. This is a foundational step in reading readiness. Furthermore, successfully completing a page builds immense confidence in early writers. Seeing their progress from shaky, uneven lines to controlled strokes fosters a sense of accomplishment that encourages them to keep practicing.

For busy parents and teachers, the convenience of printables is unmatched. Whether you are at home, waiting for an appointment, or sitting in a coffee shop, having a portable stack of activities ensures that learning can happen anywhere. It is a low-stress way to introduce early academic concepts without the pressure of a formal classroom environment.

Types of Alphabet Worksheets Every Preschooler Needs

Not all activities are created equal. To provide a well-rounded experience, you should look for a variety of worksheet styles that target different skills:

  • Letter Tracing Worksheets: These provide structured guidance for both uppercase and lowercase letter formation. They are excellent for developing muscle memory.
  • Letter Recognition Coloring Pages: These focus on visual identification. Children must search for a specific letter hidden among others, which sharpens their attention to detail. You can also explore engaging dot marker coloring activities for preschoolers for more colorful learning fun.
  • Find the Letter Hidden Pictures: These engaging games make identification feel like a puzzle, keeping children focused and entertained for longer periods.
  • Beginning Sounds Matching Activities: These worksheets ask children to draw a line connecting a letter to an image that starts with that letter’s sound, reinforcing phonics.

How to Effectively Use Alphabet Worksheets (Tips for Success)

Even the best worksheets can lose their appeal if they become a chore. To keep things engaging, aim for short, focused sessions lasting only 10 to 15 minutes. Children at the preschool age have limited attention spans, and short bursts of learning are far more effective than long, forced lessons.

Try pairing your printed materials with physical manipulatives. If your child is tracing the letter B, have them build a letter B out of playdough or find magnetic letters to place on the page. By involving multiple senses, you increase the likelihood that the information will stick. You can also incorporate easy dry sensory activities for toddlers to build tactile engagement alongside their daily tracing.

Designating a specific ‘learning corner’ in your home can also signal to your child that it is time to focus. A small desk, a comfortable floor mat, or even a dedicated tray can help create a sense of routine. To make these resources even more sustainable, consider placing your worksheets inside plastic sheet protectors. By using dry-erase markers, your child can practice the same letter dozens of times without needing a fresh sheet of paper every day.

Step-by-Step: Incorporating ABC Worksheets into a Daily Routine

Consistency is the secret to building strong literacy skills. Start by focusing on a ‘Letter of the Week.’ This approach allows your child to fully immerse themselves in one character at a time, exploring its shape, sound, and common words associated with it.

Combine your tracing exercises with phonics games throughout the day. For example, if you are working on the letter S, point out items around the house that start with the ‘ssss’ sound, such as ‘spoon’ or ‘sock.’ This helps bridge the gap between the worksheet on the table and the world around them.

When it comes to writing versus identification, be patient. Many children are ready to identify letters long before they have the physical control to write them. If your child seems frustrated by the pencil work, pivot back to identification games like coloring or finding letters. Allow their physical development to guide the intensity of the writing tasks.

Recommended Resources: Where to Find Quality Alphabet Printables

When selecting resources, look for designs that are clean and intentional. A good worksheet should feature a simple, clear font that isn’t overly decorative, as fancy scripts can be confusing for a young learner. The images should be recognizable and distinct to avoid unnecessary distraction.

We believe that high-quality learning materials should be accessible to everyone. Our library of free alphabet printable worksheets for preschoolers is designed with these exact principles in mind. From simple tracing guides to fun, interactive phonics puzzles, you can download and print our entire collection today to start your journey. If you need older material later on, you can also explore free printable worksheets for 5-year-olds as your child grows.

Conclusion

Introducing the alphabet to your preschooler is an exciting milestone that sets the stage for a lifelong love of reading and writing. By using free alphabet printable worksheets as a supplemental tool, you provide your child with the structure and repetition they need to succeed in a fun, pressure-free way. Remember that your support and encouragement are the most important tools in their kit. Keep the activities consistent, celebrate their progress, and enjoy this special time of discovery together. Download our free set of alphabet worksheets today and begin the adventure!

Frequently Asked Questions

At what age should a child start tracing letters?

Most children begin to show an interest in tracing around age three or four. If your child shows interest, start with simple, large-scale tracing activities and move to formal worksheets as hand control improves.

Should I teach uppercase or lowercase letters first?

While it is common to start with uppercase letters because they are easier to form, lowercase letters are more common in reading. Experts often suggest introducing them simultaneously or prioritizing lowercase early on.

How do I help a preschooler who is frustrated with handwriting?

Frustration usually stems from physical difficulty. Try using a thicker crayon, a marker, or a finger in sand. Shorten practice sessions and remind them that mistakes are a normal part of learning.

How long should daily alphabet worksheet sessions last?

Aim for short, focused sessions lasting only 10 to 15 minutes. Preschoolers have limited attention spans, and short bursts of learning are far more effective than long, forced lessons.

Can I reuse these alphabet worksheets?

Yes! You can place your worksheets inside plastic sheet protectors and use dry-erase markers so your child can practice the same letter repeatedly without needing fresh paper.

What skills do alphabet printables help develop?

Alphabet printables help develop fine motor skills, hand-eye coordination, letter recognition, and phonemic awareness by linking visual letter symbols to their sounds.

15 Engaging Dot Marker Coloring Activities for Preschoolers (Printables Included)

0

15 Engaging Dot Marker Coloring Activities for Preschoolers (Printables Included)

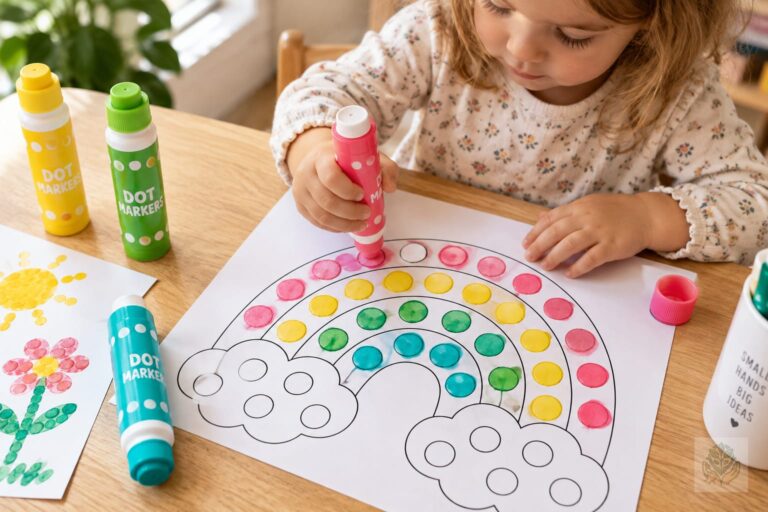
Finding the perfect balance between education and play can be a challenge for parents of toddlers and preschoolers. We want activities that are engaging, educational, and—let’s be honest—not incredibly messy. Enter the humble dot marker. These bingo daubers are absolute game-changers for early childhood development, offering a structured way for young children to explore creativity while building essential physical skills.

15 engaging dot marker coloring activities for preschoolers are more than just a way to kill time on a rainy afternoon. When children use these tools, they are engaging in a multisensory experience that supports their development in ways that traditional crayons simply cannot match. From strengthening hand muscles to teaching focus, these activities are a must-have in your homeschooling or weekend activity toolkit. You can also explore other ways to keep them busy with these engaging afternoon activities for preschoolers.

Developmental Benefits of Using Dot Markers

Many parents view dot markers as just another art supply, but child development specialists know better. These tools provide a unique opportunity to build the foundation for future academic success.

Hand-eye coordination and precision

Learning to place a dot inside a specific circle requires significant visual-motor integration. As your child learns to align the tip of the marker with a designated space, they are practicing the coordination needed for later tasks like handwriting and using scissors. This process helps bridge the gap between what their eyes see and what their hands can physically achieve. For more hands-on practice, you can try some fun DIY crafts that strengthen hand-eye coordination in kids.

Building pre-writing muscle strength

The tripod grip is a critical milestone for preschoolers. Dot markers require a specific grasp that encourages the use of the thumb, index, and middle fingers. By gripping the marker and pressing it down, children are actively building the small muscle strength in their hands and wrists, which is essential for holding a pencil correctly when they eventually start formal school work. You can find additional exercises in our guide on fun pencil grip activities for toddlers and preschoolers to boost fine motor skills.

Encouraging creativity without the mess

Let’s face it: paint and brushes are wonderful, but they often lead to stress for parents. Dot markers offer the satisfaction of painting with ink but in a contained, controlled format. They allow children to express themselves through color and pattern without the need for constant cleanup, making art time something everyone can look forward to.

Top 15 Dot Marker Coloring Activities for Preschoolers

Ready to get started? These activities utilize basic printables to target specific learning goals. Whether your child is just starting to identify colors or is ready to practice alphabet recognition, these ideas will keep them entertained.

Letter and Number Recognition (Alphabet dot sheets)

Fill the outline of letters with dots to reinforce shape and sound. For numbers, have your child dot the digit and then dot the corresponding number of objects nearby. You can pair these with strategies found in our guide on how to teach lowercase letters to preschoolers.

Color Matching Challenges

Create a sheet with various colored circles. Ask your child to use the matching marker color to fill in the circle. This reinforces both color identification and matching logic.

Dot-to-Dot Pattern Sequences

Encourage early math skills by creating pattern sequences (e.g., red, blue, red, blue). Ask your child to continue the sequence using their markers to strengthen their logical thinking.

Seasonal Dot Art (Holidays and Seasons)

From dotting a pumpkin in October to a snowflake in January, seasonal printables help children connect their art to the world around them. These thematic activities keep learning fresh and exciting throughout the year.

DIY Dot Marker Puzzles

Draw a simple picture, such as a star or a heart, and have your child fill it with dots. Once dry, cut the shape into three or four pieces to create a DIY puzzle they can assemble.

How to Integrate Dot Markers into Preschool Learning

To get the most out of these activities, it is important to introduce them with purpose. Here are some strategies for classroom or home learning.

Tips for teaching proper grip

If your child is struggling to hold the marker, try placing a sticker on the side of the marker barrel to show them where their thumb should rest. Remind them to use a light press rather than smashing the tip, which helps preserve the markers and encourages control.

Using dot markers for counting games

Use dot printables that feature ten-frames. Have your child place one dot per square while counting aloud. This physical connection to counting is far more effective than just memorizing numbers.

Sight word practice with bingo daubers

For preschoolers starting to read, write simple three-letter words on a page. Have them dot each letter of the word as they sound it out. This tactile method helps anchor the letter forms in their memory.

Creating Your Own Dot Marker Worksheets

You don’t need to be a professional designer to make custom materials. Using simple tools like Microsoft Word, Canva, or even hand-drawn circles on plain paper can create hours of entertainment.

Simply use the shape tool to create circles that are roughly one inch in diameter. Arrange these shapes into letters, numbers, or simple animals. Keep your designs clean and uncluttered to avoid overwhelming your young learner.

Conclusion

Incorporating 15 engaging dot marker coloring activities for preschoolers into your routine is a simple way to foster academic growth while having fun. By focusing on consistency and keeping the atmosphere light, you will help your child develop the fine motor skills they need to succeed.

Ready to begin your creative journey? Download our free printable pack today and watch your little one transform simple dots into works of art. Share your completed projects with us on social media—we love to see your little artists in action!

Frequently Asked Questions

At what age can kids start using dot markers?

Most children can safely start using dot markers around 18 months to two years old with proper adult supervision. At this stage, toddlers enjoy experimenting with colors and making repetitive marks.

Are dot markers washable?

Yes, most popular brands of dot markers are formulated to be washable. They generally wash easily off skin and out of most fabrics with soap and water, though checking individual labels is recommended.

How do dot markers help with preschool development?

Dot markers strengthen fine motor muscles, improve the pincer and tripod grips, and enhance hand-eye coordination as children learn to place dots precisely inside designated circles.

How can I prevent my child from making a mess with dot markers?

Use a dedicated art tray, place butcher paper under the worksheets, and establish clear rules that markers are strictly for use on paper to keep the activity contained.

Can dot markers be used for educational games?

Absolutely. You can use dot markers for letter recognition, counting exercises, color matching games, and practicing simple sight words to support early academic skills.

How do I make my own dot marker worksheets?

You can easily create custom worksheets using digital tools like Canva or Microsoft Word by drawing one-inch circles arranged into letters, numbers, or simple shapes.

10 Easy Dry Sensory Activities for Toddlers (Mess-Free Fun!)

0

10 Easy Dry Sensory Activities for Toddlers (Mess-Free Fun!)

If you are a parent of a toddler, you know that sensory play is essential. It is the language through which little ones explore the world. However, you might also dread the thought of water spills, paint-covered walls, or sticky slime ground into the carpet. This is where dry sensory activities for toddlers become your secret weapon.

Sensory play is a fundamental pillar of early childhood development. It helps toddlers understand textures, weights, and spatial relationships. By opting for dry materials, you can offer your child a rich tactile experience that keeps your home clean and your stress levels low. Let us dive into why these mess-free activities are a game-changer for your daily routine.

Why Choose Dry Sensory Activities?

The primary benefit of dry sensory bins is the simplicity of cleanup. While water bins require towels, mop-ups, and drying time, dry materials like rice or pasta are easily contained or vacuumed. For alternative wet play ideas, you can also explore our 15 engaging water sensory play ideas for young children. These activities encourage independent play, allowing you to fold laundry or enjoy a warm cup of coffee while your child is deeply engaged.

Beyond the convenience, dry sensory activities support critical developmental milestones. When a toddler scoops, pours, or sorts, they are refining their fine motor skills. They are also building concentration and hand-eye coordination. Exploring different textures—the smooth surface of a dried bean versus the soft fuzz of a pom-pom—helps children categorize information about the physical world.

Essential Supplies for Mess-Free Sensory Bins

You do not need an expensive kit to get started. In fact, most of the best supplies are already in your pantry. To set up successful dry sensory activities for toddlers, focus on three categories: a sturdy container, a filler, and transfer tools.

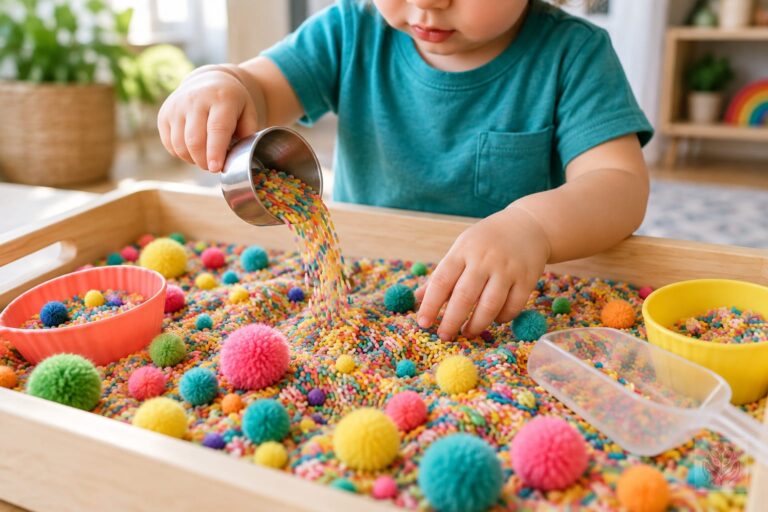
For the container, a plastic under-bed storage bin works perfectly because it has a large surface area. A shallow roasting pan or a wooden tray also works well for keeping items contained. For fillers, consider dried rice, split peas, uncooked pasta, dried beans, or pom-poms. You can find even more inspiration in our guide on 15 fun sensory bin fillers for toddlers. Finally, grab some basic tools like measuring cups, plastic scoops, funnels, and blunt-ended tongs. These items help toddlers practice the mechanics of grasping and releasing.

10 Easy Dry Sensory Activities Your Toddler Will Love

  1. The Rainbow Rice Excavation: Dye rice with food coloring for a vibrant, multi-sensory experience. Bury small plastic animals inside and let your toddler dig for treasures.
  2. Pasta Sorting and Transferring: Provide different shapes of dry pasta and ask your toddler to sort them into bowls using their fingers or large spoons.
  3. Pom-Pom Color Matching: Place a variety of colored pom-poms in a bin. Give your toddler small containers that match those colors and let them sort the pom-poms accordingly.
  4. Dried Bean ‘Sand’ Castle: Beans have a distinct weight and sound. Use cups and molds to let your child create shapes, focusing on the sensory feedback of the beans as they pour.
  5. Kinetic Sand Exploration: While slightly different, kinetic sand is a dry material that sticks only to itself, making it one of the most low-mess options available.
  6. Oatmeal Construction Site: Use dry oats as a base. Add small plastic trucks or construction vehicles to the bin for a pretend-play experience that feels great to touch.
  7. Dried Lentil Scooping Station: Lentils are smaller than beans, providing a different tactile sensation. Encourage your child to use a funnel to watch them flow into different bottles.
  8. Hidden Treasure Hunt (using dried corn): Use dried corn kernels as your base. Hide puzzle pieces or small toys deep inside for a fun search-and-find activity.
  9. Cotton Ball Texture Bin: This is a wonderful, soft option. Fill a bin with colorful cotton balls and encourage your toddler to count them or move them from one side of the tray to the other.
  10. Felt and Ribbon Tactile Box: For a non-food option, fill a box with strips of ribbon and scraps of felt. This encourages sensory exploration of fabrics without the risk of small loose items.

Safety First: Tips for Managing Sensory Play

While these activities are generally safe, supervision is mandatory, especially for toddlers who are still exploring with their mouths. If you are concerned about choking hazards, always choose larger fillers like large pasta shells or big pom-poms.

To keep materials inside the bin, place a large beach towel or an old plastic tablecloth underneath the setup. This makes cleanup as easy as folding the edges of the towel and shaking the leftovers back into the bin. Always store your sensory materials in airtight containers to keep them fresh and free from moisture or pests. For tips on keeping these and other items organized, check out our smart storage ideas for baby and toddler rooms.

How to Extend Playtime

To keep your child interested, rotate your supplies. You do not need to introduce a new theme every day; simply changing the tools can spark renewed interest. For example, replacing a spoon with a pair of kitchen tongs can make an old activity feel brand new. To encourage further independence and focus, you can also look into 10 Montessori toys that encourage independent play.

You can also incorporate seasonal themes to make things more exciting. During the fall, use dried corn and small pumpkins. During the winter, use white rice as ‘snow’ and add arctic animal figurines. These small adjustments keep the learning process fresh and engaging for your toddler.

Conclusion

Incorporating dry sensory activities for toddlers into your week does not have to be a major project. Start small, use what you have in your cupboards, and observe how your child learns through touch and manipulation. These moments of quiet, focused play are as beneficial for you as they are for your little one. What is your favorite sensory bin filler? Share your ideas in the comments below!

Frequently Asked Questions

What are dry sensory activities for toddlers?

Dry sensory activities involve using non-liquid materials like dried rice, beans, pasta, or pom-poms in a bin to provide tactile exploration for young children without the mess of water or paint.

Why choose dry sensory bins over wet ones?

Dry sensory bins offer extremely easy cleanup since spilled materials can be quickly swept or vacuumed up, eliminating the need for towels, mop-ups, and drying time associated with water play.

What supplies do I need to set up a dry sensory bin?

You only need three basic items: a sturdy plastic container or tray, a dry filler like rice, oats, or pasta, and transfer tools such as measuring cups, funnels, and spoons.

How do sensory activities help toddler development?

They refine fine motor skills, build hand-eye coordination, encourage independent concentration, and help toddlers learn to categorize different textures and weights in the physical world.

Are dry sensory bins safe for young toddlers?

Yes, as long as you provide active adult supervision and select larger fillers like big pom-poms or large pasta shells if your child still tends to put items in their mouth.

How can I keep sensory materials contained during playtime?

Place a large beach towel or a plastic tablecloth underneath the sensory bin to catch any stray pieces, making cleanup as simple as shaking the leftovers back into the container.

10 Creative DIY Crafts That Encourage Problem-Solving Skills in Kids

0

10 Creative DIY Crafts That Encourage Problem-Solving Skills in Kids

As parents, we often look for activities that do more than just pass the time. We want experiences that nourish our children’s growing brains. One of the most effective ways to foster cognitive development is through creative DIY crafts that encourage problem-solving skills in kids. When children engage in open-ended crafting, they are not just making art; they are learning to navigate challenges, experiment with physics, and iterate on their own ideas. You can explore more ideas for inspiration with our 15 indoor activities that encourage creative thinking in kids.

Crafting serves as a bridge between abstract thinking and physical manifestation. By taking raw materials and transforming them into functional items, children learn that they have the power to influence their world. This process strengthens their executive function, helping them plan, focus, and adjust their strategy when things do not go as expected.

Why Problem-Solving Skills Matter for Early Development

At its core, problem-solving is the ability to identify a challenge, generate potential solutions, and test them until one succeeds. When children practice this through play, they are developing cognitive flexibility. This skill allows them to switch between tasks and adapt their thinking to meet new demands.

The creative process is inherently built on trial and error. Whether it is a glue joint that will not hold or a structure that keeps tipping over, these small hurdles are actually golden opportunities. By encouraging our children to solve these minor crises, we teach them resilience. They learn that a mistake is not a failure, but rather a vital piece of data that points them toward a better solution.

Creative DIY Crafts for Kids

Craft 1: DIY Marble Run (Engineering & Physics)

Building a marble run is a classic way to introduce creative DIY crafts that encourage problem-solving skills in kids. For this project, you will need cardboard tubes, masking tape, shallow boxes, and a marble.

The main challenge is straightforward: how can you design a track that allows the marble to travel from the top to the bottom without getting stuck? This task forces children to think about gravity, momentum, and the importance of steepness. If the marble stops, they must analyze why and adjust the track accordingly. It is a fantastic exercise in architectural planning and basic physics. For other science-oriented play concepts, check out this guide on complete guide to STEM toys for kids of every age.

Craft 2: Cardboard Box Forts & Engineering (Structural Design)

Every child loves a fort, but turning it into an engineering project makes it an incredible learning experience. Gather various sizes of cardboard boxes, heavy-duty tape, and perhaps some clips or fasteners.

The problem here is maximizing space and ensuring structural integrity so the fort does not collapse. Children must consider load-bearing concepts, such as how to stack boxes so the roof stays up. This develops spatial reasoning and teaches them how to distribute weight effectively. It is a masterclass in stability and logic disguised as play.

Craft 3: Recycled Material Robots (Resourcefulness & Assembly)

Give your child a bin of recyclables—yogurt cups, bottle caps, wire, and boxes—and challenge them to create a robot. The core issue is connectivity: how do you join these mismatched shapes into a single, cohesive unit?

This requires significant pattern recognition and creative design. If the arm is too heavy for the body, the robot will tip over. How can they counterbalance it? This project encourages resourcefulness as they learn that the first solution is not always the best one, and that engineering involves a fair amount of revision.

Craft 4: DIY Puzzles and Tangrams (Logical Sequencing)

Create your own custom puzzles by drawing a picture on a square of cardboard and cutting it into irregular shapes. For a more structured challenge, look into the concept of tangrams, which uses geometric shapes to recreate silhouettes. You can also read more about spatial challenges in our complete guide to puzzle games for kids of every age.

The objective is to fit these parts back together to recreate the original image. This task builds strong visual-spatial skills. It forces children to rotate shapes mentally and predict how edges will align, which is a foundational skill for later mathematical success. Discover related options in our breakdown of 10 best STEM toys that improve logical reasoning skills in children.

How to Guide Without Taking Over (Parenting Tips)

It is easy to fall into the trap of doing the work for your child, especially when you see them getting frustrated. However, the true value of creative DIY crafts that encourage problem-solving skills in kids lies in the child doing the heavy lifting.

Use the technique of scaffolding. Instead of fixing a problem yourself, ask open-ended questions like, What do you think would happen if we moved this piece to the left? or Can you see why the tape is peeling off? By acting as a consultant rather than a foreman, you foster a safe environment where curiosity thrives. Let them experience the satisfaction of overcoming an obstacle on their own. For further support on encouraging independent activities, see our post on 10 Montessori toys that encourage independent play.

Conclusion

Integrating these activities into your weekly routine provides children with the tools they need to navigate a complex world. Remember, it is always about the process, not the product. The most beautiful sculpture is the one your child built while working through the frustration of a falling support beam.

By choosing creative DIY crafts that encourage problem-solving skills in kids, you are laying the groundwork for a future of confident, innovative thinking. Do you have a favorite project that kept your child engaged for hours? We would love to hear your experiences in the comments below!

Frequently Asked Questions

What are DIY crafts that encourage problem-solving skills?

These are open-ended crafting activities where children must figure out how to build, connect, or balance materials, which helps them develop critical thinking, spatial reasoning, and resilience.

How do crafts improve cognitive development in children?

Crafting bridges abstract thinking and physical creation. It strengthens executive functions by teaching kids how to plan, focus, and adjust their strategies when challenges arise during play.

What materials are needed for a DIY marble run?

You will need basic household items such as cardboard tubes, masking tape, shallow boxes, and a marble to test gravity and momentum.

How can I help my child without taking over the project?

Use scaffolding by asking open-ended questions like ‘What happens if we move this piece?’ instead of fixing the problem yourself, allowing your child to experience the satisfaction of overcoming obstacles.

Why is trial and error important in children’s crafts?

Trial and error teaches children that mistakes are not failures but valuable data that guides them toward finding a better solution, building confidence and resilience.

At what age can kids start doing problem-solving crafts?

Toddlers and preschoolers can start with simple stacking or sorting crafts, while older children can tackle complex engineering projects like cardboard robots and structured marble runs.