
Home Blog Page 10

Best Bicycle Gloves for Young Cyclists: A Parent’s Buying Guide (2024)

“`html

Best Bicycle Gloves for Young Cyclists: A Parent’s Buying Guide (2024)

When you see your child pedaling down the driveway, it is easy to focus on the helmet as the ultimate safety accessory. While helmets are non-negotiable, there is another piece of gear that often gets overlooked but can make a world of difference: the best bicycle gloves for young cyclists. Whether your little one is navigating the neighborhood cul-de-sac or tackling their first dirt trail, the right pair of gloves protects those delicate hands while improving their overall riding experience.

Cycling gloves are not just about style; they are an essential piece of safety gear designed to handle the realities of childhood cycling. From preventing painful blisters during long rides to providing vital cushioning during an unexpected tumble, gloves are a smart investment. In this guide, we will explore why these accessories matter, how to find the perfect fit, and our top recommendations for the current season. If you are looking to get your child more active, check out our 10 outdoor activities to boost toddler development naturally.

Why Kids Need Specialized Bicycle Gloves

Many parents wonder if children really need specialized gloves. The answer is a resounding yes. Beyond the cool factor, these gloves serve several practical functions that enhance a child’s safety and enjoyment on the bike.

Impact protection: Palm padding for falls

It is a universal truth that kids fall while learning to bike. When a child loses balance, their natural instinct is to put their hands out to catch themselves. Pavement and gravel are unforgiving surfaces. The best bicycle gloves for young cyclists feature reinforced palm padding that acts as a shock absorber, helping to prevent scrapes and abrasions when those palms hit the ground. For more tips on mastering bike skills, read our guide on how to practice starting and stopping a bicycle.

Enhanced grip: Controlling the handlebars in all weather

Little hands can get sweaty, especially on hot summer afternoons. This moisture can make rubber grips feel slick, making it harder for a child to maintain a firm hold on their handlebars or operate their hand brakes. Quality cycling gloves provide a textured palm surface that offers superior grip in both wet and dry conditions, giving your child the confidence to steer accurately.

Sun and element protection

Hands are constantly exposed to the sun while cycling. Gloves provide a physical barrier against harmful UV rays. Furthermore, on chillier mornings or during autumn rides, long-sleeved gloves protect little fingers from the wind, keeping them nimble and responsive.

Psychological boost: Kids feel like ‘pro’ cyclists

Never underestimate the power of gear to motivate a child. When kids pull on a pair of sleek, colorful cycling gloves, they often feel more like the professional riders they see on TV or in local bike parks. This sense of identity can be the difference between a child wanting to go for a ride or wanting to stay on the couch.

Key Features to Look for in Youth Cycling Gloves

Not all gloves are created equal. When shopping for the best bicycle gloves for young cyclists, keep these specific features in mind to ensure you get a product that is both durable and functional. When buying gear, you might also find our ultimate sports equipment guide for active kids helpful for sizing and safety tips.

Material: Breathability vs. Durability

Look for a combination of materials. The back of the hand should be made from a breathable, moisture-wicking synthetic fabric to prevent overheating. The palm, however, should be constructed from a more robust, synthetic leather-like material that can withstand repeated contact with the ground and handlebar friction.

Palm Padding: Gel vs. Foam for vibration damping

For casual neighborhood riding, foam padding is usually sufficient. However, if your child is getting into mountain biking or long-distance family rides, consider gel padding. Gel pads are excellent at absorbing vibrations from rough terrain, which reduces hand fatigue and prevents numbness.

Closure Systems: Velcro straps vs. slip-on styles

For younger children, wide Velcro straps are generally superior. They allow for an adjustable fit that stays secure and are easy enough for a child to put on and take off without assistance. Older children might prefer the streamlined feel of a slip-on glove with an elastic cuff.

Sizing: How to measure a child’s hand accurately

Never guess a child’s size based on age alone, as hand growth varies significantly. Always consult the manufacturer’s size chart. A glove that is too large will bunch up and cause irritation, while a glove that is too small will restrict circulation and movement.

Visibility: Reflective elements for safety

If your child cycles near dusk or in areas with traffic, look for gloves with reflective piping or logos. This simple feature makes your child’s hand signals more visible to motorists, adding an extra layer of security to their ride.

Top Picks: Best Bicycle Gloves for Young Cyclists (Categorized)

Selecting the right pair can be overwhelming, so we have categorized some of the best bicycle gloves for young cyclists based on typical needs.

  • Best Overall: Look for brands like Giro or Specialized, which offer youth-specific models that balance durability with excellent ergonomics and padding.
  • Best for Mountain Biking: Brands like Fox Racing provide full-finger gloves that feature reinforced knuckles and extra palm protection, ideal for trail riding.
  • Best Budget Option: Many multi-sport store brands offer excellent value packs that are perfect for kids who are constantly losing their gear. For more storage solutions, see our 15 genius sports equipment storage ideas to tame the garage clutter.
  • Best for Toddlers: Focus on gloves that are machine washable and feature oversized Velcro tabs for easy manipulation by small, developing fingers.
  • Best for High-Visibility: Seek out neon-colored or reflective-threaded gloves from safety-focused cycling manufacturers.

How to Measure Your Child’s Hand for the Perfect Fit

Getting the fit right is the most important step in finding the best bicycle gloves for young cyclists. Grab a flexible measuring tape and follow these steps.

  1. Measure the circumference of your child’s dominant hand at the widest point, just below the knuckles, excluding the thumb.
  2. Compare this measurement to the brand’s specific sizing chart.
  3. Ensure the gloves fit snugly like a second skin. If there is extra material in the palm, it can cause blisters. If the glove is too tight, it will feel uncomfortable and discourage your child from wearing them.

Maintenance Tips: Cleaning and Care

Cycling gloves take a beating. To make them last through the season, follow these simple care tips:

  • Check the label: Most synthetic cycling gloves can be machine washed on a gentle cycle. Use a mesh laundry bag to keep the Velcro straps from snagging on other clothing.
  • Air dry only: Never put cycling gloves in the dryer. High heat will break down the gel or foam padding and damage the elasticity of the wrist closure. Simply lay them flat to dry in a shaded area.

Frequently Asked Questions (FAQ)

Should kids wear full-finger or half-finger gloves?

Half-finger gloves are great for hot weather and give kids more dexterity for shifting gears. Full-finger gloves offer better protection against thorns, branches, and falls, making them the best choice for mountain biking.

Are adult extra-small gloves suitable for kids?

Usually, no. Adult gloves are designed for the proportions of adult hands, meaning the fingers are often too long and the palm width is inconsistent with a child’s hand. Stick to youth-specific sizing for the best result.

How often should I replace my child’s cycling gloves?

Replace them if they have visible holes, if the padding has flattened significantly, or if they have been involved in a heavy impact that may have compromised the integrity of the seams.

Conclusion

Investing in the best bicycle gloves for young cyclists is a small step that yields big results. By protecting their hands, you are boosting their confidence and ensuring that their riding experience remains comfortable and fun. Whether you prioritize impact protection for technical trails or simple grip for neighborhood adventures, the right pair of gloves will keep your child pedaling happily for miles to come. Ready to gear up? Be sure to explore our other reviews on youth helmets and safety lights to complete your child’s cycling safety kit. You can also find tips on how to stay prepared on every adventure with our guide to bike repair kits.

“`

Frequently Asked Questions

Should kids wear full-finger or half-finger gloves?

Half-finger gloves are ideal for hot weather and neighborhood riding. Full-finger gloves offer superior protection against falls and branches, making them best for mountain biking.

Are adult extra-small gloves suitable for kids?

No, adult extra-small gloves are proportioned for adult hands. The fingers are usually too long and the palm width incorrect, so you should always stick to youth-specific sizing.

How often should I replace my child’s cycling gloves?

Replace them if you notice visible holes, flattened padding, or compromised seams, especially after your child has taken a heavy fall.

How do I measure my child’s hand for gloves?

Measure the circumference of your child’s dominant hand at the widest point just below the knuckles, excluding the thumb, and compare it to the brand’s sizing chart.

Can I wash youth cycling gloves in a washing machine?

Yes, most synthetic cycling gloves can be machine washed on a gentle cycle. Always use a mesh laundry bag and allow them to air dry instead of using a dryer.

Why do children need padded bicycle gloves?

Padding acts as a shock absorber during falls, prevents painful blisters from handlebar friction, and reduces hand fatigue caused by vibrations on rough terrain.


20 Easy Exercise Activities for Toddlers at Home: Burn Energy Indoors

0

20 Easy Exercise Activities for Toddlers at Home: Burn Energy Indoors

If you are a parent of a busy toddler, you know the struggle of a rainy day or a long afternoon stuck inside. When your child has energy to burn but nowhere to run, the house can quickly descend into chaos. Finding easy exercise activities for toddlers at home is not just about keeping them busy; it is about supporting their physical development and helping them regulate their emotions. For more structured ideas, check out our guide on everything you need to know about indoor toddler activities.

We all want our children to grow up strong, coordinated, and happy. Integrating simple movement into your daily routine is one of the best ways to achieve this. You do not need a gym or fancy equipment to get your toddler moving. In this guide, we will explore practical, fun, and effective ways to help your child thrive indoors.

Why Physical Activity Matters for Toddlers

Movement is the primary language of early childhood. When your toddler jumps, climbs, or crawls, they are doing much more than just playing. They are building essential gross motor skills that lay the foundation for future physical tasks like running, biking, and sports. Regular physical activity also stimulates brain development by creating new neural pathways that improve focus and spatial awareness.

Beyond physical development, active play is a miracle for your daily schedule. Physical exhaustion often leads to better sleep quality at night and can significantly reduce crankiness during the day. By providing structured ways for your child to move, you are helping them process frustration, release pent-up energy, and ultimately improve their mood and behavior throughout the day. You can also explore 15 easy movement activities for kids at home to burn energy for additional inspiration.

20 Easy Exercise Activities for Toddlers at Home

Here are twenty simple ideas to turn your living room into an active zone. These activities require minimal setup and use items you likely already have around the house.

1. Animal Walks

Encourage your child to imitate different animals. Try a bear crawl, frog hop, or crab walk across the floor. This builds core strength and coordination in a fun, imaginative way.

2. Living Room Obstacle Course

Use sofa cushions, pillows, and ottomans to create a mini course. Have them climb over, crawl under, and balance on these soft surfaces to challenge their motor skills safely.

3. Freeze Dance Party

Put on their favorite music and dance together. When you pause the music, everyone must freeze in their current position. This is excellent for teaching impulse control.

4. Painter’s Tape Balance Beam

Apply a straight or zigzag line of painter’s tape to the floor. Challenge your toddler to walk along the line without stepping off. It is a simple, effective way to practice balance.

5. Balloon Volleyball

Blow up a balloon and keep it from touching the floor. It moves slowly, which makes it perfect for developing hand-eye coordination for even the youngest toddlers.

6. Indoor Scavenger Hunt

Hide small toys around a room. Ask your child to find them by running or crawling from spot to spot. Movement with a goal keeps them highly engaged.

7. Pillow Jump Challenge

Line up pillows on the carpet and have your toddler jump from one to the next like they are hopping across lily pads. Ensure the area is clear of sharp corners.

8. Sock Basket Toss

Roll up clean socks and have your toddler throw them into a laundry basket. Increase the difficulty by moving the basket further away as they get better.

9. Toddler Yoga Stretches

Guide them through simple poses like the Tree pose or Cat-Cow. Yoga is a wonderful way to teach body awareness and calm breathing.

10. Hallway Bowling

Use empty plastic bottles as pins and a soft ball to knock them down. This combines physical movement with a rewarding visual outcome.

11. Follow the Leader

Take turns leading the way around the house. Lead with high knees, jumps, tiptoes, or side-steps. It encourages mimicry and aerobic movement.

12. Kitchen Sink Car Wash

Fill a small tub with soapy water and let them wash their plastic toys. The standing, reaching, and scrubbing motions are great for upper body mobility. For more ideas on how to keep little hands busy, browse our 15 engaging indoor activities that improve fine motor skills for kids.

13. Crab Walk Races

Have them sit with their hands and feet on the floor and belly facing up. Racing across the room as a crab provides a great workout for their arms and shoulders.

14. Mirror, Mirror

Stand face-to-face and copy each other’s movements. Reach up high, touch your toes, or do jumping jacks. Mirroring helps them focus on their own physical form.

15. Laundry Basket Tunnel

Line up a few empty laundry baskets or cardboard boxes to create a long tunnel. Crawling through builds spatial awareness and arm strength.

16. Paper Plate Skating

Place paper plates under their feet on a carpeted floor. Have them slide their feet back and forth as if they are ice skating. It creates a funny, sliding sensation they will love.

17. The Floor is Lava

A classic game where they must jump from furniture to furniture without touching the floor. Keep it safe by staying low to the ground and providing plenty of supervision.

18. Hula Hoop Hops

Lay hula hoops on the floor and have your child hop into and out of them. It is a fantastic way to practice rhythmic jumping.

19. Stuffed Animal Parade

Gather their favorite plush toys and have a parade around the house. Marching, clapping, and singing while carrying toys builds endurance.

20. Simple Stretching Routine for Bedtime

End the day with slow, rhythmic stretches. It helps signal to their body that it is time to wind down after an active day of play. You can also incorporate these habits into a daily routine for kids by age.

Tips for Successful Indoor Playtime

Safety is the top priority when exercising indoors. Always clear the area of sharp objects, loose rugs that could slip, and small items that might cause a fall. If your child is jumping, ensure they are on a carpet or yoga mat to cushion their landing. Read our complete guide to baby safety at home for a room-by-room checklist.

Keep things fresh by rotating your toys and activities. Toddlers get bored quickly, so try introducing only one or two new movement games per week. Most importantly, keep it lighthearted. If they lose interest, pivot to something else rather than forcing the activity.

Creating a Daily Movement Routine

You do not need to schedule hour-long workout sessions to be effective. Incorporate movement into the transitions you already have. For example, have a quick dance party while you wait for the kettle to boil, or play follow-the-leader while walking from the bedroom to the kitchen.

By weaving these easy exercise activities for toddlers at home into your daily rhythm, you turn movement into a natural part of their lifestyle rather than an extra chore. Consistency is key, and even ten minutes of concentrated active play can make a world of difference in your toddler’s energy levels. If you need help managing this, see our complete guide to flexible daily schedules for young children.

Conclusion

Keeping your little one active indoors does not have to be stressful. With a little creativity and these 20 simple ideas, you can easily burn off that excess energy while building stronger bonds with your child. Focus on fun, keep it safe, and enjoy the giggles that come with an active home. What is your favorite way to get your toddler moving indoors? Share your ideas in the comments below!

Frequently Asked Questions

How much exercise do toddlers need daily?

Toddlers should ideally get at least 3 hours of physical activity spread throughout the day, including both structured play and free movement.

Can indoor toddler exercises improve sleep?

Yes, burning physical energy indoors helps regulate a toddler’s circadian rhythm, often leading to better sleep quality and easier bedtime routines.

What are safe indoor activities for active toddlers?

Safe activities include animal walks, painter’s tape balance beams, freeze dance parties, and soft pillow jumps in a clear, hazard-free space.

Do I need special equipment for toddler workouts?

No special equipment is needed. You can use everyday household items like laundry baskets, pillows, balloons, and painter’s tape.

How do I keep my toddler engaged during indoor play?

Keep activities short, rotate games frequently, and join in on the fun to keep your toddler motivated and excited to move.

Are obstacle courses safe for a two-year-old?

Yes, as long as you use soft cushions and low furniture on carpeted surfaces, ensuring constant parental supervision during play.

How to Teach Your Child to Brake Safely on a Bike: A Step-by-Step Guide

0

How to Teach Your Child to Brake Safely on a Bike: A Step-by-Step Guide

Learning to ride a bicycle is a major milestone in childhood, representing freedom, exercise, and newfound independence. While most parents focus heavily on balance and pedaling, learning how to teach your child to brake safely on a bike is arguably the most critical skill for long-term safety. Mastering the stop allows young riders to navigate corners, avoid obstacles, and handle unexpected neighborhood traffic with confidence.

Before you head out, ensure you are setting the stage for success. Safety gear, including a properly fitted helmet, is non-negotiable. Choose a flat, wide-open surface like an empty parking lot or a smooth, paved park path away from cars. The ultimate goal is to move your child away from the instinctual, jerky ‘skidding’ stop and toward a smooth, controlled deceleration that keeps them upright and in command. For more advice on active play, check out our guide on the ultimate sports equipment guide for active kids.

Preparation: Assessing Your Child’s Bike

Before your child takes off, you need to ensure their equipment is ready for the task. Start by checking the brake sensitivity. If your child has small hands, the brake levers might be too far away, requiring significant finger strength that they may not yet possess. Most bikes have an adjustment screw that brings the lever closer to the handlebar, making it much easier for little fingers to reach and squeeze. If you find they struggle with grip, try some easy hand strengthening activities for preschoolers.

You also need to understand the difference between coaster brakes and hand brakes. Coaster brakes, which engage when the child pedals backward, are common on smaller bikes. Hand brakes, however, provide more control for older children. Regardless of the system, ensure your child understands the importance of proper hand positioning. Their fingers should rest naturally on the levers at all times, rather than reaching for them only when they are already panicking.

Step-by-Step Teaching Methods

Teaching a new skill is best done in phases. Follow these steps to build confidence without overwhelming your child. For a broader look at cycling skills, you might also find our guide on how to practice starting and stopping a bicycle very helpful.

Phase 1: The Walking Test

Before they ever get on the pedals, have your child walk the bike while standing beside it. Ask them to squeeze the brakes gently to stop the bike’s forward motion. This helps them understand the relationship between the lever and the wheels without the added complexity of balancing or speed.

Phase 2: The Squeeze, Don’t Grab Technique

The most common mistake children make is grabbing the brakes with a full-hand death grip. Teach them the concept of a gradual squeeze. Tell them to imagine they are gently squeezing a sponge or holding a small, fragile toy. This prevents the bike from stopping abruptly and throwing their weight forward.

Phase 3: Front vs. Back Brakes

If the bike has two hand brakes, teach them that the back brake is for slowing down, while the front brake provides the most stopping power. Explain that using only the front brake too hard can cause the rear wheel to lift, which can lead to a tumble. A good rule of thumb is to squeeze both levers at the same time with equal pressure.

Phase 4: Gradual Stopping Drills

Once on the bike, have your child ride slowly on a flat surface. Call out “stop” and have them gently squeeze the brakes to come to a smooth halt. Praise them when they stop without skidding. Keep these sessions short and positive.

Common Braking Mistakes to Avoid

Even with practice, children are prone to panic reactions. The most dangerous is the “death grip,” where a child squeezes both levers as hard as they can in fear. This often leads to locked wheels, skidding, and a potential loss of balance. If you see this, stop and reinforce the “sponge” squeeze technique.

Another issue is relying solely on the front brake. If a child stops too abruptly using only the front, it can cause the bike to pitch forward. Emphasize that the rear brake is their primary tool for controlled slowing. By encouraging them to use both brakes in tandem, you stabilize the bike and ensure a safer, more predictable stopping distance.

Fun Drills to Practice Braking

Practice doesn’t have to be boring. Turn your training into a game to keep your child engaged. You can also explore 15 easy group games for kids at the park to make outdoor time even more exciting:

  • Red Light, Green Light: A classic game that forces children to practice starting and stopping on command.
  • Stop at the Chalk Line: Draw a line on the pavement and challenge your child to come to a full stop exactly on the line.
  • Cone Zones: Place cones in a row and have them practice weaving through them while practicing light braking adjustments to maintain speed control.

Safety Tips for Real-World Scenarios

Real-world conditions change the mechanics of braking. For example, braking on wet, slick surfaces requires much more distance than on dry pavement. Teach your child that if it is raining, they should begin braking much earlier than they normally would.

Gravel or sand can also cause tires to lose traction. Remind your child to keep the bike upright during these moments, as leaning while braking on loose terrain is a recipe for a slide. Most importantly, teach situational awareness. The best way to avoid a hard brake is to look ahead and spot hazards before they become emergencies. For maintenance tips to keep their bike running smoothly, see our guide on the ultimate guide to bike repair kits for family cycling.

Conclusion

Teaching your child to brake safely on a bike takes time, patience, and repetition. By breaking the process down into manageable steps and keeping the experience lighthearted, you are giving your child the tools to stay safe while enjoying their freedom. Remember that every rider learns at a different pace, so celebrate the small wins, like a smooth stop from a low speed. Before you head out for a long family ride, conduct one final safety check to ensure brakes are tight and tires are properly inflated. With a little guidance, your little cyclist will be cruising safely in no time. For more ways to foster independence, see our tips on how parents can encourage independent hygiene habits.

Frequently Asked Questions

What is the best age to start teaching kids how to brake on a bike?

Children can start learning basic braking concepts as early as age three or four when using balance bikes or pedal bikes with coaster brakes. As they transition to hand brakes around age five to seven, you can introduce gradual squeezing techniques.

Should my child use the front or rear bike brake?

Children should ideally use both brakes simultaneously with equal pressure. The rear brake helps control speed and prevents skidding, while the front brake provides stopping power. Using only the front brake too hard can cause the bike to tip forward.

Why does my child keep skidding when stopping?

Skidding usually happens when a child panics and applies a full-hand death grip on the brake levers. To fix this, teach them to squeeze the brakes gently as if they are compressing a soft sponge.

How can I adjust bike brakes for small hands?

Most children’s bikes feature an adjustment screw on the brake levers. Turning this screw brings the lever closer to the handlebar, making it much easier for small fingers to reach and squeeze comfortably.

What fun games can help kids practice bike braking?

You can play classic games like Red Light, Green Light, draw a chalk line on the pavement for them to stop on, or use cones to create obstacle courses that require controlled speed adjustments.

How does wet weather affect bicycle braking?

Wet pavement significantly reduces tire traction and increases stopping distances. Teach your child to start applying their brakes much earlier than usual when riding in rainy or slick conditions.

15 Classic Playground Games Every Child Can Enjoy (Screen-Free Fun)

15 Classic Playground Games Every Child Can Enjoy (Screen-Free Fun)

In our modern digital era, the lure of glowing screens and virtual games is undeniably strong. However, nothing quite replaces the joy of a sunny afternoon spent outdoors with friends. Classic playground games offer more than just a break from technology; they provide a vital foundation for childhood development that screens simply cannot replicate. Learning how parents can manage screen time at home is an essential first step in prioritizing this active play.

When children engage in 15 classic playground games, they aren’t just running around. They are navigating social hierarchies, learning to negotiate rules, and pushing their physical limits in a safe, controlled environment. These activities prove that you do not need expensive toys or batteries to create unforgettable memories. All you need is a bit of space, some imagination, and a few eager participants.

The Benefits of Traditional Playground Games

Why do these games remain popular decades after they were first invented? The secret lies in their simplicity and the multifaceted developmental advantages they offer. When children participate in outdoor play, they are building physical strength, coordination, and agility. These gross motor skills are essential for healthy growth and long-term confidence.

Beyond the physical, these games serve as a training ground for social-emotional growth. In a game of tag or hopscotch, children learn the nuances of teamwork, the necessity of following rules, and the art of conflict resolution. They must communicate clearly to keep the game moving, fostering leadership and empathy along the way. Furthermore, these activities enhance cognitive function by requiring kids to think on their feet, anticipate the moves of others, and devise strategies in real-time. For more ideas on how to encourage physical movement, explore our guide on 15 easy movement activities for kids at home to burn energy.

Category 1: High-Energy Chase Games

Chase games are the heart of the playground. They burn off excess energy and get the heart rate up, providing an immediate mood boost for kids of all ages.

  • Tag: The quintessential playground activity. Variations like Freeze Tag, where being tagged requires standing still until freed, add a layer of strategy. Shadow Tag involves trying to step on someone else’s shadow, turning the sunlight into a game element.
  • Red Light, Green Light: This game is a fantastic tool for teaching impulse control. Players must stop instantly when the leader calls Red Light, which helps children develop self-regulation and focus.
  • Duck, Duck, Goose: A classic for younger groups, this game helps children practice social anticipation and waiting for their turn. It builds a sense of group cohesion and excitement that is contagious.

Category 2: Games Requiring Minimal Equipment

You don’t need a shed full of sports gear to stay active. These classics prove that simple tools are often enough to facilitate hours of fun. If you want to organize your play space, check out our 15 genius sports equipment storage ideas to tame the garage clutter.

  • Hopscotch: With just a piece of chalk and a rock, children can develop balance, rhythm, and coordination. It is a wonderful way to practice motor planning while having fun.
  • Four Square: Using a rubber ball and a paved square, children learn about cooperative play and sportsmanship. It is a fast-paced game that keeps everyone engaged and waiting for their next turn.
  • Jump Rope: Whether performing solo tricks or jumping in a long rope held by friends, this activity is an excellent workout for the cardiovascular system. It also teaches rhythm and timing through classic jump rope rhymes.

Category 3: Imaginative & Social Play

Sometimes the best play is social and cognitive rather than purely physical. These games rely on listening and patience. Engaging in this type of play also highlights the educational benefits of pretend play explained as it relates to imagination and child development.

  • Hide and Seek: This is the ultimate test of patience and spatial awareness. Children learn to assess their environment and manage their emotions while waiting to be found or searching for their peers.
  • Follow the Leader: This game builds leadership and listening skills. The leader must create a sequence of actions, and the followers must pay close attention, encouraging focus and memory retention.
  • Simon Says: A brilliant way to develop concentration and attention to detail. Children learn to distinguish between auditory cues and impulsive reactions, which helps improve listening comprehension.

Tips for Encouraging Inclusive Play

Playgrounds are diverse spaces, and inclusion is key to a positive experience. As an adult, you can modify games to ensure every child feels included. For instance, if you have children of varying ages, allow older kids to act as mentors or referees, or adjust the boundaries of a game to accommodate different physical abilities. You can further support their growth by incorporating 7 positive parenting habits for raising confident and caring kids during these social interactions.

Promote a culture of sportsmanship by highlighting effort rather than just the outcome of a game. If a child feels overwhelmed, encourage them to take a “referee” role so they can stay involved without the pressure of direct competition. Your role as an adult is primarily to act as a facilitator. Step in when conflicts need mediation, but step back to allow children the freedom to negotiate and learn from their own interactions.

Safety First: Playground Etiquette for Kids

Safety is the foundation of fun. Teach your children to be aware of their surroundings and to look out for younger or smaller peers. Basic etiquette, like taking turns on equipment and respecting personal space, goes a long way in preventing accidents. For outdoor play safety tips, you can also review our guide on 10 outdoor activities to boost toddler development naturally.

It is equally important to discuss how to handle winning and losing gracefully. Remind your child that the purpose of playing 15 classic playground games is to enjoy the process and the company of friends. A good sport celebrates their teammates’ successes and accepts a loss with a shrug and a smile, knowing that they can always play again another time.

Conclusion

The impact of traditional play on childhood development is profound. By engaging in 15 classic playground games, children build the resilience, empathy, and physical fitness they need to thrive. These moments of screen-free fun create lasting memories and foster a sense of community that digital interactions simply cannot match.

This weekend, I challenge you to step away from the devices and join your children at the local park. Whether you are leading a round of Simon Says or chalking out a hopscotch grid, you are showing them that life is meant to be lived actively. Share your favorite childhood playground memories with your family and spark a new tradition of outdoor fun today.

Frequently Asked Questions

What are the benefits of classic playground games?

Classic playground games help children build physical strength, coordination, and agility. They also teach vital social skills such as teamwork, communication, conflict resolution, and impulse control.

Why is screen-free outdoor play important for kids?

Screen-free outdoor play promotes healthy physical growth, enhances cognitive function, and reduces screen time. It encourages imagination and allows children to form genuine connections with peers.

What equipment is needed for traditional playground games?

Many traditional games require little to no equipment. Simple items like chalk, a rubber ball, a jump rope, or just an open space are often all you need for hours of entertainment.

How can I make playground games inclusive for all children?

You can include children of all abilities by modifying game rules, adjusting boundaries, or assigning support roles like refereeing to accommodate different physical needs and ages.

What are some high-energy chase games for kids?

Popular high-energy chase games include Tag, Freeze Tag, Shadow Tag, Red Light, Green Light, and Duck, Duck, Goose, which help children burn off energy and improve focus.

How do games like Simon Says help child development?

Games like Simon Says and Follow the Leader improve listening comprehension, concentration, and attention to detail by teaching kids to follow specific auditory cues and instructions.

Crib Safety Essentials Every Parent Should Know: A Complete Guide

Crib Safety Essentials Every Parent Should Know: A Complete Guide

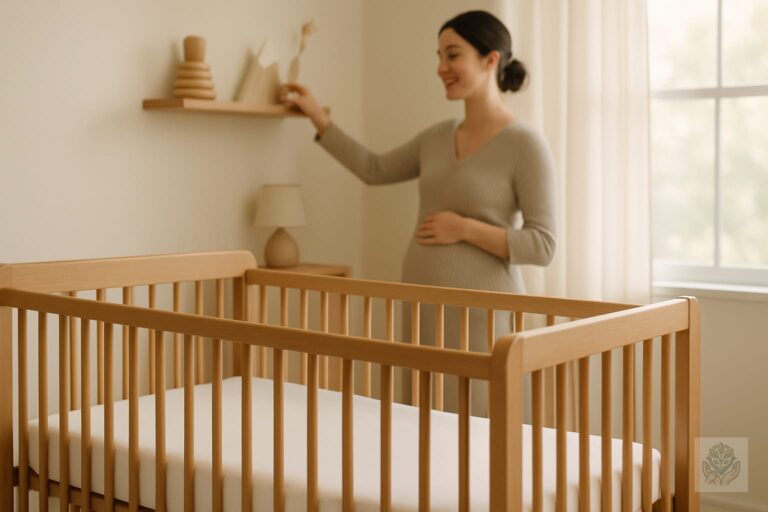
Welcoming a new baby into your home is a whirlwind of emotions, joy, and a fair amount of learning. Among the most important tasks on your to-do list is creating a safe sleep environment. While it might seem overwhelming at first, mastering these crib safety essentials will give you peace of mind so you can focus on those precious moments with your little one. You can also explore our complete guide to baby safety for a comprehensive look at securing your entire home.

Understanding the risks is not about creating fear; it is about empowerment. By learning how to reduce the risk of Sudden Infant Death Syndrome (SIDS) and accidental sleep-related injuries, you are providing the best foundation for your baby’s growth. This guide serves as your ultimate resource for everything you need to know about setting up a secure, healthy, and cozy crib.

The ABCs of Safe Sleep Explained

Pediatricians and sleep experts consistently emphasize a simple acronym to remember the foundations of a safe sleep space: the ABCs. Following these three principles is the single most effective way to protect your infant during naptime and bedtime. For further reading, check out our tips on how to create a safer sleep environment for babies.

A: Alone – Why the crib should be free of clutter

It can be tempting to decorate a crib with beautiful blankets, plush stuffed animals, or decorative pillows. However, the safest sleep surface is one that is completely empty. Alone means no toys, no loose bedding, and no items that could cover your baby’s face. Your baby does not need anything but a flat, firm mattress and a tightly fitted sheet to sleep soundly. For advice on selecting the right bedding, see our baby fitted sheets buying guide.

B: Back – The importance of back-sleeping

Placing your baby on their back for every single sleep session is non-negotiable. Whether it is a quick nap in the afternoon or a full night of sleep, back-sleeping significantly reduces the risk of suffocation. Once your baby can roll over on their own, you do not need to flip them back, but you should always start them on their back until they demonstrate that physical milestone.

C: Crib – Meeting safety standards

The crib itself must meet rigorous safety standards. This includes choosing a product that is certified for safety, ensuring the slats are appropriately spaced, and making sure the hardware is secure. A safe crib serves as a sanctuary, not a storage space for extra gear.

Choosing the Right Crib and Mattress

When shopping for nursery furniture, your priority should be compliance and safety rather than just aesthetics. Always look for the Juvenile Products Manufacturers Association (JPMA) certification seal and ensure the product meets current Consumer Product Safety Commission (CPSC) guidelines. If you are starting to furnish the room, check out our recommendations for essential furniture for a functional nursery.

The dangers of vintage or second-hand cribs

We love sustainable shopping, but cribs are one item where you should be cautious. Older cribs, particularly those with drop-sides, have been banned in many regions due to their history of causing entrapment and injury. If you must use a second-hand crib, ensure it was manufactured after 2011, has no missing hardware, and has not been recalled.

Firmness matters: Why the mattress must be tight-fitting

A soft, plush mattress might sound comfortable, but babies need a firm surface to support their development and prevent suffocation. Furthermore, ensure there is no gap between the mattress and the crib frame. If you can fit more than two fingers between the mattress and the side of the crib, the mattress is too small and presents an entrapment hazard.

What to Keep OUT of the Crib (The ‘No-Go’ List)

Many parenting products are marketed as essential for crib comfort, but in reality, they often create dangerous environments. Keeping these items out of the sleep space is critical.

  • Crib Bumpers: These have been linked to suffocation and entrapment. The safest crib is one with bare sides.
  • Loose Bedding: Heavy blankets, quilts, and comforters pose a significant risk of overheating and suffocation.
  • Stuffed Animals: While cute, plush toys should be reserved for supervised playtime outside of the crib.

Safe alternatives to heavy blankets

If you are worried about your baby getting cold, use a wearable blanket or a sleep sack. These allow your baby to move their hips freely while keeping them warm without the risks associated with loose, heavy blankets. Swaddles are also excellent for newborns, provided you stop using them as soon as your baby shows signs of trying to roll over.

Safe Crib Placement in Your Nursery

Where you place the crib in the room is just as important as what is inside it. Keep the crib away from windows where cords from blinds or curtains could pose a strangulation hazard. Additionally, keep the crib away from wall heaters, air conditioning vents, and electrical cords to prevent overheating or electrical accidents. For more decor tips that prioritize safety, explore our nursery decor ideas for a peaceful sleep space.

Is room sharing recommended?

The American Academy of Pediatrics recommends that babies sleep in the same room as their parents, but on a separate sleep surface, such as a bedside bassinet or a crib, for at least the first six months. This makes feeding and monitoring easier while keeping the baby in a protected, designated sleep zone.

Maintaining a Safe Sleep Environment as Baby Grows

Safety is not a one-time event; it is an ongoing process that changes as your child develops. As your baby becomes more active, you must adapt your safety protocols. For a broader perspective on your child’s developmental journey, take a look at our roadmap to healthy newborn care.

  • Lowering the mattress: As soon as your baby can sit up, lower the mattress to the lowest level to prevent them from climbing out.
  • Transitioning: If your child begins to attempt climbing over the crib rail, it is usually time to transition to a toddler bed or floor bed.
  • Regular inspections: Every month, check your crib for loose screws, wobbly legs, or broken slats. Tighten any hardware as needed.

Conclusion

Prioritizing crib safety essentials is the greatest gift you can give your baby. By following the ABCs of safe sleep, carefully selecting your nursery furniture, and keeping the crib free of unnecessary items, you are creating a nurturing environment where your little one can thrive. Remember, if you are ever in doubt, consult your pediatrician for guidance tailored to your baby’s specific needs.

You have got this, parents. Take it one step at a time, stay diligent, and enjoy those quiet, peaceful nights of rest with your growing family.

Frequently Asked Questions

What do the ABCs of safe sleep stand for?

The ABCs stand for Alone, Back, and Crib. Babies should sleep alone in a crib on their back for every nap and bedtime.

Are crib bumpers safe for babies?

No, crib bumpers are unsafe because they pose risks of suffocation, entrapment, and strangulation. The safest crib has bare sides.

How firm should a baby mattress be?

A baby mattress must be very firm and fit tightly inside the crib frame with no gaps larger than two fingers to prevent entrapment.

Is it safe to use a second-hand crib?

Second-hand cribs can be used only if they were manufactured after 2011, have no missing hardware, are not recalled, and do not have drop-sides.

When should I lower the crib mattress?

You should lower the crib mattress to its lowest position as soon as your baby learns to sit up to prevent them from falling out.

What should my baby wear instead of a heavy blanket?

Wearable blankets, sleep sacks, or swaddles for newborns are safe alternatives that keep your baby warm without suffocation risks.

How to Choose a Color Theme for a Baby Nursery: A Step-by-Step Guide

How to Choose a Color Theme for a Baby Nursery: A Step-by-Step Guide

Preparing for the arrival of a new baby is an experience filled with anticipation and joy. One of the most rewarding parts of this journey is designing the nursery. While selecting cribs and changing tables is important, deciding how to choose a color theme for a baby nursery often sets the entire mood of the space. It is more than just an aesthetic choice; it is about creating a sanctuary where your little one will sleep, dream, and grow.

In this guide, we will walk you through the process of selecting a palette that balances style with functionality. We will explore color psychology, current design trends, and practical tips to ensure your chosen colors contribute positively to your baby’s environment.

Understanding the Impact of Nursery Colors

Before grabbing a paint swatch, it helps to understand how color psychology works. Colors have a profound effect on our emotions and energy levels, and this applies to babies as well. Warm tones, such as soft yellows, terracottas, and corals, tend to be energizing and cozy. While they can make a room feel inviting, too much bright warm color might be overly stimulating for a newborn.

Conversely, cool tones like sages, sky blues, and gentle lavenders are known for their calming properties. These shades are excellent for promoting relaxation and better sleep cycles. When learning how to choose a color theme for a baby nursery, consider your primary goal for the room. Is it a space for high-energy play, or is your main objective a tranquil atmosphere for nap time? Balancing these tones is the secret to a well-rounded nursery. If you need help with the layout, check out our 15 calm and cozy nursery decor ideas for a peaceful sleep space.

Phase 1: Finding Your Inspiration

Design paralysis is a common hurdle for new parents. To avoid feeling overwhelmed, start by identifying a hero piece. This could be a beautiful piece of art, a patterned rug, or a set of crib bedding that you absolutely love. By pulling colors directly from an item you have already selected, you create a cohesive foundation for the entire room. You can also explore our essential furniture for a functional nursery to ensure your decor items serve a practical purpose.

Platforms like Pinterest and Instagram are fantastic resources for building digital mood boards. Collect images of nurseries that catch your eye, but try to look for common threads. Are you consistently drawn to minimalism, or do you prefer maximalist, colorful patterns? Additionally, look at the aesthetic of the rest of your home. You do not need to match every room, but creating a natural flow from the hallway into the nursery can make your living space feel more intentional and cohesive.

Phase 2: Popular Color Palette Trends

The design world has shifted away from strictly gendered colors. Today, modern parents are embracing versatile options that stand the test of time. Earth tones, such as dusty olive, terracotta, and warm greys, are incredibly popular because they bring a sense of grounding to the room. These shades are perfect for a gender-neutral color scheme that feels sophisticated yet sweet.

If you prefer a more traditional look, classic pastels like soft buttery yellow or muted mint can create a light and airy feel. For those who want to make a statement, consider using a bold accent wall in a deep navy or moody forest green paired with soft, neutral furniture. Whether you choose a monochromatic look, which uses varying shades of the same color, or contrasting color blocks, ensure the colors you select represent the mood you want to foster.

Phase 3: Practical Considerations for Parents

Practicality should always take center stage in nursery design. When choosing paint, always opt for low-VOC or zero-VOC (volatile organic compound) options. These are healthier for your baby’s developing lungs and ensure your nursery air quality remains high. Furthermore, consider a washable finish, such as eggshell or satin, which stands up to the inevitable scuffs and messes that come with parenthood. Safety is paramount, so consider reviewing our everything parents need to know about baby safety: the ultimate guide as you finalize your layout.

Lighting is another crucial factor. Natural light changes significantly throughout the day. A color that looks soft and creamy in the morning might appear harsh under the golden hue of late afternoon sun. Always observe your paint samples at different times of the day before committing. Finally, think about longevity. If you want a nursery that can grow with your child, choose a neutral base for the walls and express your chosen color theme through easily swappable decor like curtains, rugs, and throw pillows.

Step-by-Step Strategy: How to Test Your Colors

Never rely on a tiny paper swatch. Always purchase actual paint samples. Paint a large square on your wall or a piece of white poster board and move it around the room. Pay attention to how the light interacts with the shade near the windows versus the darker corners.

To achieve a professional look, apply the 60-30-10 rule. This interior design principle suggests that 60 percent of the room should be your main neutral color, 30 percent should be your secondary color, and 10 percent should be an accent color. This balance prevents the space from feeling chaotic and ensures that your chosen theme remains pleasing to the eye for years to come. As your baby grows and starts exploring, you might want to integrate best Montessori toys for cognitive development to keep their environment engaging.

Common Mistakes to Avoid When Picking Nursery Colors

One of the biggest mistakes parents make is choosing colors that are far too overstimulating. Bright primary reds or neon greens can be overwhelming for an infant who is still developing visual perception. Keep the base of the room soft and save the bold, high-contrast patterns for toys and books. For ideas on how to pick safe items for your little one, read our everything you need to know about choosing toys by age.

Another common pitfall is ignoring the importance of negative space. Do not feel the need to fill every inch with color or wall decals. White space acts as a visual anchor that allows the eyes to rest. Finally, resist the urge to over-match your furniture. A crib that perfectly matches the dresser and the changing table can feel sterile. Mixing textures, like wood tones with painted metals or soft fabrics, adds warmth and character to the nursery. You can learn more about creating an organized environment in our 10 clever open storage ideas for a Montessori-inspired kids’ room.

Conclusion

Learning how to choose a color theme for a baby nursery is an invitation to express your love and creativity. Trust your parental intuition—if a color makes you feel happy and calm, it is likely a great choice for your baby as well. Remember that the nursery does not need to be a magazine-perfect space to be a wonderful home for your child. The most important elements are the comfort, safety, and love you bring into the room every single day. We would love to see your progress! Share your nursery transformations with our community, or sign up for our newsletter for more expert parenting tips and design inspiration.

Frequently Asked Questions

When should I start picking a color theme for my baby nursery?

It is best to start planning your nursery color theme during the second trimester when you have more energy and time to test paint samples and order decor items.

Are bright colors bad for a baby nursery?

Bright primary colors can be overly stimulating for newborns. It is recommended to use softer shades for the main walls and reserve bright colors for small accents like toys.

How do I use the 60-30-10 rule in a nursery?

Allocate 60 percent of the room to a main neutral color, 30 percent to a secondary color, and 10 percent to a bold accent color for a balanced look.

What type of paint is safest for a baby room?

Always choose low-VOC or zero-VOC paints with an eggshell or satin washable finish to ensure good indoor air quality and easy cleanup.

Should the nursery color match the rest of the house?

The nursery does not need to match every room, but creating a natural flow from the hallway helps the home feel more intentional.

How can I make the nursery grow with my child?

Choose neutral wall colors and add your chosen color theme through easily swappable accessories like rugs, curtains, and throw pillows.

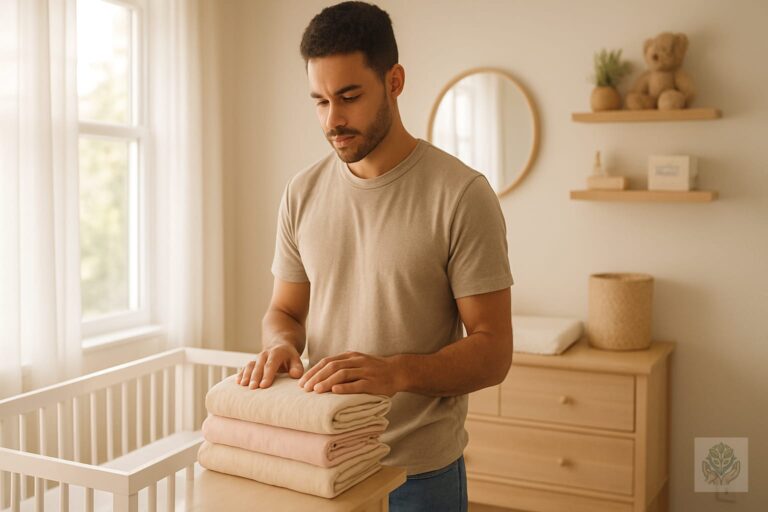
How Many Crib Sheets Do You Really Need? A New Parent’s Guide

How Many Crib Sheets Do You Really Need? A New Parent’s Guide

Building a baby registry is an exercise in balancing excitement with practicality. As you browse through endless aisles of adorable nursery decor and essential gear, you will eventually reach the bedding section. It is easy to get caught up in the patterns and themes, but the most important question is a practical one: how many crib sheets do you really need?

Many new parents assume they need a massive stockpile to keep up with the chaos of newborn life. Between diaper leaks, surprise spit-up incidents, and the sheer volume of laundry a baby generates, the fear of running out of clean bedding is real. However, over-purchasing can lead to unnecessary clutter. In this guide, we will break down the ideal quantity and why the number of crib sheets matters for your sanity. If you are still setting up, browse our list of essential furniture for a functional nursery to ensure you have all your storage needs met.

The Golden Rule: How Many Crib Sheets Do You Actually Need?

When you are preparing for a new arrival, it is tempting to buy as much as possible. However, when it comes to nursery bedding, there is a distinct difference between what you want and what you truly need. Most experienced parents and child development experts agree that there is a sweet spot for your inventory.

The minimum recommendation: Why 3 is the sweet spot

For most families, three crib sheets is the absolute perfect number. This allows you to follow the one-on, one-off, one-in-reserve rule. You keep one on the mattress, one currently in the laundry basket after a middle-of-the-night change, and one stored away for those dreaded emergency scenarios when the first two are already soiled. For more tips on bedding, check out our baby fitted sheets buying guide.

Factors that might increase your need

While three is the gold standard, some families may find they need a fourth sheet. If your baby suffers from significant reflux, which leads to frequent bedding changes throughout the day, having an extra set on hand can prevent you from having to run the washing machine at midnight. Similarly, if you live in a multi-level home or have a secondary crib in a grandparent’s house, you might want to adjust your numbers to ensure every sleeping space is adequately stocked.

Beyond the Sheets: Essential Bedding Accessories

It is not just about the sheets themselves; it is about how you protect the mattress underneath. Proper preparation is the best way to reduce your laundry load and keep your nursery hygienic.

The importance of a waterproof mattress protector

A high-quality waterproof mattress protector is non-negotiable. This layer serves as the first line of defense against liquid, protecting the integrity of the mattress and ensuring a cleaner sleep environment. When an accident occurs, you only need to strip the sheet and wipe down or replace the protector, rather than worrying about the mattress itself. To learn more about setting up your nursery for safety, visit our guide on how to create a safer sleep environment for babies.

Layering technique: The sandwich method

The sandwich method is a life-saving hack for middle-of-the-night changes. Start by placing a waterproof protector on the mattress, followed by a crib sheet. Then, add a second waterproof protector, followed by a second crib sheet. If your baby leaks in the middle of the night, you simply peel off the top layer to reveal a fresh, clean bed beneath. It saves you from having to fumble with mattress corners in the dark while your baby is crying.

Why you should skip crib bumpers and pillows

When selecting nursery bedding, safety must always come first. The American Academy of Pediatrics strongly advises against using crib bumpers, pillows, blankets, or stuffed animals in the crib. A safe sleep environment is a bare one, featuring only a firm mattress and a tightly fitted sheet. For comprehensive home safety, read our complete guide to baby safety at home.

Choosing the Best Crib Sheets for Your Baby

Not all sheets are created equal. When shopping, consider factors like fabric breathability, durability, and how easily they accommodate your specific crib mattress.

  • Organic cotton: An excellent choice for sensitive skin, offering natural breathability and softness.
  • Bamboo: Highly popular for its temperature-regulating properties and silky-smooth texture.
  • Jersey knit: Known for its stretchy, t-shirt-like feel, which often makes it easier to pull over the corners of a mattress.

Regardless of the fabric, ensure the fit is snug. A sheet should never be loose or bunched up, as this can pose a safety hazard for infants. Always check the manufacturer’s sizing guide to ensure the sheets are specifically designed for your crib type.

Tips for Managing Crib Sheet Laundry

Laundry is inevitable, but it doesn’t have to be overwhelming. With a few simple strategies, you can manage your bedding rotation like a pro.

Change frequency: Most parents change crib sheets once a week, or immediately if there is a spill or leak. Keeping a small bottle of baby-safe stain remover in your laundry room can help you tackle stubborn spots before they set in. If you are worried about your baby’s skin sensitivity during wash routines, see our complete guide to baby skin care.

Quick changes: Keep a clean, folded sheet stored in or near the crib. If you are doing a middle-of-the-night swap, using the sandwich method mentioned earlier allows you to get your baby back to sleep in under a minute, which is crucial for preserving your own sleep schedule.

FAQ

Do I need different sheets for a mini-crib vs. a standard crib?

Yes. Mini-cribs have smaller dimensions, and using a standard-sized sheet would result in a loose fit, which is unsafe. Always purchase sheets designed for your specific mattress size.

Can I use adult sheets for a baby crib?

No. Adult sheets are far too large. Even if you try to tuck them in, they will likely bunch up during the night. Always stick to products specifically designed for crib use.

Are multi-packs worth the investment?

Multi-packs are often a great value. If you find a brand you trust and they offer a set of two or three, it is usually a smart way to stock your nursery while saving money.

Conclusion

Ultimately, having three high-quality crib sheets is the ideal balance for most new parents. It ensures you have enough to manage the unpredictable messes of early parenthood without cluttering your linen closet. By focusing on safety, choosing breathable fabrics, and utilizing the sandwich method for easy middle-of-the-night changes, you can spend less time doing laundry and more time enjoying those precious moments with your baby. For more general advice on your little one’s first year, check out our complete roadmap to healthy newborn care.

Ready to finish your nursery registry? Check out our curated list of the best-rated crib sheets to ensure you are getting the softest, safest options for your little one.

Frequently Asked Questions

How many crib sheets do I actually need?

Three crib sheets is the ideal amount for most families. This allows you to have one on the mattress, one in the wash, and one spare for emergencies or unexpected middle-of-the-night leaks.

Do I need different sheets for a mini-crib vs. a standard crib?

Yes, mini-cribs have smaller dimensions. Using a standard-sized sheet will result in a loose and unsafe fit, so always buy sheets specifically designed for your mattress size.

Can I use adult sheets for a baby crib?

No, adult sheets are too large and will bunch up during the night, posing a serious safety hazard. Always use properly fitted crib sheets designed for infants.

Are multi-packs of crib sheets worth the investment?

Yes, multi-packs are usually a great value. They allow you to stock your nursery efficiently while often saving money compared to buying individual sheets.

How often should I change my baby’s crib sheets?

You should generally change crib sheets once a week. However, you must change them immediately if there is a diaper leak, spit-up, or any other spill.

What is the sandwich method for crib sheets?

The sandwich method involves layering a waterproof protector and a crib sheet, followed by another protector and sheet. If a nighttime leak happens, you just peel off the top layer for an instant clean bed.

10 Genius Shelf Organization Ideas for Children’s Rooms to Reduce Clutter

10 Genius Shelf Organization Ideas for Children’s Rooms to Reduce Clutter

If you have ever stepped on a rogue LEGO brick or struggled to close a toy bin overflowing with puzzle pieces, you know that the battle against clutter in a child’s bedroom is real. As parents, we often feel like we are constantly picking up after our little ones, but the truth is that the right storage solutions can make a world of difference. Implementing effective shelf organization ideas for children’s rooms does more than just make the space look neat; it creates a calming environment that promotes focus, play, and better sleep.

In this guide, we will explore practical, stylish, and functional ways to manage your child’s belongings. By setting up the right systems, you aren’t just cleaning up; you are teaching your children valuable life skills about responsibility and care for their possessions. If you want to foster these habits further, check out our guide on 7 positive parenting habits for raising confident and caring kids.

The Foundation: Assessing Your Child’s Storage Needs

Before you run to the home goods store for new bins, take a moment to assess what you actually have. Start by categorizing items into groups like books, building sets, arts and crafts, and special keepsakes. This audit helps you see the scale of the storage required.

Next, apply the less is more rule. Children often play more creatively when they aren’t overwhelmed by too many choices. Before organizing, go through your child’s toys and prune items that are broken, outgrown, or rarely used. A good rule of thumb is to keep only what truly engages your child, making the remaining items much easier to manage on your new shelving units. You can also explore the ultimate beginner’s guide to buying age-appropriate toys to ensure the items you keep are developmentally beneficial.

10 Best Shelf Organization Ideas for Children’s Rooms

Once you have streamlined your inventory, it is time to get creative with your storage. Here are 10 genius ways to master shelf organization.

1. Open Cubby Systems for Easy Access

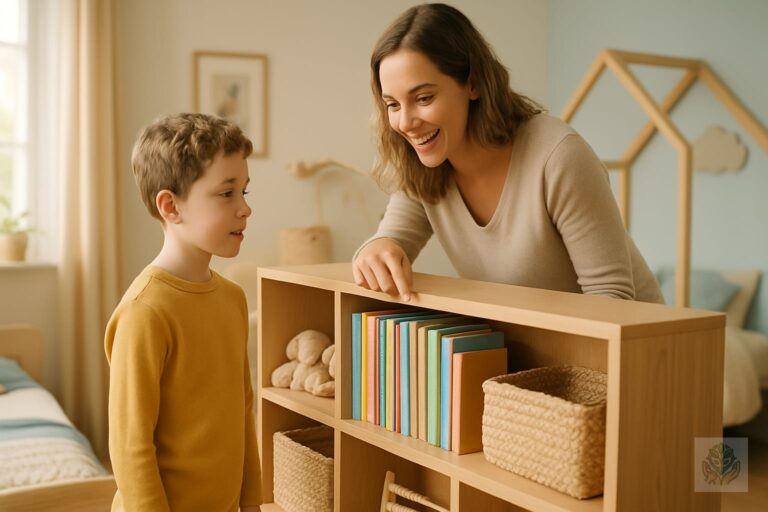
Open cubby shelves are a game-changer for younger children. Because they lack doors or lids, children can see exactly what they want without dumping an entire toy box on the floor. Assign one specific category to each cubby, such as cars in one and dolls in another. For those who prefer this style, read more about 10 clever open storage ideas for a Montessori-inspired kids’ room.

2. The ‘Rotation’ Method: Using Bins to Hide Clutter

If you have a large collection of toys, keep only a portion on the shelves at any given time. Place the remainder in bins in a closet. Rotate these items every few weeks. This keeps the room feeling fresh and makes your child feel like they are getting new toys without you spending a dime.

3. Face-Out Book Shelving to Encourage Reading

Books are often the most cluttered items in a room. Instead of stacking them spine-out, where titles are hard to read, use narrow floating ledges to display books face-out. This acts as wall art and makes it significantly more likely that your child will reach for a book to read. You can also review the ultimate guide to age-appropriate books for toddlers and preschoolers to curate the perfect collection.

4. Wall-Mounted Floating Shelves for Displaying Keepsakes

Every child has special items that aren’t necessarily for daily play, like a handcrafted trophy, a favorite framed photo, or a special model. Use wall-mounted floating shelves placed high enough to protect these fragile items while still allowing them to be enjoyed visually.

5. Color-Coded Organization for Visual Appeal

If you struggle with how to arrange toys, try color-coding. Arranging items by color can make a shelf look intentionally designed rather than messy. This works particularly well for collections of small plastic animals or building blocks.

6. Using Labels (Pictures vs. Words) for Toddler Autonomy

To foster independence, your child needs to know where things go. For toddlers, attach picture labels to the front of bins. For school-aged children, use word labels. This removes the guesswork from clean-up time and empowers them to manage their own space.

7. Incorporating Woven Baskets for Soft Toy Storage

Stuffed animals are notoriously difficult to stack. Large woven baskets placed on the bottom shelf of a bookcase are perfect for corralling soft toys. They look beautiful, provide a quick catch-all for cleaning, and add texture to the room.

8. Vertical Shelving Units to Maximize Small Spaces

In a small bedroom, floor space is gold. Use vertical shelving units that reach toward the ceiling. Keep frequently used items on the lower shelves and reserve the higher, harder-to-reach shelves for seasonal items or bins that require adult supervision.

9. Under-Shelf Hanging Organizers

Make use of the space between your shelves. Under-shelf wire baskets can slide onto existing shelf boards to provide extra space for small items like coloring books or individual doll accessories, ensuring that no vertical space is wasted.

10. Converting Standard Bookshelves into Toy Centers

You don’t need expensive toy storage furniture. A standard, sturdy bookshelf can become a toy center. Simply remove a few middle shelves to create “rooms” for larger toys or dollhouses, essentially turning a book storage unit into an active play space.

Safety First: Anchoring and Placement

While organization is essential, safety is the priority. Always anchor any shelving unit to the wall using furniture straps to prevent tipping, especially in rooms with active toddlers. Furthermore, consider the height of your shelves. Always place the heaviest items on the bottom to lower the center of gravity and keep the most popular toys at your child’s eye level to ensure they can reach them safely. For more tips on keeping your home secure, refer to our everything parents need to know about baby safety: the ultimate guide.

Budget-Friendly Tips for Stylish Storage

You don’t need to break the bank to achieve an organized room. Look for pre-loved wooden bookcases at thrift stores and give them a fresh coat of low-VOC paint. Use inexpensive storage bins and line them with fun fabrics to match your room’s decor. Even simple cardboard boxes can look high-end when covered in decorative contact paper.

How to Maintain the Organization Long-Term

Organization is not a one-time project; it is a habit. Create a daily ‘tidy-up’ ritual, perhaps before bath time or dinner. Turn on some music and make it a game. When you involve your child in the process, they take ownership of their space. As your child grows, be prepared to adjust your systems. Their needs at age four will be very different from their needs at age ten, and your storage should evolve along with them.

Conclusion

By implementing these shelf organization ideas for children’s rooms, you can create a space that is both functional and inviting. Remember that the goal is to simplify, not to reach perfection. A well-organized room provides the calm foundation your child needs to thrive. Which of these organization hacks are you planning to try first? Share your favorite tips in the comments below!

Frequently Asked Questions

How can I organize a child’s bookshelf effectively?

You can organize a child’s bookshelf by categorizing items, using face-out book displays for easy reading, color-coding blocks, and combining open cubbies with woven baskets for hidden storage.

What is the best way to store stuffed animals on shelves?

Large woven baskets placed on the bottom shelves are ideal for corralling soft toys and stuffed animals, keeping them neat while adding nice texture to the room.

How do I encourage my toddler to clean up their toys?

Use picture labels on bins for younger children and word labels for older kids. This provides clear visual cues so they know exactly where items belong, fostering independence.

Are open shelves safe for toddlers’ rooms?

Open shelves are great for accessibility, but safety is paramount. Always anchor all shelving units securely to the wall using furniture straps to prevent tipping.

What is the toy rotation method for shelves?

The toy rotation method involves keeping only a small selection of toys on the shelves at a time and storing the rest in closets. Rotate them every few weeks to keep play fresh.

How can I maximize storage in a small children’s room?

Use vertical shelving units that reach toward the ceiling, under-shelf hanging wire baskets, and multi-functional bookshelves to make the most of limited floor space.

How to Choose a Crib for Your Baby’s Nursery: The Ultimate Safety & Style Guide

How to Choose a Crib for Your Baby’s Nursery: The Ultimate Safety & Style Guide

Preparing for a new arrival is an exciting time filled with nursery mood boards, color palettes, and careful planning. Among all the decisions you make, choosing the right crib for your baby’s nursery stands above the rest. It is the centerpiece of the room, but more importantly, it is the place where your baby will spend the majority of their early months sleeping. Prioritizing safety without compromising on your personal aesthetic is the ultimate goal.

In this guide, we will walk you through the essential safety standards, the different types of cribs available on the market, and how to select the perfect mattress. Whether you are working with a cozy apartment or a spacious nursery, we are here to help you navigate this process with confidence and peace of mind.

Crib Safety 101: What Every Parent Needs to Know

When you are learning how to choose a crib for your baby’s nursery, safety must be the non-negotiable priority. The Consumer Product Safety Commission (CPSC) has implemented strict regulations to ensure that cribs are safe environments for infants. Always look for a crib that bears a certification label from the Juvenile Products Manufacturers Association (JPMA), which indicates that the product has been tested to meet or exceed rigorous safety standards. For broader peace of mind, review our complete guide to baby safety.

One of the most critical developments in modern infant safety is the ban on drop-side cribs. These cribs, which featured a side that could be lowered to make picking up the baby easier, are no longer legal for sale due to the risk of hardware failure and entrapment. If you are browsing for nursery furniture, avoid any secondhand models that feature this design.

While vintage furniture has undeniable charm, it is generally recommended to buy a new crib. Older models may not meet current slat spacing requirements. The rule of thumb is that slats should be no more than 2 3/8 inches apart—roughly the width of a soda can. If a gap is wider, a baby’s head could become entrapped. A brand-new crib ensures that all parts are intact and meet the latest safety requirements.

Types of Cribs: Which Style Fits Your Lifestyle?

Your lifestyle and living space will play a major role in determining which type of crib is best for your family. Understanding the different categories will help you narrow down your choices quickly. Beyond the bed itself, you can explore essential nursery furniture to complete your space.

  • Standard Full-Size Cribs: These are the classic choice. They provide a spacious, sturdy sleeping area and are designed to be used for the first two to three years of a child’s life.
  • Convertible Cribs: These are popular as a long-term investment. Many 3-in-1 or 4-in-1 models transition from a crib to a toddler bed, and sometimes even a full-size headboard for your child’s teenage years.
  • Mini-Cribs: If you live in an urban apartment or have a small nursery, a mini-crib is a lifesaver. They offer a smaller footprint while still providing a safe, comfortable sleeping space.
  • Portable or Travel Cribs: While not meant for everyday use in the nursery, having a lightweight, foldable crib is essential for travel or keeping at a grandparent’s house.

Key Features to Look For

Beyond the style, consider the functional features that will make your daily life easier. Adjustable mattress heights are a must-have feature. You will want the highest setting for a newborn to save your back when lifting them, and you must lower it as your baby begins to sit up and pull themselves to stand to prevent falls.

Material quality is another factor to consider. Solid wood cribs are durable and often hold up well over time, but ensure the finishes are non-toxic and lead-free. If you choose a crib with wheels for portability, ensure they have high-quality locking mechanisms that are easy to engage and disengage.

Ease of assembly is often overlooked, but remember that you will be putting this together before the baby arrives. Look for models that receive positive reviews regarding the clarity of their assembly instructions, or consider hiring a professional service if building furniture is not your forte.

Don’t Forget the Mattress: Pairing Your Crib Correctly

Choosing the right mattress is just as important as choosing the crib itself. A crib mattress should be significantly firmer than an adult mattress to reduce the risk of SIDS (Sudden Infant Death Syndrome). A soft, plush mattress is a safety hazard for a sleeping baby. For tips on creating a secure space, see our guide on how to create a safer sleep environment for babies.

Measurement is vital. When you place the mattress in the crib, there should be no more than two fingers of space between the mattress edge and the crib side. If there is a larger gap, your baby’s limbs could get stuck. Invest in a high-quality, waterproof cover to protect the mattress from inevitable accidents, and look for materials that are breathable to keep your baby cool and comfortable. You can find helpful advice on selecting the right options in our baby fitted sheets buying guide.

Budgeting for Your Nursery: What’s Worth the Splurge?

There is often a misconception that a higher price tag guarantees more safety, but when it comes to cribs, every manufacturer sold in the U.S. must meet the same CPSC safety regulations. A budget-friendly crib that meets all safety standards is just as safe as a designer model.

If you choose to save money on the crib frame, you might consider putting those extra funds toward a higher-quality mattress or extra crib sheets. When budgeting, keep an eye out for seasonal sales or holiday promotions at major baby retailers. Often, you can find premium nursery furniture at significant discounts if you are willing to wait for the right time to buy.

Frequently Asked Questions (FAQ)

How long can a baby stay in a crib?

Most children stay in a crib until they are between two and three years old. The transition usually depends more on the child’s height and their ability to climb out than on their exact age.

When should I move my baby from the crib to a toddler bed?

You should move your child to a toddler bed when they start attempting to climb out of the crib, as this becomes a significant fall risk. Most parents make this switch around age two or three.

Are bumper pads safe for newborns?

No, bumper pads, blankets, and pillows should never be placed in a crib. The American Academy of Pediatrics recommends a bare crib to prevent the risk of suffocation or entanglement.

Do I need to buy a crib conversion kit at the same time as the crib?

It is often a wise idea. Some manufacturers stop producing specific models after a few years, making it difficult to find the matching conversion kit later on. Buying it upfront ensures you have the pieces ready when you are finally ready to convert the bed.

Conclusion

Choosing a crib for your baby’s nursery is a significant milestone in your pregnancy journey. By focusing on CPSC safety standards, selecting the right size for your space, and pairing it with a firm, safe mattress, you are setting the foundation for your baby’s healthy sleep habits. Remember to check your crib regularly for loose hardware as your baby grows, and keep the sleeping area free of clutter.

Creating a beautiful, safe nursery is a labor of love that pays off in peace of mind. For more help organizing your space and checking off those final items, check out our Ultimate Nursery Registry Checklist to ensure you have everything you need for your little one’s arrival. You can also explore calm and cozy nursery decor ideas to add those final personal touches.

Frequently Asked Questions

How long can a baby stay in a crib?

Most children stay in a crib until they are between two and three years old. The transition typically depends on the child’s height and climbing abilities rather than their age.

When should I move my baby from a crib to a toddler bed?

You should switch to a toddler bed once your child begins attempting to climb out of the crib, as this poses a serious fall hazard. This usually happens around age two or three.

Are bumper pads safe for newborns?

No, bumper pads, pillows, and loose blankets are not safe. The American Academy of Pediatrics strongly recommends keeping the crib completely bare to reduce the risk of suffocation.

Do I need to buy a crib conversion kit immediately?

Buying the conversion kit at the same time as the crib is recommended. Manufacturers sometimes discontinue specific models, making it difficult to find matching parts later.

What is the standard slat spacing for a safe baby crib?

Crib slats should be no more than 2 3/8 inches apart, which is roughly the width of a soda can, to prevent a baby’s head from becoming entrapped.

How firm should a crib mattress be?

A crib mattress must be significantly firmer than an adult mattress. A firm surface is essential for reducing the risk of SIDS and providing proper support for an infant.

10 Best Traditional Indian Festival Outfits for Kids: A Style Guide for Parents

10 Best Traditional Indian Festival Outfits for Kids: A Style Guide for Parents

Festivals in India are more than just holidays; they are vibrant celebrations of color, sound, and deep-rooted heritage. For parents, dressing their children in traditional Indian festival outfits for kids is a beautiful way to pass down cultural values while creating adorable memories. However, the excitement of dressing up can quickly fade if the outfit is itchy, restrictive, or impractical for a busy child. You can find helpful advice on fabric selection in our guide on how to choose soft and comfortable festival fabrics for kids.

In this guide, we explore how to balance the timeless elegance of ethnic fashion with the practical needs of active children. Whether you are preparing for Diwali, Eid, or a family wedding, finding that perfect middle ground between style and comfort is essential for a stress-free celebration.

Why Choose Traditional Indian Outfits for Your Little Ones?

Choosing ethnic wear for your children is a deliberate act of preserving cultural heritage. When children wear these garments, they connect with their roots and learn to appreciate the craftsmanship behind traditional weaves and embroidery. Beyond cultural education, these outfits are simply unmatched in charm.

Imagine the joy of a family photo where everyone is color-coordinated in festive attire. Traditional Indian clothing often features rich palettes like marigold yellow, royal blue, and crimson red, which look stunning in photography. Dressing up can also make children feel special, fostering a sense of excitement and participation in family rituals, which is a great way to strengthen your bond as discussed in our article on why family bonding matters for young children.

Top Picks for Girls: Trendy & Comfortable Ethnic Wear

When it comes to girls’ ethnic fashion, the market is full of delightful options that don’t compromise on freedom of movement.

  • Lehenga Cholis: Modern lehengas have evolved to include softer waistbands and lighter fabrics. Look for shorter cholis that allow for easy breathing and movement.
  • Anarkali Suits: These are ideal for active girls who love to twirl. Their flowy silhouette makes them comfortable for long hours of celebration.
  • Sharara Sets: The current favorite in ethnic fashion, sharara sets offer a sophisticated look with the comfort of pants, making them perfect for younger toddlers.
  • Fabric Selection: Always prioritize breathable fabrics. While silk is beautiful, consider silk blends or soft cotton linings to ensure the skin remains cool and irritation-free.

Top Picks for Boys: Stylish & Dashing Ethnic Wear

Boys’ traditional wear has moved far beyond the basic, stiff garments of the past. Today’s styles emphasize sharp looks without the bulk.

  • Kurta Pajama Sets: These remain the gold standard. They are incredibly versatile and can be dressed up or down depending on the occasion.
  • Nehru Jackets: Adding a Nehru jacket over a simple kurta instantly elevates the outfit. It is a great way to add a layer for cooler evening celebrations.
  • Dhoti Pants: Traditional dhotis are hard to manage, but pre-stitched dhoti pants offer the same traditional aesthetic with the ease of elasticated leggings.
  • Sherwanis: Save these for formal ceremonies like weddings. Opt for ones with soft cotton inner linings to avoid discomfort during long events.

Key Factors to Consider Before Buying

Before you hit the checkout button, keep these practical tips in mind to ensure your child stays happy and comfortable all day.

Fabric selection is paramount. Avoid synthetic glitter or stiff net materials that can scratch sensitive skin. Opt for natural fibers like cotton, modal, or silk-cotton blends whenever possible. If you must choose a heavily embellished piece, ensure there is a soft, non-irritating layer between the decoration and the child’s skin. For more tips on hygiene, check out our guide on how to teach children good hygiene habits every day.

Consider ease of wear. Young children often have bathroom needs during events. Ensure your chosen outfit has accessible zippers or elasticated waistbands rather than complex drawstrings or buttons that take too long to undo. Finally, always prioritize safety. Check for loose beads, long strings, or heavy hanging embellishments that could become a choking hazard for toddlers. You can learn more about protecting your child by reading our complete guide to baby safety at home.

Styling Tips to Elevate the Look

A little bit of styling goes a long way in making an outfit look professional and polished. For girls, keep jewelry minimalist. A simple pair of bangles or a small pendant is often enough. Avoid heavy necklaces that may slide around and bother them.

For footwear, juttis are the classic choice, but ensure they are broken in or have a soft sole. If your child will be running around, look for soft-soled sandals that mimic the aesthetic of juttis. For younger children, ensure you are choosing appropriate options by following our ultimate guide to finding comfortable footwear for kids. When it comes to hair, keep it neat and out of the face. A simple floral clip or a braid decorated with small accessories can add a perfect festive touch without being overwhelming.

Sustainable and Budget-Friendly Shopping Tips

You do not need to break the bank to have your children looking their best. One of the most effective strategies is mixing and matching separates. A high-quality ethnic jacket can be worn over different kurtas, creating a fresh look every time. Choosing reusable, high-quality fabrics also ensures that these outfits can be passed down to younger siblings or cousins.

Consider shopping during off-season sales or utilizing local tailors who can repurpose old saris into beautiful outfits for your kids. Not only is this sustainable, but it also gives the outfit a sentimental story behind it. To help maintain a balanced household budget while shopping, check out our tips on 10 smart parenting tips every Indian parent should follow in 2026.

Conclusion

Celebrating festivals in traditional Indian festival outfits for kids is a wonderful way to honor your heritage and create lasting memories. By focusing on comfort, choosing breathable fabrics, and keeping the design simple, you ensure that your child is just as happy and comfortable as they are stylish.

Remember, the best accessory a child can wear is their confidence. When they are comfortable in what they are wearing, they will enjoy the festivities far more. Do you have a favorite festive look for your child? Share your photos with us or subscribe to our newsletter for more seasonal fashion tips and parenting advice!

Frequently Asked Questions

What are the best traditional Indian festival outfits for kids?

Popular options include lehenga cholis, anarkalis, and sharara sets for girls, and kurta pajama sets, Nehru jackets, and pre-stitched dhotis for boys.

How can I ensure my child is comfortable in ethnic wear?

Prioritize breathable fabrics like cotton, modal, or silk-cotton blends, and choose outfits with soft inner linings to prevent skin irritation.

Are pre-stitched dhoti pants good for young boys?

Yes, pre-stitched dhoti pants offer the traditional aesthetic with the ease of elasticated waistbands, making them much easier for toddlers to wear.

What fabrics should be avoided for children’s festival clothing?

Avoid stiff net materials, heavy synthetic glitter, and unlined rough embroidery that can scratch sensitive skin.

How do I choose safe accessories for kids’ ethnic outfits?

Keep jewelry minimal. Avoid long strings, heavy necklaces, or loose beads that could pose a choking hazard or cause discomfort.

Can I reuse kids’ traditional outfits to save money?

Yes, you can mix and match separates like Nehru jackets or pass down high-quality garments to younger siblings and cousins.