
Home Blog Page 12

10 Fun Dance Activities That Help Kids Stay Active and Build Confidence

0

10 Fun Dance Activities That Help Kids Stay Active and Build Confidence

In our modern, screen-dominated world, finding ways to keep children physically active can feel like an uphill battle. Between tablets, gaming consoles, and streaming services, the lure of the couch is often stronger than the call of the backyard. However, there is a simple, rhythmic solution that transforms exercise from a chore into a celebration: dance.

Using 10 fun dance activities that help kids stay active and build confidence is one of the most effective ways to encourage movement without making it feel like a workout. Dance is essentially a stealthy form of cardiovascular exercise disguised as play. When children lose themselves in the music, they are not counting minutes or miles; they are simply having a blast while improving their physical coordination, heart health, and emotional well-being.

Why Dance is the Ultimate Kid-Friendly Cardio

Dance is far more than just jumping around to a beat. It is a complex developmental tool that engages the mind and the body simultaneously. When children move to music, they are actively developing their gross motor skills, learning how to balance, jump, leap, and shift their weight with control. You can find more ideas in our 15 easy movement activities for kids at home to burn energy.

Beyond the physical benefits, the connection between music and rhythm has profound effects on brain development. Research suggests that music activates the brain’s motor and auditory circuits, which helps improve pattern recognition and cognitive processing. Furthermore, dance provides a safe space for self-expression. In a world where kids are often told to sit still and be quiet, dance gives them permission to take up space and express their personality, which is a massive boost for their self-esteem.

5 Easy Dance Activities for Kids at Home

You do not need a professional studio or expensive equipment to start dancing today. Here are five simple, high-energy activities to get your living room rocking.

1. Freeze Dance

This is a classic for a reason. Play a high-energy song and let the kids dance their hearts out. When you pause the music, they must freeze in their current position. This game is fantastic for teaching impulse control and body awareness as they struggle to hold that awkward pose until the music starts again.

2. The Follow the Leader Dance Train

Line up and have a leader perform a specific dance move—perhaps a silly hop, a wiggle, or a high-knee march—while everyone else mimics them. Switch leaders frequently so every child gets a turn to be the choreographer.

3. Mirror, Mirror

Pair up your children or join in yourself. Stand face-to-face and try to copy each other’s movements in perfect synchronicity. This builds focus and coordination as children learn to observe and match the movements of their partner.

4. Animal Movement Dance

Put on a track and call out different animals. If you yell monkey, they have to swing their arms. If you say snake, they have to slither on the floor. This encourages creative movement and uses different muscle groups throughout the body.

5. DIY Dance Routine

Encourage your kids to choreograph their very own 30-second dance routine to their favorite pop song. Once they have practiced it, hold a little performance in the living room. Giving them creative control empowers them and makes the activity feel like a special event. For more ways to build lasting family memories, check out our guide to 50 family bonding ideas for creating lasting memories together.

Organized Dance Options for Social Engagement

While home dance sessions are wonderful for daily activity, organized classes offer unique social benefits. Joining a local dance studio allows children to learn discipline, teamwork, and the value of practice in a structured environment. Styles like Ballet offer grace and posture, Hip-Hop builds rhythm and confidence, and Jazz focuses on energy and expression. If you are struggling with keeping them on track, our daily routine for kids by age 1–6 years complete guide can help.

If you are not ready for a weekly commitment, explore virtual options. YouTube is packed with high-quality, kid-friendly dance tutorials and channels like GoNoodle, which specialize in short, active brain breaks for children of all ages. These resources are perfect for rainy days when outdoor play is not an option. You can also explore 15 engaging indoor activities that improve fine motor skills for kids for more rainy day inspiration.

Setting the Stage: How to Make Dance Time Exciting

To turn a boring afternoon into a high-energy dance party, you need to set the scene. Start by curating a playlist of songs that are upbeat, positive, and age-appropriate. When the music is high-energy, it is impossible not to move.

Next, use props to keep things fresh. Hand out silk scarves, ribbons, or even DIY glow sticks to add a visual layer to the experience. Finally, define your space. Even if it is just moving the coffee table aside, creating a designated dance floor tells your child that this time is dedicated to movement and fun.

Overcoming Resistance: Tips for Reluctant Movers

Some children might be shy or feel self-conscious about their dance moves at first. The best way to break the ice is to model the behavior yourself. If they see you dancing—even if you are being silly or doing the ‘dad dance’—they will realize that judgment is not a part of this activity. It makes dancing feel safe and ‘cool.’ You can also use 7 positive parenting habits for raising confident and caring kids to help encourage them gently.

If your child is still resistant, keep the sessions short. Ten-minute bursts of movement are often more effective than a long, drawn-out session that feels like a requirement. Focus entirely on fun, joy, and laughter. If they feel like they are being graded on their technique, the fun will evaporate instantly. Keep the pressure low and the spirits high. If you need to manage screen time while they dance, check out our guide on how parents can manage screen time at home.

Conclusion

Incorporating dance into your child’s daily routine is about so much more than physical exercise. It is about fostering a lifelong relationship with movement, building confidence, and creating memories of joy and laughter within your family. By using these 10 fun dance activities that help kids stay active and build confidence, you are setting the stage for healthier habits that will last a lifetime.

Why not start tonight? Clear a space in the living room, crank up the speakers, and invite your children to join you for an impromptu family dance party. We would love to hear from you. What is that one special song that gets your whole family moving every single time? Share your favorite family dance anthem in the comments below!

Frequently Asked Questions

How do dance activities help kids stay active?

Dance combines cardio exercise with play, making it fun for kids to burn energy while improving their strength, flexibility, and cardiovascular health without feeling like they are working out.

What age is appropriate to start dance activities for kids?

Toddlers and young children can start participating in simple movement and rhythm games as soon as they can walk and follow basic instructions.

How can I encourage a shy child to join in on dance games?

The best approach is to model the behavior yourself by dancing and being silly. Keeping the sessions short and free of judgment helps shy children feel safe.

Do I need special equipment for these dance activities?

No special equipment is required. All you need is an open space, a device to play music, and optionally fun props like scarves or glow sticks.

Are online dance resources good for children?

Yes, platforms like YouTube and GoNoodle offer fantastic, age-appropriate tutorials and short brain breaks that keep kids moving on rainy days.

How long should a kid’s dance session last?

Ten to fifteen-minute bursts of movement are often ideal for younger children, though sessions can be longer if the kids are having fun.


Handwashing for Kids: A Simple Guide for Parents

0

Handwashing for Kids: A Simple Guide for Parents

Introduction

As parents, we are constantly navigating the challenges of keeping our children healthy. Whether it is flu season or just the standard cycle of daycare colds, we all want to protect our little ones from unnecessary illness. When it comes to preventative care, the most effective tool in your arsenal is surprisingly simple: handwashing for kids. It is the number one defense against the spread of common germs that lead to illnesses like the common cold, the flu, and stomach bugs.

While the concept of washing hands seems basic, the reality of getting a toddler or young child to scrub their hands effectively is often a different story. Many parents view it as a daily chore that results in wet sleeves, puddle-filled bathrooms, and arguments. However, shifting the perspective from a forced chore to a fun, essential life skill can transform the way your child views hygiene. In this guide, we will explore practical, expert-backed strategies to turn handwashing into a seamless part of your child’s daily routine.

The Science of Clean: Why Handwashing Matters for Kids

Schools, daycares, and playdates are social environments where children constantly touch shared surfaces—toys, tabletops, and doorknobs. Because children are still learning about hygiene, they frequently touch their faces, eyes, and mouths before they have had a chance to clean their hands. This creates an easy pathway for bacteria and viruses to enter their systems.

By prioritizing hygiene habits early on, you can significantly reduce the frequency of sick days for your entire household. When children learn to wash their hands properly, they act as a buffer, preventing the transmission of germs from the classroom to the home. It is a small investment of time that pays off in fewer doctor visits and a healthier family overall. For more support, read our complete guide on teaching good hygiene habits.

When Should Children Wash Their Hands?

Consistency is key to forming a habit. Rather than just telling your child to wash up when they look dirty, try to build healthy habits around specific transition points in the day. These are the moments when exposure to germs is highest.

  • Before and after eating meals or snacks.
  • After using the bathroom.
  • Immediately upon returning home from school, daycare, or the park.
  • After petting animals or playing outside.
  • After sneezing, coughing, or blowing their nose.

Integrating these moments into your family schedule—perhaps by saying, “We always wash our hands before we sit at the table”—takes the guesswork out of the process. Over time, this becomes second nature, and your child will begin to do it without needing a reminder. Discover how to encourage independent hygiene habits through consistent practice.

The 5-Step Handwashing Method (Simplified for Kids)

To teach children effective hygiene practices, break the process down into simple, memorable steps. Use the following five steps to guide them through the process until they can do it independently:

  1. Wet: Start by turning on the water and wetting the hands thoroughly.
  2. Lather: Apply soap and work it into a good foam, covering the fronts, backs, and between the fingers.
  3. Scrub: Spend at least 20 seconds scrubbing. This is the most crucial step for removing germs.
  4. Rinse: Rinse away all the soap and suds under clean, running water.
  5. Dry: Use a clean towel to dry hands completely, as germs travel more easily on wet skin.

If your child is a visual learner, consider creating a colorful chart to hang near the bathroom sink. Seeing the steps depicted in pictures helps children feel more in control of the process.

Creative Ways to Teach Handwashing

Making handwashing for kids engaging is the secret to getting them to actually participate. If you make it fun, they will want to do it.

Top 5 Fun Handwashing Songs

Since children should scrub for at least 20 seconds, singing a song is the easiest way to keep time. Try singing the “Happy Birthday” song twice, or use classics like “The ABCs” or “Twinkle, Twinkle, Little Star.” Keeping the time fun ensures they scrub long enough.

The Glitter Experiment

If your child is skeptical about why they need to wash, put a tiny bit of glitter on their hands and have them try to wash it off with water only. Then, have them use soap. They will see immediately that soap is necessary to remove the “germs” effectively. You can also explore engaging screen-free water activities to make water-based play a positive experience for your child.

Sensory-Friendly Options

Some children are sensitive to textures or smells. If your child dislikes the smell of traditional soaps, try fruit-scented options or foaming soaps, which are often easier for little hands to manage than thick gels.

Troubleshooting Common Handwashing Challenges

Even with the best intentions, you may run into resistance. If your child is afraid of loud, automatic hand dryers in public restrooms, carry a small pack of paper towels or tissues so they can dry their hands manually. If they rush the scrub time, use a sand timer or a digital timer on your phone to turn it into a game. If you find they are resistant to listening, our guide on strategies for children who refuse to listen can provide further help.

Frequent handwashing can sometimes lead to dry, cracked skin, which may make your child avoid the sink. Keep a gentle, fragrance-free moisturizer near the sink and make applying it part of the “post-wash” ritual. This teaches them that caring for their skin is just as important as cleaning it.

Hand Sanitizer: When Is It Safe to Use?

While soap and water are the gold standard for cleaning, an alcohol-based hand sanitizer is a great backup when you are on the go. However, remind your child that sanitizer is not a complete replacement for washing. It does not remove dirt or debris and is less effective when hands are visibly soiled. Always supervise younger children during application to ensure they do not ingest the product.

Conclusion

Ultimately, your children learn healthy hygiene habits by watching you. When you wash your hands consistently and openly, you set a standard that they will naturally want to follow. Remember that teaching handwashing for kids is a process, not a destination. Be patient, offer praise for their efforts, and keep the tone light. By focusing on consistency rather than perfection, you are giving your child the tools they need to stay healthy for years to come. For more ways to support their growth, check out our tips on positive parenting habits.

Frequently Asked Questions

Why is handwashing so important for kids?

Handwashing is the number one defense against the spread of common germs, preventing illnesses like colds, the flu, and stomach bugs.

How long should children wash their hands?

Children should scrub their hands with soap for at least 20 seconds, which is about the time it takes to sing the ABC song.

When should kids wash their hands?

Kids should wash their hands before and after eating, after using the bathroom, coming home from school, and playing outside.

What are the five steps of handwashing?

The five steps are wet, lather with soap, scrub for 20 seconds, rinse thoroughly under running water, and dry completely with a clean towel.

Is hand sanitizer a good substitute for soap and water?

Hand sanitizer is a great backup when you are on the go, but it does not remove dirt and is less effective than soap and water.

How can I stop my child’s hands from getting dry?

Frequent washing can dry out skin. Keep a gentle, fragrance-free moisturizer near the sink and apply it after drying their hands.

Early Morning Wake-Ups in Toddlers: Helpful Tips for More Sleep

0

Early Morning Wake-Ups in Toddlers: Helpful Tips for More Sleep

If your day officially begins at 4:45 AM because your toddler is standing by your bed chirping with energy, you are not alone. Dealing with early morning wake-ups in toddlers is one of the most common challenges parents face. While the silence of the early hours can be peaceful for some, it is rarely welcome for parents who are trying to squeeze in every possible minute of rest.

It is important to define what is actually considered a wake-up problem. Biologically, a normal wake-up time for a toddler falls between 6:00 AM and 7:30 AM. Anything consistently before 6:00 AM is usually considered early, and it often stems from a combination of biological rhythms and environmental cues. If you are feeling exhausted and desperate for a shift, know that this is a phase you can navigate with patience and consistency, much like helping kids follow a morning schedule.

By understanding the root cause of these early mornings and making small, intentional adjustments to your child’s daily routine, you can help your toddler shift their internal clock. Let’s explore how to get your mornings back on track.

Why Do Toddlers Wake Up So Early?

To solve the problem, we first need to understand the science behind it. Toddlers are highly sensitive to their circadian rhythms, which act as an internal 24-hour clock. When these rhythms are disrupted, or when external factors trigger a wake-up call, your toddler’s brain decides it is time to start the day, even if their body still needs sleep.

One of the most common culprits for early rising is actually overtiredness. While it seems counterintuitive, if a toddler goes to bed overtired, their body releases cortisol and adrenaline, which makes it harder for them to stay asleep through the night. This frequently leads to a “broken” sleep cycle in the early morning hours, resulting in an inability to drift back off. If your child struggles with bedtime overall, you might also find how to help a child who fights bedtime to be a useful resource.

Environmental factors play a massive role as well. Sunlight filtering through curtains, the neighbor’s morning commute, or the temperature in the bedroom can all signal to a toddler’s brain that it is morning time. If the schedule is slightly off, such as a nap that ends too late in the day or a bedtime that is too early, your toddler may simply be fully rested and ready to go before the rest of the house.

Step 1: Audit the Sleep Environment

Your toddler’s bedroom environment is the foundation for a good night of rest. Think of the room as a sleep sanctuary. The darker the room, the better, especially during the summer months when the sun rises early. Investing in high-quality blackout curtains can prevent the first glimmer of dawn from waking your child. You may want to consider some calm and cozy nursery decor ideas to ensure the space is conducive to sleep.

Noise control is another vital piece of the puzzle. Using a white noise machine can help mask the sounds of early birds, traffic, or a parent getting ready for work. A consistent, steady sound acts as a sleep cue that helps your child transition between sleep cycles without being jarred awake by outside noise.

Finally, check the room temperature. Toddlers sleep best in a slightly cool room, typically between 68 and 72 degrees Fahrenheit. If they are too warm, they are more likely to wake up feeling restless. Making these environmental changes is often the fastest way to stop early morning wake-ups in toddlers.

Step 2: Reviewing the Daily Schedule

Once the environment is perfected, look at the schedule. Most toddlers need between 11 and 14 hours of total sleep in a 24-hour period. If your child is getting a very long, late afternoon nap, they might not have enough sleep pressure to stay asleep until the morning. Trying to maintain a daily routine for kids by age can help you strike the right balance between activity and rest. Try capping the afternoon nap or shifting it slightly earlier to see if it allows for a longer stretch of night sleep.

Bedtime timing is equally critical. While you might be tempted to put your child to bed earlier to get more sleep, if the bedtime is too early, they may wake up fully rested at 5:00 AM. Conversely, if bedtime is too late, you run the risk of that overtiredness we mentioned earlier. Experiment with shifting bedtime by 15-minute increments to find the “sweet spot” where your child falls asleep quickly but stays asleep until a reasonable hour.

Step 3: Implementing ‘Okay to Wake’ Strategies

For older toddlers who are starting to understand boundaries, tools can be a game changer. An “Okay to Wake’ clock uses colors or icons to signal when it is time to get out of bed. Teach your child that they must stay in their bed while the light is red, and when it turns green, they are free to call out or come into your room.

Positive reinforcement is essential here. Praise your toddler for staying in their bed, even if they were awake for a few minutes before the light turned green. You can even use a sticker chart to reward them for “quiet bed time.” Consistent boundary setting is the secret ingredient; if you allow them to get up at 5:30 AM one day, they will expect it every day. Learn more about how to set healthy boundaries with toddlers to ensure success. Stay firm on the designated wake time.

Step 4: Handling the 5:00 AM Wake-Up

When the dreaded 5:00 AM wake-up occurs, your response dictates how the next morning will go. Keep interactions as boring and minimal as possible. Avoid turning on bright lights, engaging in conversation, or playing games. The goal is to show your toddler that this time of night is for sleeping, not for social interaction.

Do not reward the early start with activities that they enjoy, such as screen time or snacks. If you start their day with a favorite cartoon or breakfast in the living room, you are teaching them that waking up early is fun. If they are truly awake and won’t go back to sleep, keep them in their room in the dark with minimal fuss. Only start the day at the time you have pre-determined to be the official wake time.

When to Seek Professional Help

In most cases, early wake-ups are a behavioral issue that can be solved with patience and consistency. However, if you notice signs of sleep apnea, such as loud snoring, mouth breathing, or pauses in breathing, you should consult your pediatrician immediately. Other red flags include excessive daytime sleepiness or behavioral issues that seem tied to chronic sleep deprivation, which may require you to look into managing everyday behavior challenges in kids.

If you have tried adjusting the schedule, environment, and boundary-setting strategies for several weeks without improvement, reaching out to a certified pediatric sleep consultant may provide the personalized guidance you need. They can look at your specific situation and identify the hidden obstacles preventing your toddler from sleeping in.

Conclusion

Addressing early morning wake-ups in toddlers requires time, grace, and consistency. It rarely changes overnight, but with the right approach, you can successfully shift your child’s rhythm. Focus on the sleep environment, audit your current schedule, and set clear boundaries that reinforce when the day actually begins.

Remember that every child is different, and what works for one toddler may not work for another. Be patient with the process, stay consistent with your strategy, and give yourself credit for putting in the work. Before you know it, you will be enjoying those quiet, peaceful mornings while your toddler stays safely and soundly in bed until the sun is well and truly up.

Frequently Asked Questions

What is considered a normal wake-up time for a toddler?

A biologically normal wake-up time for a toddler falls between 6:00 AM and 7:30 AM.

Why does my toddler wake up so early?

Early wake-ups are often caused by circadian rhythm disruption, overtiredness, environmental factors like early sunlight, or an inconsistent schedule.

How can blackout curtains help with early morning wake-ups?

Blackout curtains block out early morning sunlight, preventing light from signaling your toddler’s brain that it is time to start the day.

Should I cap my toddler’s afternoon nap?

Yes, if your toddler is taking a very long or late afternoon nap, capping it can help build enough sleep pressure for them to sleep later in the morning.

What is an ‘Okay to Wake’ clock?

It is a training clock that uses colors or icons to teach toddlers when it is officially time to get out of bed.

How should I handle a 5:00 AM wake-up?

Keep interactions boring and minimal. Avoid turning on bright lights, engaging in play, or offering screens so your toddler learns that early morning is for sleeping.

Cold Symptoms in Toddlers and How to Help Them Feel Better: A Parent’s Guide

Cold Symptoms in Toddlers and How to Help Them Feel Better: A Parent’s Guide

There is nothing quite as heartbreaking as seeing your vibrant, energetic toddler suddenly become sluggish, fussy, and congested. As parents, our first instinct is to take away their discomfort immediately, but the reality is that cold symptoms in toddlers are a standard part of early childhood development. While it is never easy to watch your child struggle with a runny nose or a cough, understanding how to navigate these illnesses can make the experience much less daunting for both of you.

This guide is designed to provide you with safe, pediatrician-approved strategies to help your child find relief. Whether you are dealing with your first cold or your tenth, remember that your primary goal is comfort. Please note: While this article offers general guidance, always consult your pediatrician for medical advice specific to your child’s health history or if you are concerned about their breathing or behavior.

Common Cold Symptoms in Toddlers

Toddlers are like little sponges, picking up germs at daycare, the park, and playdates. Because their immune systems are still maturing, they may experience several colds per year. Identifying cold symptoms in toddlers early can help you start supportive care right away.

  • Runny or stuffy nose: You might notice clear mucus at first, which can thicken and turn yellow or green. This is a normal part of the healing process and does not necessarily mean they need antibiotics.
  • Sneezing and mild cough: This is the body’s way of clearing irritants from the airways.
  • Slight fever: A low-grade fever is often the body’s way of fighting off the infection. It is generally not something to fear unless it is very high or persistent.
  • Appetite and sleep changes: It is normal for toddlers to have less interest in food or wake up more frequently at night when they feel under the weather.
  • Irritability and clinginess: Your child may just want extra hugs and security while they feel off. Building a strong bond can help, so learn more about why family bonding matters for young children.

How to Help Them Feel Better: Home Remedies

When it comes to treating cold symptoms in toddlers, time and rest are the best medicine. However, you can use several effective home remedies to manage the congestion and keep your child comfortable.

Hydration is Key

Focus on keeping your toddler hydrated. Water, breast milk, formula, or warm broth are excellent choices. Hydration keeps the mucus thin, which makes it easier for your child to blow their nose or cough it up. If your toddler is older, a warm (not hot) beverage can be very soothing for a scratchy throat. You can also explore top 7 healthy snacks for kids to help maintain their nutrition during recovery.

Humidity and Nasal Care

A cool-mist humidifier in your child’s bedroom adds moisture to the air, which can prevent dry, irritated nasal passages. Before nap time, you can also sit with your child in a steamy bathroom for 10 to 15 minutes; the warm moisture can loosen up stubborn congestion. If your toddler is very congested, use saline nasal drops and a bulb syringe or nasal aspirator to clear their nose, especially before they try to eat or sleep.

Navigating Over-the-Counter (OTC) Medications

When searching for relief from cold symptoms in toddlers, many parents reach for the medicine cabinet. However, you must be extremely cautious. Most over-the-counter cough and cold medications are not recommended for children under the age of four. These products have not been proven effective for young children and can even cause dangerous side effects.

If you are treating a fever or significant discomfort, always speak with your pediatrician about the correct dosage of acetaminophen or ibuprofen. Dosing for these medications should be based strictly on your child’s current weight, not their age. If your child is over one year old, a half-teaspoon of honey can occasionally be given to soothe a persistent cough, but never give honey to a child under 12 months due to the risk of botulism. For broader health concerns, check out our guide on how to tell when a child’s symptoms are getting worse.

When to See a Doctor

Most colds resolve on their own within 10 to 14 days. However, you should contact your healthcare provider if you notice any of the following warning signs:

  • A fever that lasts more than three days or is exceptionally high.
  • Signs of dehydration, such as fewer than four wet diapers in 24 hours, or a dry mouth and tongue.
  • Difficulty breathing, including fast breathing, wheezing, or visible pulling at the skin around the ribs while breathing.
  • Symptoms that seem to be getting worse rather than better after a week.
  • Persistent ear pulling or crying when touched, which may indicate an ear infection. Read more about understanding ear infections in young children for additional context.

Comfort Measures for a Sick Toddler

Beyond medical remedies, emotional support is vital for managing cold symptoms in toddlers. Your child is likely feeling vulnerable, so prioritize extra cuddles, quiet stories, and patience. Keep the environment calm, dim the lights if they are sensitive to glare, and keep the household volume low. Understand that their sleep schedule might be disrupted; be flexible and prioritize rest over strict routine during these few days. If you need help managing these transitions, refer to our guide on flexible daily schedules for young children.

Prevention: Can You Stop the Next Cold?

While you cannot avoid every germ, you can reduce the frequency of illness. Encourage frequent handwashing for everyone in the family, especially after returning home from school or public places. Teach your toddler to cover their coughs with their elbow, and try to limit exposure to playmates who are clearly unwell. Finally, ensure your child gets plenty of rest and eats a balanced diet to keep their immune system functioning optimally. Teaching them to practice good hygiene habits is a great step in long-term prevention.

Conclusion

Watching your toddler deal with cold symptoms in toddlers is a challenging experience, but it is also a normal part of their immune system’s growth. By focusing on hydration, nasal hygiene, and comfort, you can help them navigate these days with ease. Remember to trust your intuition—if something feels wrong, call your doctor. Most importantly, give yourself some grace during these stressful days. What is your go-to trick for helping your toddler sleep through a stuffy nose? Share your tips in the comments below! For more parenting support, read our positive parenting techniques that actually work.

Frequently Asked Questions

What are the most common cold symptoms in toddlers?

Common symptoms include a runny or stuffy nose, sneezing, a mild cough, a low-grade fever, decreased appetite, and temporary fussiness or changes in sleep patterns.

How can I help relieve my toddler’s nasal congestion at home?

You can use a cool-mist humidifier in their room, run a steamy bathroom for 10 minutes, and use saline nasal drops with a bulb syringe to gently clear mucus.

Can I give my toddler over-the-counter cold medications?

Most over-the-counter cough and cold medications are not recommended for children under the age of four. Always consult your pediatrician before administering any medication.

How should fever reducers be dosed for a toddler?

Fever reducers like acetaminophen or ibuprofen should always be dosed strictly based on your toddler’s current weight, not their age, and after consulting a doctor.

When should I take my toddler to the doctor for a cold?

Call your pediatrician if the fever lasts more than three days, symptoms worsen after a week, your child shows signs of dehydration, or they experience trouble breathing.

How long do typical cold symptoms last in toddlers?

Most common cold symptoms in toddlers peak within a few days and resolve completely on their own within 10 to 14 days.

How Much Sleep Do Children Need by Age? The Ultimate Guide for Parents

0

How Much Sleep Do Children Need by Age? The Ultimate Guide for Parents

As parents, we often focus on nutrition, education, and physical activity to support our children’s development. However, one of the most critical pillars of health is frequently overlooked: rest. Understanding how much sleep children need by age is not just about keeping the house quiet in the evening; it is a vital component of physical growth, cognitive function, and emotional regulation.

If you have ever found yourself staring at the clock, wondering if your toddler or teenager is getting enough shut-eye, you are not alone. Sleep needs change drastically as children grow, and keeping up with these transitions can feel like a moving target. In this guide, we explore the science of sleep and provide you with actionable strategies to ensure your family gets the rest they deserve.

Why Sleep is Non-Negotiable for Growing Kids

Sleep is when the magic happens. While your child is dreaming, their body is busy releasing growth hormones, repairing tissues, and consolidating everything they learned throughout the day. When children do not get the recommended amount of sleep, it impacts more than just their mood; it affects their ability to focus at school, their immune system strength, and their long-term health outcomes.

Consistent sleep quality is the foundation upon which all other development rests. By prioritizing sleep, you are investing in your child’s success and well-being for years to come. Establishing a daily routine for kids by age is one of the best ways to ensure these consistency goals are met.

The Recommended Hours of Sleep by Age: Quick Reference Chart

The National Sleep Foundation and the American Academy of Pediatrics provide general guidelines that serve as an excellent starting point for parents. While every child is unique, these ranges offer a helpful benchmark for planning your family’s schedule.

Age GroupRecommended Sleep Duration
Newborns (0-3 months)14-17 hours
Infants (4-11 months)12-15 hours
Toddlers (1-2 years)11-14 hours
Preschoolers (3-5 years)10-13 hours
School-Age Children (6-13 years)9-11 hours
Teenagers (14-17 years)8-10 hours

Breaking Down Sleep Needs by Developmental Stage

Sleep requirements are dictated by the rapid pace of development occurring at each stage of life. During infancy, the primary goal is physical growth and brain maturation. As children transition into school age, they face increased cognitive demands, necessitating deep sleep to process complex information and regulate emotions.

Teenagers (14–17 years)

Teenagers are a unique demographic because their circadian rhythms naturally shift. They tend to feel alert later at night and struggle to wake up early for school. Despite this biological shift, they still require 8 to 10 hours of sleep to manage the intense academic, social, and physical changes of adolescence. Encouraging a consistent wake-up time, even on weekends, can help regulate their internal clocks and prevent the common trap of social jetlag. For those struggling to manage morning responsibilities, check out our tips on how to help kids follow a morning schedule.

Signs Your Child Isn’t Getting Enough Sleep

Identifying sleep deprivation is not always as obvious as seeing a child fall asleep at the dinner table. Often, the signs are more subtle. If you suspect your child is struggling, look for these common indicators:

  • Frequent irritability or emotional outbursts
  • Difficulty concentrating on homework or school tasks
  • Daytime sleepiness or hyperactive behavior
  • A reliance on screens or sugar to stay awake
  • Increased clumsiness or physical accidents

The Impact of Sleep Deprivation on Child Development

When a child is consistently sleep-deprived, the consequences ripple through their entire life. Chronic fatigue can impair the brain’s executive functioning, making it difficult for children to manage impulses, follow directions, and navigate social relationships. Over time, this can lead to behavioral issues and anxiety, which you can read more about in our guide to managing everyday behavior challenges in kids.

Physical Health and Immunity

Sleep is a powerful boost for the immune system. During rest, the body produces cytokines, which are proteins that help the immune system fight off infections and inflammation. Children who do not sleep enough are often more susceptible to the common cold and other illnesses. Furthermore, studies have consistently shown a link between poor sleep habits and metabolic issues, such as a higher risk of childhood obesity, as the body struggles to regulate hunger hormones like ghrelin and leptin.

Practical Tips for Establishing a Healthy Bedtime Routine

Consistency is your greatest tool. A predictable bedtime routine signals to your child’s brain that it is time to wind down. Aim for a sequence that lasts 30 to 45 minutes and remains the same every single night.

  1. Consistent Timing: Set a bedtime and a wake time that remains consistent seven days a week.
  2. Digital Detox: Turn off all tablets, televisions, and smartphones at least one hour before bed to limit blue light exposure. You can learn more about this in our article on how parents can manage screen time at home.
  3. Relaxing Activities: Incorporate calming habits like reading a book, taking a warm bath, or practicing gentle stretches.
  4. Low Stimulation: Keep the lights dim and the noise level low in the hour leading up to sleep.

Optimizing the Bedroom Environment

The bedroom should be a sanctuary for rest. Ensure the room is dark, cool, and quiet. Consider using blackout curtains to keep morning sunlight out or a white noise machine to mask external sounds. If your child is fearful of the dark, a soft, warm-toned nightlight is acceptable, but avoid bright or blue-toned lights which can inhibit melatonin production. For younger children, you might consider calm and cozy nursery decor ideas to create a soothing space.

Common Sleep Challenges and How to Handle Them

Even with the perfect routine, challenges arise. Developmental leaps, stress, and growth spurts can all cause temporary sleep regressions. The most important thing is to maintain your boundaries while remaining supportive. If these challenges persist, you might find our strategies on how to help a child who fights bedtime very useful.

Nightmares and Night Terrors

It is important to distinguish between nightmares and night terrors. Nightmares usually occur during the second half of the night and involve a child waking up scared and able to recall the dream. Comforting them is key. Night terrors, however, usually happen in the first few hours of sleep; the child may scream or thrash but remain partially asleep. In the case of night terrors, it is often best to ensure their safety without trying to wake them, as they will typically drift back into deep sleep on their own.

When to Talk to Your Pediatrician About Sleep

While minor disruptions are a normal part of parenting, certain issues warrant a professional conversation. If you notice your child snoring heavily, gasping for air, or seeming unusually tired despite getting enough hours in bed, consult your pediatrician. These can sometimes be signs of sleep-disordered breathing or other medical conditions that require intervention. If you are unsure when to escalate concerns, our guide on how to tell when a child’s symptoms are getting worse provides helpful red flags to watch for.

Conclusion: Consistency is Key

Understanding how much sleep children need by age is a journey that evolves as your child grows. By prioritizing a calm environment, maintaining a steady routine, and staying attentive to your child’s specific needs, you are providing them with the essential tools for a healthy, happy life. Start small, be patient with the process, and remember that consistent habits today will pay off in a well-rested, thriving child tomorrow.

Frequently Asked Questions (FAQs)

  • Should I let my child nap if they missed sleep last night? A short nap can help recover lost sleep, but keep it brief and scheduled for early in the day so it does not interfere with their nighttime sleep.
  • Are screen time restrictions really necessary? Yes. Blue light suppresses melatonin, the hormone that helps the body fall asleep, making it much harder to transition into rest.
  • How do I handle a child who refuses to go to bed? Focus on a structured, soothing routine. If they continue to struggle, talk to them during the day about why sleep is important, rather than debating at bedtime.

Frequently Asked Questions

How many hours of sleep do newborns need?

Newborns aged 0 to 3 months generally require between 14 and 17 hours of sleep each day, distributed across multiple naps.

How much sleep do toddlers need?

Toddlers between the ages of 1 and 2 years old need about 11 to 14 hours of sleep every 24 hours, including naps.

Why do teenagers need more sleep than adults?

Teenagers undergo rapid physical, emotional, and cognitive development, and their circadian rhythms naturally shift, requiring 8 to 10 hours of rest.

Should I let my child nap if they missed sleep last night?

A short nap can help recover lost sleep, but keep it brief and scheduled for early in the day so it does not interfere with nighttime sleep.

Are screen time restrictions really necessary before bed?

Yes, screen restrictions are vital because blue light suppresses melatonin, the hormone that helps the body naturally fall asleep.

When should I consult a pediatrician about my child’s sleep?

Consult your pediatrician if you notice heavy snoring, gasping for air during sleep, or if your child remains unusually tired despite getting enough hours in bed.

How to Create a Balanced Diet for Your Baby: A Complete Guide for Parents

How to Create a Balanced Diet for Your Baby: A Complete Guide for Parents

As a parent, few things feel as significant as your baby’s first bites of solid food. Early nutrition is the foundation for your child’s physical growth, brain development, and long-term health. Learning how to create a balanced diet for your baby during that critical first year can feel overwhelming, but it is a rewarding journey that sets the stage for lifelong eating habits. You can also explore our baby nutrition essentials for the first year to help navigate this period.

During the first six months, breast milk or formula provides everything your little one needs. As they grow, they begin to transition toward solid foods. Creating a balanced diet for your baby is not just about filling their tummy; it is about providing a variety of nutrients that support their rapidly developing body and mind.

When and How to Start: Readiness Signs

Before you offer that first spoonful, it is important to ensure your baby is developmentally ready for solids. Most pediatricians recommend waiting until around six months of age. Beyond age, look for these specific physical cues:

  • The baby can sit up with minimal support and hold their head steady.
  • The tongue-thrust reflex has diminished, meaning they are less likely to automatically push food out of their mouth.
  • Your baby shows interest in your food, often reaching for items on your plate or mimicking chewing motions.

Remember that for the duration of the first year, breast milk or infant formula remains the primary source of nutrition. Think of solids as a supplement or a training ground for the palate, rather than a full meal replacement at the very beginning. For more details, check out our guide on starting baby’s first foods.

Building Blocks of a Balanced Baby Diet

To ensure you are providing a balanced diet for your baby, you should focus on four main pillars of nutrition. Each of these plays a specific role in your baby’s development.

Healthy Fats

Fat is crucial for your baby’s brain growth. Do not shy away from healthy fats. Excellent sources include mashed avocados, full-fat Greek yogurt, and small amounts of nut butters thinned with water or breast milk.

Iron-Rich Foods

As your baby’s natural iron stores begin to deplete around six months, incorporating iron-rich foods becomes essential. Fortified infant cereals, pureed meats like turkey or beef, and well-cooked legumes such as lentils or beans are fantastic additions to their diet. You might also want to look into zinc-rich foods for toddlers as they grow.

Vitamins and Minerals

Fruits and vegetables are the best way to introduce essential vitamins that support immunity. Aim for a rainbow of colors. Sweet potatoes, carrots, spinach, and blueberries offer a variety of textures and micronutrients that keep your baby healthy.

Protein Sources

Protein is the building block for growth. Alongside iron-rich meats, eggs are a wonderful nutrient-dense option. Once your baby is ready, eggs can be prepared in a variety of ways, such as scrambled and cut into small, manageable pieces.

Age-by-Age Nutrition Breakdown

Navigating the transition to solids is a marathon, not a sprint. Here is how to evolve your approach as your baby develops. Refer to our baby meal planning guide for more specific scheduling advice.

6-8 Months: The Introduction Phase

Focus on smooth, thin textures. Single-ingredient foods help you identify any potential allergies. Offer purees or very soft, mashed foods once or twice a day, keeping the volume small as they learn to swallow.

9-11 Months: Increasing Variety

At this stage, your baby is likely ready for more texture. Start mashing foods rather than pureeing them until completely smooth. You can introduce soft finger foods that are easy for them to grasp, such as pieces of soft banana or cooked pasta. Increase the frequency of meals to two or three times a day.

12 Months+: Moving Toward Family Meals

By their first birthday, most babies can join the family at the dinner table. They should be eating a wide variety of chopped family foods. Focus on maintaining a balanced diet for your baby by mirroring what the rest of the household eats, keeping salt and sugar levels low.

Common Foods to Avoid

Safety is the top priority when feeding an infant. To protect your child, keep the following guidelines in mind:

  • Choking Hazards: Avoid whole grapes, nuts, popcorn, raw carrots, and large chunks of meat. Always cut round foods into small, non-round pieces. Learn more about maintaining a safe environment in our complete baby safety guide.
  • Honey: Never feed honey to a child under age one due to the risk of infant botulism.
  • Cow’s Milk: Stick to breast milk or formula until age one, as cow’s milk is difficult for infants to digest and lacks sufficient iron.
  • Excessive Salt and Sugar: Their kidneys are still developing, and their palates do not need the added sugar.

Practical Tips for Success

Introducing new foods should be a positive experience. If you are introducing allergens like peanut or soy, do so one at a time and monitor your baby for any adverse reactions. If you notice a rash, vomiting, or diarrhea, contact your pediatrician immediately.

If your baby turns away, do not force the issue. The ‘division of responsibility’ approach is helpful here: your job is to provide nutritious, safe food, and your baby’s job is to decide how much they eat. This prevents power struggles and fosters a healthy relationship with food. For help with choosing the right gear for this phase, browse our baby feeding accessories guide.

Sample Weekly Meal Plan Inspiration

DayBreakfastLunchDinner
MondayOatmeal with pearMashed avocadoPureed turkey and carrots
WednesdayFull-fat yogurtMashed lentilsSoft cooked broccoli
FridayScrambled eggsMashed sweet potatoPureed chicken and peas

Conclusion

Creating a balanced diet for your baby is a long-term goal that doesn’t need to be perfect every single day. Some days your baby will eat everything in sight, and other days they may only want milk. Trust your instincts, look for the signs of readiness, and focus on providing nutrient-dense, whole foods when possible.

If you have concerns about your baby’s weight, growth, or potential allergies, always consult with your pediatrician or a pediatric nutritionist. They can provide personalized advice tailored to your child’s specific needs, ensuring your baby stays happy, healthy, and well-fed as they grow.

Frequently Asked Questions

When should I start giving my baby solid foods?

Most pediatricians recommend introducing solid foods around six months of age, provided your baby can sit up with minimal support, hold their head steady, and show interest in food.

Can I use cow’s milk as the main drink for my baby under one year?

No, cow’s milk should not be given as a primary drink to infants under one year old because it lacks sufficient iron and is hard for their kidneys to digest.

Why is honey dangerous for infants?

Honey should never be given to babies under the age of one due to the serious risk of infant botulism, a rare but dangerous form of food poisoning.

What are the key nutrients needed in a baby’s diet?

A balanced baby diet should focus on healthy fats for brain development, iron-rich foods, essential vitamins from fruits and vegetables, and quality protein sources.

How do I prevent choking hazards when feeding my baby?

Avoid hard, round, or sticky foods like whole grapes, popcorn, raw carrots, and large chunks of meat. Always cut foods into small, manageable, non-round pieces.

Should I stop breast milk or formula when starting solids?

No, breast milk or infant formula should remain the primary source of nutrition throughout your baby’s first year, with solids acting as a supplement.

The Ultimate Age-Wise Baby Meal Planning Guide: From First Bites to Toddlerhood

The Ultimate Age-Wise Baby Meal Planning Guide: From First Bites to Toddlerhood

Navigating the transition from liquid nourishment to solid foods is one of the most exciting milestones in parenthood. However, it can also be a source of significant anxiety. Creating an age-wise baby meal planning guide helps demystify the process, ensuring your little one receives the essential nutrients they need while developing healthy lifelong eating habits.

A structured approach to infant nutrition is not about perfection; it is about providing consistent exposure to a variety of flavors and textures. By understanding when and how to introduce new foods, you can confidently steer your baby through the various stages of development. Whether you are a first-time parent or a seasoned pro looking for a refresher, this guide will serve as your roadmap to success.

Phase 1: Getting Started (4–6 Months)

Most pediatricians recommend starting solids around six months, but some babies show signs of readiness slightly earlier. Before you pull out the high chair, look for key developmental markers. Your baby should be able to sit with minimal support, display good head and neck control, and show a genuine interest in your food by reaching out or watching you eat.

When it comes to the approach, you have two main options: traditional purees or Baby-Led Weaning (BLW). Purees allow for easy digestion and spoon-feeding, while BLW encourages babies to explore textures and self-regulate their intake by handling whole pieces of soft food. Both methods are effective as long as you prioritize iron-rich foods. Your baby’s iron stores from birth begin to deplete around this age, making foods like iron-fortified cereals, mashed lentils, or pureed meats excellent starting points. Learn more in our guide before starting baby’s first foods.

Phase 2: Expanding the Palate (6–9 Months)

Once your baby has mastered a few single-ingredient purees or soft finger foods, it is time to expand their palate. This stage is critical for flavor development. Introduce a wider range of vegetables, fruits, and grains. The goal here is to shift from single-ingredient meals to simple combinations that offer a complete nutritional profile.

As you introduce variety, you may be concerned about food allergies. The current consensus among pediatric experts is to introduce high-allergen foods, such as peanut butter (thinned or mixed into oatmeal), eggs, and dairy, early and often. Always observe your baby for any reaction after introducing a new allergen. Regarding hydration, breastmilk or formula remains the primary source of nutrition, but offering small amounts of water in an open cup or straw cup helps your baby develop motor skills. If you are looking for the right tools, check out our guide on the best sippy cups for babies learning to drink.

Phase 3: Building Independence (9–12 Months)

By nine months, many babies are ready to transition toward eating what the rest of the family eats. You can begin chopping food into bite-sized, manageable pieces rather than just pureeing. Focus on including healthy fats like avocado, olive oil, and full-fat yogurt, as these are essential for brain development during this rapid growth phase.

This is also a great time to stabilize your feeding schedule. Aim for three meals a day with the inclusion of one or two nutritious snacks as the baby’s appetite increases. If your baby seems interested in the family dinner table, let them sit with you. Modeling healthy eating behavior is one of the most effective ways to raise an adventurous eater. Remember, they are still learning, so keep portions small and expectations realistic. See our baby meal planning guide for six to twelve months for more practical ideas.

Phase 4: The Toddler Transition (12–24 Months)

Congratulations, you have reached the toddler phase! At this point, breastmilk or formula is no longer a nutritional necessity, and most toddlers transition to whole cow’s milk or a fortified plant-based alternative. Your child is becoming more active, requiring more energy-dense meals to sustain their constant movement.

Picky eating often surfaces during this period as toddlers assert their independence. Do not be discouraged if your child refuses a food they previously enjoyed. The key is to keep offering a variety of choices without pressure. The more you normalize different foods without making them a battleground, the more likely your toddler is to eventually try them. Consistency in your routine is your best ally in managing these challenging behaviors. You can find more tips in our guide on managing everyday behavior challenges in kids.

Safety First: Crucial Guidelines

Safety is the cornerstone of any effective baby meal planning guide. Choking is a common fear, so always ensure foods are soft, squishable, and cut into appropriate shapes. Avoid round, hard items like whole grapes, cherry tomatoes, or large chunks of meat, as these are high-risk choking hazards.

There are also specific items to avoid strictly before your child turns one. Honey, for instance, carries a risk of infant botulism. Additionally, do not add salt or sugar to your baby’s meals; their kidneys are still developing, and they do not need the extra sodium or processed sweeteners. When preparing meals in advance, follow food safety guidelines by cooling and refrigerating food immediately and using it within 48 hours, or freezing it for long-term storage. For more protection, review our ultimate guide to baby safety.

Expert Tips for Stress-Free Meal Prep

The secret to successful feeding is the one-meal philosophy. Instead of cooking separate meals, modify a portion of your own dinner to suit your baby’s stage—perhaps by mashing their portion or leaving out the added salt. This saves time and encourages the baby to appreciate family flavors.

If you have a hectic schedule, embrace batch cooking. Dedicate an hour on the weekend to prepare batches of healthy staples like steamed veggies, roasted sweet potatoes, or lentil mixtures. Use silicone ice cube trays to freeze individual portions, which can be popped out and warmed up in seconds during the week. By staying organized, you reduce the temptation to rely on pre-packaged snacks, ensuring your child gets the best nutrition possible even on your busiest days. Discover more in our guide on homemade healthy baby recipes.

Conclusion

The journey from first bites to toddlerhood is a marathon, not a sprint. Take comfort in knowing that your baby does not need to eat perfectly every single day. Focus on the weekly view rather than the daily intake. If you have any concerns regarding growth, severe allergies, or feeding difficulties, your pediatrician is always your best resource for personalized guidance.

You are doing a fantastic job guiding your child through these formative experiences. Embrace the mess, celebrate the new flavors, and enjoy this special time of discovery with your little one. For a comprehensive starting point, download our printable meal planning template and checklist to keep your kitchen organized and your baby well-fed.

Frequently Asked Questions

When should I start giving my baby solid foods?

Most pediatricians recommend starting solids around six months of age when your baby can sit with minimal support, has good head control, and shows interest in food.

What is the difference between purees and baby-led weaning?

Purees involve spoon-feeding smooth or mashed foods, while baby-led weaning allows infants to self-feed soft, manageable pieces of whole food, promoting motor skills.

When can I introduce high-allergen foods?

Current medical guidelines suggest introducing common allergens like peanuts, eggs, and dairy early and often, starting around six months, while watching for any adverse reactions.

How many meals should a nine-month-old baby eat?

By nine months, babies typically eat three meals a day along with one or two small, nutritious snacks, alongside breastmilk or formula.

What foods should I avoid giving my baby before one year?

You should strictly avoid giving honey due to the risk of infant botulism, as well as added salt, sugar, and high-risk choking hazards like whole grapes.

How can I simplify baby meal prep during a busy week?

Practice batch cooking on weekends, freeze individual portions in silicone ice cube trays, and adopt the one-meal philosophy by modifying family dinners for your baby.

Straw Cups vs. Sippy Cups: Which Is Better for Your Toddler?

Straw Cups vs. Sippy Cups: Which Is Better for Your Toddler?

Transitioning away from the bottle is a major milestone in your little one’s development. As your baby grows, the search for the perfect transition cup begins. You have likely walked down the baby aisle and felt overwhelmed by the endless options of spouts, valves, and handles. When deciding between straw cups vs. sippy cups, it is important to understand that this is more than just a convenience choice—it is a decision that impacts your child’s long-term oral motor development and speech patterns.

Many parents gravitate toward the traditional hard-spouted sippy cup because of its leak-proof design and familiarity. However, pediatric professionals, including speech pathologists and dentists, are increasingly recommending alternatives. Choosing the right cup is an essential step in fostering healthy habits that last a lifetime. Let’s explore the differences and why the experts tend to favor one over the other. You may also want to check out our guide on choosing baby feeding accessories to ensure you have the best tools for mealtime.

What is a Sippy Cup? (Pros and Cons)

A sippy cup is generally defined by its spouted lid, which often includes a valve to prevent spills. These cups were designed primarily to bridge the gap between a bottle and an open cup, offering a mess-free experience for busy parents and toddlers on the move. They are incredibly convenient and durable, making them a staple in many diaper bags.

However, the convenience comes with a trade-off. Traditional sippy cups often encourage a suckling pattern similar to a bottle or a pacifier. This motion pushes the tongue forward rather than allowing it to rest in a more mature, retracted position. Over time, this can influence speech development and potentially lead to orthodontic issues. While they are not inherently harmful for occasional use, relying on them as a primary source of hydration can perpetuate immature swallowing patterns.

What is a Straw Cup? (Pros and Cons)

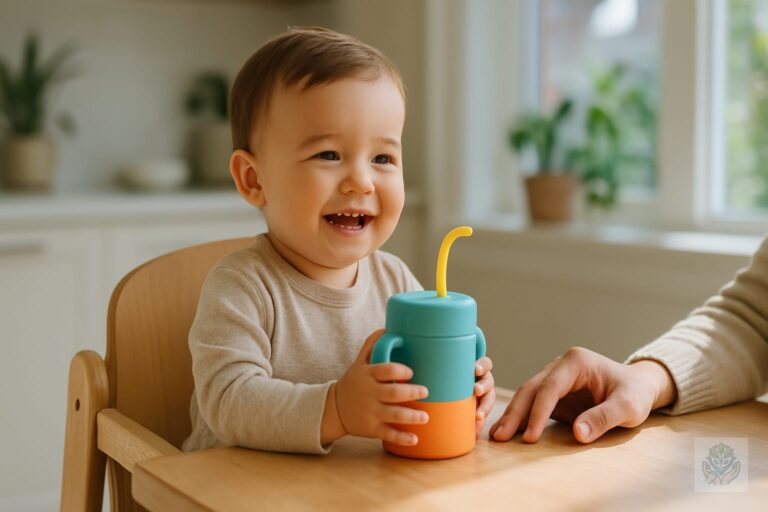
Straw cups come in various styles, from weighted straws that allow your child to drink at any angle, to simple silicone straw designs. Unlike the spouted sippy cup, a straw requires a different set of muscle movements. It encourages the lips to seal around the straw and the tongue to retract, which are foundational skills for speech and effective swallowing.

Pediatric professionals often celebrate the straw cup because it promotes the development of the oral motor skills necessary for eating a variety of food textures. It is an active exercise for the mouth. While some parents worry that straw cups might leak, many modern designs feature high-quality valves that offer the same spill-proof benefits as traditional sippy cups without the developmental downsides.

The Verdict: Why Straw Cups Usually Win

When comparing straw cups vs. sippy cups, straw cups usually win from a developmental standpoint. The act of drinking from a straw engages the cheeks, lips, and tongue in a way that mimics the mechanics of drinking from an open cup. This helps prepare the toddler for the ultimate goal: transitioning to a regular glass or plastic cup.

Beyond motor skills, there is the dental factor. Prolonged use of spouted cups can sometimes contribute to dental misalignments. By encouraging a mature swallow through straw use, you are supporting your child’s natural oral development. This simple switch can pay dividends for your child’s speech articulation and dental health, making the minor learning curve of teaching a baby to use a straw well worth the effort. For more development tips, read our article on hand strengthening activities for preschoolers which can also assist in building fine motor control.

How to Transition Your Toddler

Most children are ready to start moving away from the bottle between 6 and 12 months of age. If your little one can sit upright and shows an interest in your drinks, they are likely ready to start practicing with a straw cup. If you are also starting solids, review our ultimate guide to baby’s first foods to keep your transition period smooth.

To teach your baby to use a straw, try these steps:

  • Use a straw to pick up a small amount of water or breastmilk, then place your finger over the top to trap the liquid.
  • Place the straw tip in your child’s mouth and release your finger so a tiny drop falls onto their tongue.
  • Repeat this until they understand the sensation of the straw.
  • Once they master this, they will naturally begin to suck to pull the liquid up themselves.

If you are currently using a traditional spout, try replacing it during one mealtime per day. Gradually increase the frequency until your child is exclusively using the straw cup or an open cup. Consistency is the key to helping them adapt to the new flow and mouth position.

What to Look for When Buying Transition Cups

Not all cups are created equal. When browsing for the best options, keep safety and functionality at the forefront of your mind. Always look for BPA-free, PVC-free, and phthalate-free materials. Silicone is a favorite choice because it is soft on developing gums and teeth.

Ease of cleaning is another critical factor. Mold loves to grow in the nooks and crannies of complex valves, so choose cups that are easy to disassemble and dishwasher safe. A durable, leak-proof design will ensure you aren’t spending your day wiping up spills, while a weighted straw will make it easier for your toddler to drink comfortably while sitting in their high chair or playing on the floor. Check out our ultimate guide to baby safety for more tips on choosing non-toxic gear.

Common FAQs

Is it ever okay to use a traditional sippy cup? Yes, occasional use of a spouted cup is not cause for alarm. The goal is to avoid it becoming the primary way your child consumes liquids throughout the day.

Do straw cups cause cavities? Cavities are typically caused by prolonged contact with sugary liquids. Whether it is a straw cup or a bottle, it is best to put only water in the cup throughout the day to protect your child’s tooth enamel. If you are struggling with daily habits, our guide on teaching children good hygiene habits offers great advice.

When should my child transition to an open cup? Most pediatricians recommend introducing an open cup around 12 to 18 months. You can start practicing with small sips of water during mealtime long before that to get them comfortable with the process.

Conclusion

Navigating the world of transition cups can feel like a daunting task, but understanding the benefits of straw cups vs. sippy cups makes the decision much clearer. By choosing a straw cup, you are actively supporting your toddler’s oral motor development, setting them up for better speech outcomes, and paving the way for an easier transition to an open cup. Remember that every child develops at their own pace, so be patient with your little one as they master these new skills. With the right tools and a little bit of practice, you will successfully navigate this milestone together. You can also explore our daily routine for kids guide to help manage other developmental milestones effectively.

Frequently Asked Questions

Is it ever okay to use a traditional sippy cup?

Yes, occasional use of a spouted cup is completely fine. The main goal is to avoid letting it become the primary way your child consumes liquids throughout the day to protect their oral development.

Do straw cups cause cavities?

Cavities are typically caused by prolonged contact with sugary liquids. To protect your child’s tooth enamel, it is best to fill their transition cups only with water throughout the day.

When should my child transition to an open cup?

Most pediatricians recommend introducing an open cup around 12 to 18 months of age. You can start practicing with small sips of water during mealtime early on to help them get comfortable.

Are straw cups hard to clean?

Some straw cups can have complex valves, but many modern brands offer dishwasher-safe parts and easily removable silicone straws to prevent mold and make daily cleaning simple and quick.

When can my baby start using a straw cup?

Most babies are ready to practice with a straw cup between 6 and 12 months of age, provided they can sit upright independently and show interest in drinking from adult cups.

Why do speech therapists prefer straw cups over sippy cups?

Speech therapists prefer straw cups because they encourage lip sealing and tongue retraction, which build the crucial oral motor and muscle skills needed for proper speech articulation.

How to Make Healthy Fruit Purees for Babies: The Ultimate Step-by-Step Guide

How to Make Healthy Fruit Purees for Babies: The Ultimate Step-by-Step Guide

Embarking on the journey of solid foods is a milestone every parent looks forward to. Learning how to make healthy fruit purees for babies at home is one of the most rewarding ways to ensure your child receives nutrient-dense, high-quality nutrition during their early developmental months. By preparing meals in your own kitchen, you take full control over ingredients, texture, and flavor, while saving money compared to commercial jars. You can find more homemade healthy baby recipes to expand your repertoire.

Beyond the cost savings, homemade baby food allows you to introduce your infant to the authentic taste of real food. Many store-bought options are processed at high heat to ensure shelf stability, which can sometimes degrade vitamins. Making your own purees gives you the peace of mind that comes with knowing exactly what is on your baby’s spoon.

When Is Your Baby Ready for Fruit Purees?

Most pediatricians recommend starting solids around six months of age. However, every child develops at a different pace. Before you begin, watch for physical signs of readiness rather than just checking the calendar. Your baby may be ready to start eating when they can sit up with little to no support, have lost the tongue-thrust reflex that causes them to push food out of their mouths, and demonstrate a clear interest in what you are eating. For additional preparation, check out our guide on starting baby’s first foods.

Always consult with your pediatrician before introducing new foods. They can provide guidance based on your baby’s specific growth chart and medical history. Remember, breast milk or formula should remain the primary source of nutrition during the first year, with fruits serving as a gentle introduction to flavors and textures.

Essential Equipment for Making Baby Food

You do not need a high-end kitchen to master the art of baby food preparation. A few basic tools can make the process efficient and safe. You will need a reliable steamer basket to cook fruits while preserving nutrients, a high-quality blender or food processor to achieve a smooth consistency, and silicone storage molds or BPA-free ice cube trays for portioning. When selecting gear, refer to our guide on choosing baby feeding accessories.

Hygiene is paramount when preparing food for an infant with a developing immune system. Always sanitize your workspace, cutting boards, and utensils before you begin. Washing your hands thoroughly and ensuring that all containers are completely dry helps prevent bacterial growth, keeping your baby’s meals as fresh as possible.

Best Fruits for Your Baby’s First Bites

When starting out, focus on gentle, easily digestible fruits. Apples and pears are classic choices because they are mild in flavor and gentle on the digestive system. Bananas are excellent because they require no cooking and can be mashed easily. Avocados, while technically a fruit, provide essential healthy fats that are crucial for brain development.

When shopping, choose organic produce whenever possible to minimize exposure to synthetic pesticides. If you are using conventional fruits, be sure to wash them thoroughly or peel them to reduce surface residues. The goal is to provide a clean, simple, and allergen-friendly experience as your baby explores new tastes.

Step-by-Step: How to Make Healthy Fruit Purees

Follow these simple steps to ensure you are creating the healthiest meals for your little one:

  1. Selecting and washing: Choose ripe fruit that is free of bruises. Wash everything under cold running water to remove dirt.
  2. Peeling and removing seeds: Remove all skins, stems, pits, and seeds, as these can pose a choking hazard or be difficult to digest.
  3. Steaming vs. boiling: Steaming is the preferred method because it retains more water-soluble vitamins compared to boiling. Cook the fruit until it is tender enough to be easily pierced with a fork.
  4. Blending: Transfer the fruit to your blender. Pulse until the consistency is completely smooth and free of any large lumps.
  5. Adjusting texture: If the puree is too thick, add a small amount of expressed breast milk, formula, or filtered water to reach your desired consistency.

Storage and Food Safety Tips

Freshly made purees can be kept in the refrigerator for up to 48 hours in an airtight container. For longer storage, the ice cube tray method is a game changer. Simply pour the puree into silicone trays, freeze them solid, and then transfer the cubes to a freezer-safe bag. Each cube acts as a perfect single-serving portion.

When you are ready to serve, thaw the cubes in the refrigerator overnight or heat them gently in a water bath. Never reheat food more than once, and discard any leftovers that have touched your baby’s spoon, as saliva can introduce bacteria into the container. Maintaining a clean kitchen environment is part of overall baby safety practices.

Introducing New Flavors and Avoiding Allergens

The three-day rule is a helpful strategy for identifying potential sensitivities. Introduce one fruit at a time and wait three days before trying another. This allows you to monitor for signs of an allergic reaction, such as a rash, diarrhea, or vomiting. If the baby handles a fruit well, you can start combining it with others.

Once your baby is comfortable with individual flavors, consider mixing them with vegetables like sweet potatoes or peas to create complex flavor profiles. You can also mix fruit purees into infant cereals or oatmeal to add natural sweetness without using added sugars. Learn more about planning healthy baby meals as your little one grows.

Common Questions About Baby Purees

Many parents wonder if they should add flavorings. It is best to avoid added sugar, salt, or honey. Honey is strictly prohibited for infants under one year old due to the risk of botulism. You generally do not need spices, but a tiny pinch of cinnamon can be introduced later if you wish.

Regarding frozen or canned fruit, frozen fruit is a great alternative if it contains no added sugars or syrups. Avoid canned fruits if possible, as they often contain heavy syrups or high levels of sodium. Trust your baby’s hunger cues to determine portion sizes; they will let you know when they are full by turning their head away or closing their mouth.

Conclusion

Learning how to make healthy fruit purees for babies is a journey that connects you more deeply with your child’s nutritional needs. By starting with simple, single-ingredient purees and gradually introducing variety, you are helping your baby develop a palate for wholesome foods. Enjoy this stage of your parenting journey, and don’t be afraid to experiment with new, safe combinations as your baby grows. See more in our guide to baby nutrition tips.

Frequently Asked Questions

When can my baby start eating fruit purees?

Most pediatricians recommend starting solids around six months of age when your baby can sit up with little support, shows interest in food, and has lost the tongue-thrust reflex.

Which fruits are best for a baby’s first bites?

Apples, pears, bananas, and avocados are excellent first choices because they are mild in flavor, easily digestible, and gentle on a baby’s stomach.

Should I steam or boil fruit for baby purees?

Steaming is the preferred method because it helps retain more water-soluble vitamins compared to boiling, ensuring your baby gets maximum nutrition.

How long can homemade fruit purees be stored?

Freshly made purees can be stored in an airtight container in the refrigerator for up to 48 hours or frozen in ice cube trays for several weeks.

Can I add sugar, salt, or honey to baby purees?

No, you should avoid adding salt and sugar. Honey must never be given to infants under one year old due to the risk of infant botulism.

What is the three-day rule when introducing new foods?

The three-day rule involves introducing one new food at a time and waiting three days before trying another to easily monitor for any allergic reactions.

How to Prepare Homemade First Foods for Babies: A Step-by-Step Guide

0

How to Prepare Homemade First Foods for Babies: A Step-by-Step Guide

Transitioning your little one from breastmilk or formula to solids is an exciting developmental milestone. Many parents find themselves wondering about the best way to nourish their growing child. Learning how to prepare homemade first foods for babies is not only a rewarding experience but also a fantastic way to control the quality of ingredients your infant consumes. For a comprehensive look at the basics, check out our guide on everything you need to know before starting baby’s first foods.

The Benefits of Making Your Own Baby Food

Choosing to create your own purees or finger foods offers several distinct advantages. First, there is the cost-effectiveness. Store-bought jars can add up quickly, whereas buying seasonal produce in bulk is significantly more affordable. Second, you gain complete control over the nutritional profile. By avoiding unnecessary additives, sugars, and preservatives, you ensure your baby receives only the cleanest fuel for their development. If you need inspiration, refer to our tips for homemade healthy baby recipes.

Finally, there is the peace of mind. Knowing exactly what goes into your baby’s bowl—and having the ability to experiment with varied, fresh flavors—helps set the foundation for healthy eating habits that can last a lifetime.

Understanding Readiness Signs: When to Start

Before you start cooking, ensure your baby is developmentally ready. Most pediatricians recommend starting solids around six months. Look for these key signs: your baby can sit with little to no support, they have lost the tongue-thrust reflex that pushes food out, and they show a genuine interest in what you are eating.

Purees vs. Baby-Led Weaning

When learning how to prepare homemade first foods for babies, you will encounter two main approaches. Purees involve blending cooked food into a smooth consistency, which is often easier for beginners to manage. Baby-Led Weaning (BLW) involves offering soft, finger-sized pieces of food, allowing the baby to feed themselves. Many parents choose a hybrid approach, offering both smooth purees and soft, graspable pieces to build coordination.

Essential Equipment for Homemade Baby Food

You do not need a professional kitchen to get started. Focus on a few core tools to keep the process efficient:

  • High-powered blender or food processor: Essential for achieving a smooth, lump-free texture for early beginners.
  • Steamer basket: A simple metal or silicone basket ensures you retain as many nutrients as possible while softening vegetables.
  • Storage solutions: Silicone ice cube trays are the gold standard for portioning, while freezer-safe glass jars keep food fresh.

Safety and hygiene are paramount. Always wash your hands thoroughly before food prep. Ensure all surfaces, cutting boards, and blender components are sanitized. Avoid cross-contamination by using separate cutting boards for raw meats and produce. You can find more tips for maintaining a secure environment in our ultimate guide to baby safety.

Best First Foods for Babies

Starting with single-ingredient foods helps you identify potential sensitivities easily. Nutrient-dense options include:

  • Vegetables: Sweet potatoes, peas, avocado, and carrots are all packed with essential vitamins and fiber.
  • Fruits: Bananas, pears, and apples are naturally sweet and easy to mash or blend.
  • Proteins and grains: Iron-fortified oatmeal, lentils, and well-cooked quinoa provide the necessary minerals for growth.

How to Prepare Homemade First Foods: A Simple 3-Step Method

Mastering the technique for creating these meals is simpler than you might think.

Step 1: Washing and Peeling

Always wash produce thoroughly, even if you plan to peel it. Use a vegetable brush for items like carrots or sweet potatoes to remove dirt and residue before cooking.

Step 2: Cooking Methods

Steaming is generally preferred over boiling because it preserves water-soluble vitamins. Alternatively, roasting vegetables like sweet potatoes or carrots can caramelize natural sugars, creating a deeper, more appetizing flavor for your baby.

Step 3: Blending and Adjusting Consistency

Once your ingredients are tender, transfer them to a blender. Use breastmilk, formula, or cooled boiled water to thin the mixture. Start with a thinner consistency and gradually thicken it as your baby masters swallowing.

Safety First: Navigating Allergens and Textures

When introducing common allergens such as peanut butter, egg, or dairy, introduce them one at a time. The traditional 3-day wait rule is a helpful practice; by feeding your baby a new food for three consecutive days without introducing anything else new, you can easily monitor for signs of a rash, vomiting, or diarrhea.

As your baby grows, start introducing textures. Avoid overly processed, liquid-only diets for too long, as chewing is an essential skill that helps develop oral motor strength.

Storage and Food Safety Guidelines

Homemade baby food does not contain the preservatives found in store-bought options, so freshness is key. Keep fresh purees in the refrigerator for no longer than 48 hours. If you make a large batch, freeze it immediately.

The ice cube tray method is incredibly effective. Once the purees are frozen into cubes, transfer them to a freezer-safe bag. When it is time to feed, simply pop out one or two cubes, thaw them in the fridge overnight, or warm them gently in a water bath. For broader advice on maintaining your infant’s nutritional intake, refer to our guide on baby nutrition essentials.

Common Challenges and Troubleshooting

It is perfectly normal for babies to reject a new food at first. Research suggests it can take up to 10 or 15 exposures before a baby develops a preference for a new flavor. Stay calm and keep offering, even if they make a funny face.

If your baby experiences constipation, increase their intake of fiber-rich foods like peas or pears, and ensure they are getting enough fluids. If you feel overwhelmed, remember to balance your homemade efforts with the convenience of table foods like soft avocado or banana slices.

Conclusion

Learning how to prepare homemade first foods for babies is a journey that connects you deeply with your child’s growth. It requires patience, creativity, and a bit of trial and error, but the health benefits for your little one are immeasurable. Start small, stay consistent, and remember that every new bite is a step toward a lifetime of healthy eating.

Do you have a favorite first food you plan to try? Or perhaps a success story from your baby’s first meal? Share your experiences in the comments below, and don’t forget to download our printable Baby First Food Schedule to keep your transition organized and stress-free!

Frequently Asked Questions

When is the right time to start babies on solid foods?

Most pediatricians recommend starting solids around six months of age. Look for readiness signs like the ability to sit with minimal support, loss of the tongue-thrust reflex, and a clear interest in your food.

Should I use purees or baby-led weaning for my baby?

Both methods are great. Purees involve blending cooked foods into a smooth texture, while baby-led weaning offers soft, graspable pieces. Many parents use a hybrid approach to build motor skills and coordination.

What equipment do I need to make baby food at home?

You only need a few basic tools, including a high-powered blender or food processor, a steamer basket to retain nutrients, and silicone ice cube trays or glass jars for safe storage.

How long can I store homemade baby food in the fridge?

Without preservatives, homemade baby food spoils quickly. Keep fresh purees in the refrigerator for a maximum of 48 hours. Freeze any extra portions immediately for later use.

How should I introduce common allergens to my baby?

Introduce common allergens like peanut butter, dairy, or eggs one at a time. Use the three-day wait rule, feeding the same new food for three consecutive days to easily monitor for any adverse reactions.

What should I do if my baby rejects a new food?

It is completely normal for babies to reject new flavors at first. Research shows it can take up to 10 to 15 exposures for a baby to accept a new food, so stay patient and keep offering.