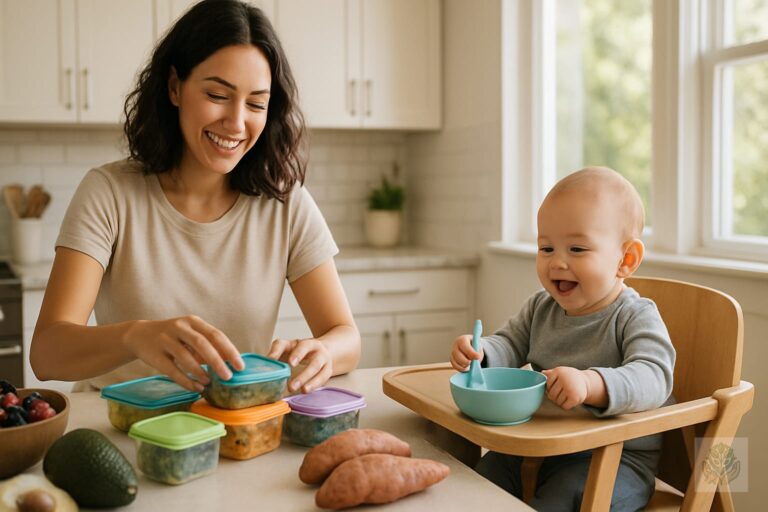

Home Blog Page 13

Baby Safety Rules Every Parent and Caregiver Should Know: A Complete Guide

0

Baby Safety Rules Every Parent and Caregiver Should Know: A Complete Guide

Welcoming a new baby into your home is an incredibly exciting milestone, but it also brings a new level of responsibility. As your little one begins to explore their surroundings, the importance of proactive baby-proofing becomes clear. Establishing baby safety rules is not about living in fear, but rather about creating a secure environment where your child can thrive.

When you prepare your home by setting the stage for a safe, exploratory environment, you are effectively creating a yes-space for your baby. This allows them to investigate safely without constant redirection. In this guide, we will walk you through the essential baby safety guidelines that every parent and caregiver should implement to navigate every stage of development with confidence. For a more comprehensive look at these home measures, check out our complete guide to baby safety at home.

The Foundation: Safe Sleep Guidelines

Safe sleep is the cornerstone of infant wellness. The American Academy of Pediatrics (AAP) provides clear, evidence-based recommendations that every caregiver should follow to ensure a secure slumber for their little one. You can also review our advice on how to create a safer sleep environment for babies for additional best practices.

The golden rule is Back to Sleep. Always place your baby on their back for every nap and every night. This simple habit significantly reduces the risk of SIDS.

  • Use a firm, flat mattress covered only by a tight-fitting baby fitted sheet.
  • Keep the sleep area completely clear of soft objects, including pillows, blankets, bumpers, stuffed animals, and wedges.
  • Practice room-sharing without bed-sharing. Keeping your baby in a crib in your room is recommended for at least the first six months, but the baby should always have their own designated sleep space.

Room-by-Room Childproofing Checklist

Childproofing is a journey, not a destination. As your baby develops new mobility skills, you will need to adapt your home accordingly. Focus on these key areas to maintain high standards of home child safety.

Nursery Safety

Your nursery should be a sanctuary. Start by anchoring all heavy furniture, such as dressers and bookshelves, to the wall using furniture anchor kits. Tip-over accidents are a serious risk, and anchoring provides essential stability. To ensure you have all the necessary items for a secure space, refer to our list of essential furniture for a functional nursery.

Kitchen and Bathroom Hazards

The kitchen and bathroom are often the most dangerous rooms in the house. In the kitchen, install stove guards to prevent little hands from reaching pot handles. Use cabinet locks on any cupboards containing cleaning supplies or sharp utensils. In the bathroom, always keep the toilet lid down with a lock, and store all medications and personal care products in a high, locked cabinet. If you are preparing for your baby’s hygiene routine, our complete guide to bathing your baby safely offers more vital safety tips.

Living Room Protection

When your baby starts crawling or cruising, sharp corners on coffee tables become significant hazards. Use foam corner protectors to cushion these edges. Additionally, ensure all electrical outlets are covered with safety plugs or sliding covers to prevent electric shocks.

Car Seat and Travel Safety

Transporting your child requires strict adherence to child safety regulations. A car seat is only effective if it is installed and used correctly. Always refer to your car seat manual and your vehicle owner’s manual for specific installation instructions.

One common mistake involves winter clothing. Never place your baby in a car seat while they are wearing a bulky winter coat, as this creates a gap between the harness and the child’s body. Instead, secure the baby in the harness first, then drape the coat or a blanket over the top for warmth.

Feeding and Choking Hazard Prevention

As your baby begins solid foods, monitoring for choking hazards is vital. Avoid high-risk items like whole grapes, nuts, popcorn, and hard candies. Always cut food into small, manageable pieces, and ensure your child is always seated and supervised while eating. You may find it helpful to look at our baby nutrition essentials for more information on safe eating.

Investing in a high chair that meets modern safety standards is also essential. Ensure the chair has a stable base and a secure five-point harness. Finally, we highly recommend that every parent and primary caregiver takes a certified CPR and infant first aid course to handle emergencies calmly and effectively.

General Household Safety Rules

Beyond specific room-proofing, keep these general infant safety tips in mind:

  • Water Safety: Never leave a baby or toddler unattended near any water source, including bathtubs, buckets, or sinks.
  • Sun and Temperature: Keep your baby’s environment at a comfortable temperature. When outdoors, limit direct sun exposure and use hats or shade rather than sunscreen on infants under six months, unless directed by a pediatrician.
  • Pet Safety: Never leave a pet and a baby alone together, no matter how gentle you believe the animal to be. Always supervise interactions closely.

Teaching Caregivers Your Safety Rules

It is common for grandparents, babysitters, and other caregivers to be less familiar with current baby safety rules. Communication is your best tool. Have a direct, honest conversation about your expectations regarding sleep, car seat usage, and supervision.

Create a simple Safety Cheat Sheet to leave on your fridge. Include emergency contact numbers, the address of your home, your pediatrician’s phone number, and a list of specific safety rules, such as no food in the car seat or the specific way to strap the baby into the stroller.

Conclusion

Implementing consistent baby safety rules significantly reduces risks and provides you with peace of mind. Remember, you do not have to be a perfect parent; you simply need to be a prepared one. By taking these proactive steps today, you are creating a secure foundation for your child to grow and explore the world.

For a detailed breakdown of these tips, download our free printable baby safety checklist to help you stay organized as your little one grows.

Frequently Asked Questions

What are the most important safe sleep rules for an infant?

Always place your baby on their back for every sleep on a firm, flat mattress with a tight-fitting sheet. Keep the crib completely free of soft objects, pillows, and blankets, and practice room-sharing without bed-sharing.

How can I make my home safer for a crawling baby?

Anchor all heavy furniture like dressers to the wall, cover electrical outlets with safety plugs, use foam corner protectors on sharp furniture edges, and install cabinet locks on cupboards containing hazardous items.

Why shouldn’t my baby wear a winter coat in a car seat?

Bulky winter coats create a dangerous gap between the harness and your baby’s body. Instead, secure your baby in the harness first and then drape a blanket or coat over them for warmth.

How do I prevent choking hazards during feeding?

Avoid high-risk foods like whole grapes, nuts, popcorn, and hard candies. Always cut food into small, manageable pieces, and ensure your baby remains seated and supervised while eating.

What are the key water safety rules for babies?

Never leave a baby or toddler unattended near any water source, including bathtubs, buckets, wading pools, or sinks, even for a few seconds.

How should I communicate safety rules to other caregivers?

Have an open conversation about your expectations regarding sleep, supervision, and car seat usage. Create a safety cheat sheet for the fridge containing emergency numbers and specific rules.

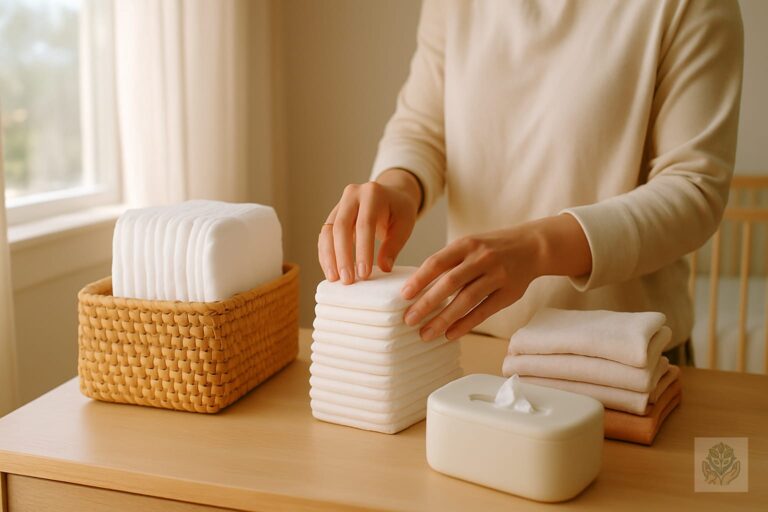
The Ultimate Baby Skin Care Checklist for Every Season: A Seasonal Guide

The Ultimate Baby Skin Care Checklist for Every Season: A Seasonal Guide

Welcoming a new baby into your home brings a whirlwind of joy, questions, and learning curves. Among the most common concerns for new parents is the delicate, velvety skin of their newborn. As the climate shifts from the biting cold of winter to the humid heat of summer, your little one’s skin needs shift too. This ultimate baby skin care checklist for every season provides a roadmap to help you navigate these environmental changes while keeping your infant comfortable and healthy. You can also explore our complete guide on everything parents should know about baby skin care for more foundational tips.

Why baby skin needs seasonal adjustments

Infant skin is significantly thinner and more permeable than adult skin. Because it absorbs substances more readily and loses moisture faster, environmental factors play a massive role in skin health. Adjusting your approach as the weather changes is not just about comfort; it is about supporting the developing skin barrier. Whether you are battling low humidity in January or high UV levels in July, a proactive strategy makes all the difference.

The importance of a consistent, gentle skincare routine

While the products or the frequency of application may change, the foundation of your routine should remain consistent. Always prioritize gentle, fragrance-free products. Consistency helps you spot potential issues, like a flare-up or an allergy, before they become major problems. By sticking to a basic, reliable routine, you provide your baby with the protection they need while minimizing irritation from unnecessary chemicals.

Brief overview of the seasonal checklist

In this guide, we will break down the specific needs for each season. You will learn when to upgrade to heavy-duty creams, when to focus on sun safety, and how to manage the tricky transition months of spring and fall. By the end of this guide, you will be equipped with a comprehensive, actionable plan for your baby’s skin health.

Understanding Baby Skin: Why It’s Different

Baby skin is biologically distinct. It produces less oil, is less resistant to bacteria, and has a higher surface-area-to-body-mass ratio. This makes infants particularly susceptible to irritation and dehydration.

The sensitivity of an infant’s barrier

Think of an infant’s skin barrier as an unfinished wall. It is still being built, and external factors like harsh weather, soaps, or detergents can cause cracks in that protection. This is why specialized care is so vital during the first year of life.

Common culprits: pH balance and fragrance sensitivity

Many adult skincare products contain fragrances and surfactants that are too harsh for a baby. Fragrances are a leading cause of contact dermatitis in infants. Always look for products labeled as pH-balanced, hypoallergenic, and free from synthetic dyes or perfumes to protect your baby’s natural acid mantle. For more advice on choosing the right items, check out our parent’s guide on how to choose safe skin care products for babies.

Winter Baby Skin Care: Combatting Dryness and Chapping

Winter brings two main enemies to your baby’s skin: cold, dry air outside and dry, artificial heat inside. This combination can quickly strip moisture from a baby’s cheeks and hands.

Hydration strategies: thicker creams vs. lotions

When the temperature drops, lotions often aren’t enough. Switch to thicker, oil-based ointments or creams during the winter. These create a more effective seal over the skin, locking in moisture and shielding against the drying effects of indoor heating systems.

Managing indoor heating and humidity

Indoor heating can turn your home into a desert. Consider running a cool-mist humidifier in the nursery to keep the air moist. Also, avoid long, hot baths, which can further dry out the skin. Opt for warm, shorter baths and apply moisturizer immediately after drying your baby to trap the water on the skin. You can follow our ultimate baby bath time checklist for first-time parents to ensure these routines are safe and effective.

Protective measures for outdoor outings

When heading out in the cold, windburn is a real risk. Use a soft barrier cream on your baby’s face before leaving the house. If it is extremely windy, consider a stroller rain cover or wind guard to create a micro-climate around the baby.

Spring Baby Skin Care: Managing Transitions

Spring is a season of flux. The air might be warming up, but pollen counts rise, and the skin often reacts to these changes.

Addressing seasonal allergies and pollen exposure

If you notice your baby rubbing their eyes or developing a patchy rash, consider that environmental allergens might be the cause. Keep windows closed on high-pollen days and wipe your baby down with a damp cloth after outdoor play to remove pollen particles from their skin and hair.

Transitioning to lighter moisturizers

As the weather warms, you can transition away from heavy winter ointments. If your baby’s skin is healthy, a lighter, water-based lotion may be sufficient to keep them hydrated without clogging pores or feeling greasy.

Sun safety begins in the spring

Do not wait for the heat of summer to start thinking about UV rays. Even in early spring, the sun can be damaging. Start using protective clothing and hats now to establish the habit before the intensity of the summer sun peaks.

Summer Baby Skin Care: Sun Protection and Heat Rash

Summer presents unique challenges. The goal is to keep the skin cool, clean, and protected from the sun’s harmful radiation.

Safe sunscreen guidelines for babies under 6 months vs. older

For babies under six months, the best strategy is to keep them out of direct sunlight entirely. If shade is not available, apply a minimal amount of mineral-based, broad-spectrum sunscreen with at least SPF 30 to small, exposed areas. For babies over six months, apply sunscreen liberally to all exposed skin every two hours.

Preventing and treating heat rash (miliaria)

Heat rash occurs when sweat ducts become blocked. It appears as tiny red bumps in skin folds like the neck, armpits, or diaper area. Keep these areas dry and cool. If a rash develops, switch to loose-fitting clothing and ensure the baby is not overdressed for the temperature.

Choosing breathable fabrics

Cotton and bamboo are the gold standards for summer baby clothes. These materials are breathable and help moisture evaporate, keeping your baby’s skin dry and comfortable compared to synthetic fabrics that trap heat. When picking out summer outfits, consider our tips on how to choose soft and comfortable festival fabrics for kids.

Fall Baby Skin Care: Preparing for the Drop in Temperature

Fall acts as a mirror to spring. It is a period where you need to start monitoring the humidity levels again as the air begins to dry out.

Gradual transition to richer moisturizers

As you pull out the sweaters, prepare to put away the light summer lotions. A gradual shift to slightly thicker products will help the skin adjust before the harsh winter weather arrives.

Managing the impact of temperature fluctuations

Fluctuating temperatures can lead to chapped lips and dry, rough patches. Keep a small tube of healing ointment in your diaper bag for quick applications on the go, protecting sensitive spots from the crisp autumn wind.

The Year-Round Essential Baby Skin Care Checklist

No matter the season, keep these items stocked in your nursery for a reliable, safe routine.

  • Gentle, fragrance-free cleanser: Use sparingly only where needed.
  • Hypoallergenic moisturizer: Apply daily, especially after baths.
  • Diaper rash protection: Use a zinc-oxide-based cream to create a barrier. Learn more in our ultimate baby diapering checklist for everyday use.
  • Sunscreen (mineral-based): Look for zinc oxide or titanium dioxide.

When to See a Pediatrician

Most skin issues in babies are minor, but it is important to know when to seek professional help.

Identifying signs of eczema vs. typical dryness

If your baby’s skin is consistently inflamed, itchy, or weeping, it might be eczema. Typical dryness usually responds well to moisturizer within a few days; eczema often requires specific, doctor-prescribed treatment plans.

Infection warning signs

Contact your pediatrician if you notice pus, spreading redness, warmth to the touch, or if your baby develops a fever. These can be signs of a skin infection that requires medical attention. You can also review our guide on how to tell when a child’s symptoms are getting worse.

Conclusion

Navigating the changing seasons doesn’t have to be overwhelming. By understanding the unique needs of your baby’s skin and making small adjustments to your routine, you can keep your little one comfortable year-round. Remember that consistency and observation are your best tools. As you grow more confident, you will find that these small acts of care become second nature.

For a quick reminder, download our printable baby skin care checklist for every season to keep in your nursery for easy reference!

Frequently Asked Questions

Why does baby skin need seasonal adjustments?

Infant skin is thinner, more permeable, and loses moisture faster than adult skin. Changing weather conditions like winter dryness or summer UV rays require different protective strategies to support the developing skin barrier.

Should I use lotions or creams in the winter?

In the winter, switch from light lotions to thicker, oil-based creams or ointments. These create a stronger barrier over the skin to lock in moisture and protect against dry indoor heating and cold winds.

When can I start using sunscreen on my baby?

For babies under six months, the best approach is keeping them out of direct sunlight. If shade isn’t available, apply a minimal amount of mineral-based sunscreen with SPF 30+. Babies over six months can use sunscreen liberally.

How do I prevent heat rash in the summer?

Heat rash occurs when sweat ducts become blocked. Keep your baby cool and dry, dress them in breathable fabrics like cotton or bamboo, and avoid overdressing them in warm weather.

What fabrics are best for a baby’s sensitive skin?

Natural, breathable fabrics like cotton and bamboo are the gold standard for baby clothes. They allow moisture to evaporate and keep your baby’s skin comfortable, unlike synthetic fabrics that trap heat.

When should I consult a pediatrician about my baby’s skin?

Contact your pediatrician if you notice persistent inflammation, signs of eczema, spreading redness, pus, or if your baby develops a fever, as these may indicate an infection requiring medical treatment.

How to Prevent Diaper Leaks: The Ultimate Guide for Day and Night

0

How to Prevent Diaper Leaks: The Ultimate Guide for Day and Night

If you are a parent, you have likely experienced the sudden, unwelcome discovery of a soaked onesie or wet crib sheets. The common frustration of diaper leaks is a rite of passage, but that does not mean you have to accept it as your new normal. Even with premium diaper brands, leaks can happen, often leaving parents scrambling for a solution in the middle of the night.

Understanding how to prevent diaper leaks is essential for maintaining your sanity and keeping your little one comfortable. In this guide, we will explore why these accidents occur and provide actionable tips to keep your baby dry and reduce the amount of laundry you have to do each week. For a comprehensive overview of routine tasks, check out our complete guide to baby diapering for new parents.

The Most Common Reasons for Diaper Leaks

Many parents assume that a leak is a failure of the diaper itself, but the issue is often related to sizing or application. Identifying the root cause is the first step toward dry nights and happy days.

Incorrect sizing: Too big vs. too small

Size charts are helpful, but they are not universal. If a diaper is too small, it will not have enough absorbent material to hold your baby’s output. Conversely, if the diaper is too big, there will be gaps around the legs and waist where liquid can easily escape. Always prioritize the weight range, but pay attention to the fit on your specific baby’s body type.

Improper application (the ‘ruffle’ check)

One of the most overlooked steps is checking the leg cuffs. After you secure the tabs, run your finger around the elasticized ruffles. They should be pulled outward, not tucked inside the diaper. If the ruffles are tucked inward, the diaper creates a channel for moisture to leak right onto your baby’s clothes.

Saturated diapers (capacity issues)

Sometimes, the diaper is simply full. Babies grow rapidly, and their fluid intake changes. If you are consistently finding a soaked diaper in the morning, your baby may have simply outgrown the absorbency capacity of their current daytime diaper.

Anatomy and movement: How baby’s shape affects fit

Every baby has a different body shape. A diaper that works perfectly for your friend’s chunky-thighed baby might leak on your long, lean baby. Pay attention to how your baby moves; an active crawler requires a different fit than a stationary newborn.

Daytime Diapering Success: Tips for Active Babies

Active babies are constantly on the move, which puts extra stress on the diaper’s seal. To ensure success, focus on the details of every diaper change.

  • Master the ‘Leg Cuff’ flip: As mentioned, always sweep your finger around the leg holes to ensure the ruffle is facing outward.
  • Ensure the waistband is snug but comfortable: You should be able to fit two fingers comfortably between the diaper and your baby’s belly. If the gap is wider, it is too loose.
  • Watch for signs it is time to size up: If the tabs are reaching toward the edge of the diaper, if you see red marks on the skin, or if you are dealing with frequent leaks, it is likely time to move to the next size.

Nighttime Diaper Hacks: Getting Through the Night

Nighttime is when most parents face the biggest challenges. Longer stretches of sleep mean longer periods of time between changes, making overnight leaks a common occurrence. You can also explore our tips on how to help a child who fights bedtime to ensure your nights are as peaceful as possible.

Switching to overnight-specific diapers

Consider using diapers designed specifically for overnight use. These often feature extra absorbent polymers and enhanced leak guards to handle 10 to 12 hours of wetness. They are usually thicker than daytime versions and are specifically engineered for heavy wetters.

The ‘Booster Pad’ trick

If overnight diapers are not enough, you can try adding a diaper booster pad. These are thin, super-absorbent inserts that you place inside the diaper to provide an extra layer of protection without adding unnecessary bulk.

Layering tips for heavy wetters

Some parents find success in sizing up for the night, even if the baby is still in a smaller size during the day. A larger diaper provides more surface area for absorption. Additionally, ensure your baby is not wearing too many layers of clothing, which can trap heat and make the diaper feel less comfortable. Check out our guide on baby fitted sheets to ensure your crib setup is also comfortable.

Troubleshooting Specific Leak Patterns

The location of the leak often tells you exactly what is wrong with the fit or the usage.

Leaks out the back (the ‘blowout’ struggle)

Back leaks are often the result of the diaper being too low. Pull the back of the diaper up higher before securing the tabs. If the diaper is too low in the back, there is nowhere for fluid to go but up and out.

Leaks out the leg holes (gaps and fit issues)

Leg leaks usually point to a sizing issue or a failure to flip the leg ruffles. If the diaper feels secure but still leaks, your baby might have thin thighs, and you may need to try a different brand with more flexible elastic.

Leaks through the front (common in boy anatomy)

If you have a baby boy, make sure his anatomy is pointing downward when you fasten the diaper. If he is pointing upward, he will likely leak out the front waistband every single time.

Common Diaper Fitting Mistakes to Avoid

We all want to make the process quick, but small mistakes can lead to big messes. Avoid putting the diaper on too loose in anticipation of growth; a diaper should fit the baby as they are today. Additionally, do not ignore tab placement. If one side is significantly higher than the other, the diaper will be crooked and prone to gaps. Finally, avoid the urge to over-tighten, which can restrict blood flow and cause discomfort.

When to Contact a Pediatrician

While most leaks are just a laundry nuisance, persistent heavy wetness accompanied by other symptoms might warrant a call to your pediatrician. If you notice signs of skin irritation, persistent diaper rash, or if you are concerned about your baby’s hydration levels, always seek professional medical advice. For general hygiene and skin health, refer to our complete guide to baby skin care for new parents.

Conclusion

Learning how to prevent diaper leaks is a process of trial and error. By focusing on proper sizing, mastering the leg ruffle flip, and utilizing overnight-specific gear for longer stretches, you can reclaim your sleep and keep your baby dry. Remember that every baby is unique, and you will soon find the perfect combination of products and techniques that works for your family. If you want more tips for your newborn, read our complete roadmap to healthy newborn care from birth. Have a tried-and-true diaper hack? Share your tips in the comments below!

Frequently Asked Questions

Why does my baby leak out of their diaper every night?

Nighttime leaks usually happen because the diaper reaches its absorption capacity during long sleep stretches. Switching to a dedicated overnight diaper, sizing up for the night, or using a booster pad can help handle the extra fluid.

How do I stop leg leaks in diapers?

Leg leaks are typically caused by incorrect sizing or tucked-in leg ruffles. Always run your finger around the elasticized cuffs after fastening the diaper to ensure the ruffles are pulled outward, creating a proper seal.

Should I buy a bigger diaper size for overnight use?

Many parents find success in sizing up for the night because a larger diaper offers more absorbent surface area and better coverage, provided it still fits snugly around the waist and legs without large gaps.

Why is my baby boy leaking through the front of his diaper?

For baby boys, front leaks often happen because his anatomy is pointing upward when the diaper is secured. Always make sure to point his anatomy downward before fastening the tabs to prevent front waistband leaks.

How do I know if my baby’s diaper is too small?

Signs that a diaper is too small include frequent leaks, red marks on the skin, the diaper feeling overly heavy and saturated quickly, and the fastening tabs reaching toward the outer edges of the diaper.

How tight should a baby’s diaper be?

A diaper should fit snugly but comfortably. You should be able to fit two fingers between the waistband and your baby’s belly. Avoid over-tightening, which can cause discomfort, but ensure there are no loose gaps.

How to Wash Your Baby’s Hair Without Tears: A Stress-Free Guide for Parents

0

How to Wash Your Baby’s Hair Without Tears: A Stress-Free Guide for Parents

For many parents, the simple act of cleaning a squirming infant can feel like a high-stakes mission. If you find yourself dreading the moment you have to lather up your little one’s scalp, you are certainly not alone. Many parents struggle with bath-time meltdowns, specifically when it comes to the dreaded hair wash. Learning how to wash your baby’s hair without tears is not just about cleanliness; it is about turning a stressful chore into a calm, reliable bonding experience.

Babies often fear hair washing for a variety of developmental and sensory reasons. The sensation of water running over their face, the sudden change in temperature, or the fear of getting soap in their eyes can trigger an immediate fight-or-flight response. By understanding these triggers, you can adjust your approach to minimize discomfort and build your baby’s confidence in the water.

Preparation: Setting the Stage for Success

Before you even step foot in the bathroom, your preparation can dictate how the session goes. One of the most common mistakes is timing the bath incorrectly. If your baby is overtired or hungry, they will have zero patience for the sensory demands of a hair wash. Aim for a window when your baby is well-rested and has had a light snack, typically after a nap but before the bedtime rush. You can find more tips on establishing a peaceful evening in our guide for children who fight bedtime.

Temperature is equally important. Ensure the water is comfortably warm—around 100 degrees Fahrenheit—but never hot. Having a simple checklist of essential tools can make the process significantly smoother. Consider keeping a soft washcloth, a dedicated rinsing cup with a soft silicone edge, and a baby shampoo visor within arm’s reach before you start. For a complete list of essentials, refer to our baby bath time checklist.

Step-by-Step Guide: How to Wash Baby’s Hair Without Tears

When you are ready, follow these steps to maintain a peaceful environment for your little one.

  1. Softening the process: Before wetting the hair, engage in gentle play. Splash the water with your hands or let your baby play with their favorite bath toys. This helps them feel secure and distracts from the upcoming task.
  2. The lean back technique: Instead of pouring water directly over the forehead, gently support your baby in a reclined position. By keeping their head tilted back slightly, you allow the water to run down the back of their head rather than into their eyes or nose.
  3. Protective barriers: Use a soft washcloth held over their forehead to catch stray droplets, or utilize a baby visor. These tools provide a psychological safety net for your child, letting them know that water won’t be streaming into their face.
  4. Strategic distraction: If your baby is old enough, give them a toy to hold or sing a favorite nursery rhyme. Distraction is a powerful tool in pediatric care because it occupies the brain’s processing power, leaving less focus for the sensory input of the water.

Product Spotlight: Finding the Best Tear-Free Shampoo

Not all baby products are created equal. When selecting a shampoo, prioritize fragrance-free and hypoallergenic formulas to protect your baby’s delicate skin barrier. Many parents find success with natural, plant-based ingredients that avoid harsh sulfates, which can strip natural oils from the scalp. For more advice on product selection, check out our guide on choosing safe baby skin care products.

Always perform a patch test on your baby’s inner arm 24 hours before using a new product on their head. This simple step helps you identify any allergic reactions before they cover the entire scalp. Choosing a formula specifically labeled as tear-free is essential, as these are pH-balanced to minimize irritation if a little bit does happen to drip into the eyes.

Advanced Tips for the ‘Bath-Hating’ Baby

If your baby has developed a significant aversion to hair washing, you might need a gradual desensitization approach. Start by simply wiping their head with a damp, warm cloth rather than pouring water. Over several days, slowly introduce the rinsing cup, ensuring the flow of water is minimal and controlled.

Consistency is key. Incorporate these steps into a predictable routine so your baby knows exactly what to expect. Perhaps most importantly, check your own energy. Babies are incredibly intuitive; if you feel anxious or hurried, they will mirror that stress. Take a deep breath, move slowly, and project a sense of calm confidence. Your relaxed demeanor can be the most effective soothing tool in your kit. If you need help structuring other parts of your day, see our daily routine guide for kids.

Common Mistakes to Avoid

Even with the best intentions, it is easy to fall into traps that exacerbate fear. Avoid using high water pressure from a showerhead, which can be overstimulating. Instead, use a gentle cup or a soft sponge to control the flow. Never rush the process; if your baby shows clear signs of distress, such as pulling away or stiffening, take a pause. Forcing the issue will only cement the negative association with bath time.

When to Consult a Pediatrician

Most bath-time struggles are completely normal, but there are times when you should seek professional advice. If your baby exhibits extreme, inconsolable distress that persists despite all attempts at comfort, it may be worth discussing sensory processing concerns with your pediatrician. Additionally, if you notice persistent scalp issues like thick, yellow, or red patches—often indicative of cradle cap or infantile eczema—a doctor can provide specific, medicated guidance to soothe the skin. Always stay alert to signs that your child’s symptoms are getting worse.

Conclusion

Learning how to wash your baby’s hair without tears is a journey of patience and trial and error. By controlling the environment, using the right tools, and staying calm, you can transform the experience from a battle into a pleasant ritual. Every baby is unique, so do not get discouraged if one technique works better than another. Stay consistent, keep it gentle, and enjoy these small moments of connection. What are your favorite bath-time hacks? Share your tips in the comments below or subscribe to our newsletter for more practical, stress-free parenting advice.

Frequently Asked Questions

Why do babies cry when washing their hair?

Babies often cry due to the sensory shock of water on their face, the sudden temperature change, or the fear of soap stinging their eyes.

What is the lean-back technique?

The lean-back technique involves gently tilting your baby’s head backward so water flows down the back of their head rather than into their eyes and nose.

Are tear-free shampoos completely non-irritating?

Tear-free shampoos are formulated to be pH-balanced and minimize eye irritation, but it is still best to keep the product out of your baby’s eyes.

How can I distract my baby during hair washing?

You can use floating bath toys, sing your baby’s favorite nursery rhymes, or give them a cup to hold to occupy their attention.

What should I do if my baby hates baths?

Take a gradual approach by using a warm, damp cloth to wipe their hair first, and slowly introduce rinsing cups over several days.

When should I consult a pediatrician about bath time?

Consult your pediatrician if your baby shows extreme, inconsolable distress or if you notice persistent red, yellow, or thick scalp patches like cradle cap.

Newborn Care Essentials You Really Need: A No-Nonsense Checklist

0

Newborn Care Essentials You Really Need: A No-Nonsense Checklist

Walking into a baby store for the first time can feel like stepping onto another planet. Everywhere you look, there are high-tech gadgets, specialized creams, and expensive contraptions promising to make your life easier. For many expecting parents, the sheer volume of newborn care essentials marketed as mandatory can lead to both decision fatigue and a significantly lighter bank account.

The truth is that newborns have surprisingly simple requirements. They do not need a nursery that looks like a catalog spread or the latest battery-operated soothing devices. By focusing on a minimalist approach to baby gear preparation, you can save money, reduce clutter, and keep your focus where it belongs: on getting to know your new little human.

Understanding Your Newborn’s Real Needs

To cut through the noise of consumer culture, we must look at biology. A newborn’s life revolves around a few core pillars: sleep, warmth, nutrition, and hygiene. When you strip away the marketing, you find that your baby really only needs a safe place to rest, consistent nourishment, clean skin, and loving contact with their primary caregivers.

Adopting a less-is-more mindset during your newborn product selection process is not just about saving money; it is about intentionality. When you have fewer items to manage, you spend less time cleaning and organizing gear and more time responding to your baby’s cues. Let’s look at the essential baby items that bridge the gap between necessity and convenience.

The Essential Checklist: What You Really Need

Sleeping Gear

Safety is the non-negotiable priority here. Your baby needs a firm, flat, and safe sleep surface. A bassinet or a crib that meets current safety standards is a must. You will also need a few fitted sheets and a waterproof mattress cover for inevitable spills and leaks. Swaddles are highly recommended for the first few months to help soothe the startle reflex and encourage longer sleep stretches. For more guidance, read our How to Create a Safer Sleep Environment for Babies: A Parent’s Complete Guide.

Feeding Essentials

If you choose to breastfeed, your primary needs are minimal: a comfortable nursing pillow, some high-quality nipple cream, and nursing pads. If you are formula feeding or pumping, prioritize quality over quantity. You need a few bottles, a reliable bottle brush, and a simple way to store milk. Regardless of how you feed, keep a stash of soft burp cloths handy, as they will quickly become your most-used household item. You can find more tips in our Baby Nutrition Essentials for the First Year: A Month-by-Month Feeding Guide.

Diapering Must-Haves

You do not need a fancy changing table if you have a safe, flat surface. A portable changing pad is often more convenient than a dedicated station. Stock up on plenty of diapers—whether you choose cloth or disposable—and a high-quality, fragrance-free wipe. Keep a reliable diaper rash cream on hand for sensitive skin, but skip the fancy dispensers or specialized warming devices. Check out our The Complete Guide to Baby Diapering for New Parents: Tips, Tricks & Safety.

Clothing Basics

Newborns grow rapidly, often outgrowing their clothes in a matter of weeks. Focus on functional comfort. You need plenty of side-snap onesies, footed sleepers for easy middle-of-the-night changes, and a few hats for warmth. Avoid outfits with complicated buttons or zippers that make diaper changes harder than they need to be.

Health & Hygiene

Keep your medicine cabinet simple. A high-quality digital rectal thermometer is essential for accurately monitoring your baby’s health. You will also need baby nail clippers or a file, a soft-bristled hairbrush, and a mild, fragrance-free baby soap or wash. Avoid loading up on lotions and powders until you see how your baby’s skin reacts to new products. See our The Complete Guide to Baby Skin Care for New Parents: Everything You Need to Know.

Transportation and Mobility

When it comes to leaving the house, safety and ease of use are paramount. A car seat is the one item you should never buy secondhand unless you know the complete history of the seat to ensure it has never been involved in an accident. Beyond that, a stroller or a baby carrier is a personal choice. Many parents find that a good quality baby carrier allows them to keep the baby close while keeping their hands free, which is invaluable during those early, clingy weeks.

What You Can Skip (The ‘Save Your Money’ List)

Marketing departments work hard to convince you that certain items are critical, but many parents find these gadgets gathering dust after a week. You can generally skip wipe warmers, which often dry out wipes and harbor bacteria. Expensive diaper pails are rarely worth the investment; a standard trash can with a lid usually suffices. Avoid buying a massive collection of newborn shoes, as they fall off easily and serve no purpose other than aesthetic appeal.

Tips for Preparing Your Home on a Budget

Preparing for a newborn does not have to break the bank. Look for opportunities to buy high-quality, durable items secondhand, especially for big-ticket items like strollers or playpens, provided they meet current safety standards. Accept hand-me-downs from friends and family—most parents are thrilled to pass along items that are still in great condition. Remember, prioritize safety and function over brand names and aesthetics. For a comprehensive approach, review our Complete Guide to Baby Safety at Home: A Room-by-Room Checklist for New Parents.

Conclusion

At the end of the day, your newborn does not care about the brand of their stroller or the aesthetic of their nursery. They care about being held, fed, and kept safe by their caregivers. By focusing on these newborn care essentials, you reduce the stress of preparation and create a calm, welcoming space for your baby. Embrace the journey of parenthood with confidence, knowing that your presence and your responsiveness are the only things your baby truly needs to thrive. For more tips on navigating this time, see our What Every Parent Should Know About Newborn Care: The Ultimate First-Time Parent Guide.

Frequently Asked Questions

What are the absolute must-haves for a newborn?

A newborn truly only needs a safe place to sleep, reliable feeding supplies, diapers, basic clothing like onesies and sleepers, and a few health items like a digital thermometer.

Can I buy a used crib or car seat?

You can buy certain items used, but you should avoid secondhand car seats unless you know their complete history. Always ensure any used sleep surface meets current safety standards.

What baby gear should I skip to save money?

You can easily skip wipe warmers, specialized diaper pails, unnecessary luxury lotions, and newborn shoes, as these items are rarely used and offer little practical value.

How many clothes does a newborn actually need?

Newborns grow out of clothes very quickly. Focus on functional comfort with a handful of side-snap onesies, footed sleepers, and a couple of hats for warmth.

Do I need a fancy changing table?

No, a dedicated changing table is not required. A portable changing pad placed on any flat, secure surface works just as well and saves space.

How can I prepare for a baby on a budget?

Accept hand-me-downs from family and friends, buy durable gear secondhand, and focus strictly on essentials rather than trendy gadgets marketed to new parents.

Common Childhood Illnesses Every Parent Should Know: A Symptom Guide

Common Childhood Illnesses Every Parent Should Know: A Symptom Guide

If you are a parent, you know the feeling all too well. Your child wakes up with a warm forehead, a runny nose, or a sudden cough, and your heart immediately sinks. Navigating common childhood illnesses is a rite of passage for every family. While it is rarely easy to watch your little one feel under the weather, understanding the symptoms and knowing how to manage them can make a world of difference.

This article serves as a comprehensive resource to help you distinguish between routine bugs and situations that require medical intervention. Please remember: This guide is for educational purposes only. If you are ever worried about your child’s health, your pediatrician is your best resource and should always be your first point of contact.

The Common Cold: Managing the Sniffles

The common cold is the most frequent visitor in any household with children. Usually caused by a viral infection, colds can linger for several days, characterized by a runny or stuffy nose, sneezing, a mild cough, and sometimes a low-grade fever.

Because colds are viral, antibiotics will not help. Instead, focus on supportive care at home. Keep your child hydrated with plenty of fluids, and consider using a cool-mist humidifier in their room to help loosen congestion. Saline nasal drops and a bulb syringe are particularly effective for infants who cannot blow their noses yet.

Watch for signs that a simple cold is progressing into something more, such as a sinus infection. If your child has thick, yellow, or green mucus that persists for more than ten days, or if they develop a high fever and facial pain, it is time to consult your doctor. You can also refer to our guide on how to tell when a child’s symptoms are getting worse for extra peace of mind.

Fever: Understanding Your Child’s Immune Response

Many parents fear the thermometer, but it is important to remember that a fever is not an illness in itself. It is a sign that your child’s immune system is working hard to fight off an infection. In children, a temperature of 100.4 degrees Fahrenheit (38 degrees Celsius) or higher is generally considered a fever.

When your child has a fever, focus on their comfort rather than just the number on the display. If they are eating, drinking, and playing, they may not need medication. If they are miserable or in pain, over-the-counter fever reducers, dosed according to your doctor’s weight-based instructions, can help.

Be aware of red flags. A fever in an infant younger than three months old is always an urgent matter that requires an immediate call to your pediatrician. For older children, seek care if the fever lasts longer than three days, is accompanied by a stiff neck, persistent vomiting, or if the child seems unusually lethargic.

Common Viral Infections in Toddlers

Toddlers are notorious for sharing germs in preschool and daycare settings. Some viral infections are particularly memorable due to their unique symptoms. Hand, Foot, and Mouth Disease (HFMD) often presents as painful sores in the mouth and a rash on the palms and soles of the feet. It is highly contagious, so keep your little one home until the fever subsides and sores begin to heal. During recovery, you might want to explore some indoor toddler activities to keep them occupied while they are home.

Roseola is another mystery illness that often puzzles parents. It typically begins with a high fever for several days, followed by a sudden rash that appears just as the fever breaks. Croup, meanwhile, is easily identified by a distinct barking cough that sounds like a seal. While most cases of croup can be managed at home with cool night air or steam from a hot shower, always seek help if your child shows signs of difficulty breathing.

Stomach Bugs: Dealing with Nausea and Diarrhea

Viral gastroenteritis, or the stomach flu, is every parent’s nightmare. The primary goal here is preventing dehydration. Signs of dehydration to watch for include fewer than six wet diapers in 24 hours, dry lips, crying without tears, and an unusually sunken soft spot on an infant’s head. For parents with young babies, it is helpful to stay informed about essential baby nutrition tips to support their recovery.

Forget the old-school BRAT diet (bananas, rice, applesauce, toast) as your only option. Modern pediatricians recommend returning to a normal, balanced diet as soon as your child can tolerate it. Small, frequent sips of an oral rehydration solution are often better than juice or sports drinks, which can be too high in sugar and exacerbate diarrhea.

Ear Infections and Sore Throats

Ear infections often follow a cold. Because infants cannot tell you where it hurts, watch for clues: excessive ear tugging, irritability, or trouble sleeping when lying flat. For a deeper dive into this topic, see our article on understanding ear infections in young children. While many ear infections are viral and clear up on their own, some are bacterial and require antibiotics. Only a medical professional looking into the ear can make this distinction.

Sore throats can also be tricky. Most are viral, but Strep throat is a common bacterial infection in school-aged children. If a sore throat is accompanied by a sudden fever, swollen glands, and a lack of cold symptoms like a runny nose, it is worth a quick trip to the clinic for a rapid test.

When to Call the Pediatrician (The ‘Red Flag’ Checklist)

It can be hard to know exactly when to escalate a situation. Use this checklist as a baseline for when to seek immediate medical advice:

  • Any fever in a baby under 3 months old.
  • Signs of respiratory distress, such as rapid breathing, flared nostrils, or ribs pulling in with each breath.
  • Signs of dehydration, such as not urinating for 8 or more hours.
  • Behavioral changes that feel wrong to you, such as extreme lethargy or difficulty waking up.
  • A rash that does not fade when you press on it.

Prevention Strategies: Keeping the Family Healthy

While you cannot prevent every single illness, you can reduce the frequency of doctor visits through consistent habits. Teach your children the importance of proper handwashing with soap and warm water. For more practical advice on teaching these routines, check out our guide on how to teach children good hygiene habits. Ensure your children are up to date on all recommended vaccinations, as these are the most effective way to prevent serious, preventable diseases.

Lastly, never underestimate the power of sleep and nutrition. A body that is well-rested and nourished is far better equipped to fend off common viruses. Encourage a balanced diet rich in fruits and vegetables, and prioritize consistent bedtimes to support immune function. If you struggle with bedtimes, our guide on how to help a child who fights bedtime offers helpful strategies.

Conclusion

Parenting through sickness is rarely easy, but your intuition is your greatest tool. You know your child better than anyone else. If your gut tells you something is wrong, do not hesitate to call your pediatrician—even if it is just for peace of mind. You are doing a wonderful job navigating the ups and downs of parenthood. Remember, these illnesses are temporary, and your care and comfort are the best medicine for your little one.

Frequently Asked Questions

What temperature is considered a fever in children?

In children, a temperature of 100.4 degrees Fahrenheit (38 degrees Celsius) or higher is generally considered a fever, indicating that the immune system is fighting an infection.

How should I treat a common cold in my child?

Colds are viral, so antibiotics will not help. Focus on supportive care such as keeping your child hydrated, using a cool-mist humidifier, and applying saline nasal drops for congestion.

When should I call the doctor for a fever?

Always call your pediatrician immediately for any fever in an infant under three months old. For older children, seek care if the fever lasts more than three days or is accompanied by lethargy.

What are the key signs of dehydration from a stomach bug?

Watch for fewer than six wet diapers in 24 hours, dry lips, crying without tears, and an unusually sunken soft spot on an infant’s head.

How can I tell if my child has an ear infection?

Common clues include excessive ear tugging, unusual irritability, and trouble sleeping, especially when lying flat. A medical professional must look inside the ear to confirm.

When is a sore throat a sign of Strep throat?

Strep throat is often accompanied by a sudden fever, swollen glands, and a lack of traditional cold symptoms like a runny nose. A rapid test at the clinic can confirm this.

Complete Guide to Baby Nutrition for Healthy Growth: Everything You Need to Know

Complete Guide to Baby Nutrition for Healthy Growth: Everything You Need to Know

Navigating the world of infant feeding can feel overwhelming. From the moment your baby arrives, you are tasked with providing the building blocks for their physical and cognitive development. Understanding baby nutrition for healthy growth is not just about calories; it is about establishing a relationship with food that will last a lifetime.

Why nutrition is the foundation of growth

During the first year of life, your baby will triple their birth weight and undergo rapid brain development. Proper nourishment during this window is critical. Nutritional deficiencies or imbalances can impact everything from their immune system to their long-term health outcomes. By focusing on nutrient-dense options, you provide your child with the best possible start. For further reading, check out our baby nutrition essentials for the first year.

The journey from birth to solid foods

Your baby’s nutritional needs evolve rapidly. The journey begins with the liquid nutrition of breast milk or formula and transitions into the sensory exploration of solid foods. This progression allows your baby to develop oral motor skills and adapt to a variety of textures and tastes.

Setting the stage for healthy eating habits

Believe it or not, your baby learns about food long before they take their first bite. Modeling healthy eating, keeping mealtime stress-free, and offering a diverse range of flavors are all ways to set the stage for a healthy eater. Your role as a parent is to provide the food, while your baby decides how much they need to eat.

The First 6 Months: Liquid Gold

For the first six months, your baby receives all the hydration and nutrition they need from breast milk or infant formula. These provide the perfect balance of proteins, fats, and carbohydrates tailored for human infant development.

Breast milk vs. formula: Nutritional profiles

Breast milk is often called liquid gold because it changes its composition to meet your baby’s specific needs at different stages of growth. It also provides essential antibodies. Formula, on the other hand, is scientifically formulated to mimic the nutritional profile of breast milk, ensuring that babies receive adequate iron, vitamins, and minerals if breastfeeding is not possible or chosen.

Understanding hunger cues and feeding schedules

Rather than watching the clock, watch your baby. Common hunger cues include rooting, sucking on fingers, or smacking lips. Crying is often a late sign of hunger. Following an on-demand feeding schedule helps your baby learn to regulate their own intake, which is an important step in intuitive eating.

Vitamin D and other essential supplementation

Breastfed babies specifically need a Vitamin D supplement, as breast milk does not contain enough of this nutrient for bone development. Always consult your pediatrician before introducing any supplements to ensure the dosage is safe for your infant.

Introducing Solid Foods: When and How

The transition to solid foods is a major milestone. Most experts recommend waiting until around six months of age to ensure your baby’s digestive system is mature enough to handle complex nutrition. You can prepare by reviewing our complete guide before starting baby’s first foods.

Readiness signs: Is your baby ready for solids?

Beyond age, look for signs of physical readiness. These include being able to sit up with minimal support, good head control, and the disappearance of the tongue-thrust reflex. If your baby is consistently reaching for your food during dinner, they are likely signaling interest.

How to start: Purees vs. Baby-Led Weaning (BLW)

You can choose between traditional spoon-feeding with purees or the Baby-Led Weaning approach. Purees offer a smooth transition, while BLW allows your baby to explore soft, graspable pieces of food from the start. Both methods are effective as long as you prioritize safe, nutrient-dense ingredients.

Creating a safe environment for first bites

Always ensure your baby is seated in an upright high chair with proper support. Never leave them unattended during feedings. Familiarize yourself with the difference between normal gagging—which is a part of learning to eat—and actual choking, which requires intervention. For added peace of mind, see our ultimate guide to baby safety.

Essential Nutrients for Brain and Body Development

As your baby starts solids, prioritize foods that are rich in essential nutrients. Your goal is to maximize every bite with ingredients that support growth.

Iron: Why it’s critical for 6-12 month olds

Iron is vital for cognitive development and preventing anemia. Because your baby’s iron stores from birth begin to deplete around six months, focus on iron-rich first foods like iron-fortified cereals, pureed beans, lentils, or finely minced meats.

Healthy fats for cognitive development

Babies need high-quality fats for rapid brain growth. Avocados, full-depth yogurt, and nut butters (thinned safely) are excellent additions to your baby’s diet. Don’t be afraid to add a drop of olive oil to their purees to boost caloric density.

Calcium and protein for bone and muscle growth

Protein is the building block of muscles and tissues. You can provide this through eggs, poultry, fish, and legumes. Calcium-rich options like yogurt and cheese help build strong bones and teeth as your baby grows.

A Month-by-Month Guide to Healthy First Foods

Growth is a marathon, not a sprint. Follow this general progression to keep your baby engaged and nourished. You can find more tips in our first foods timeline for the first year.

  • 6-8 months: Start with single-ingredient purees or soft mashes. Focus on vegetables and iron-fortified cereals.
  • 8-10 months: Expand to a variety of flavors and introduce finger foods like cooked pasta, soft fruit pieces, and steamed vegetable sticks.
  • 10-12 months: Your baby can handle more complex textures. Begin transitioning them to modified versions of family meals, ensuring there is no added salt or sugar.

Navigating Food Sensitivities and Allergies

There is no benefit to delaying the introduction of common allergens like peanuts, eggs, or dairy. In fact, early, controlled introduction is now recommended by pediatricians to help prevent the development of allergies.

How to introduce common allergens

Introduce one new allergen at a time. Mix a tiny amount of peanut butter or cooked egg into a food your baby has already tolerated well. Wait 2-3 days before introducing another new allergen so you can easily identify the source if a reaction occurs.

Monitoring for signs of reactions

Watch for hives, swelling, vomiting, or breathing difficulties. If you notice any of these symptoms, stop feeding immediately and contact your pediatrician. If your baby shows signs of a severe reaction, seek emergency medical help right away.

Common Pitfalls to Avoid in Baby Nutrition

The best way to support your baby is by avoiding unnecessary additives and focusing on whole foods.

Foods to strictly avoid before age one

Honey is strictly forbidden for babies under one year due to the risk of botulism. Additionally, avoid cow’s milk as a primary drink, high-sodium processed foods, and foods that pose a high choking risk like whole nuts, popcorn, and large pieces of hard fruit.

The danger of over-reliance on processed baby foods

Commercial pouches and jars are convenient, but they are often highly processed. Try to make a mix of homemade foods and store-bought options to ensure your baby experiences a wider range of natural textures and authentic flavors. Consider trying our ultimate guide to homemade healthy baby recipes.

Pressure-free feeding strategies

Never pressure your baby to finish a jar or a bowl. Forcing a baby to eat beyond their hunger signals can disrupt their ability to self-regulate. Trust that your baby will eat what they need to sustain their growth curve.

Conclusion

Focusing on baby nutrition for healthy growth is a rewarding journey that sets the tone for your child’s long-term well-being. By staying consistent, introducing a variety of whole foods, and trusting your instincts, you are providing your baby with the best foundation for a lifetime of healthy eating habits.

Frequently Asked Questions (FAQ)

  • How much water should a baby drink? Before six months, breast milk or formula provides all necessary hydration. Once solids begin, you can offer small amounts of water in a sippy cup, but it should not replace milk feeds. See our guide to the best sippy cups for babies for recommendations.
  • Is organic baby food necessary? Organic is a personal choice. While it can reduce exposure to pesticides, the most important factor is the quality and variety of fruits, vegetables, and proteins you offer.
  • What should I do if my baby is a picky eater? Picky eating is normal during the transition to solids. Keep offering diverse foods without pressure, and remember that it often takes many exposures before a baby learns to like a new taste.

Frequently Asked Questions

When should I start introducing solid foods to my baby?

Most experts recommend starting solid foods around six months of age when your baby shows signs of developmental readiness, such as sitting up with support and good head control.

Why is iron important for babies aged 6 to 12 months?

Iron is critical for cognitive development and preventing anemia. Because a baby’s natural iron stores deplete around six months, incorporating iron-rich foods like pureed meats and fortified cereals is essential.

Can I introduce common allergens early?

Yes, current pediatric guidelines recommend introducing common allergens like peanuts, eggs, and dairy early and in small amounts to help reduce the risk of developing food allergies.

What foods should be avoided before a baby turns one?

You should strictly avoid honey due to the risk of infant botulism, cow’s milk as a primary drink, high-sodium foods, and choking hazards like whole nuts, popcorn, and hard fruit pieces.

How much water does a baby need to drink?

Before six months, breast milk or formula provides all necessary hydration. After starting solids, you can offer small sips of water in a cup, but milk should remain their primary beverage.

What should I do if my baby refuses new foods?

Picky eating is completely normal. Continue offering a variety of nutritious foods without pressure, as it can take multiple exposures for a baby to accept a new taste or texture.

The Complete Guide to Baby Meal Planning for Every Stage: From First Bites to Toddlerhood

The Complete Guide to Baby Meal Planning for Every Stage: From First Bites to Toddlerhood

Transitioning your little one from milk to solids is a milestone filled with excitement and, let’s be honest, a fair amount of overwhelm. Between navigating texture changes and managing nutritional needs, it is easy to feel lost. That is where baby meal planning becomes a total game-changer for new parents. If you are just starting, everything you need to know before starting baby’s first foods can help simplify the process.

By having a simple plan in place, you move away from the frantic search for what to feed your baby at 5:00 PM. Instead, you focus on providing balanced, nutrient-dense meals that support growth and brain development. This guide will help you navigate every developmental milestone from the first teaspoon of puree to the chaotic, fun world of toddler dining.

Phase 1: The Basics of Starting Solids (6-8 Months)

Before you start, look for the physical signs that your baby is ready. These include sitting up with minimal support, good neck control, and showing interest in your food by grabbing at your plate. Most pediatricians recommend waiting until around six months to begin, as this is when the digestive system is better prepared for solid food.

Choosing Your Path: Purees vs. Baby-Led Weaning (BLW)

There is no single right way to feed your child. Purees allow for a gradual introduction of textures, starting with smooth, single-ingredient vegetables or fruits. Baby-Led Weaning, on the other hand, encourages self-feeding by offering soft, finger-sized pieces of whole food. Many parents find success with a combination of both, providing purees for convenience and finger foods for sensory exploration.

Nutrient Focus: Iron-Rich First Foods

By six months, your baby’s natural iron stores start to deplete. Prioritizing iron-rich foods is vital for cognitive development. Excellent first foods include iron-fortified baby cereal, mashed lentils, finely ground meat, or pureed spinach. Always pair these with a source of Vitamin C, such as pureed strawberries or bell peppers, to help with iron absorption.

Sample 6-Month Meal Schedule

  • Morning: Breastmilk or formula.
  • Mid-day: One serving of an iron-rich pureed food (e.g., mashed avocado or oatmeal).
  • Evening: Breastmilk or formula.

Phase 2: Expanding Palates (9-12 Months)

By nine months, your baby is likely ready for more complex textures. Soft, mashable foods are the goal here. Moving away from liquid-like purees helps develop the oral motor skills necessary for chewing and speech. For more inspiration, check out baby meal planning from six to twelve months.

The Importance of Variety

Avoiding picky eating starts early. By exposing your baby to a wide range of flavors—bitter, savory, and sweet—you help cultivate a broader palate. Do not be discouraged if they reject a food the first time; it often takes ten or more exposures for a baby to accept a new flavor.

Introducing Common Allergens Safely

Current guidance suggests introducing common allergens like peanuts, eggs, and dairy early in the feeding journey, rather than delaying them. Introduce one new potential allergen at a time, preferably in the morning, so you can monitor for any allergic reactions throughout the day.

Sample 9-12 Month Meal Schedule

  • Breakfast: Iron-fortified cereal with fruit puree.
  • Lunch: Soft-cooked ground turkey and mashed sweet potato.
  • Dinner: Small pieces of soft-steamed broccoli and pasta.
  • Snack: Breastmilk or formula as needed.

Phase 3: The Toddler Transition (12-24 Months)

Once your child hits the one-year mark, they can officially transition to family-style meals. This is a time of incredible growth, but also a time when many parents notice a fluctuation in appetite. It is completely normal for a toddler to eat like a champion at breakfast and barely touch their dinner.

Healthy Snacking Habits

Toddlers have small stomachs and high energy needs. Focus on nutrient-dense snacks like yogurt, cheese, hummus with cucumber sticks, or sliced bananas. Try to limit “grazing” throughout the day so that they arrive at mealtime with a healthy appetite. You can find more options in our list of top 7 healthy snacks for kids.

Sample Toddler Meal Plan

  • Breakfast: Scrambled egg and whole-grain toast strips.
  • Lunch: Deconstructed turkey sandwich (meat, cheese, and bread served separately).
  • Snack: Greek yogurt with blueberries.
  • Dinner: Grilled salmon, roasted carrots, and quinoa.

Practical Strategies for Baby Meal Prep

Baby meal prep doesn’t have to consume your entire weekend. With a few smart strategies, you can manage your time effectively.

Batch Cooking Hacks

Use silicone ice cube trays to freeze single portions of purees. Once frozen, pop them into a labeled freezer bag. For finger foods, roast a large tray of seasonal vegetables once a week and store them in airtight containers for quick side dishes.

The Essential Tool Kit

  • High-quality steamer basket or machine.
  • Silicone suction plates and bowls.
  • Easy-clean bibs with crumb catchers.
  • Small, appropriately sized utensils for little hands.

Deconstructed Family Meals

Simplify your life by serving the family the same meal, but in a baby-friendly format. If you are having stir-fry, keep the ingredients slightly larger for the adults and chop them into smaller, bite-sized pieces for the toddler. Omit salt during the cooking process and add it to the adult plates at the table.

Essential Nutritional Guidelines

While planning, keep a few key nutrients in mind. Iron, Vitamin D, and Calcium are the building blocks of early development. Always discuss any specific dietary concerns or supplementation needs with your pediatrician, especially if you follow a plant-based diet. For further nutritional advice, refer to baby nutrition essentials for the first year.

Additionally, remember to avoid certain foods until after the first birthday. Never feed a baby honey due to the risk of infant botulism. Also, avoid added sugars, excessive salt, and choking hazards like whole grapes, nuts, or popcorn.

Conclusion & Frequently Asked Questions

The journey of baby meal planning is a process of trial and error. Trust your baby’s hunger cues—they know when they are full. By focusing on whole foods, variety, and a low-pressure environment, you are setting the stage for a healthy relationship with food that will last a lifetime. Take a deep breath, stay consistent, and remember that every small bite counts toward a healthy future.

FAQ

  • How much should my baby actually eat? Babies are experts at self-regulation. Look for signs like turning their head away, pushing the spoon, or closing their mouth to signal they are finished.
  • What if my baby refuses to eat? Stay calm and do not force them. Feeding a baby should never be a battle. Simply remove the food, offer a calm, positive environment, and try again at the next scheduled meal.
  • Final tips for stress-free mealtime? Keep mealtimes social. When your baby sees you enjoying healthy food, they are much more likely to follow suit.

Frequently Asked Questions

How much food should my baby actually eat?

Babies are intuitive eaters and excel at self-regulation. Look for physical cues like turning their head away, pushing the spoon away, or closing their mouth to signal they are full and finished eating.

What should I do if my baby refuses to eat?

Stay calm and never force your baby to eat. Feeding should be a positive experience. Remove the food without a fuss and try again at the next scheduled meal or snack time.

When is the right time to start solid foods?

Most pediatricians recommend starting solids around six months of age, provided your baby can sit up with minimal support, has good neck control, and shows active interest in your food.

Should I choose purees or baby-led weaning?

Both methods are great. Purees offer a smooth transition into textures, while baby-led weaning encourages self-feeding with whole foods. Many parents successfully use a combination of both approaches.

How do I safely introduce common food allergens?

Introduce common allergens like peanuts, eggs, and dairy early in the feeding journey. Offer one new allergen at a time, preferably in the morning, so you can monitor for any allergic reactions.

What foods should I completely avoid in the first year?

Never give honey to an infant under one year old due to the risk of infant botulism. Also avoid added sugars, excessive salt, and serious choking hazards like whole grapes and nuts.

The Complete Guide to Baby Feeding Accessories: A New Parent’s Essential Checklist

The Complete Guide to Baby Feeding Accessories: A New Parent’s Essential Checklist

Preparing for a new baby often feels like trying to learn a new language. You walk into a baby store and are immediately met with rows of gadgets, colorful gadgets, and conflicting advice from every direction. Among the most overwhelming categories is baby feeding accessories. You want the very best for your little one, but figuring out what is truly necessary versus what is just clever marketing can be a challenge.

The goal of this guide is to simplify the decision-making process for you. By focusing on safety, functionality, and long-term durability, you can build a collection of tools that make mealtime less stressful and more enjoyable. Whether you are breastfeeding, formula feeding, or preparing for the big transition to solid foods, this baby feeding accessories essential checklist will help you navigate your journey with confidence. For more help getting organized, check out our guide on everything you need to know about choosing baby feeding accessories.

Phase 1: Newborn Feeding Essentials (0–6 Months)

The first few months are all about getting into a rhythm. Whether you are nursing or using bottles, keeping things simple will save your sanity during those middle-of-the-night feedings. You can find more comprehensive advice in our complete roadmap to healthy newborn care from birth.

Choosing the Right Bottles

When selecting bottles, prioritize the material and the nipple flow rate. Glass bottles are excellent for those who want to avoid plastic entirely, while silicone bottles offer a soft, natural feel that mimics breastfeeding. Plastic bottles remain a popular, lightweight, and durable option, provided they are BPA-free. Start with slow-flow nipples to prevent your baby from gulping too quickly, and pay attention to anti-colic features that help reduce gas and fussiness.

Breastfeeding Must-Haves

For breastfeeding parents, your focus should be on personal comfort and efficiency. Stock up on high-quality nipple creams to soothe soreness early on. Breast pads, whether reusable or disposable, are non-negotiable for managing letdown. Finally, invest in sturdy breast milk storage bags that can be laid flat in the freezer to save space, ensuring you always have a backup supply available.

The Importance of Burping Cloths and Bibs

Never underestimate the number of burping cloths you will need. Spit-up is a natural part of infancy, and having a high-absorbency cloth draped over your shoulder at all times is a lifesaver. Look for organic cotton or bamboo fabrics, which are soft on sensitive skin and durable enough for frequent washing.

Sterilizers and Drying Racks

Do you need a high-tech electric sterilizer? Not necessarily. While they offer convenience, simply boiling parts in water or using the dishwasher’s sanitizing cycle is often sufficient. However, a dedicated drying rack—one that keeps bottles and pump parts upright and off the counter—is a must-have accessory that helps maintain hygiene while keeping your kitchen organized. For more nursery organization tips, see our guide on essential furniture for a functional nursery.

Phase 2: Transitioning to Solids (6–12 Months)

Around six months, your baby’s palate begins to expand. This is an exciting milestone, but it also means a new set of gear is required to handle the inevitable mess. You can learn more in our baby meal planning from six to twelve months guide.

High Chair Features

Your high chair is the command center for mealtime. Look for a model with a five-point safety harness to keep your baby secure. Removable, dishwasher-safe trays are essential for easy cleanup, and if you have limited space, consider a model that can fold away or attach directly to an existing kitchen chair.

First Utensils and Cups

When starting solids, soft-tip spoons are gentler on a baby’s developing gums. As your baby develops fine motor skills, introduce a straw cup rather than a traditional sippy cup. Speech-language pathologists often recommend straw cups because they promote better oral development and muscle coordination compared to spouted cups. You can also explore the best sippy cups for babies learning to drink for more options.

Plates and Bowls

The best tip for feeding a baby is to invest in suction-base plates and bowls. These stick firmly to the high chair tray, preventing your little one from tossing their entire meal onto the floor. Opt for 100% food-grade silicone; it is durable, microwave-safe, and free from harsh chemicals.

Bibs for Solids

Forget the cloth bibs when it comes to purees and finger foods. Silicone bibs with a built-in crumb catcher are superior for messy eaters. They can be wiped clean in seconds or rinsed in the sink, saving you from a never-ending cycle of laundry.

Safety First: What to Look for in Materials

As a parent, your primary concern is the safety of the materials touching your baby’s food. Always check the packaging for labels such as BPA-free, phthalate-free, and PVC-free. Food-grade silicone is generally considered the gold standard for baby feeding accessories because it is non-porous and resistant to bacteria growth. For more general safety advice, read our everything parents need to know about baby safety guide.

Cleaning is just as important as the materials themselves. Always inspect silicone items for tiny tears where food particles can hide. Replace any plastic bottles that show signs of deep scratches or wear, as these can become breeding grounds for bacteria over time.

How to Build Your Feeding Registry Without Overspending

It is easy to get caught up in buying every gadget you see, but your bank account will thank you if you stick to the essentials. Identify your ‘must-haves’ first—the items you know you will use daily. Categorize everything else as ‘nice-to-haves’ that you can purchase later if you find you really need them. Remember that you do not need every size of bottle or every type of bowl on day one. Space out your purchases based on your baby’s developmental milestones to ensure you are only buying what you actually use.

Frequently Asked Questions (FAQs)

Do I really need a bottle warmer?

While a bottle warmer is a nice convenience, it is not strictly necessary. Many babies are perfectly happy with room-temperature milk or formula. If you do choose to warm a bottle, a simple bowl of warm water works perfectly fine.

How many bottles should I own for the first few months?

Aim for 6 to 8 bottles if you plan to bottle feed full-time. This ensures you always have a clean set ready while the others are in the dishwasher, preventing the need for mid-day scrubbing.

When is the best time to introduce a straw cup?

Most babies can begin practicing with a straw cup around 6 to 9 months. It may take some time for them to understand the suction mechanism, so start with an open-cup practice and offer a straw cup with water during meal times.

Are there eco-friendly options for feeding accessories?

Yes, there are many! Look for brands that prioritize glass bottles, bamboo utensils, and silicone products. These materials are much more sustainable than single-use plastics and are free from harmful chemicals.

Conclusion

Your journey through the world of baby feeding accessories is about supporting your child’s growth while maintaining your own sanity. Focus on high-quality, safe, and practical gear rather than accumulating every gadget on the market. By choosing items that are easy to clean and built to last, you will create a stress-free environment for you and your baby. For more tips, check out our guide on everything you need to know about baby nutrition tips.

Remember that the best feeding tool is one that works for your family’s unique lifestyle. If you are looking for a simple, organized way to keep track of your shopping, download our printable baby feeding accessories essential checklist today and start your journey with peace of mind.

Frequently Asked Questions

Do I really need a bottle warmer?

While a bottle warmer is a nice convenience, it is not strictly necessary. Many babies are perfectly happy with room-temperature milk or formula. If you do choose to warm a bottle, a simple bowl of warm water works perfectly fine.

How many bottles should I own for the first few months?

Aim for 6 to 8 bottles if you plan to bottle feed full-time. This ensures you always have a clean set ready while the others are in the dishwasher, preventing the need for mid-day scrubbing.

When is the best time to introduce a straw cup?

Most babies can begin practicing with a straw cup around 6 to 9 months. It may take some time for them to understand the suction mechanism, so start with an open-cup practice and offer a straw cup with water during meal times.

Are there eco-friendly options for feeding accessories?

Yes, there are many! Look for brands that prioritize glass bottles, bamboo utensils, and silicone products. These materials are much more sustainable than single-use plastics and are free from harmful chemicals.

What materials are safest for baby feeding accessories?

Food-grade silicone, stainless steel, glass, and BPA-free plastics are generally considered the safest materials. Always check for labels confirming the items are phthalate-free and PVC-free before purchasing.

How can I prevent my baby from throwing plates off the high chair?

The best solution is to invest in 100% food-grade silicone suction-base plates and bowls. These stick firmly to smooth high chair trays, making it much harder for your baby to toss their food onto the floor.

Complete Guide to Healthy Baby Recipes for Every Age: From First Bites to Toddler Meals

Complete Guide to Healthy Baby Recipes for Every Age: From First Bites to Toddler Meals

The first two years of your child’s life are a foundational period for growth and development. Establishing healthy eating habits during this time does more than just fill a belly; it helps shape your child’s palate and relationship with food for years to come. Providing nutritious, homemade baby food is one of the most loving gifts you can give your little one.

Before you begin your journey with healthy baby recipes, it is essential to ensure your child is ready. Most pediatricians recommend introducing solids around six months, though some infants show signs as early as four months. Look for key readiness cues: the ability to hold their head steady, sitting up with minimal support, and the loss of the tongue-thrust reflex, which causes them to push food out of their mouths. For a comprehensive overview, check out our guide on everything you need to know before starting baby’s first foods.

Understanding Baby Food Stages

Moving through food stages is a gradual process that mirrors your baby’s physical development. Understanding these milestones helps you transition from smooth purees to complex table foods safely. You can track this progression using our detailed baby nutrition essentials for the first year.

Stage 1 (4-6 months): Introduction to single-ingredient purees

At this early stage, the goal is exposure. You are introducing flavors and textures one at a time to monitor for any allergic reactions or digestive sensitivities.

Stage 2 (6-9 months): Combining textures and flavors

As your baby gains more control over their mouth, you can begin thickening the consistency of their meals. This is the perfect time to mix vegetables with grains or proteins.

Stage 3 (9-12 months): Finger foods and table food prep

Your baby is likely showing interest in self-feeding. Offer soft, easy-to-grasp finger foods that allow them to practice their pincer grasp, which is also a great time to introduce engaging indoor activities that improve fine motor skills for kids.

Toddlerhood (12+ months): Transitioning to family meals

By age one, most children can join the family at the dinner table. Focus on nutrient-dense meals that the entire household can enjoy together.

Essential Nutrients for Growing Babies

To support rapid brain and physical development, your baby requires specific nutrients. Iron is perhaps the most critical, as your baby’s natural stores begin to deplete around six months. Prioritize iron-rich foods like cooked lentils, beans, and iron-fortified cereals.

Healthy fats are equally vital for cognitive development. Incorporate sources of DHA and Omega-3 fatty acids, such as avocado, mashed fatty fish like salmon, or a drizzle of flaxseed oil on vegetables. Finally, ensure your baby receives adequate calcium for bone health and Vitamin D, often sourced through fortified dairy alternatives or as a pediatrician-recommended supplement.

Stage 1: The First Bites (4-6 Months) – Simple Purees

Your first foray into healthy baby recipes should be simple. Choose mild, easily digestible vegetables like sweet potatoes, carrots, or peas. Fruits like pear and banana are also excellent starter foods because they can be easily mashed into a smooth consistency.

When preparing these, steam the produce until fork-tender. Use a small amount of breast milk or formula to thin the mixture, which provides a familiar flavor and adds extra nutrients. Avoid adding salt or sugar to these early meals, as your baby needs to learn the true, subtle flavors of whole foods.

Stage 2: Exploring Textures (6-9 Months) – Thicker Mashes & Blends

Now that your baby has mastered the basics, it is time to expand their palate. Combine a protein, such as finely minced chicken or lentils, with a vegetable like carrots or spinach. This introduces a complexity of flavor that keeps mealtimes exciting. For more inspiration, see our tips on everything you need to know about planning healthy baby meals.

This is also a recommended window for introducing common allergens, such as peanut butter or finely ground egg. Introduce these one at a time, spaced several days apart, to ensure your baby tolerates them well. Always consult with your pediatrician before introducing high-allergen foods if there is a family history of food allergies.

Stage 3: Finger Food Fun (9-12 Months)

Self-feeding builds confidence and fine motor skills. Offer soft finger foods like steamed broccoli florets that are large enough for your baby to hold, or cubed tofu that is easy to gum. If you are exploring Baby-Led Weaning (BLW), focus on pieces that are roughly the size and shape of an adult finger.

Safety is paramount during this phase. Always supervise your baby while they eat and avoid known choking hazards such as whole grapes, popcorn, raw nuts, or hard, sticky chunks of fruit. Ensure all food is soft enough to be crushed between your own thumb and forefinger.

Stage 4: Toddler Table Foods (12+ Months)

Transitioning to the family table is a major milestone. For breakfast, consider oatmeal with mashed berries or scrambled eggs with mild cheese. Lunch and dinner should be well-balanced, including a lean protein, a complex carbohydrate, and a colorful vegetable.

Picky eating often emerges during this phase. Remember that it can take ten or more exposures before a child accepts a new food. Keep serving the vegetables, model healthy eating yourself, and avoid making mealtimes a battleground. If you encounter resistance, check out our advice on how to handle a child who refuses to listen. Consistency is the key to raising an adventurous eater.

Practical Tips for Success

Preparing healthy baby recipes doesn’t have to mean spending hours in the kitchen every day. Batch cooking is your best friend. Spend a Sunday afternoon steaming and pureeing large quantities of fruits and vegetables, then freeze them in silicone ice cube trays. Once frozen, pop the cubes into freezer-safe bags for easy portioning. You can find more efficiency tips in our guide to everything you need to know about homemade healthy baby recipes.

When it comes to produce, both fresh and frozen options are excellent choices. Frozen vegetables are often flash-frozen at the peak of ripeness, ensuring high nutrient density. Always wash fresh produce thoroughly and practice good sanitation in your kitchen by washing your hands and disinfecting high-chair trays frequently.

Conclusion

Raising a healthy eater is a marathon, not a sprint. By prioritizing whole foods and maintaining a positive, stress-free relationship with mealtimes, you are setting your child up for a lifetime of wellness. Always consult your pediatrician if you have concerns about your baby’s growth, intake, or specific dietary needs.

Ready to get cooking? Download our free printable baby food chart to track your little one’s progress and keep your kitchen organized. Your journey to healthy baby recipes starts today.

Frequently Asked Questions

When can I start introducing solid foods to my baby?

Most pediatricians recommend introducing solids around six months of age, though some infants show readiness signs as early as four months, such as sitting up with support and holding their head steady.

What are the key food stages for babies?

Baby food is typically divided into four stages: Stage 1 single-ingredient purees (4-6 months), Stage 2 thicker blends (6-9 months), Stage 3 finger foods (9-12 months), and toddler family meals (12+ months).

Which essential nutrients do growing babies need most?

Babies require iron for brain development and to replenish natural stores, healthy fats like Omega-3s for cognitive growth, calcium for bones, and Vitamin D for overall health.

How should I introduce common allergens to my baby?

Introduce common allergens like peanut butter or eggs one at a time during Stage 2, spacing them several days apart to monitor for any allergic reactions or sensitivities.

What are some safe finger foods for 9-12 month olds?

Safe finger foods include steamed broccoli florets, soft-cooked carrot sticks, cubed tofu, and ripe banana pieces that are large enough to hold and soft enough to mash between fingers.

How can I save time when making homemade baby food?

Batch cooking is ideal. Steam and puree large quantities of vegetables or fruits, freeze them in silicone ice cube trays, and transfer the frozen portions into labeled freezer-safe bags.