Home Blog Page 14

The Complete Guide to Introducing First Foods to Your Baby: When, How, and What to Feed

0

The Complete Guide to Introducing First Foods to Your Baby: When, How, and What to Feed

Transitioning your baby from a liquid-only diet to solid foods is one of the most exciting milestones in your parenting journey. It marks a shift toward independence and exploration, yet it often brings a mix of excitement and anxiety. Whether you are wondering how to navigate the messy high chair moments or questioning which ingredients are safest, understanding the basics is key to a smooth transition. If you are preparing for this, you may find everything you need to know before starting baby’s first foods helpful.

While experts often emphasize that food before one is just for fun, this phrase is meant to lower the pressure on parents. It reminds us that breast milk or formula remains the primary source of nutrition for your infant throughout their first year. Solids are a complementary addition, designed to introduce new textures, tastes, and the physical act of eating.

When to Start: Identifying the Signs Baby is Ready

The American Academy of Pediatrics recommends that most infants begin eating solid foods around six months of age. However, every child develops at their own pace. Before you reach for the baby spoon, look for specific developmental cues that indicate your baby is physically prepared to handle food.

Key developmental signs include:

  • Sitting with minimal or no support.
  • Good head and neck control, which is essential for swallowing safely.
  • The disappearance of the tongue-thrust reflex, which causes infants to automatically push foreign objects out of their mouths.
  • Showing interest in what you are eating, often by reaching for your plate or mimicking chewing motions.

If your baby is still pushing food out with their tongue or struggles to hold their head steady, they are likely not ready. It is better to wait a few weeks than to force the process, as their digestive system and motor skills need time to mature.

Choosing Your Approach: Purees vs. Baby-Led Weaning (BLW)

Modern parents have two primary paths when introducing first foods to your baby: traditional spoon-feeding with purees or Baby-Led Weaning (BLW). Both approaches can be successful, and many families choose a combination of both.

Traditional Purees

Spoon-feeding purees allows you to monitor exactly how much your baby consumes. It is often less messy and can be an effective way to introduce smooth textures. However, it can sometimes delay a baby’s experience with chewing and tongue-lateralization skills.

Baby-Led Weaning

BLW involves offering soft, finger-sized pieces of whole food that your baby picks up and feeds themselves. This encourages independence and can help with fine motor skill development. While it can be significantly messier, many parents find it enjoyable to watch their baby explore textures at their own pace.

Combo Feeding

Many families find that offering purees for breakfast and finger foods for dinner works best for their lifestyle. There is no right or wrong answer, provided your baby is safe and gaining weight steadily.

Best First Foods for Babies

When you start, focus on nutrient-dense options to support your baby’s rapid growth. Iron is a particularly important nutrient during this period, as natural stores from birth begin to deplete around six months. For a comprehensive look at how to nourish your growing infant, check out our guide on baby nutrition essentials for the first year.

Nutrient-dense options include:

  • Iron-fortified infant oatmeal or cereal.
  • Pureed or soft-cooked meats like beef or poultry.
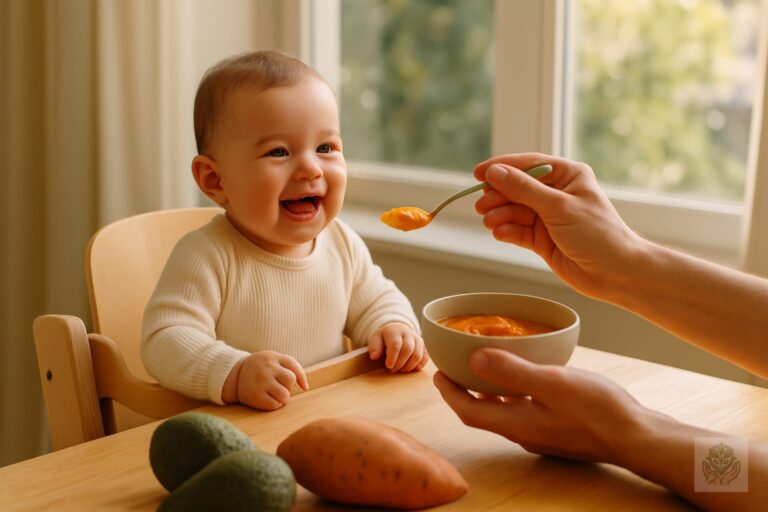
  • Mashed avocado, which is packed with healthy fats.
  • Steamed and mashed root vegetables like sweet potatoes or carrots.

It is important to remember that added salt and sugar are unnecessary and should be avoided in the first year. Furthermore, never give honey to a baby under twelve months due to the risk of infant botulism, and steer clear of cow’s milk as a primary beverage until they reach their first birthday.

Safety First: Navigating Allergens and Choking

Safety is the most important aspect of feeding. Many parents worry about common allergens like peanuts, eggs, and dairy. Current guidelines suggest introducing these allergens early and often, rather than delaying them, to help reduce the risk of future food sensitivities. Always keep in mind the best practices to prevent common household accidents for babies as your little one starts to explore more independently.

When introducing a new allergen, offer it in a small amount and observe your baby for a few days before trying another new food. It is also vital to understand the difference between gagging and choking. Gagging is a natural, loud reflex that helps a baby move food forward in their mouth; it is a normal part of learning to eat. Choking is silent and prevents breathing, which requires immediate intervention. Always supervise your baby during every meal, avoid high-risk shapes like whole grapes or round hot dog slices, and never let them eat while reclining.

Creating a Baby Feeding Schedule

Start slow. Begin with one meal a day at a time that works best for your family—often when your baby is happy and alert. You might offer a small amount of solids about an hour after a breast milk or formula feed, ensuring they aren’t so hungry that they become frustrated. If you need help organizing your day, you can refer to our tips on baby meal planning from six to twelve months.

As your baby becomes more comfortable, you can gradually increase the frequency to two and eventually three meals a day. Consistency is helpful, but don’t stress if you skip a day due to naps or travel. The goal is to build a positive association with the family dinner table.

Helpful Gear for Starting Solids

You don’t need a kitchen full of gadgets, but a few basics will make the process easier. Invest in a stable high chair with a footrest, as a supported posture is critical for safe swallowing. Soft-tipped spoons are gentle on sensitive gums, while suction-based bowls or plates help prevent the inevitable “toss-the-plate” game. See our full recommendations for everything you need to know about choosing baby feeding accessories.

Because eating is a sensory experience, expect a mess. Have plenty of absorbent bibs on hand, and consider a large floor mat that you can easily wipe down. These simple tools will save you significant time and cleanup energy.

Conclusion

Introducing first foods to your baby is a journey meant to be explored together. Every baby will have their own preferences, and there will be days when they eat everything in sight and days when they turn their nose up at everything. Trust your instincts, follow your baby’s lead, and keep the environment relaxed. If you ever have concerns about growth, development, or reactions to food, reach out to your pediatrician. Above all, take photos and enjoy these messy, precious moments of discovery. For more advice, read about the essentials of baby nutrition to feel more confident throughout this transition.

Frequently Asked Questions

When is the right time for introducing first foods to your baby?

Most infants are ready around six months of age when they can sit with minimal support, have good head control, show interest in food, and lose the tongue-thrust reflex.

Should I choose purees or baby-led weaning?

Both purees and baby-led weaning are great options. Purees offer controlled spoon-feeding, while baby-led weaning encourages self-feeding and fine motor skills. Many parents combine both methods.

What are the best first foods for infants?

Nutrient-dense and iron-rich options are best, including iron-fortified baby oatmeal, pureed meats, mashed avocado, and steamed root vegetables like sweet potatoes.

When can I introduce common allergens like peanuts and eggs?

Current pediatric guidelines recommend introducing common allergens early and often, starting around six months, to help reduce the risk of developing food allergies.

How do I know the difference between gagging and choking?

Gagging is a normal, loud reflex that helps babies move food forward in their mouth. Choking is silent, prevents breathing, and requires immediate emergency intervention.

How much should my baby eat when starting solids?

In the beginning, solids are just for practice alongside breast milk or formula. Start with just a taste or one small spoonful once a day, gradually increasing as your baby grows.

How to Dress Children for Outdoor Summer Play: The Ultimate Comfort & Safety Guide

How to Dress Children for Outdoor Summer Play: The Ultimate Comfort & Safety Guide

Introduction

Summer is a season of endless potential for adventure, discovery, and physical activity. As parents, we want to encourage our children to explore the outdoors, but we also worry about their comfort in the heat and their protection from the elements. Knowing how to dress children for outdoor summer play is about more than just fashion; it is about creating an environment where your child can focus on their play rather than their clothing. By choosing the right materials and keeping safety at the forefront, you can set the stage for long, happy days spent in the sunshine.

The Golden Rule: Prioritizing Breathable Fabrics

Why Cotton and Linen are Your Best Friends

When temperatures rise, the fabric against your child’s skin makes all the difference. Cotton and linen are nature’s gifts for warm weather. These natural fibers are highly breathable, allowing air to circulate and sweat to evaporate efficiently. Linen, in particular, has a loose weave that feels cool even on the stickiest afternoons. When you dress your child in these lightweight materials, you help regulate their body temperature naturally, preventing the overheating that leads to crankiness and discomfort.

Fabrics to Avoid: Synthetics that Trap Heat

While polyester and nylon are excellent for performance sportswear, they are often poor choices for casual summer play. Many synthetic fabrics are designed to be moisture-wicking, but in extreme heat, they can feel clammy or trap heat against the skin. Avoid heavy, thick knits or non-breathable plastic-based fabrics that do not allow for adequate airflow. When choosing clothes for the playground, prioritize natural, loose-fitting options that feel soft and gentle on sensitive skin.

Sun Safety: More Than Just Sunscreen

The Benefits of UPF Clothing

Sun protection is a critical part of how to dress children for outdoor summer play. While sunscreen is essential, it can wear off or be missed during quick applications. Ultraviolet Protection Factor (UPF) clothing is a game-changer for parents. These garments are engineered to block harmful UVA and UVB rays, providing a physical barrier that doesn’t wash away in the pool or sweat off during a game of tag. Investing in a few high-quality UPF shirts or long-sleeved rash guards can significantly reduce the risk of sunburn for little ones with fair or sensitive skin.

Choosing the Right Sun Hat (And How to Keep It On)

A wide-brimmed hat is an essential accessory for any summer outfit. Look for hats with chin straps to prevent them from blowing away during windy beach days or active park sessions. A hat with a back flap can provide extra coverage for the neck and ears, areas that are frequently missed by sunscreen. If your toddler is prone to pulling off their hat, try choosing styles with soft, flexible brims that feel more like a part of their clothing, or engage them in picking out a fun pattern they will be proud to wear.

Protecting Little Eyes: Sunglasses for Kids

Children’s eyes are just as sensitive to sun damage as their skin. Durable, shatter-resistant sunglasses with 100% UV protection are a must-have for bright summer days. Look for frames made from flexible, rubberized materials that can withstand being sat on or dropped. Wrap-around styles are particularly effective because they prevent sunlight from entering through the gaps on the sides, providing better coverage while your child plays.

Dressing for Specific Summer Activities

Water Play: Quick-Dry Gear and Water Shoes

Water play is the hallmark of childhood summer. Whether it is a splash pad, a neighborhood pool, or a local beach, your goal should be clothing that transitions easily from water to land. Quick-dry shorts and shirts are perfect for this. Most importantly, do not forget water shoes. Hot sand and slippery pool decks can be dangerous, so a pair of sturdy, grippy water shoes will protect little feet from burns and provide the traction needed to prevent slips and falls. Explore more engaging screen-free water activities to keep them entertained.

Hiking and Nature Walks: Protection Against Bugs and Grass

Nature trails offer beauty but also come with hidden challenges like tall grass, mosquitoes, and ticks. When heading out for a hike, prioritize long pants made from thin, lightweight, light-colored material. Light colors make it much easier to spot ticks or other insects. Tucking pants into socks is an old-school trick, but it works wonders for keeping bugs away from ankles. Breathable, long-sleeved layers can also protect against poison ivy and scratches from brush.

Park Play: Lightweight Comfort for Slides and Swings

The playground is an area where clothing durability meets freedom of movement. Loose-fitting shorts and simple cotton t-shirts are ideal. Avoid clothing with drawstrings or loose embellishments that could snag on playground equipment, which poses a safety risk. Remember that metal slides can get incredibly hot under the summer sun, so keep shorts slightly longer or carry a thin towel to place on the seat to prevent burnt legs. For more fun at the park, try some of these easy group games.

Footwear: Keeping Little Feet Cool and Secure

Sandals vs. Closed-Toe Shoes: When to Choose Which

Choosing footwear often involves a trade-off between ventilation and protection. Sandals are excellent for the beach or backyard wading pools because they dry quickly and allow feet to breathe. However, for rougher terrain like gravel paths or busy playgrounds, closed-toe shoes are superior. They prevent stubbed toes and keep dirt and rocks from getting stuck in the shoe, which can be irritating for young children. Read our complete guide to finding comfortable footwear for kids to learn more.

Ensuring Proper Support for Active Play

Even in the summer, kids need supportive footwear. Avoid cheap, thin flip-flops for long periods of walking or running, as they do not provide adequate arch support or heel stability. Look for sneakers with breathable mesh uppers that mimic the comfort of a sandal while offering the structure of a trainer. A well-fitted shoe ensures your child can run, jump, and climb comfortably without worrying about blisters or foot fatigue.

The Layering Strategy for Variable Summer Weather

Handling Breezy Evenings and Early Mornings

Even the hottest days can start with a chilly morning or end with a cool breeze. The key to versatility is a lightweight layering piece. A thin, zip-up hoodie or a light long-sleeve cotton shirt can be easily tied around the waist during the heat of the day and slipped on once the sun begins to dip. This approach ensures your child stays comfortable regardless of how the weather shifts throughout the day.

Practical Tips for Parents: Laundering and Durability

Managing Grass Stains and Mud

If your children are playing hard, their clothes are going to get dirty. Embrace the mess as a sign of a great day! Treat grass and mud stains immediately with a pre-wash stain remover or a simple paste of baking soda and water. Choosing colors that hide stains well—such as navy, forest green, or patterned prints—can also save you a lot of stress during the laundry process.

Building a Minimalist Summer Capsule Wardrobe

You do not need a massive closet to keep your child comfortable all summer. A capsule wardrobe of high-quality basics goes a long way. Focus on five or six versatile pairs of shorts, a mix of short and long-sleeved breathable shirts, two pairs of comfortable shoes, and one lightweight jacket. By curating a selection of clothes that can all be mixed and matched, you simplify your morning routine and make packing for day trips a breeze. Check out our ultimate packing list for your next family outing.

Conclusion

Learning how to dress children for outdoor summer play doesn’t have to be a complicated task. By focusing on breathable fabrics, essential sun protection, and activity-appropriate gear, you are giving your children the best possible foundation for their summer adventures. Remember, the best outfit is one that lets them jump in puddles, climb trees, and run through the grass without restriction. When children feel comfortable in their clothing, they are more likely to stay engaged, stay happy, and enjoy the magical, fleeting days of summer to the fullest. For more ways to encourage physical development, check out these outdoor activities to boost toddler development naturally.

Frequently Asked Questions

What are the best fabrics for children’s summer clothing?

Cotton and linen are the best fabrics for summer because they are natural, highly breathable, allow air circulation, and help regulate body temperature by letting sweat evaporate efficiently.

Why should I choose UPF clothing for my kids?

UPF clothing provides a reliable physical barrier against harmful UVA and UVB rays. Unlike sunscreen, it doesn’t wear off, wash away in water, or sweat off during active play.

What kind of shoes are best for active summer play?

It depends on the activity. Sandals are great for the beach or water play, while closed-toe sneakers with breathable mesh uppers are ideal for playgrounds, hiking, and rough terrain to prevent stubbed toes.

How can I protect my child from bugs during nature walks?

Dress your child in lightweight, light-colored long pants and long sleeves. Light colors make it easier to spot ticks and insects, and tucking pants into socks provides an extra barrier against bugs.

How do I handle playground safety regarding clothing?

Choose loose-fitting shorts and t-shirts without drawstrings or loose embellishments that could snag on equipment. Also, opt for slightly longer shorts or carry a towel for hot metal slides.

What is a summer capsule wardrobe for kids?

A capsule wardrobe is a minimalist collection of mix-and-match basics, typically including five or six pairs of shorts, a mix of breathable shirts, two pairs of shoes, and one lightweight jacket.

15+ Free Printable Worksheets for 4-Year-Olds: Fun Learning at Home

15+ Free Printable Worksheets for 4-Year-Olds: Fun Learning at Home

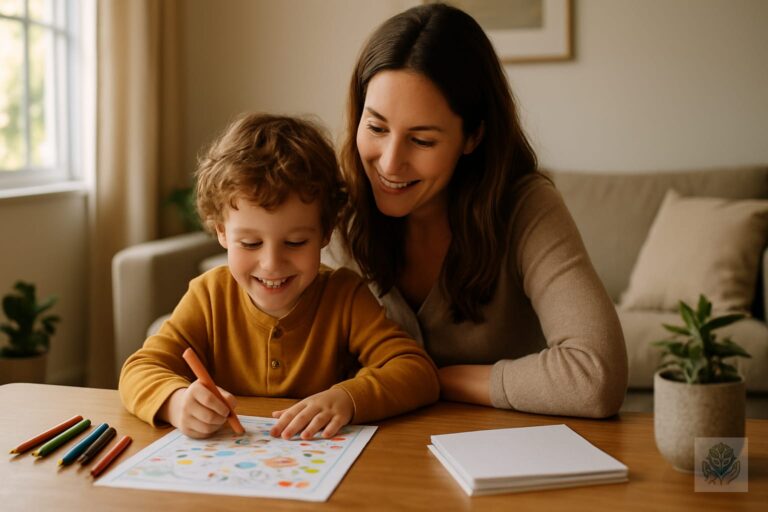
At age four, children are like little sponges, soaking up information about the world around them. As a parent, you have the unique opportunity to nurture this natural curiosity. Using high-quality, free printable worksheets for 4-year-olds can be an incredible way to supplement their preschool experience or provide structured, engaging learning moments at home, especially when you build a simple preschool learning corner.

Play-based learning remains the golden standard for this age group. When we introduce educational concepts through worksheets, the goal is not to force academic pressure, but to offer a calm, focused activity that builds confidence. Foundational skills, like holding a crayon correctly or recognizing the letter A, serve as building blocks for the years ahead. The best worksheets are those that feel less like a chore and more like a playful challenge.

Why 4-Year-Olds Benefit from Printable Worksheets

Many parents ask if worksheets are appropriate for preschoolers. The answer is a resounding yes, provided they are balanced with plenty of physical play and social interaction. Printable worksheets help 4-year-olds develop fine motor skills, which are crucial for later writing success. Practicing pencil control, tracing lines, and navigating mazes strengthens the small muscles in the hands, much like these 11 easy hand strengthening activities for preschoolers.

Beyond physical development, these activities introduce early literacy and numeracy in a gentle way. Identifying letters or counting objects on a page helps children grasp concepts that feel abstract in conversation. Most importantly, completing a short, engaging task gives a child a sense of accomplishment. This builds the focus and concentration needed for more complex academic work in kindergarten and beyond.

Must-Have Worksheet Categories for Preschoolers

When curating a home learning environment, focus on variety. A well-rounded collection of free printable worksheets for 4-year-olds should cover several developmental domains. By mixing and matching these categories, you keep your child engaged without them feeling overwhelmed.

Alphabet and Letter Recognition

Letter recognition is the first step toward reading. Look for worksheets that encourage tracing, coloring letters, or matching uppercase letters to their lowercase counterparts. These visual aids help children solidify their knowledge of the alphabet, and you can supplement this practice with 10 simple letter recognition games for toddlers.

Number Sense and Basic Shapes

Developing a “number sense” means understanding what a quantity actually represents. Worksheets that ask a child to count items, circle the correct number, or trace shapes are essential. These simple activities make abstract math concepts feel concrete and manageable.

Fine Motor Skill Builders

Not every worksheet needs to be about letters or numbers. Include pages that feature scissor practice, dot-to-dot puzzles, or mazes. These exercises are fantastic for hand-eye coordination and spatial awareness, and children often view them as puzzles rather than schoolwork. For more variety, try these 15 engaging indoor activities that improve fine motor skills for kids.

Logical Thinking

Encourage critical thinking with sorting activities or pattern recognition pages. Asking your child, “What comes next?” in a sequence of colors or shapes helps develop the logical processing skills they will use in science and math for years to come.

How to Use These Worksheets Effectively

To ensure your child stays enthusiastic about learning, keep sessions brief. The ‘under 15 minutes’ rule is your best friend here. At four years old, attention spans are naturally short. If your child seems tired or frustrated, put the work away and move on to something else, perhaps by referring to a daily routine for kids by age to keep the day structured yet flexible.

To make your resources last longer, consider laminating your free printable worksheets for 4-year-olds. By using dry-erase markers, you transform a one-time activity into a reusable tool. You can also turn these sheets into interactive games. Use manipulatives like dry beans or colorful buttons to count items on a page, or add stickers to reward their hard work upon completion.

Recommended Free Printable Worksheets

Ready to start? Here are three sections of activities designed to get you started on your home learning journey.

Section 1: Literacy and Phonics Fun

Focus on letter sounds and formation. These sheets provide a guided path for tracing the first letter of their name or identifying common objects that start with specific sounds. Remember to keep the focus on the sound of the letter rather than just the visual shape.

Section 2: Counting and Math Basics

These worksheets move from counting to 5, then to 10. Incorporate real-life counting as well—ask your child to count their snacks or toys as they complete the worksheets to show them how math exists everywhere in their daily life. You can also explore the complete guide to ABC and number activities for young learners for more inspiration.

Section 3: Creative and Logic Puzzles

These are the fan favorites. Mazes, coloring by number, and shadow-matching games provide a break from traditional writing. These activities foster creativity and improve the analytical thinking skills necessary for solving problems.

Conclusion

Creating a fun, low-pressure learning environment at home can set the foundation for a lifelong love of discovery. By utilizing these free printable worksheets for 4-year-olds, you provide the tools for growth while spending quality time together. Remember that your guidance and encouragement are the most important part of the learning process.

Want to keep the momentum going? Sign up for our newsletter today to receive new, exciting printable activities delivered to your inbox every week. Let’s make learning at home a joyful adventure for your little one!

Frequently Asked Questions

How many worksheets should a 4-year-old do per day?

One to two short worksheets is plenty. The goal is positive exposure and confidence building, not high completion volume.

What if my child refuses to use worksheets?

Never force learning. If they show disinterest, take a break for a few days and focus on hands-on activities like block building or chalk drawing instead.

Are worksheets better than digital learning apps?

Worksheets provide vital tactile development and pencil control that digital apps simply cannot replicate. They are great tools for physical coordination.

What skills do these worksheets help develop?

They help develop fine motor skills, pencil control, letter and number recognition, basic shapes, hand-eye coordination, and early logical thinking.

How can I make worksheets reusable?

You can easily laminate your free printable worksheets and have your child use dry-erase markers, transforming them into reusable activities.

At what age should children start using educational worksheets?

Children can start around age three or four with very simple tracing and coloring pages, provided the activities remain fun and pressure-free.

Beyond the Lines: 10 Creative Coloring Ideas Without Traditional Books

Beyond the Lines: 10 Creative Coloring Ideas Without Traditional Books

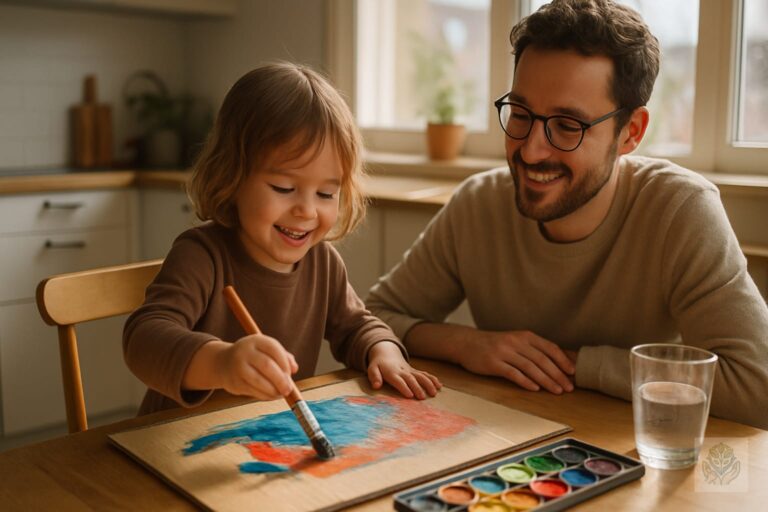
For many parents, the humble coloring book is a staple of childhood. You likely have a drawer overflowing with half-finished pages featuring cartoon characters and geometric patterns. While these books provide a quiet moment of focus, they often place invisible boundaries on a child’s imagination. By shifting our perspective, we can discover that creative coloring ideas without traditional books offer a much richer developmental experience for growing minds.

When we move away from pre-printed pages, we invite children to transition from mere fillers to true artists. This approach, often referred to as process art, focuses on the act of creating rather than the final result. In this guide, we will explore how to unlock your child’s potential by rethinking the tools, surfaces, and techniques they use to explore color. Many of these methods serve as fun DIY crafts that improve fine motor skills.

Why Step Away from Traditional Coloring Books?

Traditional coloring books have their place, but they often inadvertently teach children that there is a right and wrong way to create art. When a child is presented with a pre-drawn outline, the implicit instruction is to stay within the lines and use specific colors to match the image’s intent. This can limit original thought and stifle self-expression.

Focusing on open-ended art allows children to develop essential fine motor skills in more dynamic ways. For instance, holding a heavy rock or a textured leaf requires different grip adjustments than holding a slender crayon. Furthermore, removing the pressure to stay inside the lines helps mitigate the perfectionism that many children feel when they think their art must look a certain way. By experimenting with creative coloring ideas without traditional books, you provide a safe space where mistakes are simply part of the creative journey. If you need more ways to boost their development, explore our engaging indoor activities that improve fine motor skills.

Creative Coloring Surfaces: Rethinking the Canvas

The canvas doesn’t always have to be a piece of paper. Changing the surface can immediately make an activity feel new and exciting.

  • Cardboard boxes and recycled packaging: Before you toss those delivery boxes, let your child decorate them. Cardboard offers a sturdy, textured surface that absorbs markers and paints differently than paper, teaching children about surface absorption.
  • Natural surfaces: Take the art outside. Coloring on smooth river rocks, wooden tree slices, or even large leaves provides a connection to nature. These surfaces are irregular, forcing the child to adapt their movements to the shape of the canvas.
  • Fabric art: Use plain white pillowcases or canvas tote bags. Fabric markers create lasting art that children can wear or use in their bedrooms, giving them a sense of ownership over their creations.
  • Wall-sized murals: Tape a long roll of butcher paper to a wall or floor. A massive, vertical canvas changes the physical relationship between the child and the work, allowing for large, sweeping arm movements that are excellent for shoulder development.

Innovative Coloring Tools and Techniques

Coloring is not limited to crayons and markers. Introducing unconventional tools can transform a simple afternoon into a scientific exploration of texture and pigment.

Try using items found in your kitchen, such as Q-tips, sponges, or even plastic forks, to apply color. A sponge can create soft, blended edges, while a Q-tip allows for precise, pointillist dots. You can also introduce wax resist art by drawing with a white crayon on paper and then painting over it with watercolors. The water-based paint will slide off the wax, revealing the hidden design like a magic trick.

Salt painting is another wonderful technique. Have your child draw a design with white glue, sprinkle salt over it, and then touch a brush loaded with liquid watercolor to the salt. The color will travel along the lines, creating a mesmerizing, fuzzy effect that feels professional and rewarding. For additional inspiration, check out our 7 creative texture coloring activities for toddlers.

Coloring as a Sensory Experience

Coloring should be a full-sensory event. By adding texture and scent to the process, you engage more of the child’s brain, which aids in cognitive development and emotional regulation.

For a scented experience, mix a drop of essential oil or extract into your homemade paints. This creates a scratch-and-sniff quality that makes the artwork memorable. You can also experiment with ice cube painting by freezing water mixed with food coloring. As the ice melts, the pigments blend on the paper, teaching children about the way colors mix and change states of matter.

For tactile experiences, consider mixing sand or dried coffee grounds into your paint. This adds a gritty texture that feels satisfying to touch. These sensory inputs turn the act of coloring into a grounding experience, which is particularly helpful for children who need a calm-down activity after a busy day.

Building ‘Coloring Kits’ for Creative Play

To encourage independent art, keep a dedicated art caddy within reach. Avoid filling it with just coloring books; instead, include a variety of mediums like chalk, oil pastels, charcoal, and thick markers. Ensure that all your supplies are non-toxic and washable, which removes your own anxiety about the potential mess and allows you to be more relaxed during play.

Curating a process art invitation is a great way to set the stage for discovery. An invitation is simply a tray or table set up with specific supplies and a blank surface, left out for the child to find on their own. By presenting the materials in an inviting, organized way, you respect the child’s autonomy and allow them to dive into the work whenever inspiration strikes. You can organize these supplies in a dedicated space by building a simple preschool learning corner.

Conclusion

Embracing a lifestyle of creative art means letting go of the need for a pristine end product. The mess that comes with painting, rubbing, and gluing is simply evidence of learning. These creative coloring ideas without traditional books are designed to build confidence, resilience, and creative thinking in children of all ages. To keep the creativity flowing all week, consider creating a daily activity routine for preschoolers.

We encourage you to put down the pre-printed coloring books for a week and see what happens when you hand your child a rock, a sponge, or a piece of cardboard instead. You might be surprised at the level of focus and joy they exhibit when they are free to color their own world. If you try these ideas, we would love to hear which ones were a hit in your home. Share your favorite creative coloring hacks in the comments below!

Frequently Asked Questions

What are creative coloring ideas without traditional books?

Creative coloring without traditional books involves open-ended process art where children use non-traditional surfaces like cardboard, rocks, and fabric, along with unconventional tools like sponges and Q-tips, instead of pre-printed coloring pages.

Why is process art better than traditional coloring books?

Process art focuses on the act of creating rather than the final result. It reduces perfectionism, encourages original thought, builds fine motor skills through diverse grip adjustments, and allows children to explore color without strict boundaries.

What alternative surfaces can kids use for coloring?

Children can use recycled cardboard boxes, smooth river rocks, wooden tree slices, large leaves, plain white pillowcases, canvas tote bags, or massive rolls of butcher paper taped to walls and floors.

What are some fun, unconventional coloring tools?

You can use kitchen items like Q-tips, sponges, or plastic forks, as well as ice cubes made from colored water, homemade scented paints, and white crayons for wax-resist watercolor painting.

How does sensory coloring help child development?

Adding textures, scents, or temperature changes to coloring engages more of the child’s brain, which aids in cognitive development, emotional regulation, and provides a calming sensory experience.

How can I set up an independent art station for my child?

Keep a dedicated art caddy filled with a variety of non-toxic mediums like chalk, oil pastels, and thick markers, alongside blank surfaces, and set up inviting process art trays for your child to discover.

How to Make a Simple Oat Sensory Bin at Home: A Step-by-Step Guide

0

“`html

How to Make a Simple Oat Sensory Bin at Home: A Step-by-Step Guide

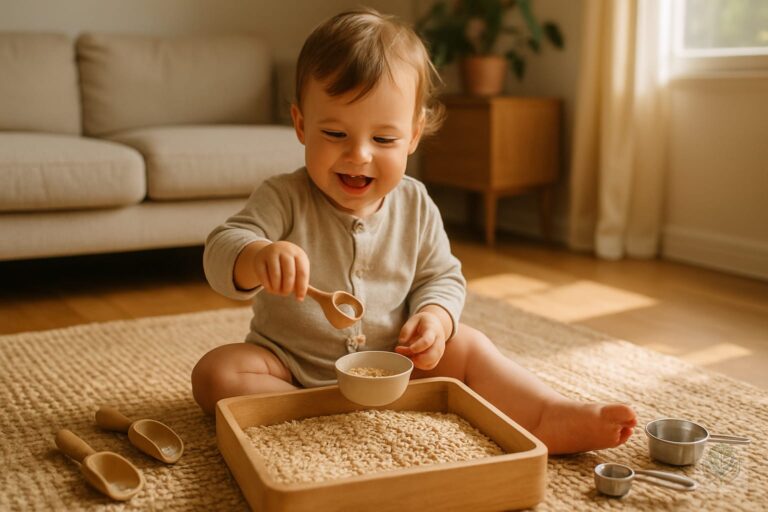
As parents, we are always looking for ways to engage our children in meaningful play that doesn’t require complex gadgets or expensive toys. Sensory play is one of the most effective ways to support early childhood development, helping little ones process the world around them. Creating a simple oat sensory bin is a fantastic entry point into this world of exploration.

Sensory bins serve as a dedicated space for children to experiment with textures, weights, and sounds. Oats, in particular, have become a staple in many households because they are gentle, accessible, and offer a unique tactile experience that captivates toddlers for long stretches of time. In this guide, we will walk you through everything you need to know to set up your own sensory station at home.

Benefits of Oat Sensory Bins

The beauty of sensory play lies in its simplicity. When a child dips their hands into a bin filled with dry oats, they are doing much more than just playing; they are actively engaging their nervous system. This tactile stimulation helps children understand concepts like volume, depth, and texture. Indoor activities like this are great for developing coordination.

One of the primary reasons parents choose oats over other fillers is that they are generally considered a taste-safe option for younger babies or toddlers who still mouth their toys. While they are not meant to be a meal, knowing that a stray oat won’t cause harm offers parents peace of mind during play sessions. Additionally, oats are incredibly affordable and accessible, allowing you to rotate your sensory fillers frequently without breaking the bank.

What You’ll Need: Supplies Checklist

Before you get started, gather a few basic items. Having the right tools on hand ensures that the play remains engaging and the cleanup remains manageable.

  • The Bin: A shallow plastic storage container works best. Look for one with a wide surface area and low sides, which allows your toddler to reach inside easily without straining.
  • The Oats: Use old-fashioned rolled oats or quick oats. Both work perfectly, though old-fashioned oats are slightly sturdier for repeated scooping.
  • Scooping Tools: Plastic measuring cups, small wooden bowls, kitchen tongs, or dedicated sand shovels are excellent for practicing motor skills.
  • Optional Add-ins: Consider adding silicone cupcake liners, non-toxic figurines, or natural elements like wooden scoops to enhance the theme.

Step-by-Step: How to Make a Simple Oat Sensory Bin

Setting up your sensory space should be just as fun as the play itself. Follow these steps to ensure a successful experience for your little one.

Step 1: Preparing the play space

Even the most careful toddlers tend to scatter filler occasionally. To minimize the mess, place your sensory bin on a large towel, an outdoor patio mat, or a plastic tablecloth. This makes cleanup as simple as shaking the mat off once the play session concludes.

Step 2: Choosing and setting up the base container

Choose a bin that is sturdy enough to hold the weight of the oats. If you have multiple children playing at once, a wider under-bed storage bin provides ample space for everyone to participate without bumping elbows. Establishing a daily activity routine for preschoolers helps children know when it is time to engage in these sensory projects.

Step 3: Pouring and prepping the oat base

Fill your container with about two to three inches of dry oats. This depth is perfect for hiding small objects for your child to find, which adds an element of mystery and surprise to the activity.

Step 4: Incorporating thematic props

Once the base is ready, add your tools and props. Instead of dumping everything in at once, try arranging the items neatly to invite your child to explore. The presentation can often spark more creative play ideas.

Pro Tips for a Successful Sensory Experience

To keep the play fresh and engaging, you can dye your oats using food coloring and a splash of vinegar. Simply place the oats in a gallon-sized bag, add a few drops of color, shake vigorously, and spread them on a baking sheet to dry overnight. This adds a visual component that children love. For more inspiration, check out our ultimate guide to DIY crafts.

Safety reminders: Always supervise your child during sensory play. While oats are safe, they can be a choking hazard if handled improperly. Furthermore, establish a rule that the oats stay inside the bin. This helps set boundaries and teaches your child respect for their play materials.

To keep your supplies fresh, store the oats in an airtight container or a sealed storage bin when not in use. This prevents moisture buildup and keeps the sensory bin ready for your next rainy-day activity.

3 Easy Themes to Try

If you want to keep your toddler interested, switch up the theme of your bin regularly:

  1. Farm Animal Rescue: Bury plastic farm animals in the oats and provide a small barn or a toy tractor to help transport the animals.
  2. Construction Site: Use small metal trucks, pebbles, and orange cones to transform the bin into a miniature job site.
  3. Kitchen Baking Play: Provide measuring spoons, whisks, and muffin tins, and encourage your child to pretend they are baking a cake.

Frequently Asked Questions (FAQs)

Can my baby eat the oats?

While oats are technically safe to ingest in small amounts, they are intended for play. If your child is still in the phase where they explore everything with their mouth, supervise closely to ensure they don’t consume large quantities.

How long do oats last in a sensory bin?

In a dry, airtight environment, you can reuse oats for several weeks. If you notice any moisture, spills, or if they have been played with by many children, it is best to refresh the bin to prevent mold.

Are oats better than rice for sensory bins?

Oats are generally softer and lighter, making them ideal for younger toddlers. Rice creates a more ‘auditory’ experience due to its clicking sound and is better for older children who are less likely to put filler in their mouths.

Conclusion

A simple oat sensory bin is a gateway to hours of quiet, focused play. By providing your child with these simple materials, you are fueling their curiosity and helping them develop essential fine motor skills in an environment that feels safe and natural. You can explore more ways to support growth in our complete guide to preschool activities. We hope you feel empowered to try this project at home today.

Do you have a favorite way to use sensory bins? We would love to see your creations! Share your photos with us on social media or subscribe to our newsletter for more weekly parenting tips and developmental activities.

“`

Frequently Asked Questions

Can my baby eat the oats during sensory play?

While oats are taste-safe and harmless in small amounts, they are intended for play rather than consumption. Always supervise your little one closely if they still tend to mouth objects.

How long can I reuse oats in a sensory bin?

If kept in a clean, dry environment, dry oats can be reused for several weeks. Discard them immediately if moisture gets inside or if mold appears.

Are oats better than rice for younger toddlers?

Yes, oats are softer, lighter, and safer for younger toddlers compared to hard grains like rice, making them an excellent first choice for sensory bins.

How do I prevent my toddler from making a huge mess?

Place a large towel, patio mat, or plastic tablecloth underneath the sensory bin before play begins to catch stray oats and make cleanup effortless.

Can I dye the oats different colors?

Yes, you can dye oats by placing them in a bag with a few drops of food coloring and a splash of vinegar, then letting them dry overnight on a baking sheet.

What tools should I include in an oat sensory bin?

Plastic measuring cups, small wooden bowls, kitchen tongs, silicone cupcake liners, and toy construction trucks are wonderful tools to encourage scooping and fine motor skills.

10 Fun DIY Crafts That Improve Fine Motor Skills in Toddlers and Preschoolers

0

10 Fun DIY Crafts That Improve Fine Motor Skills in Toddlers and Preschoolers

As parents, we are always looking for ways to foster our children’s growth through play. One of the most critical areas of development in early childhood is fine motor skills. When your little one picks up a crayon, zips their coat, or learns to use a fork, they are relying on the small muscle groups in their hands and fingers. Engaging in 10 fun DIY crafts that improve fine motor skills in toddlers and preschoolers is an excellent way to turn everyday playtime into a powerful learning experience.

Crafting bridges the gap between simple play and intentional developmental work. By providing your child with tools and textures that challenge their dexterity, you are helping them build the coordination needed for future academic success, such as handwriting. In this guide, we will explore simple, budget-friendly crafts that will keep your child entertained while supporting their physical development. For more inspiration, check out our guide on engaging indoor activities that improve fine motor skills for kids.

Understanding Fine Motor Skills: Why Your Child Needs Them

Fine motor development refers to the coordination of small muscle movements—usually involving the fingers and hands—in synchronization with the eyes. This process is complex and develops gradually during the first few years of life. By focusing on activities that enhance these skills, you are setting the foundation for essential daily tasks.

Between the ages of one and five, children move through several milestones. They progress from a primitive palmar grasp—where they use their whole hand to hold an object—to a refined pincer grasp, where they use the tips of their thumb and index finger. Mastering these movements is crucial for independence, as it directly impacts their ability to button shirts, tie shoes, and eventually hold a pencil with control and confidence.

Preparation: Tips for Setting Up a Successful Craft Station

Before you dive into these projects, setting up the right environment is key. You do not need an expensive craft room to make this work. A simple kitchen table or a floor mat will suffice, as long as you prioritize a mess-friendly setup. Consider placing a plastic tablecloth underneath your project to make effortless cleanup part of your routine, much like setting up a simple preschool learning corner.

Always choose age-appropriate materials to ensure safety. While crafts are beneficial, supervision is non-negotiable, especially when using small items like beads or pom-poms that could pose a choking hazard. Keep your station organized so your child feels empowered to handle their tools, and remember that the goal is the process, not a perfect finished product.

Top 10 DIY Crafts for Fine Motor Skill Improvement

These activities are designed to be simple, engaging, and highly effective for developing hand strength and coordination. You can also explore our favorite educational toys for kids for more ways to support smart learning.

  • Pipe Cleaner and Colander Poking: Give your child a colander and a handful of pipe cleaners. Pushing the cleaners through the tiny holes requires a perfect pincer grasp and high levels of focus.
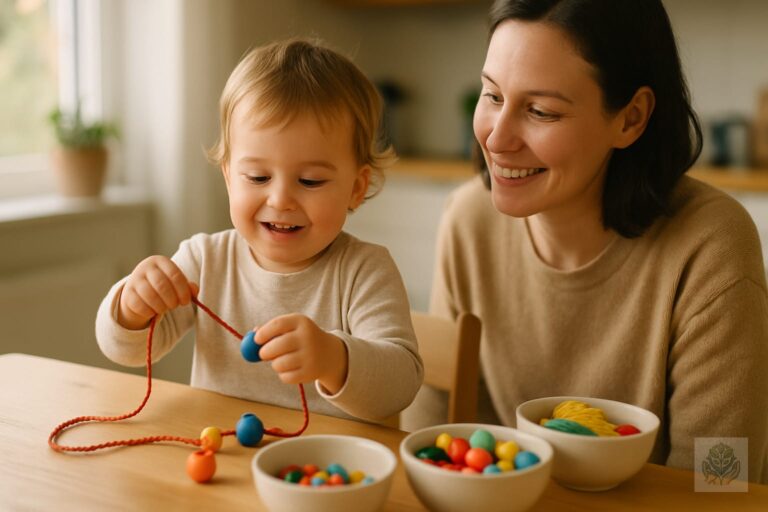
  • DIY Lacing Cards: Cut thick cardboard into fun shapes and punch holes along the edges. Have your child thread a shoelace or ribbon through the holes, which significantly improves hand-eye coordination.
  • Beaded Pasta Necklaces: Use dried penne or rigatoni pasta and yarn. Threading pasta onto a string is a classic activity that hones precision and allows children to practice patterns.
  • Paper Tearing Mosaics: Provide construction paper and encourage your child to tear it into tiny pieces before gluing them down. Tearing paper is surprisingly excellent for strengthening finger muscles.
  • Q-Tip Painting Patterns: Instead of brushes, use cotton swabs. Holding the small handle of a Q-tip helps children refine their pencil control.
  • Homemade Playdough Sculptures: Kneading, rolling, and squeezing homemade playdough provides natural resistance training, which builds the internal muscles of the palm.
  • Sticker Art Stations: Peeling stickers off a backing and placing them on paper is a fantastic way to practice dexterity and spatial awareness.
  • Sorting Pom-Poms with Tongs: Use kitchen tongs or oversized tweezers to transfer pom-poms from one bowl to another. This challenges their ability to manipulate external tools.
  • Salt Dough Handprint Ornaments: The process of rolling out the dough and pressing their hand into it provides deep sensory input, which is essential for motor planning.
  • Coffee Filter Butterflies with Spray Bottles: Use washable markers on filters, then have your child spray them with water. Squeezing the trigger on a spray bottle strengthens hand muscles and improves coordination.

How to Customize Crafts Based on Age and Skill Level

It is important to meet your child exactly where they are. For toddlers aged 1 to 3, keep the activities short and focus on large movements. For example, let them tear larger pieces of paper or use larger beads for stringing. As your child reaches the preschool stage (ages 4-5), you can increase the difficulty by introducing smaller beads, more complex patterns, or limited-time challenges to build their endurance. Finding the right balance is similar to choosing toys by age to match their exact developmental stage.

Frequently Asked Questions

How long should my child spend on these crafts?

Toddlers often have shorter attention spans. Aim for 10 to 15 minutes of focused activity. If they are engaged, feel free to continue, but stop if they lose interest.

What if my child gets frustrated easily?

Frustration is common when developing new skills. Offer encouragement, simplify the task, or offer to work alongside them by modeling the activity to show it can be done. You can also explore advice on how to handle child tantrums without shouting if frustration escalates into big meltdowns.

Are there signs that a child needs extra help with fine motor skills?

If your child consistently avoids using their hands, shows extreme difficulty with basic self-care tasks like dressing, or lacks a dominant hand by age five, it may be helpful to consult with a pediatric occupational therapist. You can also look into recommendations on when to talk to a pediatrician about your child’s physical activity or development.

Conclusion

Incorporating these 10 fun DIY crafts that improve fine motor skills in toddlers and preschoolers into your weekly routine can make a lasting difference in your child’s developmental journey. Consistency is key, so do not worry about making every craft perfect—just focus on the fun and the effort your child puts into the process. Over time, you will notice their hands becoming steadier, their grip stronger, and their confidence growing.

We would love to see how your little ones do! Share your craft creations in the comments below, or tell us which activity was the biggest hit in your home.

Frequently Asked Questions

How long should my child spend on these crafts?

Toddlers typically have short attention spans, so aim for 10 to 15 minutes of focused activity. If they remain engaged, you can continue, but it is best to stop once they lose interest to keep crafting a positive experience.

What if my child gets frustrated easily?

Frustration is normal when children are developing new skills. Offer gentle encouragement, simplify the task, or sit alongside them to model how to complete the activity.

Are there signs that a child needs extra help with fine motor skills?

Yes, if your child consistently avoids using their hands, shows extreme difficulty with basic self-care tasks like dressing, or lacks a dominant hand by age five, consider consulting a pediatric occupational therapist.

What are fine motor skills?

Fine motor skills involve the coordination of small muscle movements in the hands and fingers, working together with the eyes to perform precise tasks like writing, cutting, and buttoning.

At what age should children start fine motor crafts?

Children can start simple fine motor activities as early as one year old, progressing from tearing large pieces of paper to handling beads and scissors as preschoolers.

Do I need expensive supplies for these crafts?

Not at all. Most of these DIY crafts use everyday household items such as colanders, yarn, pasta, cardboard, and clothespins, making them budget-friendly and accessible.

15 Engaging Indoor Activities That Improve Fine Motor Skills for Kids

15 Engaging Indoor Activities That Improve Fine Motor Skills for Kids

As parents, we often focus on our children’s big physical milestones like walking or running. However, the development of fine motor skills—the small, precise movements of the hands, fingers, and wrists—is just as crucial for their long-term success. These skills are the foundation for essential daily tasks such as writing, using utensils, brushing teeth, and dressing themselves.

Fine motor skills involve the coordination of small muscle groups. Developing these abilities takes time and repetition, but the good news is that you do not need expensive toys or complicated equipment to help your child improve. Through simple, engaging indoor activities for children, you can turn playtime into a developmental powerhouse. Explore more ideas in our ultimate guide to indoor toddler activities.

Understanding Fine Motor Development

Why do these tiny hand movements matter so much? From a child development perspective, the hand and the brain are intrinsically linked. When a child manipulates an object, they are learning about texture, spatial awareness, and force control. These experiences strengthen the neural pathways required for complex cognitive tasks later in life.

For toddlers, this might look like picking up Cheerios with a pincer grasp, while preschoolers are often ready for tasks requiring more grip strength, like using scissors. If you notice your child struggling to hold a crayon, avoiding small building blocks, or getting frustrated with clothing fasteners, they may benefit from extra, low-pressure practice through play.

15 Indoor Activities to Boost Fine Motor Skills

Category 1: Sorting and Threading

  • Bead Stringing: Provide thick shoelaces and wooden beads. This activity requires patience and steady eye-hand coordination.
  • Pom-Pom Sorting: Use kitchen tongs to move pom-poms into a muffin tin. The act of squeezing the tongs strengthens the muscles used for handwriting.
  • Pasta Threading: Use dry penne pasta and a piece of yarn to create a necklace. It is a cost-effective way to refine grasping patterns.

Category 2: Sensory Play

  • Playdough Sculpting: Kneading, rolling, and pinching playdough is excellent for finger strength and dexterity. You can find more targeted ideas in our overview of hand strengthening activities for preschoolers.
  • Hidden Object Rice Bin: Fill a plastic bin with dry rice and hide small figurines inside. Searching for items buried in the bin provides valuable sensory input.
  • Water Spraying: Use a spray bottle to water indoor plants. The repetitive squeezing motion is a fantastic workout for small hands.

Category 3: Practical Life Skills

  • Button and Zipper Boards: Create a board with various fasteners. Practicing on a board before doing it on their own clothes lowers frustration levels.
  • Clothespin Matching: Clip clothespins onto the edge of a sturdy card or cardboard box. This is one of the most effective exercises for building pincer strength.
  • Coin Bank Challenge: Have your child slide coins or heavy washers into a small slot. It requires precise orientation and focus.

Category 4: Arts and Crafts

  • Tearing Paper: Give them old magazines to tear into strips. It sounds simple, but it is excellent for finger isolation.
  • Safety Scissors Practice: Draw lines on paper and have your child cut along them. This builds the bilateral coordination needed for complex craft projects.
  • Dot Marker Art: Using dot markers requires steady placement, which is a great precursor to learning how to space letters on a page.

Category 5: Construction Play

  • LEGO Stacking: Snapping pieces together and pulling them apart is the gold standard for developing finger strength. For more options, check out our guide on the best educational toys for kids.
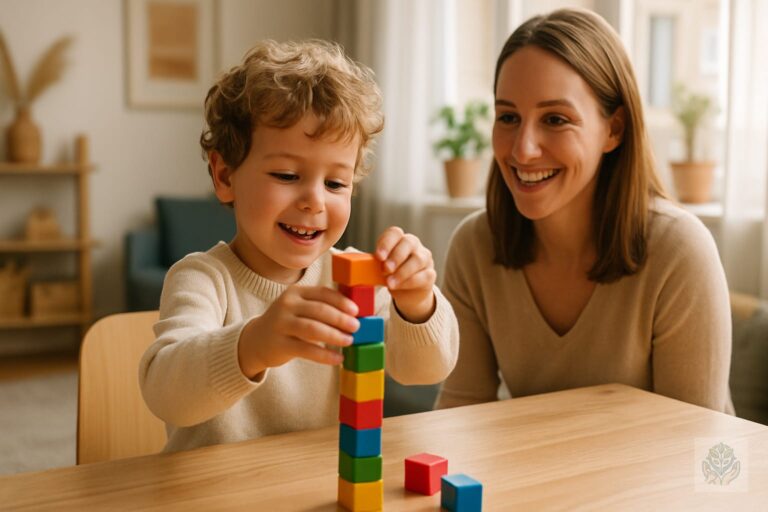
  • Stacking Blocks: Building a tower requires balance and control. It helps children understand cause and effect while refining their grip.
  • Snapping Connectors: Toys that snap together at different angles challenge the child to use both hands in a coordinated way.

Tips for Successful Fine Motor Play Sessions

The most important rule when working on child development activities is to keep the mood light. Focus on the process rather than the outcome. It does not matter if the tower falls or if the pom-poms are sorted incorrectly; what matters is the time spent engaging those muscles.

Always provide close supervision, especially when using small items like beads that could be a choking hazard. Rotate your activities frequently to keep interest high. If your child seems bored with beads, put them away for a few weeks and switch to playdough or rice bins. Establishing a consistent schedule can also help; learn how to structure your days with a daily routine for kids by age.

When to Consult a Professional

While most children reach developmental milestones at their own pace, there are times when extra support is beneficial. If your child shows significant signs of frustration, consistently avoids using their hands, or struggles with basic self-care tasks well beyond the expected age, consider speaking with your pediatrician.

Occupational therapy is a wonderful resource that provides tailored exercises to address specific developmental delays. Early intervention can make a world of difference, so never hesitate to ask for guidance. You are your child’s best advocate, and seeking support is a sign of proactive, loving parenting.

Conclusion

Incorporating these 15 engaging indoor activities that improve fine motor skills is a simple yet powerful way to support your child’s growth. By making these exercises part of your daily routine, you are setting the stage for confidence in school and everyday life. Remember, consistency is far more effective than intensity. Pick one activity this week and enjoy the process of watching your child learn and grow. Do you have a favorite way to keep those little hands busy? Share your ideas in the comments below!

Frequently Asked Questions

What are fine motor skills in children?

Fine motor skills involve the coordination of small muscle groups in the hands, fingers, and wrists, which are essential for tasks like writing, cutting, and dressing.

Why are indoor activities that improve fine motor skills important?

They build hand strength, enhance eye-hand coordination, and develop neural pathways necessary for daily self-care and academic success.

What household items can help build fine motor skills?

Everyday items like clothespins, spray bottles, kitchen tongs, dry pasta, and rubber bands are fantastic tools for fine motor development.

How can I make fine motor practice fun for toddlers?

Turn exercises into games by using playdough, hiding objects in a rice bin, or sorting colorful pom-poms with toy tongs.

At what age should children start practicing fine motor skills?

Children begin developing these skills in infancy through grasping objects, and structured activities can be introduced as early as toddlerhood.

When should I consult a professional about my child’s motor skills?

If your child consistently avoids using their hands, shows extreme frustration with basic self-care, or struggles significantly past expected milestones, consult a pediatrician.

How to Build a Simple Preschool Learning Corner: A Step-by-Step Guide

How to Build a Simple Preschool Learning Corner: A Step-by-Step Guide

Creating a dedicated space for your little one to explore, create, and learn can feel like a daunting task when you are already juggling a busy household. However, you do not need an entire playroom or a massive budget to make it happen. Learning how to build a simple preschool learning corner is one of the most effective ways to encourage independent play while providing your child with a consistent environment for cognitive and emotional development.

Think of this space as a intentional “yes” space—a designated area where your child feels empowered to touch, manipulate, and explore materials without constant redirection. Whether you have a spacious living room or a tiny apartment nook, this guide will show you how to design a functional, beautiful, and educational environment that benefits both you and your toddler.

Why Every Preschooler Needs a Learning Corner

As parents, we often worry about our children spending too much time in front of screens or feeling overwhelmed by a bedroom full of toys that never get used. A dedicated learning corner solves many of these challenges by providing a sense of order. When a child knows exactly where their books, blocks, and art supplies live, they naturally gravitate toward more purposeful play.

Beyond reducing screen time, these corners are essential for developing executive function. By choosing their own activity and engaging with it, children practice focus, problem-solving, and emotional regulation. This independence builds confidence, as children learn to manage their own activities and return items to their proper places once they are finished.

Choosing the Perfect Location

You do not need to build an addition to your home to find the perfect spot. The best location for a learning corner is one where your child feels safe and you feel comfortable supervising. A quiet nook in the living room, a corner of the dining area, or even a modified closet can work wonders.

Consider the natural flow of your home. You want a spot with good lighting—near a window is ideal—to help maintain a calm, inviting atmosphere. Ensure the space is accessible to your child so they can enter and exit independently. If you are working with a very small square footage, keep in mind that proximity to your own workspace allows for natural connection; your child can work on their “projects” while you catch up on emails or household chores nearby.

Essential Elements for a Simple Learning Corner

The goal of a minimalist learning area is to avoid overstimulation. When a shelf is overflowing with too many options, children often dump everything out in frustration rather than playing with one thing. Follow the “less is more” philosophy by keeping the area curated.

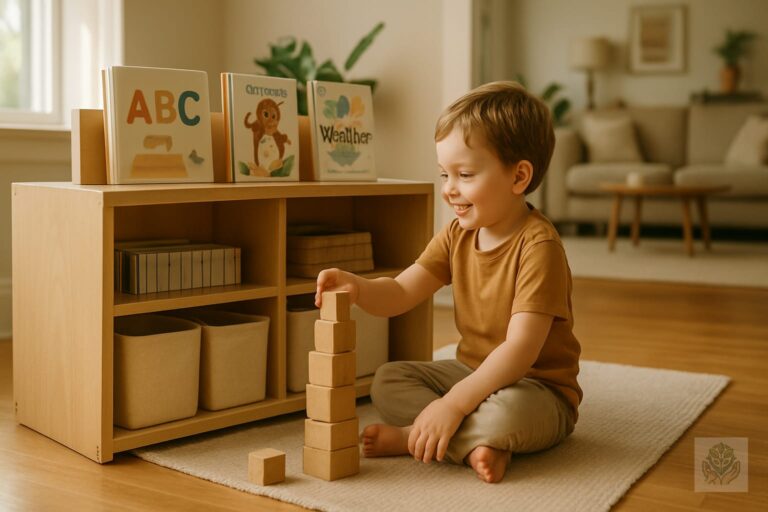
  • Low, Open Shelving: Use child-height shelves so your preschooler can reach items without asking for help. You can find inspiration for styling these spaces in our 10 clever open storage ideas for a Montessori-inspired kids’ room.
  • Comfortable Seating: A small floor mat, a few soft cushions, or a beanbag chair can turn a hard floor into a cozy retreat.
  • Storage Bins and Labels: Use clear bins or baskets so your child can see what is inside, and add picture labels to help them learn where items belong.
  • Defined Boundaries: A small area rug can act as a visual boundary, signaling to your child that this is the place where their work happens.

Curating Your Learning Stations

To make the space truly versatile, we recommend the Four-Pillar Approach. By creating specific zones, you allow your child to shift their focus between different types of developmental play.

1. Literacy and Reading Nook

This is your quiet space. Feature a small shelf where books are displayed with covers facing forward rather than spines; this visual appeal draws children into reading. Include a cozy, soft place to sit. To find great titles to fill this space, check out the ultimate guide to age-appropriate books for toddlers and preschoolers.

2. Fine Motor Area

Focus on skills like grasping and precision. Puzzles, shape sorters, lacing beads, or stacking blocks provide the perfect challenge for growing hands and minds. You can also incorporate 11 easy hand strengthening activities for preschoolers to further boost their fine motor skills.

3. Sensory and Creative Station

If space is tight, use a simple tray or a lidded bin for sensory activities like kinetic sand or dry beans. For art, ensure paper and crayons are always within reach but easy to contain.

4. Imaginative Play Corner

This does not need to be a full kitchen set. A basket filled with dress-up scarves, hats, or a few simple dolls allows your child to explore roles and emotions through dramatic play. Learn more about why this matters in our overview of the educational benefits of pretend play explained.

Budget-Friendly DIY Tips

Building a learning corner should not strain your bank account. Many of the best tools are already in your home or can be found at local thrift shops. Look for low bookcases that can be laid on their sides to create an instant shelving unit.

Use baskets from discount stores or woven boxes you already own to organize materials. You can create your own labels by taking photos of the toys, printing them out, and taping them to the bins. This visual organization is highly effective for preschoolers who are not yet reading but are learning to categorize objects.

How to Keep It Organized

The secret to maintaining this space is the art of toy rotation. Instead of leaving every toy available at once, keep half of your materials in storage. Every two or three weeks, swap the items in the learning corner with the stored items. This keeps play fresh and exciting, and drastically reduces the mess in your home.

Finally, make clean-up part of the play. Use a timer or a “clean-up song” to turn the process of putting items back into a game. When children are involved in the maintenance of their own learning space, they take more pride in their environment. For more ideas on structuring your child’s day, browse our daily activity routine for preschoolers guide.

Frequently Asked Questions (FAQs)

How big should the area be? It only needs to be large enough for your child to sit comfortably and spread out a small activity. Even a three-by-three foot space is sufficient.

How often should I rotate toys? Every two to four weeks is a good standard. You will know it is time when your child stops engaging with the materials currently on the shelves.

How do I keep it clean? Use washable surfaces whenever possible and choose toys that are easy to wipe down. A simple routine of tidying up before nap time or bedtime keeps the space functional for the next day.

Conclusion

Learning how to build a simple preschool learning corner is an investment in your child’s independence and love for learning. By providing a dedicated, organized, and inviting space, you are giving them the tools they need to explore the world on their own terms. Start small, observe what your child gravitates toward, and allow the space to evolve as they grow. Ready to get started? Sign up for our newsletter to download a free Toy Rotation Checklist to keep your new learning corner organized all year long.

Frequently Asked Questions

How big should the learning corner be?

It only needs to be large enough for your child to sit comfortably and spread out a small activity. Even a three-by-three foot space is more than sufficient for a functional setup.

How often should I rotate the toys?

Every two to four weeks is a good standard. You will know it is time to rotate when your child stops engaging with the materials currently on the shelves.

How do I keep the learning corner clean?

Use washable surfaces whenever possible and choose toys that are easy to wipe down. A simple routine of tidying up before nap time or bedtime keeps the space functional.

Do I need expensive furniture for this space?

Not at all. Many of the best tools are already in your home or can be found at thrift shops. Low bookcases laid on their sides work wonderfully.

What if I live in a small apartment?

A quiet nook in the living room, a corner of the dining area, or even a modified closet can work wonders. Proximity to your workspace allows for natural connection.

Why are low shelves important?

Low, open shelving ensures your preschooler can reach items without asking for help, which builds confidence and fosters independent decision-making.

How to Create a Daily Activity Routine for Preschoolers: A Stress-Free Guide

How to Create a Daily Activity Routine for Preschoolers: A Stress-Free Guide

If you have ever spent your morning chasing a toddler who refuses to put on shoes, or survived a meltdown because lunch was delayed by ten minutes, you know that preschool life can feel like a whirlwind. Without a plan, parents often find themselves constantly reacting to the next outburst rather than guiding their child through a peaceful, productive day. The secret to reclaiming your sanity is to learn how to create a daily activity routine for preschoolers.

Preschoolers are at a developmental stage where they are learning to navigate their big emotions and developing a sense of self. They crave predictability because it makes the world feel safe and manageable. When children know what to expect next, they experience less anxiety and have fewer power struggles. This guide will walk you through the science of structure and provide actionable steps to build a routine that actually works for your unique family.

Why Preschoolers Need a Daily Routine

Structure does not mean rigidity. Instead, a consistent schedule serves as a roadmap for your child’s day. When you establish a daily activity routine for preschoolers, you are providing them with the security they need to explore, learn, and grow. One of the most significant benefits is the reduction of power struggles. When the transition to bedtime or mealtime is an expected part of the rhythm rather than an abrupt interruption of play, your child is far more likely to cooperate. For more guidance on organizing your days, explore our complete daily routine guide for kids by age.

Beyond behavior, routines foster independence. By knowing the sequence of the day, children begin to take initiative. They start to put their toys away when they see the clock approach lunchtime or head toward the bathroom after a snack because they know it is part of the flow. This builds immense confidence. Furthermore, routines reinforce healthy biological habits. Regular mealtimes, consistent naps, and predictable sleep cycles help regulate your child’s internal clock, leading to better mood, better sleep, and more stability for everyone.

Key Components of a Successful Preschool Schedule

A successful schedule is all about balance. If you focus only on educational tasks, your child will become restless; if you focus only on physical play, they may become overstimulated. To create an effective daily activity routine for preschoolers, aim for a blend of active movement and quiet, focused engagement. You can find more ideas in our comprehensive overview of preschool activities for early learning.

You must establish anchor points. These are the non-negotiable moments in your day that remain consistent, such as waking up, eating breakfast, lunch, and dinner, and your bedtime routine. These anchors provide the stability your child needs to pivot between different activities. Finally, try to mix child-led play with parent-led activities. While you want to guide their development, allowing your child the autonomy to choose their own toys or books during specific blocks of time fosters creativity and decision-making skills.

Step-by-Step: How to Build Your Routine

Building a plan might seem daunting, but it can be broken down into four manageable steps. First, identify your non-negotiables. These are the fixed points of your day—nap times, mealtimes, and work or school commitments. Write these down as the skeleton of your day.

Second, slot in essential developmental activities. Ensure that you have time for outdoor physical play, fine motor tasks like drawing or building with blocks, and language-rich activities like reading together. Third, add buffer zones. Never schedule activities back-to-back without a ten-minute transition period. These buffers are where you can help your child switch gears, preventing the dreaded transition meltdown.

Fourth, keep it realistic. It is easy to fall into the trap of over-scheduling, but preschooler attention spans are short. If you find yourself rushing from one task to the next, you are likely doing too much. Start with a simple framework and add more structure only as you see how your child responds.

Sample Daily Routine for Preschoolers

Use this template as a starting point, but feel free to adjust it to fit your household:

  • Morning: Wake up, breakfast, and high-energy play to get the wiggles out.
  • Mid-day: Educational focus (puzzles, letter tracing) followed by lunch.
  • Afternoon: Quiet time or nap followed by creative play (painting, sensory bins).
  • Evening: Dinner, bath, reading time, and a consistent wind-down ritual.

Remember, the goal of this daily activity routine for preschoolers is to support your child, not to create a rigid set of rules that governs every second of your existence.

Pro-Tips for Implementing the Routine

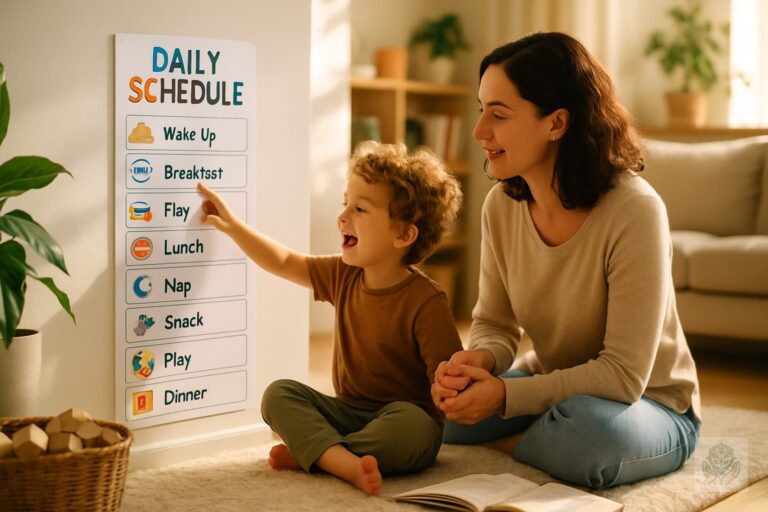
Visual schedules are a game-changer for this age group. Because preschoolers cannot yet read time on a clock, use pictures or icons to represent different parts of the day. A simple chart on the wall allows them to see exactly what is happening next. You can even use color-coded strips to show different blocks of time.

Timers are another effective tool. If you are struggling with transitions, try using a visual timer or a fun song to signal that an activity is ending. When children hear the sound or see the sand run out, they begin to anticipate the change themselves. Finally, embrace flexibility. Life happens, and it is perfectly okay to deviate from the plan if you are having a wonderful time at the park or if everyone is just having a tired day. The routine is meant to serve you, not the other way around.

Common Challenges and How to Solve Them

Even with the best plan, resistance happens. If your child resists a transition, validate their feelings. Say something like, I see you are having so much fun with those blocks, but it is time to move to lunch now. Giving a five-minute warning before a shift can also drastically reduce pushback. For more help with everyday friction, review our strategies in the complete guide to managing everyday behavior challenges in kids.

If you find that the schedule is not working, adjust it for your child’s unique temperament. Some children need more downtime, while others need constant physical stimulation. If the day goes off the rails, let it go. Do not try to force the schedule back into place. Simply meet your child where they are, provide a little extra comfort, and try again the next day. You can also explore advice on positive parenting techniques that actually work to handle tough moments.

Conclusion

Learning how to create a daily activity routine for preschoolers is one of the most proactive steps you can take as a parent. By fostering predictability, you are setting the stage for fewer meltdowns and more joyful interactions. Remember, consistency is the goal, but perfection is not. Start small, stay patient, and listen to the feedback your child gives you through their behavior.

Are you ready to bring more peace to your home? Download our free printable routine template and start your journey toward a more structured day today. If you have a favorite trick for keeping your preschooler on track, please share it in the comments below!

Frequently Asked Questions

Why do preschoolers need a daily routine?

Preschoolers crave predictability because it makes the world feel safe and manageable. Routines help reduce anxiety, minimize power struggles, encourage independence, and regulate biological sleep and eating habits.

How do I start building a daily schedule for my child?

Begin by identifying fixed anchor points like mealtimes, naps, and waking up. Then, slot in developmental activities like outdoor play and reading, making sure to include buffer zones for smooth transitions.

What is the best way to help preschoolers understand a schedule?

Since preschoolers cannot read clocks yet, use visual schedules with pictures or icons. Color-coded charts and fun timers also help them easily anticipate what activity comes next.

What should I do if my preschooler resists transitions?

Validate their feelings by acknowledging what they are currently enjoying, and give them a gentle five-minute warning before the activity needs to change to help them mentally prepare.

How flexible should a preschool daily routine be?

The routine should serve your family, not rule it. It is completely okay to deviate from the schedule occasionally when life happens or when your child needs extra downtime.

How do I balance learning and play in a preschool routine?

Aim for a healthy blend of active physical movement, quiet focused tasks, child-led play, and parent-led learning blocks to prevent your child from becoming restless or overstimulated.

Complete Guide to Baby Safety at Home: A Room-by-Room Checklist for New Parents

0

Complete Guide to Baby Safety at Home: A Room-by-Room Checklist for New Parents

Welcoming a new baby is one of life’s most profound transitions. Amidst the sleepless nights and heartwarming milestones, many parents find themselves looking around their homes with a newfound sense of urgency. The goal of baby safety at home is not to turn your living space into a sterile fortress, but rather to create a secure, comfortable environment where your child can explore, grow, and learn with confidence. For more essential advice, check out our Everything Parents Need to Know About Baby Safety: The Ultimate Guide.

As your baby moves from those precious first weeks of stillness to the active stages of rolling, crawling, and eventually cruising, your house will change in their eyes. A coffee table becomes a mountain to climb, and an electrical cord becomes an interesting toy. By proactively managing your home environment, you can foster a ‘yes space’ where you spend less time saying no and more time enjoying those fleeting moments of discovery.

When Should You Start Baby Proofing?

Many parents wonder if they should wait until their baby starts moving before they begin the process of baby proofing. The answer is a resounding no. The best time to start is well before your little one becomes mobile, ideally between months four and six. Once your baby starts crawling, you will find it nearly impossible to find the time or energy to install hardware or reorganize cabinets.

Starting early allows you to test your systems and identify hazards you might have overlooked. It also turns a potentially stressful task into a manageable project that you can tackle in small, weekend-sized bites. Remember, infant safety is a journey that evolves with your child. As they grow taller and more curious, your security measures will need to adapt accordingly.

The Living Room: Creating a Safe Play Zone

The living room is often the heart of the home and the primary location for family interaction. To ensure childproofing success here, you need to think like your baby. Get down on your hands and knees and look at the world from their perspective to spot hidden dangers.

  • Secure heavy furniture: Bookshelves, dressers, and television stands are major tipping hazards. Use furniture straps or wall anchors to secure these items firmly to the wall studs.
  • Corner guards and edge bumpers: Sharp edges on coffee tables and TV consoles can cause painful bumps and bruises. Soft foam covers can mitigate these risks during those wobbly first steps.
  • Electrical safety: Cover all unused electrical outlets with sliding plates or plug covers. Organize loose cords behind furniture or use cable management boxes to prevent tugging and tripping.
  • Safe storage: Keep small objects, decorative knick-knacks, and remote controls out of reach. These items are common choking hazards for curious explorers.

Kitchen Safety: Managing Hot Zones

The kitchen is one of the most hazardous rooms in the home due to the presence of heat, sharp objects, and chemicals. Establishing home safety for babies in this room is non-negotiable.

  • Lock cabinets and drawers: Use magnetic or latch-style locks to secure any cabinet containing cleaning supplies, plastic bags, or sharp kitchen tools.
  • Stove safety: Consider installing stove knob covers to prevent your toddler from turning on burners. Always turn pot handles toward the back of the stove while cooking to prevent accidental spills.
  • Breakable storage: Move glass, ceramic, and heavy appliances to higher cabinets that your child cannot reach, even with a step stool eventually.

Nursery and Bedroom Essentials

Your baby spends a significant amount of time sleeping, making the nursery the most critical area for infant sleep safety. A clutter-free space is not just about aesthetics; it is about reducing risks. You can also explore our guide on How to Create a Safer Sleep Environment for Babies: A Parent’s Complete Guide for more details.

  • Safe sleep environment: Follow current safe sleep guidelines, including placing the baby on a firm, flat surface without blankets, pillows, or stuffed animals to reduce the risk of SIDS.
  • Blind cord safety: Dangling cords from window blinds are strangulation hazards. Install cordless blinds or use cord cleats to keep them completely out of reach.
  • Furniture placement: Keep cribs and toddler beds away from windows, drapes, and wall lamps where cords could be accessed.

Bathroom and Laundry Room: Preventing Drowning and Poisoning

Bathrooms and laundry rooms contain some of the most dangerous household items. Implementing strict toddler safety measures in these rooms is essential for peace of mind.

  • Toilet lid locks: Keep the toilet lid closed and secured with a latch to prevent accidental drowning or the child dropping toys into the plumbing.
  • High storage: Keep all medications, vitamins, and cleaning chemicals in a high, locked cabinet. Never store these items under the sink where a child can easily reach them.
  • Water supervision: Never, ever leave a baby unattended in or near a bathtub, even for a moment. Drowning can happen silently and quickly, even in shallow water.

Stairways and Entryways

As your baby becomes mobile, stairs become a major source of concern. Proper gating is a fundamental part of home safety.

  • Hardware-mounted vs. pressure-mounted gates: Always use a hardware-mounted gate at the top of the stairs, as these are drilled into the wall and can withstand significant force. Pressure-mounted gates are fine for doorways or the bottom of the stairs but should never be used at the top.
  • Entryway organization: Keep shoes, bags, and umbrellas tucked away. Cluttered entryways are prime tripping hazards for both toddlers and parents carrying a baby.

Top Baby Safety Gadgets Worth the Investment

While you do not need to buy every gadget on the market, some tools are worth the investment for the added layer of security they provide. High-quality baby monitors with video and audio are essential for keeping an ear and eye on your little one during nap time. Smart home sensors can alert you to unauthorized doors being opened or changes in room temperature.

Investing in reliable, name-brand cabinet locks and high-quality safety gates will save you frustration in the long run. Cheap, flimsy plastic locks often break within weeks, whereas sturdy, well-engineered versions offer a much longer lifespan and better protection for your household.

Common Baby Proofing Mistakes to Avoid

Even well-intentioned parents often make common mistakes when setting up their home. One of the most frequent errors is underestimating a baby’s climbing ability. A drawer that is locked today might be used as a ladder tomorrow, so always ensure that furniture is anchored securely. Read our guide on How to Prevent Common Household Accidents for Babies: The Ultimate Room-by-Room Safety Guide for further insights.

Another mistake is forgetting to secure smaller items that seem harmless. Paperclips, coins, and loose change can be lethal choking hazards. Finally, do not neglect the ‘hidden’ areas like garages or home offices, where your baby might wander if a door is left slightly ajar. Consistent vigilance is key to effective baby safety at home.

Conclusion: Peace of Mind for You and Your Baby

Achieving baby safety at home is not a one-time chore; it is an ongoing process of assessment and adjustment. As your child grows from a crawler to a runner, their capabilities will change, and your safety measures must evolve alongside them. Take a deep breath and tackle these steps one at a time. By preparing your home thoughtfully, you are creating a foundation of security that allows you to focus on what matters most: bonding with your child and enjoying the beautiful journey of parenthood. To build an even stronger connection during this time, take a look at Why Family Bonding Matters for Young Children: Building a Foundation for Life.

Frequently Asked Questions

When should I start baby proofing my home?

It is best to start baby proofing before your baby becomes mobile, ideally between months four and six, to ensure you are well-prepared before they start crawling.

What is the safest type of baby gate for stairs?

Always use a hardware-mounted gate at the top of the stairs because it is securely drilled into the wall and can withstand significant force.

How can I prevent heavy furniture from tipping over?

Secure heavy furniture like bookshelves, dressers, and television stands firmly to the wall studs using furniture straps or wall anchors.

What are the key rules for a safe sleep environment?

Place your baby on a firm, flat surface without any blankets, pillows, or stuffed animals to significantly reduce the risk of SIDS.

How do I secure the kitchen against baby hazards?

Use magnetic or latch-style locks on cabinets containing cleaning supplies or sharp tools, install stove knob covers, and always turn pot handles toward the back.

Are pressure-mounted gates safe for the top of stairs?

No, pressure-mounted gates should never be used at the top of stairs because they can dislodge under pressure; use them only at doorways or the bottom of stairs.