
Home Blog Page 16

How to Practice Starting and Stopping a Bicycle: A Parent’s Guide to Teaching Kids

0

How to Practice Starting and Stopping a Bicycle: A Parent’s Guide to Teaching Kids

Teaching a child to ride a bike is a milestone every parent looks forward to, but the focus often lands solely on balancing. While balance is key, learning how to practice starting and stopping a bicycle is the true foundation of long-term safety and confidence. If a child can glide but cannot stop effectively, they are at risk of accidents. Mastering these two movements gives your child the control they need to navigate sidewalks, parks, and trails with peace of mind.

Many parents wonder why starting and stopping are more critical than pedaling itself. The answer is simple: control. A child who feels in command of their bike is a child who stays calm during unexpected moments. Before you head to the neighborhood park, set the stage for success by choosing a flat, paved area away from traffic, such as an empty school parking lot or a quiet cul-de-sac.

Pre-Ride Safety Check

Before you begin, ensure your child’s gear is ready for action. A bike that fits poorly or lacks maintenance can turn a fun lesson into a frustrating experience.

  • Bike Sizing: Your child should be able to touch the ground with their feet while sitting on the saddle. This is crucial for stopping safely. You can also explore the ultimate sports equipment guide for active kids to ensure all protective gear and equipment are properly fitted by age.
  • Helmet Safety: Ensure the helmet is level on their head, not tilted back, and that the chin strap is snug. It should only allow two fingers between the strap and the chin.
  • Brake and Tire Check: If the bike has hand brakes, ensure your child’s hands can comfortably reach the levers. Inflate the tires to the recommended PSI so the bike rolls smoothly.

Phase 1: Mastering the Starting Technique

The secret to starting a bicycle successfully lies in the positioning of the pedals. Many children try to start with both feet on the pedals while stationary, which leads to immediate wobbling. Instead, teach them the ready position.

The Power Pedal Position

Have your child stand over the bike frame. Instruct them to rotate one pedal so it is positioned at the 2 o’clock position—roughly a quarter turn forward from the very bottom. By placing their dominant foot on this pedal, they can push down with force to gain the momentum needed for balance. The other foot remains on the ground to provide stability until the bike begins to move.

Building Confidence

Before they start pedaling, let them practice the motion of pushing down on that pedal while scooting the bike forward. This helps them understand how the pedal interaction feels without the pressure of having to keep moving immediately. Once they feel steady, encourage them to lift the second foot and find the other pedal as they gain speed. For younger children still developing lower body strength and coordination, incorporating easy movement activities for kids at home can be a great way to build foundational motor skills.

Phase 2: Teaching Controlled Stopping

Learning how to stop a bicycle is often the biggest hurdle for new riders. Whether the bike uses a coaster brake (pedaling backward) or hand brakes, the technique requires a delicate touch.

The Gentle Squeeze

If the bike has hand brakes, emphasize a soft, progressive squeeze rather than a sudden, jerky pull. A sudden grab of the brakes can cause the front tire to lock or the bike to tip forward. Teach your child to use both hand brakes simultaneously with a light, gradual pressure to come to a smooth, controlled halt.

Weight Distribution

Encourage your child to keep their eyes up and looking forward, rather than staring down at their hands or feet. By looking ahead, they maintain better posture and center their weight. As the bike slows, remind them to prepare to put one foot down to stabilize the bike the moment they reach a complete stop.

Step-by-Step Drills for Practice

Once the individual components are clear, turn the lessons into games. These drills make practicing fun while building essential muscle memory.

  1. The Stop-and-Go Line: Use sidewalk chalk to draw a start line and a stop line about 20 feet apart. Practice starting, riding to the line, and coming to a smooth stop right on the mark.
  2. Verbal Cues: Use commands like Ready, Set, Go and Ready, Set, Stop. This improves your child’s reaction time and helps them associate your voice with specific physical actions.
  3. Flat Surface Mastery: Always start on perfectly flat ground. Once they are consistent, you can move to very slight inclines to practice stopping while moving a bit faster.

Troubleshooting Common Roadblocks

It is perfectly normal for children to feel nervous. If your child keeps tipping over at stops, check if the seat is too high, preventing them from putting their feet down quickly. If they seem afraid of falling, remind them that stopping is how they stay safe. If they get frustrated with pedal anxiety, go back to using the bike as a balance bike for a few minutes to regain their sense of equilibrium. When kids experience outdoor physical setbacks, using positive parenting techniques that actually work can help keep spirits high and frustration low.

Parental Tips for a Stress-Free Session

The goal is to foster a love for riding, not to reach professional skill levels in one afternoon. Keep sessions short—about 20 to 30 minutes is usually enough. Offer plenty of positive reinforcement, even for small successes. If you notice your child becoming overly emotional or physically tired, it is time to call it a day. A fresh start the next morning is often much more productive than pushing through frustration.

Conclusion

Learning how to practice starting and stopping a bicycle is an ongoing process that builds real-world independence. Celebrate the small milestones, like that first smooth stop at the driveway line, and keep the environment supportive. By focusing on these core skills, you are giving your child the tools to explore their world safely. With consistency and your guidance, they will soon be ready to graduate from the driveway to neighborhood sidewalks and beyond. For more ideas on keeping children active and healthy outdoors, check out our guide on the best outdoor toys and activities for active kids.

Frequently Asked Questions

Why is starting and stopping more important than pedaling?

Starting and stopping give your child complete control over their bike. Mastering these skills ensures they can navigate obstacles safely and remain calm during unexpected moments.

What is the best way to start a bicycle without wobbling?

Use the power pedal position. Have your child place their dominant foot on a pedal positioned at the 2 o’clock spot, pushing down firmly while keeping the other foot on the ground for stability.

How should kids use hand brakes to stop safely?

Teach them to use a soft, progressive squeeze rather than a sudden, jerky pull. They should apply both hand brakes simultaneously with gradual pressure to avoid tipping forward.

Where is the best place to practice bike riding?

Choose a flat, paved area away from traffic, such as an empty school parking lot, a quiet cul-de-sac, or a smooth neighborhood park path.

How long should a practice session last?

Keep sessions short, around 20 to 30 minutes, to prevent physical fatigue and frustration. Stop immediately if your child gets overwhelmed.

What should I do if my child keeps tipping over when stopping?

Check if the bicycle seat is too high, which can prevent them from placing their feet flat on the ground quickly to stabilize the bike.

15 Easy Group Games for Kids at the Park (No Equipment Needed)

0

15 Easy Group Games for Kids at the Park (No Equipment Needed)

We have all been there. You arrive at the park with a group of energetic children, expecting them to run wild and occupy themselves for hours. Instead, within ten minutes, the cries of I am bored start echoing across the playground. Keeping kids entertained at the park does not have to be a struggle, nor does it require a trunk full of expensive toys.

Group games are a fantastic way to facilitate social development, foster teamwork, and burn off that excess energy. By choosing games that require absolutely no equipment, you embrace the convenience of spontaneity. You do not need balls, nets, or bats; you only need a bit of imagination and a group of willing participants. Here is how you can transform any grassy patch into an arena of fun.

Why Choose Group Games for Park Outings?

Outdoor play is essential for a child’s physical health, but it offers much more than just cardiovascular exercise. When children engage in structured or semi-structured group games, they learn how to navigate the complexities of social interaction. They practice taking turns, following rules, and managing disappointment when the game does not go their way.

These games also serve as excellent tools for improving communication skills. Whether they are coordinating a strategy for a game of tag or listening for cues in a movement game, children are constantly learning to process information and express themselves. Best of all, these activities require minimal prep time for parents. You can get a game started in seconds, allowing you to focus on the joy of watching them play. For more ways to keep kids active, check out our guide on 15 easy movement activities for kids at home.

Classic Tag Variants (The Easiest Go-To Games)

Tag is the ultimate park game. It is universal, high-energy, and requires no explanation, even for the youngest children. To keep things fresh, try these variations that turn a simple chase into a story.

Freeze Tag

Freeze Tag is a classic for a reason. When a player is tagged, they must freeze in place like a statue. To be unfrozen, another player must crawl under their legs or tap them on the shoulder. This keeps everyone involved until the very last person is frozen.

Toilet Tag

Toilet Tag is a hilarious crowd-favorite for high-energy groups. When tagged, a child must crouch down and stick one arm out like a toilet handle. They stay there until a teammate comes by to push the handle down, making a flushing noise, to set them free. The silliness factor alone makes this a winner.

Blob Tag

Blob Tag is perfect for growing groups. It starts with one person being the tagger. When they tag someone, that person joins hands with them, forming a blob. The blob must then work together to tag more people, growing larger and larger until everyone is part of the chain. It is a fantastic lesson in working as a unit.

High-Energy Movement Games

Sometimes you need a game that balances high activity with self-regulation. These games help children learn to listen carefully and react quickly to environmental changes.

Red Light, Green Light

Red Light, Green Light is the gold standard for large groups. One person stands at the finish line with their back to the players. When they shout Green Light, the kids run toward them. When they shout Red Light, the players must freeze instantly. Anyone caught moving must return to the start. It is a great test of patience and impulse control.

Duck, Duck, Goose

Duck, Duck, Goose remains a childhood staple because of the anticipation it builds. As the leader walks around the circle tapping heads, the tension rises. The chosen goose must chase the leader around the circle before the leader can sit in the empty spot. It is simple, effective, and always results in giggles.

Simon Says

Simon Says is excellent for promoting active listening. The leader gives commands, but players only follow those starting with the phrase Simon says. It is a quiet but engaging game that forces children to pay attention to details, which is a great skill to build in a noisy park environment.

Imaginative and Creative Park Games

Not every park game needs to be about running at top speed. Sometimes, tapping into a child’s imagination creates the most memorable moments. You can read more about why this matters in our article on the educational benefits of pretend play explained.

Nature Scavenger Hunt

Nature Scavenger Hunt is easy to facilitate by using the environment. Give the kids a list of things to find—a yellow leaf, a smooth rock, a feather, or a piece of clover. It encourages them to explore the park with a curious eye, turning a simple walk into a detective mission.

Animal Charades

Animal Charades is perfect for smaller circles. One child acts out an animal—swinging their arms like a monkey or stretching their neck like a giraffe—while the others guess what they are. It builds confidence and allows children to express themselves creatively.

Shadow Tag

Shadow Tag is the best game for sunny, mid-day park visits. Instead of tagging a child’s body, players must step on the shadow of another child. It requires a completely different strategy and awareness of the sun’s position, making it a clever twist on traditional tag.

Team-Building Games for Groups

When you have a mix of ages, team-building games help bridge the gap. These activities encourage cooperation and shared goals over individual competition.

Human Knot

Human Knot is the ultimate cooperation challenge. Have the children stand in a tight circle and reach out to grab the hands of two different people across from them. Once everyone is tangled, they must work together to untangle the knot without letting go of each other’s hands. It is a beautiful puzzle that requires verbal communication and patience.

Follow the Leader

Follow the Leader is perfect for building leadership skills. The leader performs various movements—skipping, jumping, crawling, or spinning—and everyone behind them must mirror those actions. Encourage children to take turns being the leader so everyone feels empowered.

Sardines

Sardines is a reverse-hide-and-seek twist that is much friendlier for large groups. One person hides while everyone else counts. When a seeker finds the hider, they do not shout it out. Instead, they quietly join the hider in their hiding spot. As the game goes on, the hiding spot gets more crowded until everyone is squeezed together like sardines.

Tips for Managing Group Games at the Park

While the games themselves are easy, managing a group of children requires a little bit of foresight. Before you start, clearly define the physical boundaries of the play area. This keeps everyone safe and ensures no one wanders too far off.

If disagreements occur, stay calm and encourage the children to use their words. If someone thinks a tag was unfair, suggest a do-over or a quick game of rock-paper-scissors to settle it. This keeps the game moving and teaches conflict resolution skills. For additional guidance on handling challenging behavior, consult our tips on managing everyday behavior challenges in kids.

Always rotate roles so that every child gets a turn to be the leader or the tagger. This prevents feelings of exclusion and builds confidence in quieter kids. Finally, remember to schedule water breaks and move to the shade. Even the most exciting game is better when everyone is hydrated and comfortable.

Conclusion

The best memories are often made with the simplest activities. By introducing these 15 easy group games for kids at the park, you are providing them with the opportunity to build friendships, develop critical social skills, and enjoy the great outdoors without needing a single piece of equipment. You will find that when you remove the distraction of toys, the creativity of children truly shines. For more ideas on keeping children active outside, read our collection of 50 family bonding ideas for creating lasting memories together.

Do you have a favorite park game that your children love to play? We would love to hear your ideas! Share your go-to no-equipment games in the comments section below so we can keep the park fun growing for everyone.

Frequently Asked Questions

What are some easy group games for kids at the park that need no equipment?

Classic games like Freeze Tag, Toilet Tag, Red Light Green Light, and Duck Duck Goose require zero equipment and can be started instantly in any grassy park area.

How do you keep a large group of kids entertained at the park?

You can keep large groups entertained by rotating through high-energy movement games and creative tag variations like Blob Tag or Sardines, which naturally accommodate many participants.

What are good team-building games for outdoor play?

Human Knot, Follow the Leader, and Sardines are excellent team-building games that encourage cooperation, communication, and shared goals among children of varying ages.

How can I manage conflicts during park games?

Clearly define physical boundaries before starting, encourage children to use their words to resolve disputes, and suggest a quick do-over or rock-paper-scissors to settle disagreements fairly.

Are these park games suitable for toddlers and older kids?

Yes, games like Simon Says, Animal Charades, and Nature Scavenger Hunts can easily be adapted for mixed-age groups, allowing toddlers and older children to play together safely.

Why are no-equipment games beneficial for children?

No-equipment games foster creativity, improve communication skills, support physical health, and teach children how to navigate social interactions like taking turns and following rules.

How to Create a Safer Sleep Environment for Babies: A Parent’s Complete Guide

0

How to Create a Safer Sleep Environment for Babies: A Parent’s Complete Guide

Welcoming a new baby into your home is an incredible journey filled with love and milestones. However, it also brings a new set of responsibilities, particularly when it comes to bedtime. Every parent wants to ensure their little one is comfortable and secure throughout the night. Understanding how to create a safer sleep environment for babies is one of the most proactive steps you can take to support your infant’s healthy development and your own peace of mind.

It is natural for new parents to feel anxious about Sudden Infant Death Syndrome (SIDS). While the thought can be overwhelming, following evidence-based guidelines significantly reduces risks. The American Academy of Pediatrics (AAP) has spent years researching the best ways to protect infants during sleep. By implementing these clear, actionable strategies, you can transform your nursery into a sanctuary that prioritizes both safety and rest.

The ABCs of Safe Sleep

When you are tired and adjusting to the rhythms of life with a newborn, it is easy to forget the essentials. The AAP simplifies the guidelines for a safer sleep environment for babies with the ABCs: Alone, Back, and Crib. Remembering this simple acronym will help you keep your infant protected every single time they drift off to sleep.

A: Alone

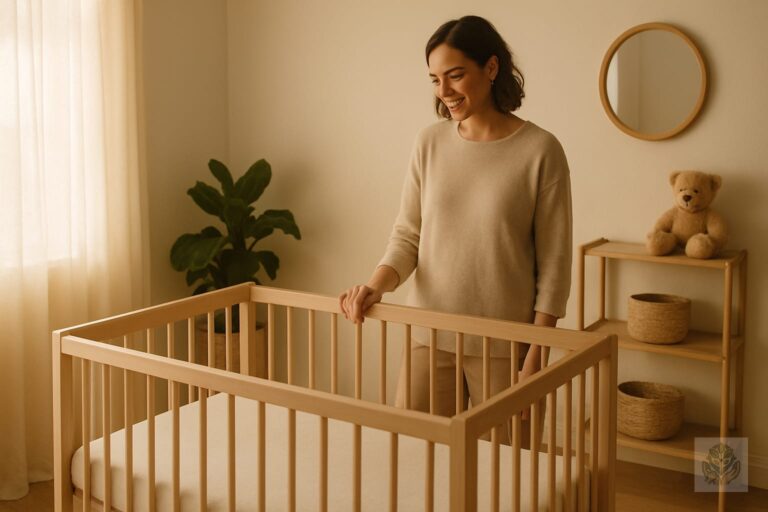
Babies should always sleep alone. This means no pillows, stuffed animals, bumper pads, or loose blankets in the crib. While it might look cozy to decorate the crib with plush toys or soft bedding, these items pose a suffocation hazard. A bare sleep surface is the safest sleep surface.

B: Back

Always place your baby on their back to sleep for every nap and every night. While some babies may seem to prefer sleeping on their tummies, the back-sleep position is non-negotiable for infants. It keeps the airway open and significantly lowers the risk of SIDS.

C: Crib

Your baby should sleep on a firm, flat surface. This could be a crib, bassinet, or play yard that meets modern safety standards. Avoid soft surfaces like sofas, armchairs, or adult mattresses, as they can cause a baby to roll into a position that compromises their breathing.

Choosing the Right Sleep Surface

The foundation of a safer sleep environment for babies is the furniture they sleep on. When shopping for gear, prioritize simplicity over aesthetics. Avoid mattresses that feel squishy or memory foam toppers; if you can press down on the mattress and it doesn’t immediately spring back, it is too soft. For more details on what to look for when selecting bedding, read our Baby Fitted Sheets: What Parents Should Look For (Ultimate Buying Guide).

Check that your crib or bassinet is free from hardware gaps where a limb could get stuck. Additionally, avoid inclined sleepers, loungers, or nests. These products, while popular, often place a baby’s head at an angle that can cause their chin to drop toward their chest, potentially blocking their airway. Stick to a flat, firm mattress with a tight-fitting sheet designed specifically for that model.

What Should Your Baby Wear to Sleep?

Since blankets are not allowed in the crib, parents often worry that their baby will get cold. The best solution is to use a wearable blanket, also known as a sleep sack. These garments provide warmth without the risk of loose fabric covering the baby’s face.

If you choose to swaddle your baby during the early weeks, ensure the swaddle is secure and not too tight around the hips. As soon as your baby shows signs of rolling over, typically around two to four months, you must stop swaddling. At this stage, transition to a wearable blanket that allows the arms to be free, which keeps them safe should they roll onto their stomach during the night.

Creating the Ideal Nursery Environment

Temperature regulation is a vital part of a safer sleep environment for babies. Overheating is a known risk factor for SIDS. Aim to keep the nursery between 68 and 72 degrees Fahrenheit. If you are comfortable in a light layer of clothing, your baby likely is too. For inspiration on setting up a beautiful room, check out these 15 Calm and Cozy Nursery Decor Ideas for a Peaceful Sleep Space.

White noise machines can be wonderful for drowning out household sounds, but be mindful of the volume. Ensure the device is placed at least seven feet away from the crib and kept at a low decibel level—no louder than a quiet conversation. Finally, keep lighting dim during the night. This helps differentiate day from night, supporting your baby’s developing circadian rhythm while making late-night check-ins less stimulating.

Room Sharing vs. Bed Sharing

The AAP recommends room sharing for at least the first six months, and ideally up to one year. This means having the baby sleep in your room, but in their own designated sleep space like a bassinet or crib. This setup makes it easier to feed and monitor your baby while significantly reducing the risks associated with bed sharing.

Bed sharing—bringing your baby into your adult bed—can be dangerous due to the presence of pillows, heavy blankets, and the risk of a parent rolling onto the infant. If you bring the baby into your bed for a feeding or comfort, ensure the environment is cleared of all hazards. If you find yourself drifting off, move the baby back to their own safe, flat surface as soon as possible. To ensure your home is secure overall, review our How to Prevent Common Household Accidents for Babies: The Ultimate Room-by-Room Safety Guide.

Safe Sleep Checklist for Parents

To ensure you maintain a safer sleep environment for babies consistently, keep this checklist handy near the nursery door:

  • Is the crib completely bare of toys, bumpers, and pillows?
  • Is the mattress firm and the sheet tightly fitted?
  • Is the baby placed on their back to sleep?
  • Is the room temperature set between 68 and 72 degrees?
  • Are the baby’s arms free if they have started rolling?
  • Have you shared these rules with grandparents or babysitters?

Conclusion

Creating a safer sleep environment for babies is one of the most important roles you fill as a parent. By following the ABCs of safe sleep and staying diligent about the nursery setup, you are providing the best possible start for your little one. Remember that every baby is different, and it is always a good idea to consult your pediatrician if you have specific concerns about your baby’s sleep habits or development. You can also explore our Everything Parents Need to Know About Baby Safety: The Ultimate Guide for more tips.

You are doing a wonderful job navigating the complexities of parenthood. Stay informed, stay consistent, and don’t hesitate to reach out for support when you need it. If you found this guide helpful, please share it with other new parents in your life to help keep more babies safe and sound. For guidance on other aspects of infant care, take a look at our The Complete Roadmap to Healthy Newborn Care From Birth: A First-Time Parent’s Guide.

Frequently Asked Questions

What are the ABCs of safe sleep for babies?

The ABCs stand for Alone, Back, and Crib. Babies should always sleep alone in a bare crib, placed strictly on their backs for every nap and nighttime sleep.

When should I stop swaddling my baby?

You should stop swaddling as soon as your baby shows the first signs of trying to roll over, typically around two to four months of age.

Is it safe to use a blanket in the crib?

No, loose blankets should never be placed in a crib because they pose a suffocation hazard. Instead, use a wearable blanket or sleep sack to keep your baby warm.

What is the ideal room temperature for a baby’s nursery?

The nursery should be kept between 68 and 72 degrees Fahrenheit to prevent overheating, which is a known risk factor for SIDS.

How long should my baby room-share?

The American Academy of Pediatrics recommends room sharing for at least the first six months, and ideally up to one year, with the baby sleeping in their own bassinet or crib.

What kind of mattress is safest for an infant?

An infant needs a firm, flat mattress that fits tightly within the crib or bassinet. Avoid soft mattresses, memory foam toppers, or inclined sleepers.

15 Calm and Cozy Nursery Decor Ideas for a Peaceful Sleep Space

0

15 Calm and Cozy Nursery Decor Ideas for a Peaceful Sleep Space

Creating a Sanctuary: Why a Calm and Cozy Nursery Matters

Preparing for a new baby brings an undeniable wave of excitement, nesting instincts, and yes, a little bit of stress. Amidst all the registry checklists and tiny outfits, designing the room where your little one will rest is often the most therapeutic step. Setting up a dedicated, tranquil environment does more than just look good on social media. A genuinely calm and cozy nursery plays a vital role in helping infants wind down, regulate their nervous systems, and drift off to sleep more easily.

Infants are deeply sensitive to their surroundings. When a room is cluttered, visually chaotic, or lit with harsh fluorescents, it can overstimulate a baby who is already learning how to process a big world. On the flip side, thoughtful nursery design supports healthy sleep habits by signaling to your baby that the room is a safe, quiet place for rest. Furthermore, let us not forget about you—the exhausted parent spending countless hours rocking, nursing, and soothing during night wakings. A serene space helps lower your cortisol levels during those 3:00 AM wake-up calls.

In this guide, we explore actionable, beautiful strategies to build a dreamy sanctuary. From color psychology to lighting hacks, read on to discover how to design a gorgeous sleep space that balances effortless style with everyday functionality.

1. Choose a Soft, Neutral Color Palette

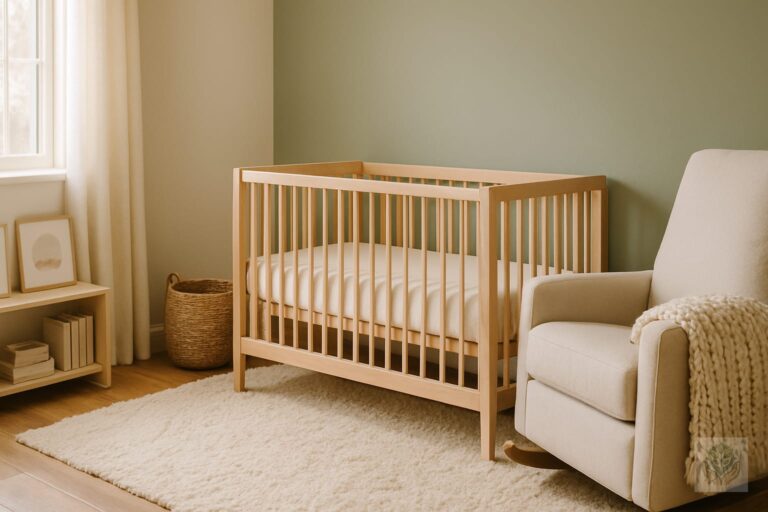
The foundation of any peaceful bedroom begins with the walls. When searching for the ideal nursery paint color, steer clear of overly saturated primary colors that can energize an infant. Instead, lean into soft, warm whites, gentle greiges, muted earth tones, and calming sage greens. These hues act as a visual exhale, making the entire room feel grounded and expansive.

Color psychology strongly supports the use of muted tones in infant spaces. Soft blues, pale grays, and warm taupes mimic natural outdoor environments, which naturally promote relaxation and melatonin production. If you are worried that an all-neutral room might look a bit sterile, do not fret. You can easily combat this by choosing paint with a matte finish that absorbs light softly rather than reflecting it harshly.

2. Layer in Warm and Tactile Textures

Color is only part of the equation; texture is what truly makes a room feel lived-in and inviting. Nurseries often feature hard surfaces like wooden cribs, plastic baby gear, and smooth dressers. To balance these out, you must introduce tactile, soft elements that invite touch and warmth. For additional comfort on the bed, consider choosing items from our baby fitted sheets buying guide.

Try incorporating a chunky knit throw blanket draped over the rocking chair, airy linen curtains that flutter gently with the breeze, and a plush, high-pile faux-fur rug for tummy time. These layers do not just add visual depth; they also absorb sound, which helps muffle footsteps when you are trying to sneak out of the room after a successful nap transfer. As your baby grows, these diverse sensory touchpoints support healthy tactile exploration.

3. Install Layered, Warm Lighting

Overhead lighting is the absolute enemy of a sleepy baby. If you flip on a glaring white overhead light during a midnight diaper change, you instantly signal to your baby’s brain that it is time to wake up. Swap out harsh bulbs and install dimmable fixtures across the board.

When selecting lightbulbs, always look for warm-toned options rated at 2700K or lower. This specific color temperature mimics the gentle glow of sunset, naturally encouraging melatonin production. To complete the ambiance, layer in cozy accent lighting such as a dim wall sconce above the glider or a cute, touch-controlled bedside lamp with an amber-toned shade. To establish an even better nighttime routine once lights are dimmed, consult our expert guide on how to help a child who fights bedtime as they grow older.

4. Embrace Minimalist Furniture and Clever Storage

Clutter is the silent killer of calm. When toys, diapers, and laundry are scattered everywhere, the room instantly feels chaotic. By embracing minimalist furniture—such as a simple Scandinavian-inspired wooden crib and a streamlined, comfortable glider—you instantly free up precious floor space. You can find more layout suggestions in our overview of essential furniture for a functional nursery.

Adopt the out-of-sight, out-of-mind philosophy by investing in clever storage solutions. Woven baskets, canvas bins, and lidded storage boxes are your best friends here. Tuck daily essentials neatly away inside furniture or closet organizers so that your horizontal surfaces remain completely clear, maintaining that tranquil, spa-like vibe.

5. Bring the Outdoors In with Nature-Inspired Decor

Biophilic design—the practice of connecting humans to nature within built environments—has profound psychological benefits, even for infants. Adding elements of the natural world naturally lowers heart rates and creates a deeply peaceful atmosphere.

Consider introducing pet-safe, air-purifying houseplants like a parlor palm or a spider plant on a high shelf out of reach. Alternatively, incorporate natural materials such as rattan changing tray baskets, bamboo hampers, and light oak shelving. These organic textures introduce an earthy warmth that synthetic materials simply cannot replicate. For families looking to expand natural play areas as the child grows, check out our selection of best outdoor toys for active toddlers.

6. Keep Wall Art Simple and Serene

Gallery walls can sometimes become too busy and overstimulating for a nursery. Instead of hanging dozens of loud, colorful prints, curate a few select pieces that evoke a sense of wonder and tranquility. Gentle watercolor landscapes, abstract shapes in muted tones, or simple botanical illustrations work wonders.

When hanging your art, remember to place some pieces down low at baby’s eye level. Once your little one reaches the tummy time and crawling stages, having gentle, high-contrast shapes or friendly animal faces to look at will keep them happily engaged without causing sensory overload. Always use secure, shatterproof framing to keep safety paramount. You can also explore options from our best educational toys for kids age-wise guide for smart learning to prepare for future developmental stages.

Final Thoughts on Designing Your Dream Cozy Nursery

Designing a space for your new arrival is a truly joyful milestone. By focusing on foundational elements like soothing color palettes, tactile layers, warm-toned lighting, and smart storage solutions, you can effortlessly craft a calm and cozy nursery that serves as a peaceful haven for your entire family.

Always remember that functionality is just as important as aesthetics. A gorgeous room loses its charm if the glider hurts your back or the changing table is too far from the diapers. Prioritize comfort and ease of use alongside your decor choices, and you will have a room that feels just as good as it looks.

What is your favorite way to add warmth to a baby’s room? Share your go-to cozy decor tips in the comments below!

Frequently Asked Questions

What are the best colors for a calm nursery?

Soft neutrals like warm whites, greiges, muted earth tones, and calming sage greens are ideal because they promote relaxation and do not overstimulate an infant.

How can I make my nursery feel cozy?

You can add coziness by layering tactile textures such as a chunky knit throw blanket, linen curtains, a plush rug, and warm-toned lighting.

What type of lighting is best for a baby’s room?

Dimmable fixtures with warm-toned bulbs rated at 2700K or lower work best. They mimic the glow of sunset and encourage natural melatonin production.

How do I keep a nursery looking minimal and calm?

Use clever storage solutions like woven baskets, canvas bins, and lidded boxes to hide clutter and keep horizontal surfaces completely clear.

Are houseplants safe to use in a nursery?

Yes, as long as you choose non-toxic, pet-safe, and air-purifying varieties like parlor palms and place them safely out of your baby’s reach on high shelves.

How can I decorate nursery walls without overstimulating the baby?

Opt for a few select pieces of art, such as gentle watercolor landscapes or simple botanical illustrations in secure, shatterproof frames, rather than a busy gallery wall.

Baby Fitted Sheets: What Parents Should Look For (Ultimate Buying Guide)

0

Baby Fitted Sheets: What Parents Should Look For (Ultimate Buying Guide)

Introduction

The importance of a safe and cozy sleep space

Creating a nurturing nursery is one of the most exciting parts of preparing for a new baby. Parents spend countless hours researching cribs, soothing mobiles, and blackout curtains to ensure their little one gets the rest they need. Yet, one of the most fundamental elements of the nursery often gets overlooked. For more ideas on organizing your nursery setup, read our guide on essential furniture for a functional nursery. Selecting the right baby fitted sheets plays a massive role in your infant’s daily comfort and safety.

Your baby will spend up to sixteen or seventeen hours a day sleeping during those first few months. Because their skin is delicate and their bodies are still developing temperature regulation, the fabric resting against them matters deeply. Beyond pure comfort, sleep safety is paramount for every parent navigating the newborn fog.

Why choosing the right baby fitted sheet matters more than you think

It is easy to assume that all crib sheets are essentially the same, but material quality, elasticity, and weave make a tremendous difference. A poorly made sheet can shrink in the wash, lose its stretch, or worse, pull away from the mattress corners and create a suffocation hazard. Investing time into understanding baby fitted sheets ensures peace of mind every time you lay your baby down for a nap or bedtime.

Why Crib Sheet Safety is Priority Number One

Adhering to safe sleep guidelines (AAP recommendations)

The American Academy of Pediatrics provides strict safe sleep guidelines to reduce the risk of Sudden Infant Death Syndrome and suffocation. The core message is clear: keep the crib bare. This means no pillows, heavy blankets, stuffed animals, or loose positioning devices. Because the crib must remain free of extra items, the crib sheet becomes the single piece of fabric your baby interacts with directly.

Following these recommendations means choosing a sheet that fits snugly over a firm, flat mattress. You should never use a flat sheet tucked in around a mattress, as it can easily come loose. A dedicated baby fitted sheet is an absolute necessity.

The danger of loose bedding and ill-fitting sheets

An ill-fitting sheet is more than just a minor annoyance; it is a genuine safety hazard. If a sheet is too large for the mattress, it can bunch up or slip off the corners while the baby moves around. This excess fabric can potentially cover an infant’s nose and mouth.

Always inspect the dimensions of your mattress before purchasing bedding. Standard crib mattresses measure approximately twenty-eight inches by fifty-two inches, but thickness can vary. Always match your sheet size to your specific mattress dimensions.

Deep pockets and secure elastic bands: Your best defense

When shopping for baby fitted sheets, look for options featuring fully encased, thick elastic bands that run the entire perimeter of the sheet rather than just at the corners. This ensures the fabric hugs the underside of the mattress tightly and securely. Deep pockets are also beneficial if you use a waterproof mattress protector or a slightly thicker organic mattress.

Key Factors to Consider When Buying Baby Fitted Sheets

1. Material and Fabric Breathability

Babies cannot regulate their body temperature as efficiently as adults. Breathable fabrics help prevent overheating during sleep, which is a critical factor in safe sleep practices. Natural fibers allow air to circulate freely around your baby, keeping them comfortable throughout the night.

2. Safety Certifications (OEKO-TEX, GOTS Organic)

Because your baby’s skin absorbs whatever it touches, chemical-free textiles are essential. Look for certifications like OEKO-TEX Standard 100, which tests for harmful substances, or GOTS (Global Organic Textile Standard), which ensures organic integrity from harvest to manufacturing. These labels give parents confidence that no toxic dyes or pesticides are near their baby. To learn more about selecting safe materials for your little one, check out our guide on how to choose safe skin care products for babies.

3. Fit and Mattress Dimensions (Standard crib vs. mini crib)

Not all baby beds are created equal. While standard cribs dominate the market, mini cribs, portable play yards, and bassinets require entirely different sheet sizes. Always double-check product labels to ensure you are buying the correct size for your specific sleeping apparatus.

4. Durability and Ease of Washing

Prepare yourself for frequent laundry loads. Spit-up, diaper leaks, and midnight blowouts mean your baby fitted sheets will live in the washing machine. Look for fabrics that maintain their softness, elasticity, and color through dozens of hot-water cycles without pilling or tearing.

5. Skin Sensitivity and Hypoallergenic Properties

Eczema and sensitive skin are common in infancy. Hypoallergenic fabrics that lack synthetic blends minimize the risk of skin irritation, rashes, and chafing. Pure, natural materials are always the gentlest choice for a newborn.

Comparing the Best Fabrics for Baby Sheets

Organic Cotton: Soft, breathable, and eco-friendly

Organic cotton is a gold standard in baby bedding. It is cultivated without synthetic pesticides or fertilizers, making it exceptionally gentle on sensitive skin. It offers fantastic breathability and durable everyday performance.

Jersey Knit: Stretchy, t-shirt soft, and easy to fit

Jersey knit sheets feel just like your favorite worn-in cotton t-shirt. They feature a knit weave rather than a traditional woven structure, giving them incredible stretch. This stretch makes wrestling a sheet onto a tight mattress significantly easier during middle-of-the-night sheet changes.

Bamboo Rayon: Temperature-regulating and buttery soft

Bamboo is rapidly growing in popularity for baby products due to its luxurious texture. Bamboo rayon naturally wicks moisture away from the skin and features thermoregulating properties, keeping your baby warm in the winter and cool in the summer.

Muslin Cotton: Lightweight and gets softer with every wash

Muslin is a finely woven, breathable fabric that is wonderful for warmer climates. While it may feel slightly textured at first, high-quality muslin cotton becomes exponentially softer with every single trip through the laundry cycle.

How Many Crib Sheets Do You Actually Need?

The rule of thumb for midnight blowout emergencies

A common parenting question is how many baby fitted sheets to put on the registry. The golden rule is to have at least three to four sheets on hand. This ensures you always have a clean one ready while another is in the wash and a spare for unexpected middle-of-the-night incidents. For more checklist items to prepare for your baby, visit our ultimate baby diapering checklist.

Layering the crib mattress (the waterproof pad trick)

Seasoned parents swear by the layering method for crib mattresses. Start with a waterproof mattress protector, followed by a fitted sheet. Then, add another waterproof pad and a second baby fitted sheet right on top. When a middle-of-the-night mess occurs, you simply strip off the top layer, revealing a clean, dry sheet and mattress pad underneath in seconds.

Care and Maintenance Tips for Baby Sheets

Best laundry practices for baby’s delicate skin

Wash all new baby fitted sheets before their first use to remove any manufacturing residue or dust collected during shipping. Use gentle, fragrance-free laundry detergents formulated specifically for sensitive infant skin. You can find more helpful tips in our complete roadmap to healthy newborn care.

How to avoid shrinkage in organic and cotton fabrics

Natural fibers like cotton and bamboo are prone to shrinking when exposed to high heat. To maintain the precise fit of your baby fitted sheets, wash them in cold or warm water and tumble dry on low heat or line dry when possible.

Avoiding harsh chemical detergents and fabric softeners

Skip liquid fabric softeners and dryer sheets entirely when washing baby bedding. These products leave a chemical film on the fabric fibers, which can reduce breathability, compromise flame-retardant properties, and irritate your baby’s skin.

Conclusion

Summary of what to look for

Choosing the right baby fitted sheets is an important part of setting up a safe and comfortable nursery. By prioritizing safety certifications, breathable natural fabrics, secure elastic, and the correct size, you create an ideal environment for your baby to rest and grow. For guidance on other essential items, check out our guide on top 10 best baby products every new parent needs.

Final checklist for confident shopping

  • Verify your mattress dimensions (standard vs. mini).
  • Look for 100% breathable natural fabrics like organic cotton, bamboo, or jersey.
  • Check for safety certifications such as OEKO-TEX or GOTS.
  • Ensure the sheet features a thick, fully encased elastic hem.
  • Stock up on at least three to four sheets for easy rotation.

Frequently Asked Questions

Why are baby fitted sheets important for sleep safety?

Baby fitted sheets must fit securely over the mattress to prevent loose fabric from creating a suffocation hazard, adhering to safe sleep guidelines.

What is the standard size for a crib mattress sheet?

Standard crib mattresses measure approximately 28 inches by 52 inches, but you should always verify your specific mattress dimensions and thickness before buying.

How many baby fitted sheets do I need to buy?

It is recommended to have at least three to four sheets on hand to handle frequent laundry loads from spit-up, diaper leaks, and middle-of-the-night accidents.

What are the best breathable fabrics for baby sheets?

Top choices include organic cotton for everyday durability, jersey knit for stretchiness, bamboo rayon for temperature regulation, and muslin for warm climates.

What safety certifications should I look for in crib sheets?

Look for OEKO-TEX Standard 100 certification to ensure the fabric is free of harmful substances, and GOTS for verified organic textiles.

How can I prevent baby sheets from shrinking in the wash?

Wash your natural fiber sheets in cold or warm water and tumble dry on low heat or line dry to maintain their precise fit.

10 Clever Open Storage Ideas for a Montessori-Inspired Kids’ Room

0

10 Clever Open Storage Ideas for a Montessori-Inspired Kids’ Room

Designing a child’s bedroom can feel like a constant battle against clutter. Toys overflow from plastic bins, clothes end up on the floor, and favorite books vanish under beds. If you are searching for a calmer, more intentional approach to your child’s living space, a Montessori-inspired open storage system might be the exact solution you need.

By implementing thoughtful montessori open storage ideas, you can transform a chaotic bedroom into a peaceful sanctuary that nurtures your child’s natural desire for independence. When children can easily see, reach, and return their belongings, they naturally learn to care for their environment without constant reminders from adults. For more guidance on creating a well-rounded space, take a look at our essential furniture for a functional nursery guide.

Why Open Storage is the Cornerstone of a Montessori Kids’ Room

At the heart of the Montessori philosophy lies the concept of the prepared environment. Dr. Maria Montessori observed that children thrive when their surroundings are scaled to their physical size and designed for their developmental needs. Traditional bedrooms often feature high closets, deep toy chests, and furniture meant for adults, which inadvertently makes children entirely dependent on caregivers for basic daily tasks.

Visible and accessible open storage completely changes this dynamic. When toys and clothes are displayed clearly on low shelves rather than hidden away in opaque bins, cognitive overwhelm drops significantly. Instead of dumping an entire toy box onto the floor to find one specific block, your child can spot the desired item instantly.

This visibility encourages deep, self-directed play and sustained concentration. When playtime ends, the clear visual cues make the cleanup process intuitive rather than frustrating. Implementing practical and aesthetic open storage solutions is the first step toward raising a confident, self-reliant child. Discover more options for enrichment with our best educational toys for kids age-wise guide.

The 3 Golden Rules of Montessori Organization

Before diving into specific furniture pieces, it helps to understand the core principles governing Montessori organization in the home. Keeping these rules in mind ensures your storage choices actively support your child’s growth.

1. Low to the Ground

Every single item your child uses daily should be physically within their reach. This means ditching high bookcases and towering dressers in favor of furniture that sits low to the floor. If a toddler needs to ask an adult to reach a puzzle or a pair of socks, the environment is no longer fostering independence.

2. Less is More

Overcrowded shelves lead to decision fatigue and frantic toy dumping. The Montessori approach relies heavily on toy rotation. By displaying only a curated selection of eight to ten items at a time and storing the rest away, you keep novelty high and maintain a calm aesthetic.

3. Order and Beauty

Children possess an innate sensitivity to order during their early years. Every toy, book, and garment should have a designated, visible home. Using natural materials like wood, wicker, and cotton adds warmth and beauty, teaching children to value and respect their personal belongings.

7 Inspiring Open Storage Solutions for Your Child’s Room

Bringing these principles to life does not require a complete architectural overhaul. Here are seven practical open storage solutions you can easily integrate into your child’s bedroom or playroom.

1. Low Wooden Shelving Units

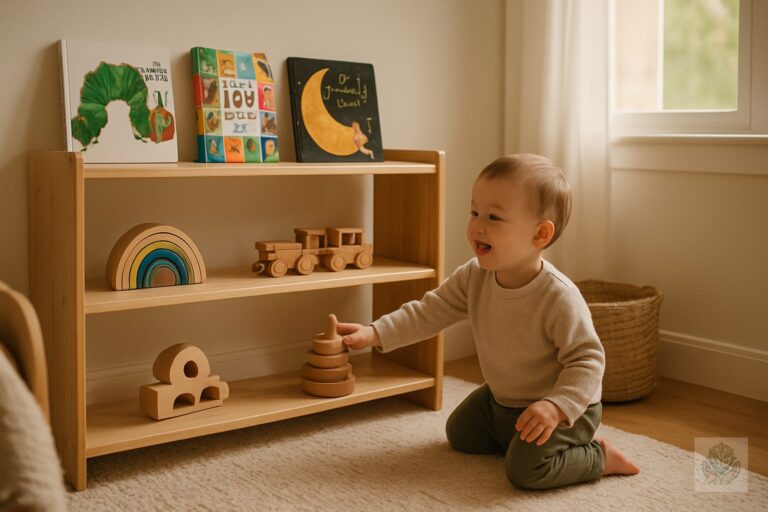
The classic Montessori toy shelf is typically low, wide, and features open compartments. Instead of packing multiple toys into one cubby, place just one activity per section. For example, put a wooden puzzle on its own tray or a basket of musical instruments by itself. This invites deep engagement and makes cleanup remarkably straightforward. You can also explore selections from our Montessori learning toys parent’s guide to find the best items for these shelves.

2. Low Hanging Clothes Rails

Instead of hiding your child’s wardrobe behind closed closet doors, install a low garment rack at their eye level. Hang just three to five weather-appropriate outfits for the week. Allowing your child to choose their own clothes each morning builds vital decision-making skills and self-confidence.

3. Low Open Baskets and Bins

For soft toys, wooden blocks, or art supplies, shallow open baskets work wonders. Natural materials like seagrass or felt bins look wonderful and allow toddlers to peer inside easily. Avoid deep bins where items get lost at the bottom, as these inevitably lead to dumping and frustration.

4. Picture Ledges for Book Display

Traditional bookcases store books with their spines facing out, which can be visually overwhelming for young children. Picture ledges mounted at child height display books with their covers facing forward. This functions like a bookstore display, immediately drawing children in and encouraging a lifelong love of reading. Pair this setup with selections from our ultimate guide to age-appropriate books for toddlers and preschoolers.

5. Capped Cube Storage Used Horizontally

If you already own standard cube storage shelves, simply turn them on their side. By utilizing them horizontally instead of vertically, you instantly lower the height to a safe, child-friendly level while creating a sturdy surface on top for displaying special treasures or activity trays.

6. Peg Rails at Child Height

Installing a simple wooden shaker peg rail low on the wall provides a designated spot for daily items. Hang your child’s everyday jacket, backpack, sun hat, or a basket of dress-up clothes here. It establishes a comforting routine where children know exactly where to place their gear upon walking into their room.

7. Floor-Level Display Trays

Sometimes storage is less about furniture and more about spatial definition. Using shallow wooden trays or woven mats on the floor helps define specific play areas. A puzzle lives on its specific tray, signaling to the child where the work begins and ends.

Adapting Open Storage Across Different Zones

A well-planned Montessori room is divided into distinct zones for sleeping, dressing, reading, and playing. Tailoring your storage to each specific zone maximizes functionality throughout the day.

In the play zone, focus on categorization. Keep building materials together in one open basket, sensory toys on low wooden shelves, and art supplies neatly arranged on trays. In the sleep and clothing zone, simplify wardrobe choices down to a few seasonal options on your low clothing rack. In the reading nook, combine a cozy floor mattress or plush rug with low book slings so your child can easily curl up with a story whenever they desire.

How to Maintain Your Child’s Open Storage System Long-Term

Setting up an organized room is a wonderful milestone, but maintaining the system requires a bit of ongoing strategy. Fortunately, open storage makes maintenance much easier when you follow a few simple habits.

  • Implement a Toy Rotation Schedule: Every few weeks, pack away half of the current toys in opaque storage bins in a closet. Bring out a fresh batch to renew your child’s interest and keep the open shelves from becoming cluttered.
  • Involve Your Toddler in Cleanup: Make tidying up a shared, joyful activity rather than a punishment. Guide your child by naming where items go, such as putting the wooden blocks back into their specific basket. Learn more effective routines in our daily routine for kids by age guide.
  • Adapt as Your Child Grows: Children develop rapidly. Raise your picture ledges, adjust garment rail heights, and swap out toddler toys for board games and independent art supplies as your child reaches new developmental stages.

Empowering Your Child Through Thoughtful Design

Transitioning to montessori open storage ideas is about much more than achieving a clean, Pinterest-worthy aesthetic. It is an intentional design choice that communicates trust and respect to your child. By providing an environment that is accessible, orderly, and beautiful, you grant them the autonomy to manage their own space.

If overhauling an entire bedroom feels daunting, remember that you do not need to do everything at once. Start small by clearing off one low shelf or setting up a single picture ledge for books. Watch how your child naturally interacts with the new setup, and let their engagement guide your next steps. Thoughtful design truly empowers children to become capable, confident learners in their own homes.

Frequently Asked Questions

What is Montessori open storage?

Montessori open storage uses low, accessible shelves, baskets, and racks to display toys and clothes at a child’s eye level, promoting independence and reducing clutter.

Why is open storage important in a Montessori room?

Open storage allows children to easily see, reach, and return their belongings without adult help, fostering self-reliance, decision-making, and deep concentration.

How do I organize toys using Montessori principles?

Keep toys on low shelves with only one activity per tray or basket. Implement a toy rotation schedule to prevent overwhelm and maintain high engagement.

What furniture works best for Montessori open storage?

Low wooden shelving units, horizontal cube storage, low clothing rails, picture ledges for books, and shallow open baskets are ideal Montessori furniture choices.

How high should Montessori storage be?

Storage should always be at the child’s physical eye and reach level, typically very low to the ground, so toddlers can access their items independently.

How do I maintain a Montessori open storage system?

Rotate toys every few weeks, involve your child in simple cleanup routines, and adjust shelf heights as your child grows and develops new skills.

Essential Furniture for a Functional Nursery: The Ultimate Guide for New Parents

0

Essential Furniture for a Functional Nursery: The Ultimate Guide for New Parents

Setting Up Your Baby’s Room: Why Functionality Matters Most

Preparing for a new arrival is an exciting journey, but looking at endless pages of baby gear can quickly become overwhelming. When browsing social media, it is easy to get swept up in picture-perfect, highly stylized nurseries that prioritize aesthetics over practicality. However, as experienced parents will tell you, the secret to a stress-first year lies in choosing the right essential furniture for a functional nursery.

Your baby room layout needs to work hard for you during midnight diaper changes, early morning feedings, and endless rocking sessions. In this guide, we will cut through the marketing noise and focus on what you truly need. We will explore the must-have furniture pieces that balance safety, comfort, and longevity, while also touching on a few optional items that can make your life easier. For more general advice on preparing your home, check out our guide on top 10 best baby products every new parent needs.

1. The Crib: Safety and Sleep Solutions

When it comes to nursery planning, the crib is undoubtedly the star of the show. It is the anchor of the room and the place where your baby will spend a significant amount of time sleeping and developing. Because infant sleep safety is paramount, selecting the right crib requires careful consideration of safety standards and structural integrity.

There are several types of cribs available on the market today:

  • Standard Cribs: Full-sized stationary cribs with fixed sides that offer a sturdy and traditional sleeping environment.
  • Convertible Cribs: Versatile models that transition from a crib to a toddler bed, daybed, and sometimes even a full-size bed.
  • Mini-Cribs: Compact options that are wonderful for smaller nurseries or shared primary bedrooms.
  • Bassinets: Highly portable, smaller sleepers meant for the first few months when your baby stays in your room.

When shopping, always look for JPMA certification and ensure the mattress support adjusts to multiple height levels so you can lower it as your baby begins to sit and stand. Buying a quality convertible crib is a smart long-term investment that will easily adapt as your baby grows into an independent toddler. To ensure your little one’s sleep environment is secure from every angle, review our prevent common household accidents for babies safety guide.

2. The Changing Table & Dresser: Maximizing Storage

Diaper changes happen dozens of times a day, making a well-designed changing station an absolute must-have. Instead of purchasing a single-purpose changing table that your child will outgrow in a year, consider investing in a sturdy double dresser topped with a removable changing tray. This approach provides incredible longevity and maximizes your storage space.

Ergonomics should be a top priority here. A changing surface that sits at a comfortable waist height will save your back and shoulders during those exhausting midnight changes. Organization is equally important for maintaining your sanity during messy moments. Keep diapers, wipes, diaper rash cream, and a change of clothes within arm’s reach by utilizing drawer dividers or stylish countertop baskets. Learn more about everyday diapering routines in our complete guide to baby diapering for new parents.

3. The Glider or Rocking Chair: Comfort for Late Nights

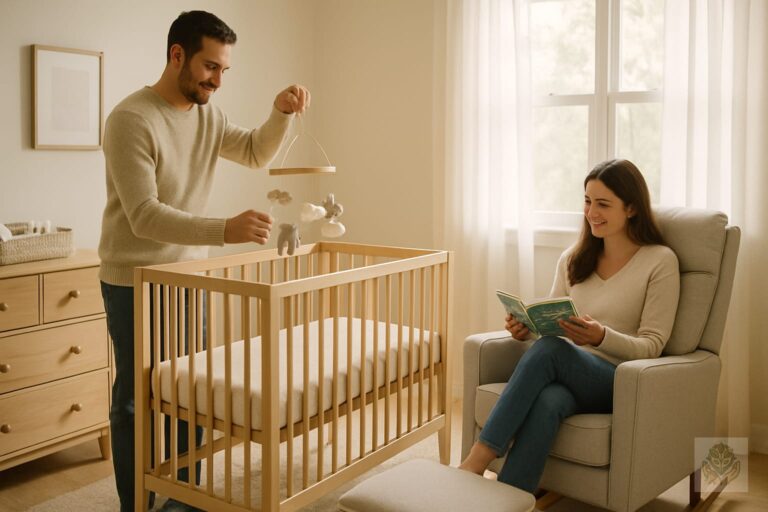
Many first-time parents underestimate just how much time they will spend sitting in the nursery. Whether you are nursing, bottle-feeding, reading bedtime stories, or rocking a colicky baby to sleep, a comfortable seating option is entirely non-negotiable. This is where a high-quality glider or rocking chair becomes your absolute best friend.

When testing out chairs, look for features that promote deep relaxation and physical support. Essential features include built-in lumbar support, stain-resistant performance fabric that easily wipes clean, a smooth and silent gliding or rocking motion, and armrests positioned at a height that supports your arms during feeding. Pair your chair with a matching ottoman for ultimate comfort during those long, quiet nights.

4. Storage and Shelving: Keeping Clutter at Bay

Babies may be tiny, but they come with an astonishing amount of gear, clothing, and toys. Smart storage solutions are essential for keeping the nursery organized and serene. Incorporating versatile storage pieces early on ensures that everything has a designated home.

Consider adding a sturdy bookcase or cube storage unit for picture books, memory boxes, and everyday essentials. Floating wall shelves are another fantastic way to utilize vertical wall space, keeping decorative items out of reach while adding warmth to the room. As your baby transitions into toddlerhood, fabric storage bins and low toy chests will make cleanup time quick and effortless. For ideas on filling those bookshelves as they grow, take a look at our ultimate guide to age-appropriate books for toddlers and preschoolers.

Bonus: Optional Furniture for Specific Needs

While the crib, dresser, and glider form the holy trinity of nursery furniture, a few optional pieces can add extra convenience depending on your home layout and lifestyle.

A bedside bassinet or co-sleeper is immensely helpful for keeping your newborn close during the first few months without needing a full-sized crib in your bedroom. Additionally, a small nursery side table is wonderful for holding your water bottle, burp cloths, a nursing pillow, and the baby monitor. If you have extra square footage, a cozy reading nook chair can also transition nicely as your child grows.

How to Arrange Your Nursery Furniture Safely

Once you have gathered your essential furniture for a functional nursery, safety layout planning must take center stage. The physical arrangement of the room impacts both your daily workflow and your child’s physical safety.

First and foremost, follow the ABCs of nursery safety by anchoring all heavy furniture, such as dressers and bookcases, securely to the wall using heavy-duty anti-tip straps. Position the crib safely away from windows, drapery cords, blinds, and heavy wall art. Finally, design an efficient workflow triangle by placing your crib, changing table, and glider in close proximity so you can navigate the room easily in the dark. For more tips on keeping your overall living space secure, explore our baby safety ultimate guide.

Create a Space That Grows With Your Child

Designing your baby’s room is an exciting milestone, and focusing on quality, safety, and versatility will yield the best results. By investing in the essential furniture for a functional nursery—such as a convertible crib, a long-lasting dresser, and a comfortable glider—you create a nurturing environment that supports both your baby’s development and your own parenting journey. Keep your layout streamlined, prioritize safety above all else, and enjoy creating a wonderful space for your little one. To prepare for the milestones ahead, read through our newborn care ultimate first-time parent guide.

Frequently Asked Questions

What are the most essential furniture pieces for a nursery?

The core essential furniture pieces for a nursery include a safe crib, a sturdy dresser with a changing top, and a comfortable glider or rocking chair for feeding and soothing.

When should I start buying nursery furniture?

It is best to start shopping for nursery furniture around the second trimester, roughly between weeks 16 and 20, to allow plenty of time for shipping, assembly, and off-gassing.

Are convertible cribs worth the investment?

Yes, convertible cribs are a great long-term investment because they transition from a crib into a toddler bed, daybed, and sometimes a full-size bed as your child grows.

How can I make diaper changes more comfortable?

Invest in a waist-height changing table or a double dresser with a changing tray to protect your back, and keep all diapering supplies organized within arm’s reach.

Do I really need a glider or rocking chair in the nursery?

A comfortable seating option is highly recommended because you will spend countless hours nursing, feeding, rocking, and reading bedtime stories to your baby.

How do I ensure my nursery furniture is safe?

Always look for JPMA-certified cribs, keep the crib away from windows and cords, and securely anchor all heavy dressers and bookcases to the wall to prevent tip-over accidents.

11 Easy Hand Strengthening Activities for Preschoolers (Fun & Playful Ideas)

0

11 Easy Hand Strengthening Activities for Preschoolers (Fun & Playful Ideas)

Have you ever watched your preschooler try to open a stubborn juice box, button a winter coat, or grip a pencil for the very first time? You might be surprised to learn that these everyday tasks rely on a foundational physical skill that develops quietly behind the scenes: hand strength. When parents think about preparing children for school, academic milestones like counting and alphabet recognition usually come to mind. However, physical readiness—specifically fine motor development—is just as crucial for a child’s successful transition into kindergarten and beyond.

Developing strong hands is not just about building muscle; it lays the neurological and physical groundwork for future academic success, including neat handwriting, cutting with scissors, and manipulating classroom tools. Fortunately, you do not need expensive therapy equipment or complicated lesson plans to support your child. Discover these easy, play-based hand strengthening activities for preschoolers that you can set up in minutes using everyday household items. To complement these physical exercises with cognitive growth, you might also want to explore our best educational toys for kids age-wise guide for smart learning.

Why Hand Strength Matters for Preschoolers

To understand why little hands need extra workouts, it helps to look at the big picture of physical development. Gross motor skills involve large muscle groups used for running, jumping, and climbing. Conversely, fine motor skills involve the precise coordination of small muscles in the hands, fingers, and wrists. Before a child can master the delicate control needed to write their name, their hand muscles, arches, and finger joints must be strong and stable.

How hand strength supports everyday independence goes far beyond the classroom. Strong hands allow children to independently manage zippers, snap pants, open lunch containers, and tie shoes. When hand muscles are weak, children often experience hand fatigue, making writing or drawing frustrating rather than enjoyable. By incorporating targeted fine motor practice into daily play, we can prevent this frustration.

How do you know if your child needs a little extra support? Signs your preschooler might need fine motor help include complaining that their hand hurts when drawing, avoiding coloring or puzzles, using a whole-fist grasp on a pencil rather than a tripod grip, or struggling to manipulate small objects like buttons and beads.

Top Easy Hand Strengthening Activities Using Household Items

Building finger power does not require drilling exercises or boring worksheets. Children learn best through play, and everyday objects offer incredible opportunities for natural resistance training.

Activity 1: Playdough and Putty Power

Playdough is the ultimate fine motor tool. Encourage your child to roll dough into long snakes, pinch small pieces off with their thumb and index fingers, or hide small plastic beads inside for their fingers to dig out. The resistance of the dough actively builds intrinsic hand muscles.

Activity 2: Spray Bottle Plant Watering

Give your child a spray bottle filled with water and let them mist house plants or outdoor flowers. Squeezing a trigger repeatedly requires isolated finger extension and tremendous hand strength, specifically targeting the hand arches. For more inspiration on keeping children active outdoors, check out our guide on 10 outdoor activities to boost toddler development naturally.

Activity 3: Sponge Squeezing Water Transfer

Set up two bowls—one filled with water and one empty. Show your child how to submerge a kitchen sponge, lift it, and squeeze the water into the empty bowl. This fantastic activity combines gross motor reach with intense hand-squeezing action.

Activity 4: Tearing Paper Art

Save junk mail, colorful magazines, or construction paper and invite your child to tear them into strips and small pieces. Tearing paper builds bilateral coordination—using both hands to do opposite movements—while developing finger pinch strength.

Activity 5: Clothespin Matching Games

Write numbers or letters on the edge of a shoebox and matching ones on clothespins, then ask your child to clip them to the correct spot. Squeezing a clothespin is an exceptional exercise for developing an isolated pincer grasp. You can find more early learning tasks in our ultimate complete guide to preschool activities for early learning.

Playful Fine Motor Games to Build Grip Strength

When children are fully engaged in a game, they happily push through physical challenges that might otherwise feel like hard work. Try these playful grip-builders during your next quiet time.

Activity 6: Sticker Peeling and Sticking

Peeling stickers off a glossy sheet requires incredible fine motor precision. Children must use their fingertips to find an edge, lift it, and place it down carefully, which strengthens the ulnar side stability of the hand.

Activity 7: Pipe Cleaner Colanders

Flip a kitchen colander upside down and give your child a handful of colorful pipe cleaners. Let them push the pipe cleaners through the tiny holes and pull them out the other side. The varying resistance levels provide wonderful tactile and muscular feedback.

Activity 8: Q-Tip Painting

Swap out thick paintbrushes for cotton swabs. Holding a Q-tip requires a tripod grasp similar to a pencil, and dipping and dotting paint onto paper encourages fine motor control and finger dexterity.

Activity 9: Building with LEGO or Duplo Bricks

Construction toys are fantastic for hand development. Pushing building blocks together and pulling them apart requires significant finger power and hand-eye coordination. To expand your toy collection for skill-building, review our ultimate beginner’s guide to buying age-appropriate toys.

Kitchen-Based Hand Exercises Disguised as Fun

The kitchen is a goldmine for occupational therapy-inspired activities disguised as everyday cooking adventures. Involve your child in meal prep with these ideas:

Activity 10: Using Child-Safe Tongs and Tweezers

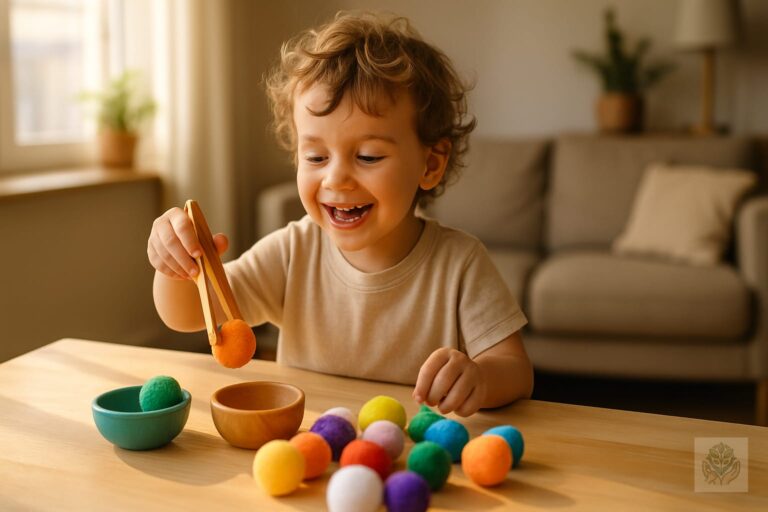
Set out a bowl of dry cereal, cotton balls, or large pom-poms and challenge your child to transfer them from one container to another using salad tongs or oversized tweezers. This directly strengthens the fingers used for holding writing utensils.

Activity 11: Rolling Out Cookie Dough with Small Mini Rolling Pins

Give your preschooler their own patch of dough and a small rolling pin. Pushing down and rolling forward requires upper body strength combined with wrist and palm stability.

Activity 12: Opening and Closing Small Containers

Gather clean plastic spice jars, small Tupperware containers, and twist-cap bottles. Let your child practice unscrewing lids, popping snap-tops open, and securing them back down.

Tips for Keeping Hand Exercises Engaging for Young Children

As you introduce these hand strengthening activities, keeping the experience positive and low-pressure is essential. Here are a few expert tips for success:

  • Keep it short: Five to ten minutes a day is plenty for young children whose hands tire quickly.
  • Follow the child’s lead: Turn daily chores, like putting away groceries or sorting laundry, into playful hand games.
  • Avoid frustration: Grade the difficulty to match your child’s current ability. For example, use soft, pliable dough before introducing stiff therapy putty.

Conclusion

Supporting your child’s physical development does not require rigid schedules or expensive curriculum books. By weaving simple, playful hand strengthening activities for preschoolers into your daily routine, you give your child the tools they need for academic confidence and everyday independence. Whether you hand them a pair of tongs during snack time or set up a sticker-peeling challenge during a quiet afternoon, these small moments of play add up to big physical gains. For a structured approach to structuring their day around these activities, check out our guide on daily routine for kids by age (1–6 years complete guide).

Ready to get started? Pick just one activity from this list to try with your child today and watch their fine motor skills blossom!

Frequently Asked Questions

Why is hand strength important for preschoolers?

Hand strength is essential for developing fine motor skills, which are required for writing, cutting with scissors, buttoning coats, and opening lunch containers independently.

What are signs of weak hand muscles in children?

Signs include complaining of hand fatigue while drawing, avoiding coloring or puzzles, using a whole-fist grasp on pencils, and struggling with buttons or zippers.

How can I improve my preschooler’s hand strength at home?

You can use everyday items like playdough, spray bottles, kitchen sponges, clothespins, and tongs to naturally build hand and finger muscles through play.

How long should hand strengthening exercises take?

Keep sessions short and engaging. Five to ten minutes a day is plenty for young children whose hands tire quickly.

Can playdough help build hand strength?

Yes! Rolling dough into snakes, pinching pieces, and hiding beads inside actively builds intrinsic hand muscles and finger dexterity.

What kitchen items can be used for fine motor practice?

Child-safe tongs, mini rolling pins, small Tupperware containers, and spice jars are fantastic kitchen tools for building grip strength.

The Ultimate Guide to Age-Appropriate Books for Toddlers and Preschoolers

0

The Ultimate Guide to Age-Appropriate Books for Toddlers and Preschoolers

Introduction

Choosing the right books for your little ones can feel overwhelming with thousands of colorful options lining bookstore shelves. However, finding age-appropriate books for toddlers and preschoolers makes a massive difference in how children connect with stories. When books match a child’s developmental stage, reading transforms from a chore into a magical, bonding experience.

Why Early Reading Matters

As a parent or caregiver, you hold the key to unlocking a lifelong love of learning. Reading aloud to young children builds critical vocabulary, improves listening skills, and sparks imagination. Furthermore, shared reading sessions strengthen emotional bonds between you and your child. Long before children learn to read words on a page, they learn to love the rhythm of language through your voice.

How Children’s Reading Needs Change from Toddlerhood to Preschool

A one-year-old and a four-year-old process the world in entirely different ways. Younger toddlers need tactile experiences and simple concepts, while preschoolers are ready for engaging plots, humor, and complex emotions. Understanding these evolving needs helps you curate a home library that grows right alongside your child. For older children, you can also explore our top kids study tables & chairs for better focus (2026 buying guide).

Understanding Reading Milestones by Age

Every child develops at their own unique pace, but general milestones can guide you toward the right literature for your growing reader.

12 to 18 Months: Sensory Exploration and Board Books

At this stage, babies and young toddlers experience books with all their senses. They chew them, drop them, and pat the pages. Books are physical objects to explore rather than stories to follow linearly. Sturdy board books with high-contrast images or photographs of familiar objects capture their fleeting attention spans.

18 to 24 Months: Simple Stories and Repetitive Text

As language explodes, older toddlers begin recognizing familiar words and phrases. They love predictable text that allows them to chime in. Simple narratives about daily routines like brushing teeth, going to bed, or eating meals resonate deeply during this phase.

2 to 3 Years: Plot Development and Relatable Characters

Two-year-olds start following basic storylines. They connect with characters experiencing big emotions like anger, frustration, or excitement. Books that reflect their daily social experiences help them navigate new environments like daycare or playground interactions. You can also review how to handle child tantrums without shouting (proven methods) to help manage big feelings during this age.

3 to 5 Years: Imagination, Concepts, and Early Literacy

Preschoolers love adventure, silliness, and imaginative tales. They can sit through longer narratives and begin predicting what happens next. At this stage, children also notice letters, rhyming sounds, and numbers woven into stories, laying the groundwork for formal reading instruction. For more learning resources, check out our guide on preschool activities for early learning.

Best Books for Younger Toddlers (Ages 1–2)

Selecting books for younger toddlers requires focusing on physical durability and sensory engagement.

Durability Matters: Top Sturdy Board Books

Paper pages do not survive a determined one-year-old. Invest in thick board books with rounded corners that withstand enthusiastic page-turning and occasional teething. Classics like Goodnight Moon by Margaret Wise Brown and Pat the Bunny by Dorothy Kunhardt are absolute staples that stand the test of time.

Sensory and Touch-and-Feel Books

Tactile engagement keeps young toddlers glued to the page. Look for books featuring fuzzy fur, bumpy scales, or shiny foil. These sensory elements encourage fine motor skill development while keeping storytime interactive and fun. You can expand on these concepts with ideas from our texture coloring activities for toddlers.

Books with Rhythm, Rhyme, and Repetition

Toddlers are naturally drawn to musical language. Books featuring rhythmic text and catchy refrains help children anticipate words, which builds early phonological awareness. Sandra Boynton board books, such as Boynton on Board or Moo, Baa, La La La!, are perfect examples of playful, rhythmic reading.

Best Books for Older Toddlers (Ages 2–3)

As children approach age three, their emotional worlds expand, making storytime a wonderful tool for social-emotional growth.

Social-Emotional Learning: Managing Big Feelings

Two-year-olds experience intense emotions without always having the vocabulary to express them. Books addressing tantrums, sharing, and fear of the dark provide a safe mirror for their feelings. Titles like Llama Llama Mad at Mama by Anna Dewdney or Hands Are Not for Humping by Martine Agassi help guide positive behavior in a gentle, accessible way.

Bedtime Stories to Calm the Routine

Wind-down books signal to the brain that sleep is approaching. Look for soothing, quiet stories with gentle language and calming illustrations. Good Night, Gorilla by Peggy Rathmann or Where’s Spot? by Eric Hill offer comforting bedtime engagement without overstimulating tired minds. If bedtime continues to be a struggle, you can also read our guide on how to help a child who fights bedtime.

Interactive Lift-the-Flap and Sound Books

Interactive elements keep restless toddlers seated. Lifting flaps to find hidden objects builds cognitive skills and object permanence. Just remember to supervise flap-heavy books to prevent accidental rips while your child learns gentle handling skills.

Best Books for Preschoolers (Ages 3–5)

Preschoolers are ready for rich storytelling, imaginative adventures, and books that stimulate critical thinking.

Engaging Picture Books with Strong Plots

Look for narratives with a clear beginning, middle, and end. Books like Where the Wild Things Are by Maurice Sendak or The Gruffalo by Julia Donaldson captivate preschoolers with imaginative plots and memorable characters who solve problems.

Early STEM and Educational Concepts

Preschoolers love learning how the world works. Incorporate books that introduce counting, colors, nature, and simple scientific concepts. Eric Carle’s The Very Hungry Caterpillar naturally weaves counting, days of the week, and life cycles into a delightful narrative. You can also explore best educational toys for kids (age-wise guide for smart learning) to further support their cognitive growth.

Humorous Books That Make Preschoolers Laugh

Humor is a powerful engagement tool for four- and five-year-olds. Silly books featuring absurd premises or quirky characters build a lifelong association of reading with pure joy. Mo Willems’ Elephant and Piggie series or The Pigeon Finds a Hot Dog! guarantee giggles during every reading session.

Tips for Reading Aloud to Toddlers and Preschoolers

Having the right books is only half the battle; knowing how to read them aloud transforms ordinary storytime into an unforgettable learning adventure.

How to Keep Wriggly Toddlers Engaged

Never stress if your toddler refuses to sit still or wants to skip pages. Let them hold the book, turn the pages, or stand up while you read. Use silly voices, sound effects, and dramatic pauses to capture their attention and draw them back into the narrative.

Asking Open-Ended Questions to Build Comprehension

Pause during the story to ask engaging questions rather than just reading straight through. Ask questions like, What do you think happens next? or How do you think the bear feels right now? This practice builds critical thinking and reading comprehension skills.

Making Storytime Part of the Daily Routine

Consistency creates habit. Weave reading into your daily rhythm, whether it is right after naptime, during an afternoon quiet hour, or tucked snugly into the bedtime routine. Even ten minutes a day makes a remarkable impact on early literacy development. For structuring the rest of their day, refer to our daily routine for kids by age (1–6 years complete guide).

Conclusion

Finding the ideal age-appropriate books for toddlers and preschoolers sets the foundation for a lifetime of joyful reading and learning. By matching your child’s developmental milestones with durable board books, emotional narratives, or imaginative picture books, you foster both a love of literature and a deeper connection with your little one. Start small, follow your child’s interests, and enjoy the wonderful journey of shared storytelling.

Call to Action: Share Your Child’s Favorite Book

What is your child’s all-time favorite bedtime story? Did we miss a must-read classic on our list? Drop a comment below and share your top book recommendations with our parenting community!

Frequently Asked Questions

What kind of books are best for one-year-old toddlers?

Sturdy board books with high-contrast images, simple photographs, and sensory elements like touch-and-feel textures are ideal for one-year-olds who explore books physically.

How do reading needs change from toddlerhood to preschool?

Younger toddlers need tactile board books and simple routines, while preschoolers enjoy imaginative plots, humor, relatable characters, and early educational concepts.

Why are board books important for toddlers?

Board books feature thick pages and rounded corners that withstand teething, dropping, and enthusiastic page-turning by young children.

How can I keep my wriggly toddler engaged during storytime?

Let them hold the book, use silly voices and sound effects, and do not stress if they want to skip pages or stand up while you read.

What are some good books for helping toddlers manage big emotions?

Books like Llama Llama Mad at Mama and Hands Are Not for Humping help two-year-olds navigate tantrums, big feelings, and social interactions.

At what age should I introduce picture books with plots?

Children around age two to three begin following basic storylines, making it a great time to introduce relatable characters and simple narratives.

How to Handle a Child Who Refuses to Listen: Proven Strategies for Parents

“`html

How to Handle a Child Who Refuses to Listen: Proven Strategies for Parents

Introduction

Picture this: you have asked your child to put on their shoes for the third time. They are sitting right in front of you, staring directly at the television screen as if you are speaking a foreign language. Your blood pressure rises, your patience wears thin, and you find yourself fighting the urge to raise your voice. If this scenario sounds familiar, you are definitely not alone. Every parent on earth has faced the universal struggle of dealing with a child who refuses to listen.

The Universal Struggle: Why Won’t They Listen?

It is easy to interpret a child ignoring your words as blatant disrespect or outright defiance. However, childhood development experts remind us that a child who refuses to listen is rarely trying to give parents a hard time. More often than not, they are simply having a hard time. Understanding the underlying mechanisms behind listening struggles can completely transform how you approach discipline and daily communication at home.

What You Will Learn in This Guide

In this comprehensive guide, we will explore the root causes behind why children ignore instructions. You will discover immediate, in-the-moment tactics to gain cooperation without resorting to yelling, as well as proactive parenting strategies to foster a more responsive environment. By shifting your approach, you can build stronger connection, reduce household stress, and teach your child vital self-regulation skills. Learn more about effective approaches in our guide on positive parenting techniques that actually work.

Why Kids Don’t Listen (The Root Cause)

Before implementing new behavior management strategies, it helps to understand what is happening inside your child’s mind and body. Children do not process requests the exact same way adults do. When we figure out why listening is so difficult in certain moments, we can tailor our responses to be much more effective.

Developmental Stages: Brain Development and Impulse Control

The human brain develops from the bottom up, meaning the emotional centers develop long before the logical, reasoning parts of the brain. The prefrontal cortex, which is responsible for impulse control, focus, and working memory, does not fully mature until a person reaches their mid-twenties. When young children are engaged in play, their developing brains experience intense hyper-focus. Shifting attention away from something fun requires a massive amount of executive functioning power that toddlers and young children simply have not mastered yet.

Sensory Overload and Transition Trouble

Sometimes, a child who refuses to listen is dealing with sensory overload. A loud classroom, a busy morning routine, or the bright lights of a grocery store can overstimulate their nervous system. When kids are overwhelmed, their fight-or-flight response activates, impairing their ability to process verbal commands. Furthermore, transitions are notoriously difficult for children. Moving from a preferred activity, like playing video games, to a non-preferred activity, like cleaning up, feels genuinely painful to a child.

The ‘Background Noise’ Effect: Over-Nagging and Yelling

Parents often fall into the trap of repeating instructions multiple times. When we say things like clean your room over and over while walking around the house, our voices become background noise. Children quickly learn that they do not need to respond to the first, second, or even third request because nothing actually happens until the parent raises their voice in frustration. Breaking this cycle requires intentional changes in how and when we deliver our expectations.

Immediate Tactics: What to Do in the Moment

When you are in the thick of a power struggle and need immediate cooperation, certain communication techniques work wonders. Instead of escalating the tension, these gentle parenting strategies help you regain your child’s attention effectively.

Get Down to Their Eye Level

Yelling instructions from across the kitchen rarely works. To truly capture your child’s attention, physically drop down to their eye level. Gently place a hand on their shoulder to provide a comforting sensory anchor. This simple action signals to their nervous system that it is time to tune in, and it establishes a respectful connection before any demands are made.

Use the ‘Connect Before You Direct’ Method

Children struggle to pivot when they feel disconnected from us. Before launching into a command, take a moment to join their world. Say something like, wow, you are building an incredible tower with those blocks, or notice what movie they are watching. Once you have established eye contact and a moment of genuine connection, transition smoothly into your instruction.

Keep Instructions Short, Clear, and Positive

Little brains have limited working memory. Multi-step directions like go upstairs, brush your teeth, put on your pajamas, and pick up your dirty clothes are guaranteed to fail. Break tasks down into bite-sized pieces. Furthermore, tell your child what to do rather than what not to do. Instead of saying stop running in the hallway, try walking feet, please.

The Power of the Pause: Give Them Processing Time

After you give a direction, stop talking. Resist the urge to repeat yourself, rephrase, or lecture. Count to five slowly in your head to give your child adequate processing time to translate your words into an action plan. Often, parents jump back in too quickly, which interrupts the child’s thought process and triggers fresh resistance.

Proactive Strategies to Encourage Better Listening

While in-the-moment tactics are essential, establishing long-term habits will dramatically reduce the frequency of listening battles. Proactive routines create a predictable, low-stress environment where cooperation becomes the default behavior.

Establish Predictable Routines

Children thrive on predictability. When mornings, bedtimes, and transitions follow a familiar rhythm, kids do not feel like random demands are constantly being dropped on them. Create visual routine charts together so your child can check off tasks independently, shifting the authority figure from you to the schedule. You can also explore structured approaches like a daily routine for kids by age to keep your day organized.

Involve Them in the Process (Give Choices)

Power struggles often stem from a deep human desire for autonomy. You can satisfy your child’s need for control by offering limited, guided choices. Instead of asking if they are ready to get dressed, ask whether they want to wear the blue shirt or the striped shirt today. They still get dressed, but they feel empowered in the decision-making process.

Use Visual Cues and Timers for Transitions

Auditory warnings like five more minutes can be abstract for young children. Visual timers, hourglasses, or transition songs provide concrete representations of time passing. When the visual timer runs out, the timer tells them it is time to transition, which minimizes the amount of direct nagging required from parents.

Catch Them Being Good: Positive Reinforcement

We often give our children the most attention when they are misbehaving. Shift this dynamic by actively catching them when they listen the first time. Offer specific, heartfelt praise such as, I love how you turned off the television right away when I asked; that showed so much responsibility. Positive reinforcement builds self-esteem and encourages them to repeat that cooperative behavior.

What NOT to Do When Your Child Refuses to Listen

Knowing what approaches to avoid is just as important as knowing what strategies to implement. Steering clear of common communication traps will save you from escalating minor disagreements into major emotional outbursts.

Avoid the Yelling Trap

It is completely normal to feel overwhelmed, but yelling trains your child’s brain to tune you out until your voice reaches a certain decibel level. When you raise your voice, it activates the child’s stress response, making them more likely to fight back, shut down, or flee rather than listen and learn. For alternative methods, review these gentle discipline strategies to guide your child without yelling.

Don’t Make Idle Threats or Empty Warnings

Threatening punishments that you have no intention of following through on, such as we are never leaving the house again, completely undermines your credibility. Children quickly learn to call your bluff. Stick to realistic, logical consequences that directly relate to the situation.

Refrain from Negotiating Mid-Meltdown

When a child is deep in a emotional meltdown or flat-out refusing to listen, rational conversation goes out the window. Do not try to reason, bargain, or lecture while emotions are running high. Wait until everyone is calm before discussing what happened and how to handle things differently next time. Discover helpful guidance in our tips on how to handle child tantrums without shouting.

When to Seek Professional Support

Most listening struggles are a normal part of childhood development, testing boundaries, and learning self-regulation. However, sometimes persistent defiance points to deeper underlying challenges that require professional guidance.

Distinguishing Normal Defiance vs. Behavioral Red Flags

Normal childhood defiance is situational, predictable around transitions, and responds well to consistent positive parenting techniques. Red flags might include extreme aggression, chronic refusal to follow basic safety rules, severe anxiety around transitions, or an inability to engage in normal daily activities despite your best patience and strategies.

Consulting a Pediatrician or Child Therapist

If you suspect that your child’s listening struggles stem from conditions like ADHD, sensory processing differences, auditory processing disorders, or anxiety, reach out to your pediatrician. A qualified child therapist or occupational therapist can offer tailored assessments, practical coping tools, and specialized support for your family.

Conclusion

Learning how to handle a child who refuses to listen is a journey that requires immense patience, self-reflection, and practice. Remember that changing family dynamics takes time, and setbacks are a completely normal part of the learning process for both you and your child.

Consistency is Key

The most effective parenting strategies only work when applied with steady, calm consistency. By dropping the yelling, connecting before directing, and setting up predictable routines, you are teaching your child invaluable lifelong skills in communication, emotional regulation, and mutual respect. You can also explore our advice on addressing common parenting mistakes and how to fix them for further insights.

Final Encouragement for Parents

Give yourself grace on the hard days. You do not need to be a perfect parent to raise a cooperative, resilient child. Every time you pause, take a deep breath, and approach a challenging moment with empathy, you are strengthening your relationship and building a foundation of trust that will last a lifetime. For additional guidance, read our overview of the complete guide to managing everyday behavior challenges in kids.

“`

Frequently Asked Questions

Why does my child completely ignore me when I speak?

Children often ignore instructions due to immature brain development, sensory overload, or difficulty with transitions. When they are hyper-focused on play, their prefrontal cortex struggles to shift attention quickly.

How can I get my child to listen without yelling?

Get down to their eye level, establish physical contact like a hand on the shoulder, connect before giving a directive, and keep instructions short, positive, and clear.

What is the ‘connect before you direct’ method?

It is a technique where you join your child’s current world or activity for a brief moment to build emotional connection before asking them to transition to a new task.

Why do multi-step directions fail with young children?

Young children have limited working memory. Giving multiple commands at once overwhelms their cognitive capacity, leading to frustration and apparent defiance.

How do I handle a child who refuses to transition away from screens?

Use visual timers or countdowns instead of verbal warnings. Predictable routines and concrete representations of time help children prepare mentally for upcoming transitions.

When should I seek professional help for persistent defiance?

Consult a pediatrician or child therapist if defiance is extreme, involves chronic aggression, or does not improve with consistent positive parenting strategies, as it may indicate underlying conditions like ADHD.