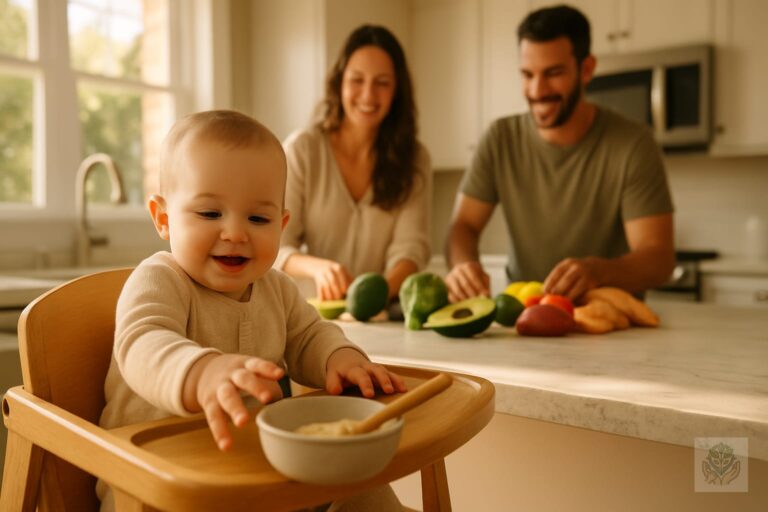
Home Blog Page 19

Baby Meal Planning From Six to Twelve Months: The Ultimate Guide for Busy Parents

0

Baby Meal Planning From Six to Twelve Months: The Ultimate Guide for Busy Parents

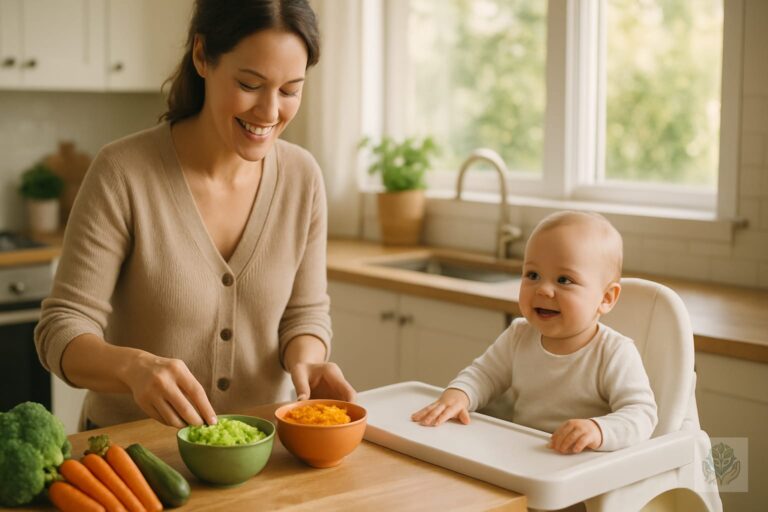
Welcome to one of the most exciting, messy, and rewarding milestones of your parenting journey! Transitioning your little one from an exclusive milk diet to solid foods opens up a whole new world of flavors, textures, and sensory experiences. However, if you are a busy parent juggling work, household chores, and childcare, the thought of baby meal planning can feel completely overwhelming. You might wonder what to feed them, how often to feed them, and how to fit it all into your hectic daily routine.

Take a deep breath. You do not need to be a Michelin-starred chef to raise an adventurous, healthy eater. With a little bit of organization, batch cooking, and realistic expectations, baby meal planning can become a seamless part of your family life. This comprehensive guide will walk you through nutritional milestones, stage-by-stage meal plans, safety guidelines, and practical prep hacks designed specifically for busy parents.

Why Baby Meal Planning Matters at 6 to 12 Months

Between six and twelve months of age, your baby undergoes the most rapid physical and cognitive development of their early life. Their nutritional needs shift dramatically, and breastmilk or formula alone is no longer enough to support their growing body and brain. Thoughtful baby meal planning ensures that your little one receives adequate iron, zinc, and other essential nutrients during this critical window of development.

Planning ahead also saves you precious time and mental energy during the week. Instead of staring blankly into the refrigerator at 5:30 PM wondering what mashed vegetable to throw together, a solid plan gives you direction. It reduces food waste, keeps your grocery budget in check, and helps you introduce a wide variety of wholesome foods before your baby develops natural food preferences and selectivity.

Signs Your Baby Is Ready for Solid Foods

Before diving into baby meal planning, it is crucial to ensure your baby is developmentally ready for solids. Most pediatric health organizations recommend starting solids around six months of age. Look for these key developmental signs:

  • Your baby can sit up independently with little to no support.
  • They have lost the tongue-thrust reflex, which automatically pushes foreign objects out of their mouth.
  • They show a strong interest in what you are eating, often reaching for your food or watching every bite you take.
  • They have good head and neck control.

Understanding the Nutritional Needs: 6 to 12 Months

Navigating infant nutrition can feel like learning a brand-new language. As you embark on your baby meal planning journey, keeping a few foundational nutritional rules in mind will give you total peace of mind.

Milk Still Comes First: Breastmilk and Formula Guidelines

An important rule of thumb for the first year of life is that food before one is just for fun. This catchy phrase reminds us that breastmilk or infant formula remains the primary source of nutrition and calories throughout the entire first year. Solid foods are meant to complement milk feedings, not replace them. Always offer milk feeds before solids during the early months so your baby does not get too full to nurse or take a bottle.

Key Nutrients to Focus On: Iron, Zinc, and Healthy Fats

When you start baby meal planning, your main nutritional focus should be on iron-rich foods. Full-term infants are born with a store of iron inherited from pregnancy, but these stores deplete significantly around six months of age. Breastmilk is naturally low in iron, making it essential to introduce iron-dense foods like pureed meats, mashed beans, iron-fortified cereals, and lentils early on. Zinc and healthy fats, such as avocado and full-fat yogurt, are equally important for brain development and immune support.

Phase 1: The 6-Month-Old Meal Plan (Getting Started)

At six months old, your baby is just dipping their toes into the culinary pool. The goal during this first month is not volume; it is exploration, learning how to swallow, and getting used to new textures and spoon mechanics.

Purees vs. Baby-Led Weaning (BLW): Choosing Your Path

Parents often stress over choosing between traditional purees and baby-led weaning. Traditional purees involve feeding smooth, spoon-fed foods before gradually moving to chunky textures. Baby-led weaning skips purees entirely, allowing the baby to self-feed soft, graspable pieces of table food right from the start. The best approach? Whichever works best for your family. Many parents choose a combined approach, offering smooth purees alongside soft, safe finger foods.

Sample 1-Week Schedule for a 6-Month-Old

During the first few weeks of baby meal planning at six months, you will typically offer just one solid meal per day, gradually working up to two meals by the end of the month.

  • Morning: Wake-up breastmilk or formula feed.
  • Mid-Morning: Nap time.
  • Lunch (or Mid-Day Meal): One to two tablespoons of a single-ingredient puree (e.g., sweet potato or mashed avocado) about 30 to 60 minutes after a milk feed. Follow with a milk top-up if desired.
  • Afternoon: Nap and afternoon milk feed.
  • Evening: Bedtime milk feed.

Best First Foods and Single-Ingredient Purees

Keep initial baby meal planning incredibly simple. Introduce one new food at a time, waiting two to three days before introducing another if you want to carefully monitor for potential food sensitivities. Excellent first foods include:

  • Avocado mashed with a little breastmilk or formula
  • Steamed and pureed sweet potato or butternut squash
  • Smooth applesauce with no added sugar
  • Steamed and pureed carrots
  • Thinly mixed iron-fortified baby oatmeal

Phase 2: The 7 to 9-Month-Old Meal Plan (Exploring Textures)

As your baby approaches the seven to nine-month mark, their oral motor skills improve rapidly. They learn to mash food with their gums and move food from side to side in their mouth. Your baby meal planning should now focus heavily on texture progression. For a detailed breakdown of what to introduce when, consult our first foods timeline.

Moving Beyond Purees: Lumpy Textures and Finger Foods

Say goodbye to perfectly smooth, watery purees! Now is the time to embrace lumpy purees, mashed foods with texture, and soft finger foods. Introducing varied textures now is critical for preventing feeding difficulties and picky eating later in toddlerhood.

Sample Daily Feeding Schedule (Milk + 2 Solid Meals)

By seven to nine months, most babies comfortably eat two solid meals a day alongside four to five milk feedings.

  • Early Morning: Breastmilk or formula feed.
  • Breakfast (approx. 1 hour after milk): Mashed banana with full-fat Greek yogurt or oatmeal mixed with fruit puree.
  • Mid-Day: Nap and mid-day milk feed.
  • Dinner: Shredded chicken with well-cooked, mashed carrots and tiny pieces of well-cooked pasta.
  • Bedtime: Bedtime milk feed.

Easy Homemade Meal Prep Ideas for 7-9 Months

Busy parents love meals that require minimal effort. Try making a batch of vitamin-rich baby recipes such as soft-baked sweet potato wedges, scrambled eggs cut into thin strips, or mashed black beans seasoned with mild cumin. These foods can be prepped in minutes and stored in the refrigerator for quick assembly.

Phase 3: The 10 to 12-Month-Old Meal Plan (Three Meals & Snacks)

Welcome to the final stretch of babyhood! Between ten and twelve months, your baby is transforming into a toddler right before your eyes. Their nutritional needs shift again as solid foods begin to take center stage, though milk remains an important part of their daily routine.

Transitioning to Family Foods and Table Scraps

The beauty of this phase is that baby meal planning can merge directly into family meal planning. With a few simple modifications—like keeping salt to a minimum and avoiding added sugars—your baby can eat what the rest of the household is eating. This saves an immense amount of time and helps your baby feel included at the family dinner table.

Sample Daily Schedule (3 Meals + 1-2 Snacks)

A typical daily schedule for a 10 to 12-month-old includes three structured meals and one or two healthy snacks. To better manage these routines, check out our guide on flexible daily schedules for young children.

  • Breakfast: Scrambled eggs, small pieces of whole-wheat toast with thin nut butter, and sliced ripe berries.
  • Morning Snack: Soft steamed pear slices or whole-milk yogurt.
  • Lunch: Shredded turkey, well-cooked green beans, and soft-cooked quinoa.
  • Afternoon Snack: Cheese cubes or soft avocado pieces.
  • Dinner: Family mealnight—flaked baked salmon, roasted zucchini spears, and mashed potatoes.
  • Bedtime: Nursing session or bottle of formula.

Self-Feeding Milestones and Utensil Practice

At this stage, your baby will likely want to take matters into their own hands. Encourage self-feeding by pre-loading spoons and handing them to your baby, or offering finger foods that require a pincer grasp. Selecting the right baby feeding accessories can help facilitate this learning process. Expect a tremendous amount of mess; it is all part of the sensory learning process.

Safety First: Choking Hazards and Allergen Introduction

Safety is the top priority for any parent navigating baby meal planning. Knowing how to mitigate risks ensures mealtimes remain safe, stress-free, and enjoyable.

Foods to Avoid Before Age One

Certain foods pose severe health risks to infants under the age of one year old. Always avoid the following:

  • Honey: Never give honey to a baby under one due to the risk of infant botulism.
  • Cow’s Milk as a Main Drink: Whole cow’s milk can be used in cooking or baking, but should not replace breastmilk or formula as a primary beverage before twelve months.
  • Choking Hazards: Hard, round, sticky, or slippery foods must be modified. Cut grapes and cherry tomatoes into quarters lengthwise, steam hard vegetables until mushy, and avoid whole nuts, popcorn, and thick dollops of nut butter.

How and When to Introduce Common Allergens (Peanuts, Eggs, Dairy)

Current pediatric guidelines strongly recommend introducing common food allergens early—around six months of age, once your baby has tolerated a few basic foods. Early and regular introduction of allergens like peanuts, eggs, dairy, fish, and soy can significantly reduce the risk of developing food allergies. Introduce allergens one at a time during the day when you can monitor your baby for any unusual reactions.

Pro Tips for Stress-Free Baby Meal Prep

You do not need to spend your entire weekend standing over a stove to master baby meal planning. Smart strategies can make prep effortless.

Batch Cooking and Freezing Baby Food

When you are already cooking vegetables for dinner, steam a double batch. Puree or mash the extra portions and spoon them into clean silicone ice cube trays. Once frozen, pop the cubes out and store them in labeled freezer bags. You can find more inspiration in our homemade healthy baby recipes guide. You can thaw individual cubes whenever you need a quick meal component.

How to Modify Family Meals for Your Baby

The ultimate time-saver in baby meal planning is reverse-engineering family dinners. If you are making a pot of chili, scoop out a portion for your baby before adding hot spices and excess salt. Mash or chop it to the appropriate texture, and dinner is served for everyone at once.

Conclusion

Embarking on the journey of baby meal planning from six to twelve months may feel intimidating at first, but it quickly becomes an enjoyable routine. Remember to keep things simple, focus on nutrient-dense whole foods, and embrace the inevitable mess that comes with learning to eat. Every baby develops at their own unique pace, so trust your instincts and enjoy watching your little one discover the joy of food.

Ready to get organized? Download our free printable 6-12 month meal planner today and take the guesswork out of feeding your growing baby!

Frequently Asked Questions

When should I start baby meal planning for solids?

Most pediatricians recommend starting solids around six months of age when your baby can sit up independently, shows interest in food, and loses the tongue-thrust reflex.

How many meals should a 6-month-old eat?

At six months, start with one solid meal per day, gradually increasing to two meals by the end of the month. Breastmilk or formula remains the primary source of nutrition.

When can I introduce common food allergens?

Current guidelines recommend introducing common allergens like peanuts, eggs, and dairy around six months of age after tolerating a few basic foods, which helps reduce allergy risks.

Can I use cow’s milk as a drink before age one?

No. Cow’s milk should not be given as a primary beverage before twelve months because it lacks essential iron and can strain an infant’s kidneys. It can, however, be used in cooking.

How do I store homemade baby food?

You can batch-cook foods, freeze them in silicone ice cube trays, and then transfer the frozen cubes into labeled freezer bags for quick, easy meal preparation.

What are the main choking hazards to avoid?

Avoid hard, round, sticky, or slippery foods such as whole grapes, cherry tomatoes, popcorn, whole nuts, and thick dollops of nut butter unless properly modified.
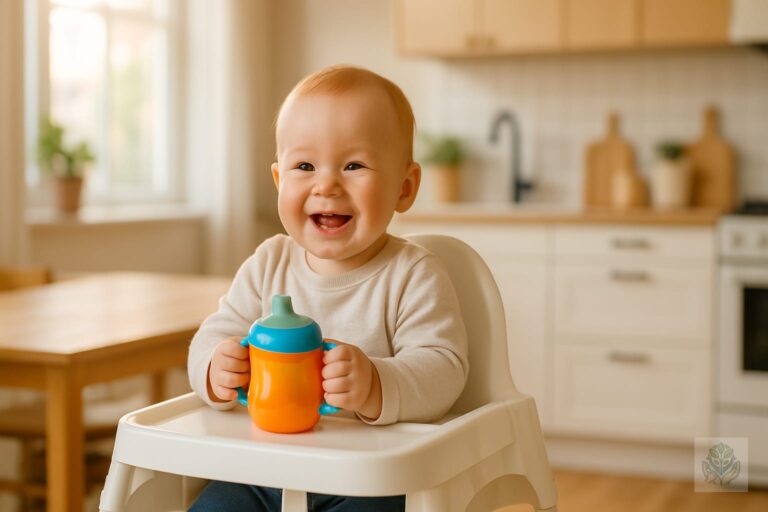
Best Sippy Cups for Babies Learning to Drink: The Ultimate 2024 Guide

0

Best Sippy Cups for Babies Learning to Drink: The Ultimate 2024 Guide

Introduction: Navigating the Sippy Cup Transition

Introducing your baby to their very first cup is a major milestone in their early development. Around six months of age, as you begin your weaning journey and introduce solid foods, your little one will also need to learn how to stay hydrated outside of breastmilk or formula. Finding the best sippy cup can dramatically ease this transition, supporting proper dental health, developing crucial oral motor skills, and cutting down on mealtime messes and parental frustration.

With hundreds of options flooding store shelves, choosing the right container feels overwhelming. Every baby has unique preferences, and what works wonders for one infant might just become a chew toy for another. This comprehensive guide covers everything you need to know about baby cup stages, top-rated products on the market, and expert tips from pediatric specialists to help your family succeed.

When and How to Start: Choosing the Right Cup for Your Baby’s Age

The journey from bottle to independent drinking happens in distinct phases. Understanding these stages helps you select the appropriate tool at the right time, fostering natural motor skill development without unnecessary frustration.

Stage 1: Training Cups and Open Cups

Pediatric feeding experts and speech-language pathologists (SLPs) often recommend introducing an open cup or a very basic training cup as early as six months. While your baby will spill almost everything initially, open-cup practice teaches them how to sip rather than suck. Tiny silicone cups designed for tiny hands allow babies to practice dipping their lips and managing liquid flow with your gentle support.

Stage 2: Weighted Straw Cups

Weighted straw cups are an absolute game-changer for babies learning to drink. Unlike traditional bottles, a weighted straw allows your baby to drink from any angle—even completely upside down. This encourages an intuitive sipping motion, supports oral motor development, and protects developing jaw and teeth alignment far better than hard-spout alternatives.

Stage 3: Spouted Sippy Cups

Spouted cups are the traditional transition choice for many families. They feature a firm or soft mouthpiece that mimics a bottle nipple while requiring a slightly different suction technique. While convenient and widely available, many modern feeding specialists suggest using soft spouts sparingly or skipping straight to straws and 360-degree designs.

Stage 4: 360-Degree Cups

The 360-degree cup encourages big-kid drinking without the messy puddles. These clever cups feature a valve-sealed lid that only releases liquid when your child presses their lips against the rim and sucks. It mimics the mechanics of drinking from a regular open cup while remaining completely leak-proof when dropped or tossed from a high chair.

At a Glance: The Best Sippy Cups for Babies Learning to Drink in 2024

To help you compare your options quickly, we have evaluated the top-performing cups based on leak-proof ratings, ease of cleaning, and safety materials like BPA-free plastics and food-grade silicone.

CategoryProduct NameBest FeatureMaterial
Best Weighted StrawMunchkin Tip & SipAny-angle drinkingBPA-Free Plastic
Best 360-Degree CupMunchkin Miracle 360Dentist-approved rimPlastic & Silicone
Best Starter CupDr. Brown’s MilestonesRemovable handlesSilicone Spout
Best Stainless SteelPura Kiki Infant BottleUltimate durabilityPro-Grade Steel
Best Spill-Proof StrawPhilips Avent My BendyAngled lower strawPlastic & Silicone
Best Open TrainerEZPZ Tiny CupSLP recommended100% Silicone

The 6 Best Sippy Cups for Transitioning Babies Reviewed

We have tested and researched the top contenders to bring you our honest reviews of the absolute best sippy cups for babies learning to drink this year.

1. Best Weighted Straw Cup: Munchkin Tip & Sip

The Munchkin Tip & Sip is a beloved staple in many households. The weighted ball at the end of the straw follows the liquid wherever the cup tilts, ensuring your baby gets a drink whether they are sitting upright or lying down on the play mat.

Pros: Excellent for teaching straw-drinking mechanics, ergonomic handles, completely leak-proof when closed properly.

Cons: The straw requires a dedicated cleaning brush and can be tedious to wash thoroughly.

Why we love it: It bridges the gap between bottle feeding and independent straw drinking seamlessly.

2. Best 360-Degree Cup: Munchkin Miracle 360

Recommended widely by pediatric dentists, the Munchkin Miracle 360 supports natural muscle development in the mouth because children drink from the edge just like an adult cup.

Pros: Zero complex valves or spouts to trap mold, easy to assemble, dentist-recommended.

Cons: If dropped hard on a hard floor, the silicone valve can occasionally pop loose and cause a small splash.

Why we love it: It drastically reduces clean-up time while promoting proper oral posture.

3. Best Starter Cup with Handles: Dr. Brown’s Milestones Sippy Cup

Dr. Brown’s is a trusted name in infant feeding, and their Milestones straw and sippy cup line features ultra-soft silicone spouts that are gentle on tender gums.

Pros: Soft spouts that mimic familiar textures, easy-grip removable handles, great transition piece.

Cons: Some babies chew right through the soft silicone spouts over time.

Why we love it: The transition handles give babies a secure grip while they build confidence.

4. Best Stainless Steel Option: Pura Kiki Stainless Steel Bottle

If you want to avoid plastic entirely, the Pura Kiki system is a phenomenal lifetime investment. It transitions effortlessly from a newborn nipple bottle to a straw cup and sippy cup simply by changing the silicone top attachment.

Pros: 100% plastic-free, highly durable, keeps water cool longer.

Cons: Heavier than plastic alternatives for very young babies; higher initial price point.

Why we love it: Unmatched safety, longevity, and environmental sustainability.

5. Best Spill-Proof Spout: Philips Avent My Bendy Straw Cup

The Philips Avent My Bendy straw cup features an integrated anti-leak valve and a uniquely bent lower straw that allows kids to drink comfortably to the very last drop without tipping their heads back too far.

Pros: Ergonomic contoured shape, fewer parts to clean, reliable leak protection.

Cons: The straw components can be tricky to reassemble after sterilization.

Why we love it: Thoughtful design features make independent drinking much easier for toddlers.

6. Best Open Cup Trainer: EZPZ Tiny Cup

Designed by a speech-language pathologist, the EZPZ Tiny Cup is made from soft, flexible silicone sized specifically for infant mouths and hands.

Pros: Weighted base prevents tipping, sensory bumps activate lip closure, safe for warm and cold liquids.

Cons: Not spill-proof; expect water to end up on the high chair tray.

Why we love it: It is the ultimate tool for teaching correct open-cup swallowing patterns from day one.

What to Look for When Buying a Sippy Cup for a Beginner

Choosing the best sippy cup requires balancing your baby’s developmental stage with your own tolerance for cleaning and leaks. Keep these essential factors in mind while shopping:

Material Safety

Ensure any cup you purchase is explicitly labeled BPA-free, BPS-free, and phthalate-free. Food-grade silicone and stainless steel are fantastic, highly durable alternatives to traditional plastics that do not leach chemicals over time.

Ease of Cleaning

Hidden mold is every parent’s nightmare when it comes to baby cups. Look for designs with minimal crevices, removable valves, and dishwasher-safe components. If a cup requires five tiny brushes to clean, you will likely dread using it.

Ergonomics and Weight

Tiny hands need lightweight cups with easy-to-grasp handles, textured grips, or contoured bodies. Heavy stainless steel cups work wonderfully once your toddler has mastered coordination, but lightweight plastic or silicone options are usually better for six-month-old beginners.

Flow Rate and Leak-Proof Technology

A good beginner cup should release liquid with gentle suction or tipping without requiring your baby to strain. Look for reliable anti-colic or anti-leak valves that prevent water from pooling everywhere every time the cup gets dropped.

Tips from Pediatric Feeding Experts: How to Teach Your Baby to Use a Cup

Introducing a new drinking method takes patience, consistency, and plenty of encouragement. Pediatric feeding specialists offer these valuable strategies to make the transition smooth:

  • Start with just one to two ounces of water during mealtimes to avoid overwhelming your baby.
  • Model drinking behavior by letting your baby watch you sip water from a cup enthusiastically.
  • Expect your baby to chew on the spouts or straws initially—this tactile exploration is a normal part of learning.
  • Embrace the mess! Spills are a guaranteed part of the learning process, so waterproof bibs and splash mats are your best friends.
  • Consider skipping hard plastic spouts altogether, as many speech-language pathologists note they can encourage tongue-thrusting patterns similar to bottle nipples.

Frequently Asked Questions (FAQs)

Should I start with a straw cup or a traditional sippy cup?

Many pediatric feeding experts and speech-language pathologists recommend starting with an open cup or a weighted straw cup rather than a traditional spouted sippy cup. Straw cups encourage proper lip seal and tongue retraction, supporting optimal speech and oral motor development.

When should babies completely drop the bottle?

Pediatricians generally recommend transitioning away from bottles entirely between 12 and 18 months of age. Prolonged bottle use past 18 months can increase the risk of tooth decay and interfere with speech development.

How do I prevent mold in my baby’s sippy cup valves?

To prevent mold, disassemble all valves, straws, and silicone gaskets immediately after every use. Wash them thoroughly in hot, soapy water using specialized small brushes, and ensure every component is 100% dry before reassembling and storing.

Finding the right cup for your little one is a journey of trial and error. Whether your baby falls in love with a weighted straw cup or masters the 360-degree design, patience and positive encouragement will lead the way. Celebrate the small victories, keep cleaning simple, and enjoy this exciting milestone in your baby’s growth!

Frequently Asked Questions

Should I start with a straw cup or a traditional sippy cup?

Many pediatric feeding experts recommend starting with an open cup or a weighted straw cup rather than a traditional spouted sippy cup. Straw cups encourage proper lip seal and support optimal oral motor development.

When should babies completely drop the bottle?

Pediatricians generally recommend transitioning away from bottles entirely between 12 and 18 months of age to prevent tooth decay and speech interference.

How do I prevent mold in my baby’s sippy cup valves?

Disassemble all valves, straws, and gaskets immediately after every use. Wash them thoroughly in hot, soapy water and ensure every component is completely dry before reassembling.

At what age can I introduce a sippy cup to my baby?

You can introduce training cups or tiny open cups around 6 months of age when your baby starts eating solid foods and needs extra hydration.

Are stainless steel sippy cups safe for babies?

Yes, high-grade stainless steel cups are extremely safe, durable, and free of harmful chemicals like BPA, BPS, and phthalates.

Why do speech therapists dislike traditional hard spouts?

Traditional hard spouts can encourage tongue-thrusting patterns similar to bottle nipples, whereas straw and open cups promote mature swallowing mechanics.

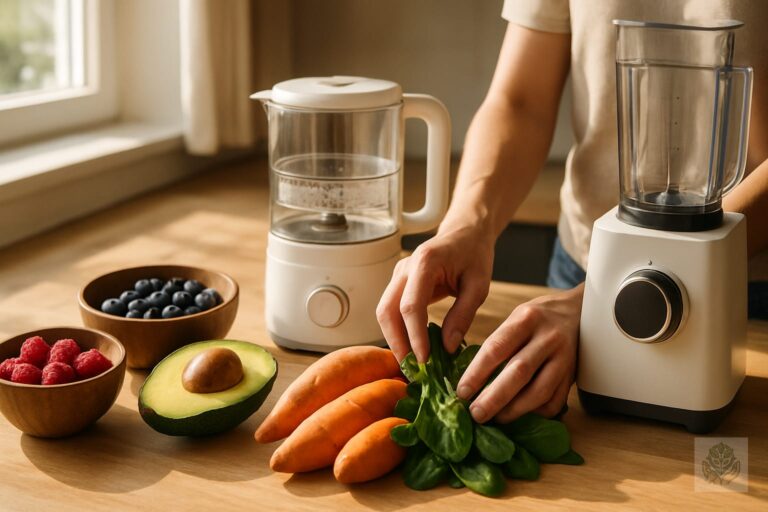
Vitamin-Rich Baby Recipes Using Fresh Ingredients: A Parent’s Guide

0

“`html

Vitamin-Rich Baby Recipes Using Fresh Ingredients: A Parent’s Guide

Introducing solid foods to your little one marks an exciting milestone in your parenting journey. Before you begin, you may want to review our guide to starting your baby’s first foods to ensure you are ready for this transition. As your baby transitions from breast milk or formula, every single bite offers an opportunity to build a strong foundation for lifelong health. Preparing homemade meals packed with nutrients ensures your child receives the absolute best nourishment during their crucial first years of growth.

Many parents feel overwhelmed by the thought of making baby food from scratch. However, crafting vitamin-rich baby recipes using fresh ingredients is simpler and much faster than you might think. For more inspiration, explore our comprehensive guide to homemade healthy baby recipes. By harnessing the natural flavors and colors of whole foods, you provide a sensory-rich eating experience that commercial jars simply cannot match.

Introduction

Why Fresh Ingredients Matter for Your Baby’s Development

Your baby’s brain and body develop at an astonishing rate during their first year. During this rapid growth window, every nutrient plays a specialized role in cognitive development, immune function, and bone strength. Fresh fruits, vegetables, grains, and proteins offer a dense matrix of vitamins and minerals that work synergistically in the body.

When you prepare fresh meals, you preserve the natural vitality of the food. Unlike highly processed alternatives, fresh ingredients expose your baby to subtle shifts in flavor and texture. This early exposure helps prevent picky eating later in toddlerhood, encouraging a curious and adventurous palate right from the start.

The Problem with Store-Bought: Fresh vs. Processed Baby Food

Commercial baby food serves a wonderful purpose for convenience and emergency backup. Yet, the high-heat manufacturing processes required for shelf-stable jars often strip away delicate vitamins, particularly vitamin C and certain B vitamins. Manufacturers often add water, thickeners, or starches to achieve a uniform texture, diluting the overall nutrient density.

In contrast, making baby food at home gives you complete control over what goes into your child’s tummy. You select organic produce when possible, avoid added sugars and hidden sodium, and customize textures to match your baby’s exact developmental stage. Knowing exactly how a meal was prepared brings unmatched peace of mind.

Understanding Your Baby’s Nutritional Needs

Key Vitamins and Minerals for Growing Infants (Iron, Vitamin C, Vitamin A, and Healthy Fats)

As infants reach the six-month mark, their natural iron stores begin to deplete, making dietary iron a top priority. Pairing iron-rich foods like lentils, spinach, or soft meats with vitamin C sources enhances mineral absorption. Vitamin A, found abundantly in orange and dark green vegetables, supports healthy vision and immune defense. For a deeper look at essential nutrients, consult our ultimate guide for new parents on baby nutrition.

Healthy fats are another non-negotiable component of infant nutrition. The developing brain requires high amounts of dietary fat for myelin sheath formation and cognitive processing. Incorporating ingredients like avocado, olive oil, and full-fat yogurt supports this incredible neurological leap.

How Fresh Produce Retains Maximum Nutrients

The journey from farm to table directly impacts the vitamin content of your baby’s meal. Produce harvested at peak ripeness contains the highest concentration of antioxidants and micronutrients. The longer fruits and vegetables sit in transit or on store shelves, the more vitamins degrade.

Sourcing local produce or shopping at farmers markets ensures your ingredients are as fresh as possible. Once home, proper storage and gentle cooking techniques help lock in those precious vitamins, ensuring every spoonful delivers maximum nutritional value.

Essential Kitchen Tools for Making Vitamin-Rich Baby Food

Steamers to Lock in Water-Soluble Vitamins

Boiling vegetables leaches valuable water-soluble vitamins, such as vitamin C and various B vitamins, right out of the food and down the drain. A simple steamer basket preserves these nutrients by cooking vegetables quickly using circulating steam rather than submersion.

Blenders, Food Processors, and Baby Food Mills

Having the right blending equipment makes meal prep effortless. A high-powered blender or food processor whips up silky-smooth purees for younger infants in seconds. If you are just starting to equip your kitchen, see our advice on choosing baby feeding accessories. A manual baby food mill also works wonderfully for travel or for quickly mashing soft table foods on the go.

Safe Storage Solutions (BPA-free containers and freezer trays)

Batch cooking saves busy parents precious time. Invest in high-quality, BPA-free silicone freezer trays with tight-fitting lids to portion out purees. Once frozen, you can pop the cubes out and store them in labeled freezer bags for up to three months.

Top 5 Vitamin-Rich Fresh Ingredients to Include Daily

Avocados (Healthy fats and Vitamin E)

Avocados are a nutritional powerhouse for infants. They provide heart-healthy monounsaturated fats essential for brain development, along with vitamin E for healthy skin and immune support. Their naturally creamy texture requires no cooking, making prep as simple as slicing and mashing.

Sweet Potatoes (Beta-carotene and Vitamin A)

Vibrant orange sweet potatoes delight babies with their natural sweetness. They are loaded with beta-carotene, which the body converts into vitamin A. This vital nutrient protects eye health and supports cellular growth.

Spinach and Kale (Iron and folate)

Dark leafy greens bring a heavy dose of plant-based iron, folate, and calcium to your baby’s bowl. Steam them lightly and blend them into fruit purees to soften their earthy flavor while boosting nutritional density.

Berries (Antioxidants and Vitamin C)

Berries like blueberries, raspberries, and strawberries are antioxidant champions. They protect cells from damage and provide a generous boost of vitamin C. Mash or puree them thoroughly, or serve soft cooked berries to older babies.

Squash and Carrots (Immune-boosting vitamins)

Winter squashes and carrots offer a comforting, mild flavor profile packed with carotenoids. Roasting these vegetables caramelizes their natural sugars, creating a rich flavor that babies adore while delivering a powerful immune-boosting punch.

Easy & Delicious Vitamin-Rich Baby Recipes (By Age)

Stage 1 (6+ months): Sweet Potato and Apple Vitamin C Mash

This gentle, easily digestible recipe combines the beta-carotene of sweet potato with the vitamin C of fresh apples, fitting perfectly into a month-by-month feeding guide for beginners.

  • 1 medium organic sweet potato, peeled and cubed
  • 1 crisp apple, peeled, cored, and cubed
  • A splash of breast milk, formula, or filtered water for thinning

Place the sweet potato and apple cubes into a steamer basket over boiling water. Steam for 12 to 15 minutes until fork-tender. Transfer to a blender or food processor, add the liquid, and blend until completely smooth. Cool before serving.

Stage 2 (8+ months): Avocado, Spinach, and Pear Puree

A brilliant green combination offering healthy fats, iron, and gentle fiber.

  • 1 ripe avocado, pitted and scooped
  • 1 ripe pear, peeled, cored, and lightly steamed
  • 1 small handful of fresh baby spinach, steamed until wilted

Combine the steamed spinach, cooked pear chunks, and raw avocado in a blender. Puree until smooth and creamy. The natural fats in the avocado help your baby absorb fat-soluble vitamins from the spinach.

Stage 3 (10+ months): Roasted Butternut Squash and Carrot Finger Foods

Encourage self-feeding and fine motor skills with soft, roasted finger food sticks. For more help with meal organization, read about planning healthy baby meals for older infants.

  • 1 small butternut squash, peeled and cut into finger-sized batons
  • 3 large carrots, peeled and cut into matching batons
  • 1 tablespoon olive oil

Toss the vegetable batons in olive oil and spread evenly on a baking sheet. Roast at 400 degrees Fahrenheit for 25 to 30 minutes until tender and slightly caramelized. Let cool completely before serving as graspable finger foods.

Toddler Transition (12+ months): Fresh Berry and Spinach Mini Oatmeal Muffins

A wholesome, hand-held breakfast option packed with hidden greens and fresh fruit.

  • 1 cup rolled oats
  • 1 ripe banana, mashed
  • 1/2 cup fresh mixed berries
  • 1 packed cup fresh baby spinach, finely chopped
  • 1 egg
  • 1/2 cup whole milk

Blend the oats into a fine flour consistency, then mix all ingredients together in a bowl. Spoon the batter into a greased mini muffin tin. Bake at 350 degrees Fahrenheit for 12 to 15 minutes. These freeze wonderfully for busy mornings.

Tips for Preparing and Storing Homemade Baby Food Safely

Washing and Sourcing Organic Produce

Babies have developing immune systems, making proper food hygiene essential. Always wash fresh produce thoroughly under running water, even if you plan to peel it, to remove surface dirt and bacteria. Choosing organic varieties when possible helps minimize your baby’s exposure to synthetic pesticide residues. Keeping your kitchen environment safe is just one part of the ultimate guide to baby safety for new parents.

Best Cooking Methods to Prevent Nutrient Loss (Steaming vs. Boiling)

Prioritize steaming, roasting, or baking over boiling whenever possible. These dry-heat and gentle vapor methods preserve maximum vitamin retention. If you do use cooking water for pureeing, use the vitamin-infused residual water from steaming rather than plain tap water.

Freezing and Reheating Guidelines

Store homemade baby food in airtight containers in the refrigerator for up to 48 hours, or freeze portions immediately for longer storage. Thaw frozen portions overnight in the refrigerator. Reheat until steaming hot, then let it cool down completely before offering it to your baby.

Conclusion

Summary of Benefits

Embracing home-cooked meals using vitamin-rich baby recipes using fresh ingredients empowers you to provide optimal nutrition during your child’s most formative months. From boosting brain development with healthy fats to strengthening immune function with vibrant produce, your kitchen efforts yield profound rewards and contribute to a complete roadmap to healthy newborn care.

Call to Action: Share Your Favorite Recipe or Join Our Parenting Newsletter

What fresh ingredients does your little one enjoy the most? Drop a comment below to share your favorite homemade baby food combination. Don’t forget to subscribe to our parenting newsletter for weekly nutritious recipes, developmental milestones, and expert feeding tips straight to your inbox.

“`

Frequently Asked Questions

When can I start making vitamin-rich baby recipes using fresh ingredients?

Most pediatricians recommend introducing solid foods around six months of age. Starting with single-ingredient purees allows you to monitor for any potential food allergies while providing essential vitamins and minerals.

Why is steaming better than boiling for baby food?

Steaming preserves water-soluble vitamins like vitamin C and B vitamins. Boiling can leach these vital nutrients directly out of the food and down the drain, reducing the overall nutritional value of your baby’s meal.

How do I safely store homemade baby food?

Store fresh baby food in airtight, BPA-free containers in the refrigerator for up to 48 hours. For longer storage, freeze portions in silicone trays for up to three months.

Can I mix fresh fruits and vegetables together?

Yes! Combining sweet vegetables like sweet potatoes with fruits like apples creates appealing flavor profiles while enhancing the absorption of key vitamins and minerals.

Why are healthy fats important in infant recipes?

Healthy fats found in avocados, olive oil, and whole-fat yogurt are critical for your baby’s rapid brain development and help the body absorb fat-soluble vitamins like vitamin A and E.

Do I always need to buy organic produce for my baby?

While organic produce helps minimize pesticide exposure, thoroughly washing conventional fruits and vegetables under running water is also an effective way to prepare safe, healthy meals.

First Foods Timeline From Six to Twelve Months: The Ultimate Month-by-Month Feeding Guide

0

First Foods Timeline From Six to Twelve Months: The Ultimate Month-by-Month Feeding Guide

Reaching the six-month mark is an incredible milestone in your parenting journey. Your sweet baby is transforming right before your eyes, and suddenly, they are showing a curious interest in what is on your plate. Stepping into the world of solid foods can feel both thrilling and slightly overwhelming. You might wonder if your baby is truly ready, how much they should actually eat, and which foods to offer first. For more foundational knowledge, read our complete guide to baby nutrition tips.

This comprehensive first foods timeline is designed to guide you month by month through your baby’s first year of eating. By focusing on variety, safety, and a joyful approach to mealtimes, you will help your little one build a healthy relationship with food that lasts a lifetime.

Before You Begin: Safety and Readiness Basics

Before spooning up that very first bite, it is important to ensure your baby is developmentally ready. Pediatric guidelines generally recommend starting solids around six months, but every baby develops at their own pace. Look for these essential signs of physical readiness rather than just relying on a calendar date. Learn more in our guide to starting baby’s first foods:

  • Your baby can sit upright with little to no support.
  • They have lost the tongue-thrust reflex, which means they do not automatically push food out of their mouth with their tongue.
  • They show strong interest in food, perhaps watching you eat with fascination or reaching for your plate.
  • They have good head and neck control.

As you embark on this adventure, you will also want to understand the difference between gagging and choking. Gagging is a normal, protective reflex where your baby pushes food forward in their mouth to clear their airway. It can sound alarming, but it is a safe part of learning how to manage textures. Choking, on the other hand, is silent, dangerous, and occurs when the airway is blocked. Always supervise your baby closely during every meal.

Parents generally choose between traditional purees, Baby-Led Weaning (BLW) where babies self-feed soft strips of whole foods, or a combined approach. Pick the method that feels most comfortable for your family.

Month 6: The Journey Begins

During the sixth month, your primary nutritional goal remains breast milk or formula. Solids at this stage are primarily for practice, exploring new flavors, and developing oral motor skills. Food before one is largely about fun and exploration!

Start with single-ingredient foods to help your baby get used to new tastes. Excellent options for month six include:

  • Avocados mashed or sliced into large, manageable strips.
  • Ripe bananas mashed smoothly or cut into thick pieces.
  • Steamed and thoroughly mashed sweet potatoes or carrots.
  • Iron-fortified baby oatmeal mixed with breast milk or formula.

This is also the ideal window to introduce common allergens, such as peanut butter (thinned out with water or breast milk), well-cooked scrambled eggs, and dairy. Current pediatric research shows that introducing common allergens early and often can actually help reduce the risk of developing food allergies. Introduce one new allergen at a time and wait a couple of days before trying another.

Months 7 to 8: Expanding Palates and Textures

As your baby enters their seventh and eighth months, they become much more efficient at moving food around in their mouth. It is time to transition away from completely smooth purees and move toward lumpy purees, mashed foods, and soft finger foods.

You can begin combining flavors to create exciting culinary experiences. Try mixing sweet potato with a touch of cinnamon, or apple with mild spinach. This is also a wonderful time to introduce proteins and dairy. Explore our homemade healthy baby recipes for more ideas:

  • Well-cooked, finely shredded chicken or tender beef.
  • Flaked, boneless white fish like cod or salmon.
  • Well-cooked and mashed lentils or beans.
  • Full-fat plain Greek yogurt or cottage cheese.

Keep mealtimes relaxed and messy. Let your baby touch, squish, and explore their food with their hands.

Months 9 to 10: Mastering Self-Feeding and Pincer Grasp

By nine and ten months, your baby will likely display an exciting developmental milestone: the pincer grasp. Instead of raking food with their whole fist, they now pick up small pieces using their thumb and index finger.

This new dexterity opens up a whole new world of finger foods. Offer small, bite-sized pieces that encourage independent eating:

  • Soft-cooked vegetable florets like broccoli or cauliflower.
  • Small pieces of soft ripe fruit like peaches, melons, or berries cut into quarters.
  • Scrambled eggs cut into small strips or squares.
  • Well-cooked pasta pieces like penne or fusilli.

Aim for two to three meals a day alongside your regular milk feeds. You should also introduce water in an open cup or a weighted straw cup during mealtime. Do not worry about how much water they actually drink; at this stage, it is mostly about learning the mechanics of using a cup. Now is also the perfect time to start planning healthy baby meals for your growing infant.

Months 11 to 12: Approaching Toddlerhood

As your baby approaches their first birthday, you will notice a shift in their nutritional needs. Solid foods begin to take center stage as a major source of daily energy and nutrition, while milk intake may taper slightly.

Your little one is now ready to fully integrate into family mealtimes. They can eat much of what the rest of the family eats, provided meals are prepared with low or no added salt and sugar. Establish a predictable routine of three meals and one to two healthy snacks daily.

Encourage the use of toddler-friendly spoons and forks. While they may not master utensil use right away, letting them practice builds essential coordination and independence. Make sure you are choosing the right baby feeding accessories to support their development.

Crucial Safety Rules and Foods to Avoid

Navigating this first foods timeline also means keeping safety front and center. Certain foods pose severe health risks to infants under the age of one and must be strictly avoided. To learn more about childproofing your home, see our ultimate baby safety guide:

  • Honey: Never give honey to a baby under twelve months due to the risk of infant botulism.
  • Choking Hazards: Avoid whole grapes, cherry tomatoes, nuts, popcorn, whole dried fruits, and hard raw vegetables unless they are cut, cooked, or modified safely.
  • Cow’s Milk as a Drink: While dairy in cooking or yogurt is fine, do not offer plain cow’s milk as a primary beverage until after twelve months, as it can irritate an infant’s digestive system.
  • Added Sugars and Sodium: Keep processed foods, added sugars, and salty snacks away from your baby’s developing kidneys and palate.

Recommended Amazon Products

As an Amazon Associate, NurtureBharat earns from qualifying purchases.

Conclusion

Introducing solid foods is a remarkable journey of growth, mess, and discovery. Remember the golden rule: food before one is mostly for practice, fun, and allergen exposure. Every baby moves at their own pace along this first foods timeline. Some babies take to eating instantly, while others prefer to take their time exploring textures slowly. Trust your baby’s cues, keep mealtimes joyful, and enjoy watching your little one discover the wonderful world of food!

Frequently Asked Questions

When is my baby ready to start solid foods?

Babies are generally ready around six months old when they can sit upright with little support, have lost the tongue-thrust reflex, show strong interest in food, and have good head control.

Should I start with purees or baby-led weaning?

You can choose traditional purees, baby-led weaning with soft whole food strips, or a combined approach based on what feels most comfortable for your family.

When should I introduce common food allergens?

Current guidelines recommend introducing common allergens like peanut butter, eggs, and dairy early and often starting around six months to help reduce the risk of food allergies.

What foods should I avoid giving my baby under one year?

Never give honey due to the risk of infant botulism. Also avoid choking hazards like whole grapes and nuts, cow’s milk as a primary drink, and added sugars or high sodium.

How much milk should my baby drink while starting solids?

Breast milk or formula remains the primary source of nutrition during the first year. Solids are initially for practice, exploration, and developing oral motor skills.

What is the pincer grasp and when does it develop?

The pincer grasp develops around nine to ten months, allowing your baby to pick up small pieces of food using their thumb and index finger for independent self-feeding.

The Ultimate Guide to Finding Comfortable Footwear for Kids: Healthy Feet & Happy Kids

0

“`html

The Ultimate Guide to Finding Comfortable Footwear for Kids: Healthy Feet & Happy Kids

Every parent knows the scene. You are rushing out the door for school, daycare, or a family outing, and your child suddenly refuses to put on their shoes. Tears flow, frustration builds, and you wonder why a simple morning routine has turned into a battleground. Often, the hidden culprit behind the meltdown is not stubbornness. It is discomfort. Finding truly comfortable footwear for kids can transform your daily routine and protect your child’s physical development.

As a parent, navigating the aisles of a children’s shoe department can feel overwhelming. With endless styles, flashing lights, trendy designs, and confusing sizing charts, it is easy to default to what looks cutest or costs the least. However, childhood is a critical window for physical growth. Choosing the right shoes lays the foundation for lifelong mobility and posture.

Why Comfortable Footwear for Kids Matters More Than You Think

Children’s feet are not just miniature versions of adult feet. When a baby is born, their foot bones are mostly soft cartilage. Throughout childhood, these bones gradually ossify and harden into solid bone, a process that continues well into adolescence. Because children’s feet are so malleable, external pressures can easily alter their natural shape and alignment.

When kids wear restrictive, poorly fitting shoes, the consequences extend far beyond a few blisters. Inflexible soles, narrow toe boxes, or inadequate support can alter a child’s natural gait, force abnormal weight distribution, and place undue stress on their ankles, knees, and lower back. Over time, these minor adjustments can lead to chronic discomfort, poor posture, and long-term musculoskeletal issues. If you notice persistent issues, it may be time to talk to a pediatrician about your child’s physical activity.

In this comprehensive guide, we will break down everything you need to know about children’s foot health. From understanding the core anatomy of a good shoe to mastering at-home sizing hacks and avoiding common shopping pitfalls, you will gain the confidence to choose the best comfortable footwear for kids every single time.

Anatomy of a Good Shoe: What Makes Kids’ Footwear Truly Comfortable?

Before you purchase your child’s next pair of shoes, you need to know what to look for beneath the surface. Marketing claims can be misleading, but examining the physical construction of a shoe reveals its true quality. Here are the key structural elements that define healthy, comfortable children’s shoes.

Flexible Soles vs. Stiff Soles

One of the most important tests you can perform in the store is the bend test. Hold the shoe by the toe and the heel, and try to bend it. A good kids’ shoe should flex effortlessly at the ball of the foot, right where the toes naturally bend during walking. If the sole is so rigid that you need both hands to twist it, or if it only bends in the exact middle of the arch, put it back on the shelf. Stiff soles force children to alter their natural walking pattern.

Breathable Materials

Children’s feet have active sweat glands and can easily overheat. Look for uppers crafted from breathable materials such as genuine leather, canvas, or specialized athletic mesh. Avoid non-porous synthetic plastics whenever possible, as they trap moisture, soften the skin, and create a breeding ground for bacteria, blisters, and unpleasant foot odors. This is also an excellent time to teach children good hygiene habits for their feet.

Lightweight Construction

Little leg muscles fatigue easily. Heavy, clunky shoes weigh children down and make running and jumping feel like a chore. Look for lightweight designs that allow your child to move with agility and ease. If a shoe feels heavy in your adult hand, imagine how heavy it feels on a toddler’s foot.

Cushioning and Arch Support

Infants and toddlers naturally have flat feet due to a fat pad in the arch area, which usually disappears around age four or five. Therefore, pre-walkers and young toddlers do not need aggressive arch support. Instead, they need flat, flexible soles that let them feel the ground. Older children benefit from modest cushioning and gentle arch contouring to absorb impact during high-energy play.

The Ultimate Kids’ Shoe Sizing Guide: How to Get the Fit Right

Even the most expensive, podiatrist-approved shoe will cause discomfort if the sizing is wrong. Master the art of the proper fit with these essential guidelines.

Why Hand-Me-Down Shoes Can Be Problematic

While passing down clothes is a sustainable and budget-friendly parenting strategy, hand-me-down shoes require caution. Shoes mold to the unique wear patterns and foot shape of the original owner. If a shoe is heavily worn on one side or the insole is compressed, it can force your child’s foot into an unnatural alignment. If you do accept hand-me-downs, inspect them thoroughly for uneven tread wear and structural breakdown.

The Thumb-Width Rule

Always ensure there is adequate space between your child’s longest toe and the front of the shoe. The universal rule of thumb applies here quite literally: press your thumb down on the front of the shoe while your child is standing. You should have about a thumb’s width of space (roughly half an inch) between their big toe and the shoe tip. This leaves room for foot growth and natural forward slide during movement.

Measuring Feet at Home vs. Professional Fitting

While visiting a dedicated children’s shoe store for a professional Brannock device measurement is ideal, you can easily measure feet at home. Have your child stand barefoot on a piece of paper, trace their foot with a pencil, and measure the distance from the heel to the longest toe in centimeters or inches. Always measure both feet, as one foot is frequently larger than the other, and always fit the shoe to the larger foot.

How Often to Check Shoe Sizes

Children grow in spurts, and their shoe sizes can change faster than you might expect. Follow this general timeline for routine sizing checks:

  • Ages 0 to 3 years: Check every 1 to 2 months.
  • Ages 3 to 5 years: Check every 2 to 3 months.
  • Ages 6 to 10 years: Check every 3 to 4 months.

Best Types of Comfortable Footwear for Different Ages and Stages

Footwear needs evolve dramatically as children grow, develop motor skills, and change their daily activities. Matching the shoe type to your child’s developmental stage is vital.

Pre-Walkers and Toddlers

Before babies walk outdoors, shoes are primarily for warmth and fashion rather than protection. Barefoot is best for developing balance and proprioception during indoor toddler activities. When toddlers start walking outside, look for minimalist, barefoot-style shoes with ultra-thin, highly flexible soft soles that protect against sharp objects while allowing maximum sensory feedback for outdoor activities to boost toddler development.

Active Preschoolers

Preschoolers run, climb, jump, and test their physical boundaries daily. They need durable athletic sneakers with secure closures. Velcro straps and elastic bungee laces encourage independence, allowing children to put on their own shoes, while providing a snug fit that keeps the heel locked firmly in place.

School-Age Children

As kids enter elementary school, structured activities increase. Supportive athletic trainers for sports, durable everyday casual shoes for school yards, and breathable sandals for warm weather become wardrobe staples. Ensure these shoes offer appropriate shock absorption and sturdy traction to prevent slips and falls. For more specific gear needs, you can refer to our sports equipment guide for active kids.

Top Mistakes Parents Make When Buying Children’s Shoes

Even well-meaning parents frequently fall into common shopping traps. Avoiding these missteps will save you money and protect your child’s feet.

Buying Shoes Too Big with Room to Grow

It is tempting to buy shoes two sizes too big so your child can wear them for a full year. However, oversized shoes cause the foot to slide forward, jamming the toes against the front and causing blisters. Furthermore, loose shoes force the toes to claw downward to grip the sole, which causes foot fatigue and trips.

Prioritizing Fashion Over Function

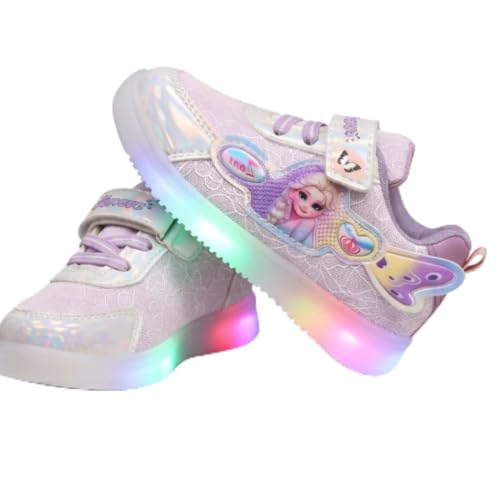
Sparkling lights, cartoon characters, and stiff faux-leather dress shoes often win over children’s hearts. Unfortunately, many fashion-forward kids’ shoes lack proper support, breathability, and flexibility. Reserve decorative dress shoes for brief special occasions and prioritize ergonomic comfort for everyday wear.

Ignoring Foot Width

Feet come in all shapes and sizes. Squeezing a wide foot into a standard shoe causes painful pressure points, bunions, and ingrown toenails. Conversely, narrow feet sliding around in wide shoes lack stability. Look for brands that offer multiple width options, particularly if your child has exceptionally narrow or wide feet.

Top Recommendations for Comfortable Footwear Brands

Navigating the vast market of kids’ footwear is much easier when you know which brands consistently deliver on quality, safety, and comfort. Parents and podiatrists frequently recommend brands that emphasize ergonomic design, flexible outsoles, and premium breathable materials.

When shopping for sneakers, look for athletic brands that incorporate reinforced toe caps to withstand playground scuffs and breathable mesh uppers. For casual everyday wear, seek out brands known for lightweight, foot-shaped toe boxes that let little toes spread out naturally. When purchasing sandals or water shoes, ensure they feature adjustable hook-and-loop straps across both the ankle and forefoot to accommodate different foot volumes securely.

Putting Your Child’s Foot Health First

Investing time and care into finding comfortable footwear for kids pays off in happier outings, fewer complaints of tired legs, and healthier long-term development. By prioritizing flexible soles, breathable materials, and correct sizing over fleeting trends, you give your child the freedom to explore the world with confidence and comfort.

Make it a habit to check your child’s shoes at the change of every season, and never hesitate to measure their feet before clicking buy online. Healthy feet support an active, joyful childhood.

What are your go-to brands for children’s shoes? Do you have any sizing hacks that make shopping easier? Share your thoughts and questions in the comments below!

Recommended Amazon Products

As an Amazon Associate, NurtureBharat earns from qualifying purchases.

“`

Frequently Asked Questions

Why are flexible soles important for kids’ shoes?

Flexible soles allow a child’s foot to move naturally and bend effortlessly at the ball of the foot during walking, preventing abnormal gait and foot fatigue.

How often should I check my toddler’s shoe size?

For children aged 0 to 3 years, you should check their shoe size every 1 to 2 months due to rapid foot growth during these early stages.

Is it okay to buy kids’ shoes two sizes too big for growth?

No, buying oversized shoes causes the foot to slide forward, leading to blisters, toe jamming, and instability while walking or running.

What is the thumb-width rule for fitting kids’ shoes?

You should press your thumb down on the front of the shoe while your child stands to ensure about half an inch of space between their big toe and the shoe tip.

Are hand-me-down shoes safe for children?

Hand-me-downs require caution because shoes mold to the original owner’s foot shape. Always inspect them for uneven tread wear and compressed insoles before use.

What materials are best for children’s shoes?

Breathable materials such as genuine leather, canvas, and athletic mesh are ideal because they prevent moisture buildup, odor, and bacterial growth.

How to Teach Children Good Hygiene Habits Every Day: A Stress-Free Guide for Parents

0

How to Teach Children Good Hygiene Habits Every Day: A Stress-Free Guide for Parents

If you have ever had to chase a reluctant toddler around the living room with a toothbrush or negotiate the nightly bath time standoff, you are certainly not alone. Daily hygiene routines often turn into high-stakes household negotiations. Children naturally prefer exploring, playing, and getting messy over stopping to wash their hands or brush their teeth.

However, teaching children good hygiene habits every day is one of the most valuable gifts you can give your growing kids. Beyond keeping dirt at bay, early hygiene education lays the foundation for lifelong health, strong self-confidence, and effective disease prevention. When these routines become second nature, kids feel cleaner, healthier, and ready to take on the world.

In this guide, we will explore practical, stress-free strategies to help you turn daily hygiene battles into smooth, empowering routines. From understanding developmental milestones to fun games that make scrubbing up enjoyable, you will find everything you need to foster healthy habits that stick.

At What Age Should You Start Teaching Kids Hygiene?

Children do not wake up knowing how to maintain personal cleanliness. It is a gradual learning process that evolves right alongside their cognitive and physical development. Understanding what kids are capable of at different ages helps you set realistic expectations and avoid unnecessary frustration.

During the toddler years, spanning ages one through three, the focus is heavily on parental modeling and introducing basic concepts. Toddlers love to mimic what adults do. Letting them watch you wash your hands or brush your teeth lays the groundwork. You will still need to do most of the physical work, but guiding their hands through a quick rinse helps them build muscle memory.

As children enter their preschool years, roughly ages four and five, they begin craving autonomy. This is the ideal window to introduce more independence with brushing, handwashing, and washing up during baths. They still need supervision and gentle reminders, but they are fully capable of handling the basic motions with your encouragement.

By the time children reach school age, around six years and older, hygiene routines should be refined. School-age kids start engaging in more physical activities, meaning things like body odor, greasy hair, and dirty fingernails enter the picture. Guiding them toward independent hygiene management helps them navigate social settings with confidence and pride in their personal presentation.

The Essential Daily Hygiene Checklist for Children

To keep things organized and ensure nothing gets missed, it helps to break down the essential daily hygiene habits into clear categories. Here is a comprehensive checklist you can reference as you build your family routine.

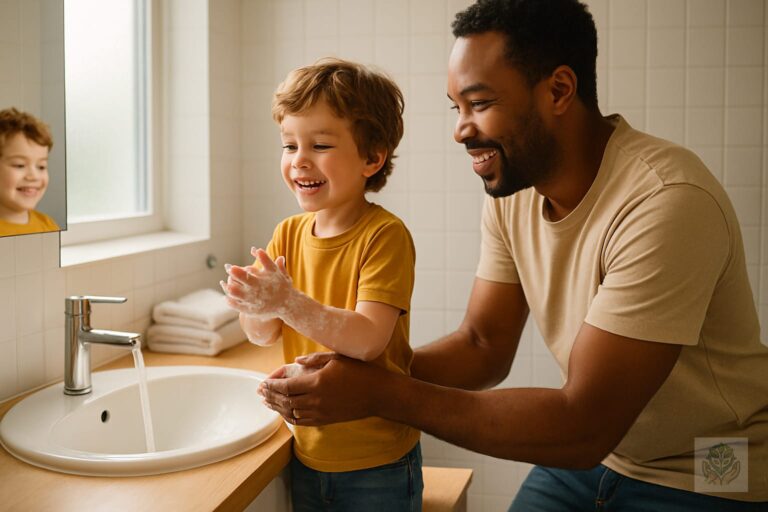
Handwashing sits at the very top of the list. Kids should wash their hands thoroughly with soap and water before eating meals, after using the bathroom, and immediately upon coming home from school, parks, or public places. Proper handwashing is your family’s first line of defense against seasonal bugs.

Dental care is another non-negotiable daily pillar. Children need to brush their teeth twice a day—once in the morning and once right before bed. Once their teeth touch side-by-side, introducing daily flossing basics protects their growing smiles from cavities and gum issues.

Bath and shower time should cover full-body cleaning, including gentle scalp washing, skin care, and thorough rinsing of sweat and dirt. While toddlers might only need a bath every other day, active school-age children usually benefit from daily showers or baths, especially after sports or outdoor play.

Finally, grooming basics round out the daily checklist. Fresh clothes every morning, thoroughly brushed hair, and trimmed fingernails prevent dirt buildup and skin irritations while keeping your child looking and feeling their best.

5 Fun Ways to Make Hygiene Habits Stick Without the Battles

Let us be honest: telling a child to go wash their hands rarely works on the first try. Instead of resorting to nagging, you can use clever strategies to transform chores into engaging activities. Here are five fun ways to teach children good hygiene habits every day without the daily power struggles.

  1. Turn routines into games: Sing a lively two-minute song while brushing teeth to make sure they hit the recommended brushing time. You can also pretend hands are ninja warriors fighting off invisible microscopic villains during handwashing.
  2. Use visual aids: Printable daily hygiene checklists or colorful sticker charts give kids a sense of ownership. Crossing off a task gives them a tangible reward and encourages self-reliance.
  3. Let kids choose their own products: Take your child to the store and let them pick out a fun-scented soap, a colorful toothbrush, or a gentle shampoo featuring their favorite character. Ownership breeds cooperation.
  4. Lead by example: Children are keen observers who copy what parents do. When they see you washing your hands consistently and taking care of your own hygiene, they view these habits as normal, everyday practices rather than arbitrary rules.
  5. Explain the why simply: Use age-appropriate terms to explain that invisible germs and superheroes interact on our skin. When kids understand that washing away germs keeps them strong enough to play soccer or go to school, they cooperate more willingly.

How to Handle Resistance to Handwashing and Bath Time

Even with the most creative strategies in place, you will likely encounter occasional resistance. Knowing how to navigate these bumps smoothly prevents minor friction from turning into major household meltdowns.

When dealing with the classic bath time refusal phase, look at the root cause. Often, kids resist leaving their toys or transitioning to a new activity rather than the bath itself. Giving a gentle five-minute and two-minute warning before bath time eases the transition. You can also make the water more inviting with bath crayons, floating toys, or warm, soothing lighting.

For children experiencing sensory issues related to hair washing, water in the eyes, or nail clipping, patience and gentle adaptations are essential. A visor designed to keep water out of eyes, a softer washcloth, or clipping fingernails right after a warm bath when they are soft can make a world of difference. Never force a sensory-sensitive child without offering alternative comforts.

When motivating hesitant children, positive reinforcement always outperforms punitive reward systems. Praise their specific efforts, such as noticing how thoroughly they scrubbed their hands or how sparkling clean their teeth look after brushing. Positive verbal encouragement builds genuine internal motivation.

Building Lifelong Healthy Habits, One Day at a Time

Teaching children good hygiene habits every day is a marathon, not a sprint. It requires immense patience, unwavering consistency, and a willingness to keep things lighthearted when resistance arises. Remember that every time you gently remind your child to wash their hands or help them brush their teeth, you are investing in their long-term health and independence.

Consistency truly yields lifelong results. By staying calm, turning routines into fun experiences, and honoring your child’s growing autonomy, you will transform daily hygiene chores into natural, self-directed habits.

Ready to make your morning and evening routines easier? Download our free printable kids’ hygiene tracker today and watch your children take charge of their daily self-care with pride!

Recommended Amazon Products

As an Amazon Associate, NurtureBharat earns from qualifying purchases.

Frequently Asked Questions

At what age should I start teaching my child hygiene habits?

You can start during the toddler years (ages 1 to 3) through parental modeling and letting them mimic your actions, such as washing hands and brushing teeth.

How often should children brush their teeth?

Children should brush their teeth twice a day—once in the morning and once right before bed—for a full two minutes each time.

How can I make handwashing fun for my toddler?

Turn handwashing into a game by pretending hands are ninja warriors fighting off germs, or sing a lively two-minute song while they scrub.

How often do school-age children need baths or showers?

Active school-age children usually benefit from daily showers or baths, especially after participating in sports or playing outdoors.

What should I do if my child resists bath time?

Give your child a five-minute and two-minute warning before bath time to ease the transition, and make the water more inviting with toys or bath crayons.

How do I encourage my child to take charge of their own hygiene?

Use visual aids like printable daily hygiene checklists, let them choose their own soap or toothbrush, and offer positive reinforcement for their efforts.

How to Tell When a Child’s Symptoms Are Getting Worse: Red Flags Every Parent Should Know

0

How to Tell When a Child’s Symptoms Are Getting Worse: Red Flags Every Parent Should Know

Introduction

Sitting by a sick child’s bedside in the middle of the night is a universally stressful experience for parents. Every cough, sigh, and restless turn makes you question whether your little one is simply fighting off a standard bug or if their condition is taking a turn for the worse. Knowing how to evaluate a sick child is one of the most challenging parts of parenthood, much like mastering the fundamentals of baby safety.

Tracking symptom progression accurately is essential because illnesses in infants and children can change rapidly. A cold that starts with a mild sniffle can sometimes develop into a secondary infection or respiratory distress within hours. Keeping a close eye on how symptoms evolve helps you provide accurate details to your pediatrician and ensures your child gets the timely care they need.

Disclaimer: This article is for informational purposes only and should not replace professional medical advice. If you ever feel your child is experiencing a life-threatening emergency, trust your instincts and call 911 or head to the nearest emergency room immediately.

Understanding Your Child’s Baseline

Before you can spot when a child’s symptoms are getting worse, you need to understand what normal illness behavior looks like for your specific child. Every child reacts differently to common viruses. Some children become quiet and snuggly, while others remain surprisingly active despite a high fever.

When evaluating a sick child, pay close attention to their baseline energy and mood. Are they responding to your voice? Do they make eye contact? Understanding their baseline helps you separate typical illness fatigue from concerning lethargy. Monitoring these changes is often easier when you have established a predictable daily routine for kids.

Never discount parental intuition, often referred to as a gut feeling. Parents know their children better than anyone else on Earth. If your pediatrician tells you a virus is going around, but your parental instinct tells you something feels fundamentally wrong, advocate for your child and seek a second opinion or further evaluation.

Key Physical Signs Symptoms Are Worsening

Physical symptoms offer some of the most reliable clues about illness progression. Knowing what to look for can prevent a minor illness from escalating without treatment.

Breathing Changes

Breathing changes are among the most critical red flags. Watch your child’s chest and stomach while they breathe. If you notice retractions—where the skin sucks in around the ribs, collarbone, or neck with each breath—or if their breathing is unusually fast and accompanied by nostril flaring or wheezing, seek medical attention right away.

Hydration Status

Hydration status is another major concern during any illness, especially those involving vomiting, diarrhea, or fever. Monitor wet diapers in infants and toddlers closely; fewer than three wet diapers in a 24-hour period is a warning sign. Proper modern baby diapering habits include tracking these outputs carefully during illness.

Fever Patterns

Fever patterns often cause unnecessary panic, but the height of the fever is less important than how your child acts when the fever comes down. However, a fever that lasts more than three to four days, or a fever that initially resolves and then returns higher than before, warrants a call to the doctor.

Skin Changes

Skin changes can also indicate worsening illness. Watch for unusual paleness, grayish or bluish skin around the lips or fingernails, mottling, or any new rash. While many rashes are benign, referring to a baby skin care guide can help you distinguish between normal irritation and a red flag.

Behavioral Red Flags in Sick Children

Behavioral shifts often provide the earliest warnings that a child’s symptoms are getting worsening. Recognizing these mental and emotional changes can help you act swiftly.

Extreme Lethargy

It is normal for a sick child to sleep more than usual. However, there is a distinct difference between normal illness fatigue and extreme lethargy. If your child is difficult to wake up, falls back asleep immediately after waking, or does not track you with their eyes, this is a serious medical red flag.

Unconsolable Crying

Unconsolable crying and extreme irritability can also signal trouble, particularly in babies and toddlers. If your infant cries continuously for more than two hours without stopping, or if their cry sounds unusually high-pitched, sharp, or painful, they need to be evaluated by a medical professional.

Altered Mental State

Confusion, disorientation, hallucinations, or an altered mental state are emergency symptoms. If your child seems unusually clumsy, speaks incoherently, or does not recognize you, seek emergency medical care immediately.

Age-Specific Warning Signs

Age plays a massive role in how pediatric illnesses are evaluated. What is considered safe for a school-age child can be a major emergency for an infant.

Infants Under 3 Months

For infants under 3 months of age, any rectal temperature of 100.4 degrees Fahrenheit or higher is considered a medical emergency. You should call your pediatrician or head to the emergency room immediately, even if your baby shows no other symptoms. This vigilance is a cornerstone of healthy newborn care.

Toddlers and Preschoolers

Toddlers and preschoolers often struggle to communicate where it hurts or what they are feeling. They may pull at their ears, refuse to swallow their own saliva, or walk with a limp. Watch their non-verbal cues and look for localized signs of pain, such as refusing to move a limb or guarding their abdomen.

School-Age Children

School-age children are better at verbalizing symptoms, but they may downplay how they feel to avoid going to the doctor or missing school. Pay attention when they complain of a severe headache, stiff neck, persistent sore throat, or pain that steadily worsens rather than improves.

When to Call the Pediatrician vs. Heading to the ER

Deciding where to seek care can be stressful. Knowing when to talk to a pediatrician and when to head to the ER makes the decision much easier.

Calling Your Pediatrician

When calling your pediatrician’s office, be prepared with specific information. Know your child’s exact temperature, the time they last drank fluids or had a wet diaper, and the medications you have administered along with exact dosages.

When to Visit the Emergency Room

Definitive signs it is time to visit the emergency room include severe difficulty breathing, sudden lethargy or unresponsiveness, signs of severe dehydration, a seizure, a stiff neck combined with a fever, or an uncontrollable bleeding episode.

When to Call 911

Call 911 immediately if your child stops breathing, turns blue around the lips or face, becomes unconscious, or experiences a severe, life-threatening allergic reaction.

How to Track and Document Symptoms

When you are sleep-deprived and worried, remembering exact timelines becomes nearly impossible. Keeping an organized illness log is a powerful tool for parents.

Maintain an Illness Log

Maintain a written or digital log tracking exact temperatures, medication types, and the precise times doses were given. Note fluid intake, frequency of vomiting or diarrhea, and any changes in behavior.

Capture Media of Fleeting Symptoms

Taking photos or short videos of fleeting symptoms, such as a strange rash, unusual breathing patterns, or a coughing fit, can be remarkably helpful for your pediatrician. Showing a doctor a ten-second video of your child’s breathing is often worth a thousand words.

Conclusion

Navigating childhood illnesses is an inevitable part of parenting, and watching your child suffer is never easy. By understanding your child’s baseline, monitoring physical and behavioral red flags, and knowing your child’s age-specific warning signs, you can respond with confidence when a child’s symptoms are getting worse.

Trust your instincts, keep a detailed record of their illness progression, and never hesitate to reach out to your pediatrician or emergency services when your gut tells you something is wrong. You are your child’s best advocate, and being prepared gives you the power to keep them safe.

Frequently Asked Questions

What are the most critical red flags that a child’s symptoms are worsening?

Key red flags include difficulty breathing, extreme lethargy, signs of dehydration such as fewer wet diapers, persistent vomiting, high fever lasting more than three days, and skin color changes like paleness or bluish lips.

When should I take an infant under 3 months old to the ER?

Any rectal temperature of 100.4 degrees Fahrenheit or higher in an infant under 3 months old is an immediate medical emergency requiring a trip to the ER or urgent pediatric evaluation.

How can I tell the difference between normal illness fatigue and dangerous lethargy?

Normal fatigue means your child is tired but responds to your voice, makes eye contact, and can be briefly engaged. Dangerous lethargy involves being difficult to wake up, failing to track you with their eyes, or falling back asleep immediately.

What breathing signs indicate respiratory distress in a sick child?

Watch for retractions where the skin sucks in around the ribs and neck, unusually fast breathing, wheezing, and nostril flaring. These are serious signs requiring immediate medical attention.

How do I know if my sick child is dehydrated?

Check for fewer than three wet diapers in 24 hours for infants and toddlers, dry lips, a sticky mouth, crying without tears, and unusual sunken eyes or soft spots.

When is it appropriate to call 911 for a sick child?

Call 911 immediately if your child stops breathing, turns blue around the lips or face, becomes unconscious, experiences a seizure, or shows signs of a severe allergic reaction.

7 Creative Texture Coloring Activities for Toddlers to Boost Sensory Skills

0

7 Creative Texture Coloring Activities for Toddlers to Boost Sensory Skills

Introduction

Watching your toddler explore the world is a fascinating journey. Every touch, grab, and scribble helps build pathways in their growing brain. If you are looking for fresh ways to keep your little one engaged with creative indoor toddler activities, incorporating texture coloring activities for toddlers is a game-changer. These hands-on art projects merge traditional coloring with tactile exploration, making learning a deeply sensory experience.

Traditional coloring books are wonderful, but adding physical textures takes creative play to the next level. When children feel rough surfaces, smooth papers, or fluffy paints while they create, they engage multiple senses at once. This multi-sensory approach captures their attention longer and supports critical developmental milestones, much like other structured preschool activities for early learning.

Why Sensory and Texture Coloring Matters for Toddlers

Toddlers learn primarily through their senses. From the moment they are born, they touch, taste, and manipulate objects to understand how the world works. Integrating sensory elements into everyday crafts helps solidify these early concepts. When a child colors on a bumpy surface, their fingers send messages to their brain about pressure, friction, and form.

This type of play also lays the groundwork for emotional regulation. Sensory art can be incredibly calming for busy toddlers. The repetitive motion of coloring combined with soothing or stimulating textures helps children ground themselves, focus their energy, and express their emotions safely, which is a key strategy used to handle child tantrums without shouting.

The Benefits of Combining Tactile Play with Art

Art is naturally therapeutic and expressive, but adding tactile components supercharges its benefits. Combining tactile play with art strengthens hand muscles, improves bilateral coordination, and fosters cognitive growth. Children learn cause and effect—such as discovering how pressing harder changes the mark left on a bumpy surface.

Furthermore, these activities encourage language development. As parents and caregivers introduce words like rough, smooth, bumpy, soft, and sticky, toddlers expand their descriptive vocabulary. They learn to connect physical sensations with verbal labels, which is a major milestone in early childhood communication.

What is Texture Coloring and Why Toddlers Need It

Texture coloring is an interactive art form where toddlers color, paint, or draw on materials that feature distinct physical textures, or where tactile elements are added directly to the coloring process. Unlike flat paper, these surfaces provide immediate tactile feedback with every stroke of a crayon, marker, or paintbrush.

This style of play is vital because modern children often spend a lot of time with flat, digital screens or smooth plastic toys. Introducing rich, tactile experiences restores a healthy balance, encouraging physical interaction with natural and man-made materials.

Understanding Tactile Development in Early Childhood

Tactile development refers to how the nervous system receives and interprets information from the receptors in the skin. Young children need a rich diet of tactile experiences to develop proper sensory integration. Without it, some children may become overly sensitive to certain clothing tags, textures of food, or physical touch.

By offering safe, controlled opportunities to explore various textures through creative projects, you help your child build sensory resilience. They learn that different feelings are not only safe to experience, but can also be enjoyable and interesting.

How Texture Coloring Supports Fine Motor Skills

Good fine motor control is essential for future tasks like handwriting, tying shoes, and using utensils. Texture coloring naturally demands more from a child’s hand muscles than drawing on regular printer paper. Pushing a crayon across corrugated cardboard or holding a sponge soaked in paint requires precise finger placement and variable grip strength.

As toddlers navigate these different surfaces, they build intrinsic hand strength, improve their pincer grasp, and enhance hand-eye coordination. These subtle physical adjustments happen naturally as they focus on the fun of the creative process, often aided by using the best educational toys for kids designed for small hands.

7 Creative Texture Coloring Activities for Toddlers

Ready to get hands-on? Here are seven fantastic, toddler-friendly art projects designed to boost sensory awareness through creative coloring and tactile play.

1. Sandpaper Rubbings: Rough vs. Smooth

Tape a piece of fine-grit sandpaper to a tabletop and place a plain sheet of paper directly over it. Give your toddler a chunky crayon with the paper wrapper removed, and show them how to rub the side of the crayon across the paper. The hidden texture of the sandpaper will magically appear on the page.

This activity introduces the concept of contrast. You can talk with your child about how the paper feels smooth on top, but the rubbing reveals a rough, grainy pattern underneath.

2. Foil and Wax Paper Resist Art

Aluminum foil and wax paper offer ultra-smooth, non-porous surfaces that change how coloring tools behave. Tape a sheet of heavy-duty aluminum foil to the table and let your toddler use permanent markers or special acrylic paints to color on it.

Because the surface is slick, the colors glide differently, providing a fascinating visual and tactile surprise. It teaches toddlers that different canvases require different levels of pressure and touch.

3. Puffy Paint Coloring Pages

Mix equal parts white school glue and shaving cream with a few drops of food coloring to create easy homemade puffy paint. Let your toddler use their fingers or a soft brush to paint this mixture directly onto thick cardboard coloring templates.

Once the paint dries, it hardens into a wonderful, pillowy three-dimensional texture. Toddlers love pressing their fingers into the dried art to feel the soft, spongy bumps they helped create.

4. Nature-Inspired Leaf and Bark Rubbings

Take a nature walk to collect flat leaves with prominent veins or pieces of textured tree bark. Place these items underneath a piece of paper and invite your toddler to color over them using leaf-shaped crayons or standard wax crayons.

This project connects indoor arts and crafts with outdoor activities that boost development naturally. It helps children notice the intricate patterns found in nature while refining their fine motor coloring skills.

5. Cotton Ball and Sponge Dab Painting

Swap out traditional paintbrushes for textured tools like cotton balls held with clothespins or small kitchen sponges cut into fun shapes. Pour washable paint onto a tray and let your toddler dip and dab their tools onto a coloring page.

The squishy nature of sponges and soft texture of cotton balls provide wonderful tactile feedback for little hands. It is an ideal low-mess introduction to painting for younger toddlers.

6. Crinkled Tissue Paper Collage Coloring

Give your toddler colorful sheets of tissue paper and let them crumple them into tight balls before smoothing them out slightly. Have them glue these crinkled, textured papers onto a large outlined coloring sheet, then color around the gaps with markers.

The crinkling action is fantastic for building hand strength, and the final collage creates a wonderful multi-layered surface that begs to be touched.

7. Sensory Rice and Bean Mosaic Coloring

Draw a simple outline of a tree, animal, or house on sturdy cardboard. Help your toddler spread a thin layer of washable school glue inside the lines, then let them sprinkle dyed sensory rice, lentils, or small beans onto the glue.

Once dry, your toddler can use thick markers to color the background around their tactile mosaic. Running small fingers over the bumpy grains provides wonderful sensory stimulation.

Tips for Setting Up Mess-Free Texture Art Stations

Sensory art is wonderfully engaging, but it can sometimes lead to a big cleanup job. With a few smart preparations, you can keep the chaos contained while your toddler explores.

Best Materials to Keep on Hand

Stocking a dedicated sensory art caddy makes spontaneous crafting much easier. You can find more inspiration in our ultimate guide to DIY crafts for kids. Keep these essential items ready in your craft closet:

  • Washable school glue and glue sticks
  • Chunky, easy-grip beeswax or wax crayons
  • A variety of textured papers, foil, and felt scraps
  • Child-safe sponges and cotton balls
  • Smocks or old oversized adult t-shirts

How to Protect Your Floors and Tables

Preparation is the secret to stress-free crafting. Always lay down a large plastic tablecloth or a washable splat mat underneath your toddler’s chair. If you are working with sticky materials like glue or puffy paint, keep a damp washcloth right next to you for quick finger wipe-downs before your toddler touches the walls or their hair.

Frequently Asked Questions (FAQs)

At what age can toddlers start texture coloring?

Most children can begin exploring basic texture coloring around 12 to 18 months of age, provided they are past the stage of putting every single object directly into their mouths. Always supervise young toddlers closely during sensory and art activities.

Are these materials safe if my toddler puts them in their mouth?

Safety depends on the specific materials you choose. For younger toddlers who still mouth objects, opt for edible sensory bases like cooked pasta, cereal, or homemade yogurt paints, and always use non-toxic, certified child-safe art supplies.

How do I encourage my toddler to talk about different textures?

Model descriptive language while you play together. Instead of just saying good job, say something like, feel how bumpy this cardboard is when you color over it. Asking open-ended questions like, does that feel soft or rough? also encourages active communication and helps you maintain positive parenting habits.

Recommended Amazon Products

As an Amazon Associate, NurtureBharat earns from qualifying purchases.

Conclusion

Incorporating texture coloring activities for toddlers into your daily routine for kids is a wonderful way to blend creativity with essential sensory development. These simple, tactile art projects support fine motor control, build hand strength, and spark endless curiosity. Gather a few household supplies, set up a cozy crafting station, and watch your little one discover the wonderful world of sensory art today.

Frequently Asked Questions

At what age can toddlers start texture coloring?

Most children can begin exploring basic texture coloring around 12 to 18 months of age, provided they are past the stage of putting every single object directly into their mouths. Always supervise young toddlers closely during sensory and art activities.

Are these materials safe if my toddler puts them in their mouth?

Safety depends on the specific materials you choose. For younger toddlers who still mouth objects, opt for edible sensory bases like cooked pasta, cereal, or homemade yogurt paints, and always use non-toxic, certified child-safe art supplies.

How do I encourage my toddler to talk about different textures?

Model descriptive language while you play together. Instead of just saying good job, say something like, feel how bumpy this cardboard is when you color over it. Asking open-ended questions like, does that feel soft or rough? also encourages active communication.

What are some easy texture coloring ideas for beginners?

Sandpaper rubbings, aluminum foil resist art, and sponge dab painting are fantastic, low-mess introductory activities that provide immediate tactile feedback for young toddlers.

How does texture coloring help with fine motor skills?

Pushing crayons across rough surfaces or holding sponges requires precise finger placement, varied grip strength, and hand-eye coordination, which naturally builds intrinsic hand muscles essential for future handwriting.

How can I keep mess to a minimum during sensory art?

Always lay down a plastic splat mat or tablecloth, keep a damp washcloth nearby for quick wipe-downs, and use a dedicated art caddy to organize non-toxic supplies before starting.

Everything You Need to Know About DIY Crafts for Kids: The Ultimate Guide

0

Everything You Need to Know About DIY Crafts for Kids: The Ultimate Guide

Unleash Their Imagination: Why DIY Crafts for Kids Matter

Picture this: your kitchen table is covered in a vibrant patchwork of construction paper scraps, rogue glitter is somehow clinging to the ceiling, and your toddler is proudly presenting you with a paper plate masterpiece covered in googly eyes. It is wonderfully chaotic, deeply messy, and entirely magical. Welcome to the wonderful world of kids crafting at home.

In a digital age dominated by screens and glowing tablets, finding hands-on ways to keep our children engaged can feel like a daily challenge. That is where creative hands-on projects come in. Whether you are looking for a rainy day distraction or a long-term hobby, incorporating DIY crafts for kids into your weekly routine offers an incredible outlet for self-expression.

This ultimate guide covers everything you need to know to make crafting fun, educational, and relatively stress-free. Crafting fosters creativity, builds essential developmental skills, and creates lasting memories that your family will cherish for years to come.

The Surprising Developmental Benefits of DIY Crafts for Kids

It is easy to view arts and crafts as merely a way to pass a rainy afternoon, but these activities are actually powerhouse engines for early childhood development. When children pick up a paintbrush, mold clay, or snip with safety scissors, they are building vital neural pathways.

First, crafting is a masterclass in fine motor skills and hand-eye coordination. Manipulating small objects, squeezing glue bottles, and threading beads strengthens the tiny muscles in children’s hands and fingers, which later translates to better handwriting and self-care skills like tying shoes.

Second, cognitive growth and problem-solving soar during art projects. Children learn spatial awareness, experiment with color mixing, and figure out structural balance when their cardboard tower starts to wobble. If a piece of tape fails, they have to adapt and find a new solution.

Third, emotional expression thrives through creative work. Children who may not yet have the vocabulary to express complex feelings can process emotions through colors, shapes, and textures. Successfully completing a project gives their self-esteem an organic, well-earned boost.

Finally, engaging in DIY crafts for kids provides quality bonding time for parents and children. Sitting side-by-side at a table opens the door for natural conversations away from the distractions of everyday life.

Best DIY Crafts for Kids by Age Group

Every child develops at their own pace, and what captivates a three-year-old might completely bore a nine-year-old. Tailoring your activities to their developmental stage ensures frustration-free fun.

Toddlers (Ages 1 to 3)

At this stage, sensory play reigns supreme. Focus on the sensory experience of creating rather than making a finished product. Great ideas include finger painting with taste-safe paints, large-piece contact paper sticky collages, and squishing soft dough.

Preschoolers (Ages 4 to 5)

Preschoolers love imaginative play and are gaining better control over their hands. Introduce simple cutting practice with safety scissors, paper plate animals, and classic playdough sculpting as part of your regular preschool activities complete with rolling pins and cookie cutters.

Early Elementary (Ages 6 to 8)

Children in this age bracket possess greater attention spans and enjoy making wearable art or functional items. Try making colorful friendship bracelets, elaborate cardboard box hideouts, and simple hand-sewing projects using felt and yarn.

Tweens (Ages 9 and Up)

Older kids crave independence and personalization for their living spaces. Encourage room decor projects, custom resin art, complex model building, and trendy upcycling of old clothing items.

Essential Supplies and How to Keep Craft Time Organized

You do not need to empty your wallet at a specialty hobby store to provide enriching creative experiences. A well-stocked starter toolkit, much like choosing the best educational toys, goes a long way. Essential items include child-safe scissors, washable school glue, glue sticks, assorted construction paper, pipe cleaners, googly eyes, and water-based markers.

One of the best ways to save money and help the planet is by embracing eco-friendly and budget-friendly recycled materials. Save toilet paper rolls, paper towel tubes, egg cartons, shoe boxes, and delivery boxes. These everyday items easily transform into rockets, castles, and animal masks.

To maintain your sanity, setting up a mess-free craft station at home is crucial. Designate a specific low-traffic area for projects, use plastic storage bins with clear labels for easy organization, and always keep a plastic tablecloth or cheap shower curtain on hand to lay down before the fun begins.

5 Easy DIY Crafts for Kids to Try Today

If you are ready to dive in right now, here are five simple, engaging projects that require minimal prep work and use items you likely already have around the house.

  1. Cardboard Castle: Gather old delivery boxes, tape them together into a fortress, and let your kids paint flags, draw drawbridges, and use markers to design their own royal play space.
  2. Nature Suncatchers: Take a walk outside to collect fallen leaves, flower petals, and interesting grasses. Press them between two sheets of clear contact paper and hang them in a sunny window.
  3. Painted Rock Monsters: Hunt for smooth stones in the yard or local park. Wash them off and use acrylic paint to transform them into quirky little rock monsters with funny faces.
  4. Paper Bag Puppets: Grab standard brown lunch bags and encourage your children to glue on paper cutouts, yarn hair, and buttons to create characters for an evening puppet show.
  5. Salt Dough Handprint Keepsakes: Mix flour, salt, and water to create a simple dough. Press your child’s hand into the mixture, bake it low and slow, and paint it to create a timeless family memory.

How to Handle Craft Messes and Short Attention Spans

Let us be honest: the thought of glitter on the hardwood floors is enough to make any parent hesitate. However, you can manage the chaos by leaning into a few practical strategies. Always use drop cloths, dress your kids in old oversized t-shirts as smocks, and strictly purchase washable art supplies.

What should you do when your child loses interest halfway through? Simply let it go. Remember that for young children, the joy is entirely in the process of making, not in the final product. If they want to abandon their painting after two minutes to go play with blocks, let them transition naturally.

Finally, balance independent crafting with guided parental involvement. Sometimes kids want you right beside them cutting and gluing, while other times they prefer to direct their own creative ship. Pay attention to their cues and let them take the lead. Incorporating positive parenting habits can help you stay patient during the messier moments.

Start Your Crafting Journey Today

Engaging in DIY crafts for kids does not require you to be an artistic Pinterest expert. It simply requires a willingness to embrace a little mess, a handful of basic supplies, and an open heart. By focusing on the joyful process rather than a flawless final product, you foster genuine creativity and confidence in your children.

Gather your supplies, clear off that kitchen table, and dive into your first project today. Share your favorite kids’ crafts in the comments below or subscribe to our newsletter for weekly project ideas delivered straight to your inbox!

Recommended Amazon Products

As an Amazon Associate, NurtureBharat earns from qualifying purchases.

Frequently Asked Questions

What are the benefits of DIY crafts for kids?

Crafting helps children develop fine motor skills, hand-eye coordination, cognitive problem-solving abilities, and emotional expression while boosting self-esteem through creative play.

How can I keep craft time organized at home?

Designate a specific craft area, use labeled plastic storage bins for supplies, and lay down a plastic tablecloth or drop cloth to make cleanup quick and easy.

What are some easy DIY crafts for toddlers?

Toddlers enjoy sensory-focused activities such as finger painting with taste-safe paints, large-piece contact paper sticky collages, and squishing soft dough.

How do I handle the mess during art and craft projects?

Always purchase washable art supplies, dress kids in old oversized t-shirts as smocks, use drop cloths, and embrace practical strategies to manage glitter and glue.

What essential supplies do I need for kids crafting?

A basic starter toolkit includes child-safe scissors, washable school glue, glue sticks, construction paper, pipe cleaners, googly eyes, and water-based markers.

What should I do if my child loses interest halfway through a craft?

Let it go and allow them to transition naturally. Remember that for young kids, the joy is in the creative process rather than the final product.

Everything You Need to Know About Indoor Toddler Activities: The Ultimate Guide for Stuck-At-Home Days

0

Everything You Need to Know About Indoor Toddler Activities: The Ultimate Guide for Stuck-At-Home Days

We have all been there. It is raining outside, the thermometer is reading below freezing, or your little one is recovering from a bug, and you are staring down twelve long hours indoors. The struggle of keeping an energetic toddler entertained inside a house can feel like an Olympic sport. You cycle through every toy in the bin by 9:00 AM, and the walls begin to feel like they are closing in. However, cabin fever does not have to win. Thoughtfully planned indoor toddler activities can transform a chaotic day into a memorable bonding experience.

As parents, navigating stuck-at-home days requires a mix of patience, creativity, and the right toolkit. When approached with intentionality, indoor play is not just a way to kill time. It is a vital component of early childhood development. In this comprehensive guide, we will explore why indoor play matters, dive into four distinct categories of engaging activities, and share sanity-saving pro tips to keep your household running smoothly.

Why Indoor Activities Matter for Toddler Development

Indoor play is much more than a distraction technique. It is the primary vehicle through which young children make sense of their world. When outdoor adventures are off the table, indoor play steps in to support crucial developmental milestones.

First, imaginative indoor play fosters creativity and problem-solving skills. Without the built-in structures of playground equipment, toddlers must use their imaginations to turn a simple cardboard box into a pirate ship or a pile of pillows into a mountain range. This type of open-ended play builds neural pathways essential for cognitive growth.

Second, active indoor games help develop both fine and gross motor skills even within a confined space. Whether your child is balancing along a piece of tape on the living room floor or carefully peeling stickers off a sheet, they are refining physical coordination and muscle strength. Finally, structured activities act as a powerful antidote to boredom-induced meltdowns and tantrums. When toddlers have a clear, engaging focus, their emotional regulation improves dramatically.

Category 1: High-Energy Burners (Get Moving!)

When your toddler is bouncing off the walls, you need to channel that physical energy somewhere productive. High-energy burners are essential for rainy days when outdoor running is impossible.

  • Indoor obstacle courses: Use couch cushions, pillows, and sturdy chairs to create a safe circuit where toddlers can crawl under, climb over, and jump across obstacles.
  • Painter’s tape games: Lay down strips of colorful painter’s tape on the carpet to create a makeshift balance beam, a hopscotch grid, or giant zig-zags they have to jump over without touching the floor.
  • Dance parties and musical statues: Turn up your toddler’s favorite upbeat tunes, dance together to burn off steam, and periodically hit pause to practice freezing in silly poses.
  • Balloon tennis and feather blow: Blow up a lightweight balloon and let your toddler use paper plates taped to craft sticks as tennis rackets. Alternatively, have them blow a feather across the table using just their breath to work on oral motor skills.

Category 2: Low-Prep Sensory Play

Sensory play is wonderful for calming an overactive mind and encouraging deep focus. The best part? You do not need expensive specialized toys to make magic happen.

Water play in the kitchen sink or bathtub provides instant engagement. Give your toddler plastic cups, funnels, and strainers, and let them pour and splash while you fold laundry nearby. For DIY sensory bins, fill a shallow storage container with dry rice, uncooked pasta, or water beads, and toss in measuring spoons and small animal figurines for endless tactile exploration.

You can also whip up quick batches of oobleck or cloud dough using kitchen staples like cornstarch, water, and conditioner. If you are short on time, freeze small plastic toys inside an ice cube tray with water, and give your toddler a bowl of warm water and a medicine dropper to play ice cube rescue.

Category 3: Quiet Time & Independent Play Ideas

Every parent needs a breather, and encouraging independent play is a gift to both you and your child. Quiet time helps prevent sensory overload and teaches toddlers how to entertain themselves.

Box cities are a fantastic way to repurpose shipping containers. Grab a few large appliance or diaper boxes, hand your toddler some washable paints or markers, and let them decorate and play inside their own private clubhouse. Sticker sorting and peeling activities are also brilliant for fine motor control; challenge your child to place all the star stickers on one piece of paper and circles on another.

Simple puzzles, shape sorters, and sorting colored objects into matching bowls keep little hands busy. When energy dips later in the afternoon, set up a cozy listening corner with plush pillows, a basket of picture books, and kid-friendly audiobooks for gentle wind-down time.

Category 4: Educational & Montessori-Inspired Activities

Learning and play go hand in hand during the toddler years. Montessori-inspired activities focus on independence and real-world competence.

Color matching is easy to set up using everyday household items. Gather colored blocks, toys, or socks, and have your toddler sort them onto matching construction paper sheets. You can practice counting using everyday objects like wooden blocks, cereal O’s, or buttons.

Practical life skills are another cornerstone of toddler learning. Invite your toddler to help match clean socks from the laundry basket, wipe down low tables with a damp sponge, or practice pouring water from a small pitcher into cups. These activities give toddlers a wonderful sense of pride and contribution.

Pro Tips for Managing Indoor Days Without Losing Your Mind

Surviving consecutive days indoors is as much about parental mindset as it is about the activities themselves. Use these expert strategies to keep your sanity intact.

Toy rotation is your best friend. Instead of leaving every toy out at once, pack half of them away in closets and rotate them every two weeks. When old toys reappear, they feel brand new and capture your toddler’s attention for much longer.

Set up safe yes spaces in your home where your toddler can explore freely without you having to say no every thirty seconds. Balance screen time purposefully with active play, and do a little low-prep planning the night before so you are not scrambling for ideas when morning arrives.

Recommended Amazon Products

As an Amazon Associate, NurtureBharat earns from qualifying purchases.

Conclusion

Stuck-at-home days with a toddler can feel daunting, but they also offer a unique opportunity to slow down and connect. Remember that your toddler does not need Pinterest-worthy setups or constant entertainment. They simply want your presence, laughter, and warmth. Embrace the mess, let go of perfection, and enjoy the cozy moments indoors.

What is your go-to strategy for keeping your little one busy when you are stuck inside? Share your favorite indoor toddler activity in the comments below!

Frequently Asked Questions

What are some good indoor activities for active toddlers?

High-energy burners like indoor obstacle courses, painter’s tape balance beams, and toddler dance parties are fantastic for burning off physical steam.

How can I keep my toddler busy indoors without expensive toys?

You can use household items for low-prep sensory play, such as water play in the sink, DIY rice bins, or giving them large cardboard boxes to decorate.

Why is indoor play important for toddlers?

Indoor play fosters creativity, problem-solving, and emotional regulation while developing both fine and gross motor skills in a safe environment.

How do I encourage independent play during indoor days?

Set up a cozy reading corner, offer sticker peeling activities, or let them build and paint inside a large cardboard box clubhouse.

What are Montessori-inspired indoor activities for toddlers?

Montessori-inspired activities focus on practical life skills, such as matching socks from the laundry, pouring water, and color-sorting everyday objects.

How can I prevent toddler boredom on rainy days?

Try toy rotation by hiding half of your toys and bringing them out every two weeks, and plan a mix of high-energy, sensory, and quiet time activities.