
Home Blog Page 21

10 Fun and Safe Water Games for Toddler Birthday Parties That Parents Love

0

10 Fun and Safe Water Games for Toddler Birthday Parties That Parents Love

Planning a summer birthday celebration for a little one is an exciting milestone, but let us be honest—keeping a group of energetic two- and three-year-olds entertained can feel like herding enthusiastic little cats. When the temperature climbs, parents everywhere look for the ultimate secret weapon to beat the heat. Enter toddler birthday party water games, the absolute best way to keep children cool, thoroughly entertained, and miraculously worn out just in time for afternoon naptime.

As child development specialists and experienced parents know, water play offers incredible sensory benefits while keeping outdoor birthday parties naturally engaging. In this guide, we explore everything you need to host an unforgettable celebration, including essential safety tips, creative game ideas, and practical party setup advice that will impress both the toddlers and their parents.

Golden Rules for Toddler Water Party Safety

Before inflating the first pool or filling the buckets, safety always comes first. Toddlers are naturally curious and notoriously fast, which means water safety requires intentional planning and unwavering vigilance. By setting up a secure environment from the start, parents can relax and enjoy the celebration.

First and foremost, establish the Water Watcher Rule. Designate a specific adult whose sole job is to watch the water area without distractions like smartphones or chatting. Rotate this role every twenty minutes so every parent gets a break, but never leave a water area unsupervised, even for a split second.

Keep the water extremely shallow. Stick to toddler-friendly splash pads, shallow inflatable pools, or simple water tables rather than deep backyard pools. At this age, a few inches of water is more than enough for maximum splashing and giggles while drastically reducing risk.

Sun safety is another non-negotiable element. Apply broad-spectrum, water-resistant sunscreen to all little guests before the party begins, and set up shaded canopy tents where toddlers can take a break from the direct sun. Always have plenty of cold water and healthy snacks on hand to prevent dehydration.

Finally, prevent slips and falls on slick surfaces. Running on wet grass or patio pavers is a recipe for scraped knees, so lay down textured outdoor mats, rubber non-slip runners, or soft towels around high-traffic splashing zones to keep little feet secure.

Top 7 Water Games for Toddler Birthday Parties

When it comes to toddler birthday party water games, simpler is almost always better. Toddlers do not care about elaborate rules; they simply want to splash, pour, and explore. Here are seven fantastic, low-stress games that will keep your tiny guests smiling for hours.

1. Sponge Ball Toss

Forget heavy, dangerous water balloons that pop and leave messy plastic pieces everywhere. Instead, make your own soft sponge balls by cutting colorful kitchen sponges into strips and securing them tightly in the middle with a zip-tie to form a fluffy sphere. Soak these in a bucket of water and let toddlers toss them at a target or gently at each other. They absorb plenty of water for a satisfying splash, but they are soft, lightweight, and completely safe for delicate toddler skin and motor skills.

2. Duck Pond Rescue

Fill a shallow kiddie pool with a few inches of water and toss in a dozen plastic yellow rubber ducks. Give each toddler a small plastic butterfly net or a kitchen strainer. Instruct them to rescue the floating ducks and place them safely into a basket on the grass. This classic game builds wonderful hand-eye coordination and keeps toddlers happily occupied as they concentrate on scooping up their floating friends.

3. Ice Cube Treasure Hunt

The night before the party, freeze small plastic animals, dinosaurs, or waterproof toys inside large plastic containers filled with water. Pop the giant ice blocks out of their molds and place them on a sensory table or the grass. Hand toddlers spray bottles filled with warm water and let them go to work melting the ice to free the trapped treasures. It is a fantastic sensory experience that combines science, problem-solving, and refreshing cool water on a hot day.

4. DIY PVC Pipe Sprinkler Tunnel

Create an instant crowd-pleaser by building a low-pressure sprinkler arch using inexpensive PVC pipes and connectors from your local hardware store. Drill small holes along the inner curve of the top pipe, attach your garden hose, and anchor it securely to the lawn. Toddlers will squeal with absolute delight as they run, crawl, and march through the refreshing mist tunnel over and over again.

5. Painting with Water

This is the ultimate mess-free art project for an outdoor party. Hand each toddler a large, thick paintbrush and a plastic bucket filled with clean water. Let them paint the wooden fence, the concrete patio, cardboard boxes, or even each other’s shadow. They get the creative satisfaction of painting, and parents love that there is zero clean-up required when the water simply evaporates in the sun.

6. Water Balloon Piñata (Toddler-Friendly)

Traditional piñatas can be overwhelming and slightly hazardous for toddlers wielding heavy sticks. Instead, string a clothesline low between two trees and hang several large, water-filled balloons at toddler head-height. Give the children soft foam pool noodles and let them gently whack the balloons until they burst in a refreshing splash. It captures all the excitement of a piñata without any tears or safety hazards.

7. Baby Pool Ball Pit

Combine two toddler favorites into one ultimate party station. Take an empty plastic kiddie pool, fill it to the brim with colorful plastic ball-pit balls, and add just a tiny splash of water at the bottom for an unexpected sensory surprise. Toddlers can sit among the floating balls, splashing and dumping water while engaging in joyful, open-ended imaginative play.

What to Include in Toddler Water Party Favor Bags

Send your tiny guests home with tokens of appreciation that match the aquatic theme without adding clutter to their homes. Thoughtful, usable party favors make parents smile just as much as the kids.

  • Cute, child-safe polarized sunglasses to protect little eyes during outdoor summer adventures.
  • Mini bubble wands or small squirt toys for continued backyard fun.
  • Soft, colorful beach towels or character-themed washcloths for quick drying off.
  • Packets of organic juice boxes, fruit leather snacks, or homemade cookies wrapped in cellophane.

Essential Checklist for a Stress-Free Water Party

Hosting a successful toddler water celebration requires careful logistical preparation. Keep this handy checklist nearby to ensure you do not miss a single detail:

  • Towel Station: Set up a dedicated rack or basket filled with extra dry towels for families who inevitably forget to bring their own.
  • Changing Tents: Provide a pop-up privacy tent or designate a clean indoor bathroom space where parents can easily change soggy toddlers into dry clothing.
  • Hydration and Snack Bar: Keep a cooler stocked with cold water and juice boxes for the kids, alongside iced coffee or refreshing lemonade for the hardworking parents.
  • First Aid Kit: Keep a fully stocked kit containing waterproof bandages, antiseptic wipes, and aloe vera gel easily accessible for minor bumps and scrapes.

Conclusion

Planning a memorable summer celebration does not have to be complicated or stressful. By keeping your activities flexible, low-pressure, and centered around simple sensory exploration, you create an environment where toddlers can thrive. Remember that at this age, a simple bucket of water, a few sponges, and good friends bring the absolute biggest smiles. Embrace the mess, soak up the sweet summer memories, and enjoy watching your little one celebrate another wonderful year of growth.

What is your toddler’s absolute favorite way to splash around in the backyard? Let us know in the comments below!

Frequently Asked Questions

What are the best water games for a toddler birthday party?

Simple and safe games like sponge ball toss, duck pond rescue, ice cube treasure hunt, and DIY PVC pipe sprinkler tunnels are ideal for keeping toddlers entertained.

How do you keep toddlers safe during a water party?

Always keep water shallow, establish a rotating Water Watcher rule with adults, apply sunscreen, provide shade, and use non-slip mats on wet grass.

Are water balloons safe for toddlers?

Standard water balloons can be a choking hazard and pop loudly. Instead, use soft sponge balls soaked in water for a safe, mess-free alternative.

How can I prevent toddlers from slipping on wet grass?

Lay down textured outdoor mats, rubber non-slip runners, or soft towels around high-traffic splashing zones to keep little feet secure.

What should I include in toddler water party favor bags?

Great favor ideas include child-safe sunglasses, mini bubble wands, small squirt toys, beach towels, and healthy snacks like fruit leather.

How do I plan a stress-free toddler water party?

Prepare a dedicated towel station, a changing tent, a fully stocked first aid kit, and plenty of cold drinks and snacks for both kids and parents.


How to Choose Safe Skin Care Products for Babies: The Ultimate Parent’s Guide

0

How to Choose Safe Skin Care Products for Babies: The Ultimate Parent’s Guide

Walking down the baby care aisle can feel completely overwhelming for new parents. Colorful bottles scream with promises of being natural, organic, and ultra-gentle, leaving you wondering which items are genuinely safe for your little one. Because infant skin requires specialized protection, learning how to choose safe skin care products for babies is one of the most important steps you can take during your parenting journey.

Whether you are preparing a nursery for an upcoming arrival or troubleshooting a mysterious rash on a three-month-old, navigating infant toiletries demands a careful eye. Marketing buzzwords often mask harsh chemical realities, making it essential to look past the front packaging. This guide will walk you through the science of infant skin, harmful ingredients to dodge, and how to decode labels like a professional.

What Makes Baby Skin Different?

To understand why you cannot simply use adult lotions and washes on an infant, you need to look at skin biology. The unique anatomy of baby skin means it is significantly thinner, more permeable, and still developing its moisture barrier. In fact, infant skin is roughly thirty percent thinner than adult skin, which means topical products absorb much more rapidly into their tiny bodies.

Furthermore, babies lose moisture at a much faster rate than adults do, leaving them prone to dry, chapped patches. Their skin is also less acidic at birth, resting closer to a neutral pH balance. This higher pH makes it much easier for harmful bacteria and environmental allergens to penetrate the skin surface. Common skin issues in the first year, such as diaper rashes, cradle cap, baby acne, and mild eczema, all require gentle, targeted care to heal without causing further irritation.

Toxic Ingredients in Baby Products to Avoid

When you are learning how to choose safe skin care products for babies, your first line of defense is knowing what to leave on the shelf. Many conventional formulations contain synthetic additives that can disrupt a baby’s developing endocrine system or trigger allergic contact dermatitis.

Here are the primary ingredients you should actively avoid:

  • Artificial fragrances and parabens: Often listed simply as fragrance or parfum, these complex chemical mixtures are common hormone disruptors and primary allergens. Parabens act as preservatives and mimic estrogen in the body.
  • Sulfates (SLS and SLES): Ingredients like sodium lauryl sulfate create a rich lather, but they strip away natural protective oils, leaving skin red, dry, and irritated.
  • Phthalates and formaldehyde-releasers: Hidden chemicals frequently found in baby washes, shampoos, and lotions that help scents linger or act as preservatives.
  • Essential oils: While marketed as natural, potent essential oils like tea tree, eucalyptus, or lavender can cause severe skin sensitization and allergic reactions in newborns.

Best Baby Skincare Ingredients for Healthy Skin

Instead of harsh synthetics, look for formulations built around nourishing, biocompatible ingredients that support the skin barrier. The best baby skincare ingredients work harmoniously with infant physiology to lock in moisture and soothe inflammation.

Keep an eye out for these beneficial components:

  • Natural moisturizers: Colloidal oatmeal calms itchy, irritated skin, while shea butter and plant-derived ceramides actively repair a compromised moisture barrier.
  • Gentle plant oils: Jojoba oil closely mimics human sebum, while fractionated coconut oil and sunflower seed oil provide lightweight, breathable hydration.
  • Zinc oxide: The gold standard for diaper rash protection, zinc oxide creates a physical, non-toxic barrier that shields raw skin from moisture and friction.

How to Read Baby Product Labels Like a Pro

Do not let front-label marketing fool you. Terms like hypoallergenic, dermatologist-tested, and pediatrician-approved are largely unregulated marketing buzzwords that hold little legal definition. A product can be labeled hypoallergenic even if it contains known contact allergens.

To truly know what you are putting on your child, turn the bottle around and read the International Nomenclature of Cosmetic Ingredients (INCI) list. Ingredients are listed in descending order by weight. For extra reassurance, look for trustworthy third-party certifications such as USDA Organic, EWG Verified, Leaping Bunny, and NSF/ANSI 305. These seals indicate that an independent organization has rigorously evaluated the formulation for safety and purity.

Choosing Safe Products for Every Nursery Staple

Different nursery items serve distinct purposes, meaning your standards should shift slightly depending on the product category. Here is how to select the safest options for everyday use:

  • Baby washes and shampoos: Prioritize fragrance-free, tear-free formulas that utilize ultra-mild, plant-based surfactants instead of sulfates. Using products from a baby bath time checklist can ensure you have everything needed for a safe routine.
  • Lotions and creams: Use lightweight lotions for daily maintenance after bath time, and reserve heavy, occlusive barrier creams for severely dry or wind-chapped skin.
  • Diaper creams: Distinguish between preventative daily balms (which contain soothing oils and a low percentage of zinc) and active treatment pastes (which feature high percentages of zinc oxide for tackling stubborn rashes).
  • Baby wipes: Opt for ultra-sensitive, water-based wipes containing over ninety-nine percent purified water, avoiding alcohol, artificial scents, and botanical extracts that can sting broken skin.

How to Properly Test and Apply New Products

Even the cleanest, most organic products can occasionally cause an allergic reaction. Whenever you introduce a new item, always perform a simple patch test. Apply a dime-sized amount of the product to a small patch of skin, such as the inside of the forearm or behind the knee, and wait twenty-four to forty-eight hours to check for redness or irritation.

Remember that newborns rarely need a complex beauty routine. In the first few months, plain warm water and an occasional gentle wash are often all they need. During bath time, keep water warm, limit baths to five or ten minutes, and gently pat dry rather than rubbing delicate skin.

Summary and Final Checklist for Parents

Mastering how to choose safe skin care products for babies comes down to a few core principles: embrace simplicity, read the ingredient list rather than the marketing claims, and steer clear of synthetic fragrances, parabens, and sulfates. Navigating the baby products market can feel overwhelming, but trusting your instincts and prioritizing clean, gentle formulations will give your child the best start possible.

Keep your routine simple, watch how your baby’s skin responds, and consult your pediatrician if you notice persistent irritation. By making informed choices today, you are protecting your little one’s health and building a foundation for lifelong wellness.

Frequently Asked Questions

Why is baby skin different from adult skin?

Baby skin is about thirty percent thinner, more permeable, loses moisture faster, and has a higher pH level, making it easier for allergens and bacteria to penetrate.

What ingredients should I avoid in baby products?

You should actively avoid artificial fragrances, parabens, sulfates like SLS and SLES, phthalates, formaldehyde-releasers, and potent essential oils.

Are terms like hypoallergenic legally regulated?

No, terms like hypoallergenic, dermatologist-tested, and pediatrician-approved are largely unregulated marketing buzzwords with little legal definition.

What are the best ingredients for baby skin?

Look for colloidal oatmeal, shea butter, plant-derived ceramides, jojoba oil, sunflower seed oil, and zinc oxide for diaper rash protection.

How do I test a new baby product before full use?

Perform a patch test by applying a dime-sized amount of the product to a small area, like the forearm, and wait 24 to 48 hours to check for irritation.

How often should I bathe a newborn?

In the first few months, newborns only need a few baths a week using warm water and mild cleanser, keeping bath time under ten minutes to prevent dryness.

When to Talk to a Pediatrician About Your Child’s Physical Activity

0

When to Talk to a Pediatrician About Your Child’s Physical Activity

Introduction

As parents, we constantly watch our children grow, learn, and explore the world around them. Movement is a fundamental part of that exploration. Whether a toddler is endlessly climbing the couch or a school-aged child is trying out for a soccer team, movement fuels healthy development. However, many caregivers find themselves wondering if their child is moving enough, or perhaps worrying that they are moving too much.

Understanding when to talk to a pediatrician about your child’s physical activity can bring immense peace of mind. Every child develops at their own unique pace, but certain milestones, behaviors, and physical complaints warrant a professional medical evaluation. This guide explores normal childhood energy levels, highlights red flags that require a doctor’s attention, and offers practical advice on how to prepare for your next clinic visit.

Understanding Normal Childhood Physical Activity Levels

Before raising concerns with a doctor, it helps to understand what typical childhood movement looks like. Children naturally burn off energy in bursts rather than sustained workouts. Recognizing these baseline patterns helps you distinguish between healthy childhood exuberance and potential underlying issues.

How much physical activity do kids actually need?

Physical activity requirements change dramatically as children grow. Medical guidelines offer clear benchmarks for daily movement:

  • Toddlers (Ages 1 to 3): Need at least three hours of physical activity daily, spread throughout the day. This includes running, jumping, and exploring safely.
  • Preschoolers (Ages 3 to 5): Also need around three hours of active play daily, with a mix of light, moderate, and vigorous intensity movements.
  • School-Aged Children and Adolescents (Ages 6 to 17): Require a minimum of 60 minutes of moderate-to-vigorous physical activity every day, including bone-strengthening and muscle-strengthening activities.

The difference between high energy and hyperactivity

Many parents worry that their child is simply too active. High energy is wonderful and completely normal. Children with high energy can focus on preferred tasks, sleep well at night, and calm down when necessary. Hyperactivity, on the other hand, often accompanies neurodevelopmental challenges like ADHD. It is characterized by persistent restlessness, an inability to stay seated when required, and impulsive actions that go beyond typical play.

Encouraging unstructured play vs. organized sports

While organized sports have benefits, unstructured free play remains the gold standard for young children. Free play builds creativity, problem-solving skills, and fundamental motor patterns without the pressure of structured rules or early sports specialization.

When to Talk to a Pediatrician: Low Activity & Developmental Concerns

While society often worries about children being hyperactive, the opposite concern is equally important. A lack of movement or apparent reluctance to engage in physical play can sometimes signal developmental delays or health issues.

Signs of delayed gross motor skills in toddlers and preschoolers

Gross motor skills involve large muscle groups responsible for running, jumping, and balancing. If your toddler is significantly delayed in walking, struggles to maintain balance, or seems unusually clumsy compared to peers, it is worth mentioning to your pediatrician. Early intervention services can work wonders for children who need a little extra support.

Lack of interest in physical play or avoiding playground equipment

Most children naturally gravitate toward slides, swings, and climbing structures. If your child consistently avoids physical play, refuses to run around with peers, or complains that their legs hurt whenever they walk short distances, dig deeper. This reluctance might stem from low muscle tone, sensory processing differences, or hidden physical discomfort.

Sudden drop in activity levels or persistent lethargy

A sudden change in behavior is a major red flag. If an active child suddenly becomes sluggish, loses interest in their favorite sports, or appears exhausted even after a full night of sleep, schedule a doctor appointment. Lethargy can point to nutritional deficiencies, anemia, sleep disorders, or viral infections.

Weight management and sedentary lifestyle concerns

Screen time and sedentary habits have increased dramatically in recent years. If you struggle to get your child away from devices and notice rapid weight gain or falling endurance levels, your pediatrician can offer guidance on establishing healthier family routines and nutritional balance.

When to Talk to a Pediatrician: Overexertion & Pain Red Flags

On the other end of the spectrum, active children and young athletes can sometimes push their bodies too hard. Knowing when to talk to a pediatrician about your child’s physical activity also includes recognizing signs of physical strain and injury.

Complaints of chronic joint, bone, or muscle pain after activity

Growing pains usually occur in the evening or at night and resolve by morning. However, pain that occurs during or immediately after exercise, causes a limp, or lingers for days is not normal. Conditions like Osgood-Schlatter disease, shin splints, and stress fractures require professional medical evaluation.

Frequent shortness of breath or wheezing during exercise

It is normal for kids to breathe heavily during a fast-paced game of tag. However, if your child experiences persistent wheezing, severe shortness of breath, or a tight chest that does not resolve quickly with rest, talk to your pediatrician about possible exercise-induced asthma.

Dizziness, lightheadedness, or fainting spells

Any instance of dizziness, lightheadedness, or fainting during or right after physical exertion must be evaluated immediately. These symptoms can sometimes indicate underlying cardiac conditions that require specialized testing.

The impact of sports specialization on growing bodies

Many children now focus on a single sport year-round from an early age. This intense repetition places immense stress on developing bones and joints. Discuss your child’s training schedule with your pediatrician to prevent overuse injuries and burnout.

How to Prepare for Your Pediatrician Appointment

When you decide to consult a medical professional, preparation helps make the most of your visit. Coming equipped with observations ensures your doctor gets an accurate picture of your child’s daily life.

Tracking your child’s daily habits and symptoms

For one to two weeks prior to your appointment, keep a simple log. Note how much time your child spends being active versus sitting. Write down specific instances of pain, fatigue, or unusual behavior, including when the symptoms occur and what makes them better.

Questions to ask your doctor about physical health and fitness

Prepare a list of direct questions to ask during the consultation. Useful prompts include:

  • Are my child’s current activity levels appropriate for their age?
  • Could these complaints be related to growth spurts or something more significant?
  • Do you recommend any physical therapy, evaluations, or lifestyle adjustments?
  • How can we safely encourage more movement without risking injury?

What to expect during the physical evaluation

Your pediatrician will likely perform a thorough physical exam, checking joint mobility, muscle tone, cardiovascular health, and growth percentiles. Depending on their findings, they may recommend blood work, imaging, or a referral to a pediatric specialist.

Conclusion

Navigating the ups and downs of childhood health can feel overwhelming at times, but you do not have to do it alone. Understanding when to talk to a pediatrician about your child’s physical activity empowers you to advocate effectively for your child’s well-being. Trust your parental instincts. If something feels off, or if you simply have questions about your child’s development, your pediatrician is your best partner in fostering lifelong healthy habits.

Frequently Asked Questions

How much physical activity do children need daily?

Toddlers and preschoolers need about three hours of physical activity daily. School-aged children and adolescents require a minimum of 60 minutes of moderate-to-vigorous activity every day.

What is the difference between high energy and hyperactivity?

High energy children can still focus, sleep well, and calm down when needed. Hyperactivity involves persistent restlessness and impulsivity that often interferes with daily functioning.

When should I worry about my child’s lack of physical activity?

You should consult a doctor if your child consistently avoids playground equipment, shows delayed gross motor skills, complains of leg pain during short walks, or experiences sudden lethargy.

Is joint pain normal after a child plays sports?

Occasional growing pains happen at night, but pain during or immediately after exercise, a lasting limp, or chronic soreness is not normal and requires a medical checkup.

What are red flags during exercise that require immediate attention?

Dizziness, lightheadedness, fainting, severe shortness of breath, and chest tightness during or right after physical exertion must be evaluated by a healthcare professional immediately.

How should I prepare for my pediatrician appointment regarding physical activity?

Keep a one-to-two-week log of your child’s daily habits, screen time, activity levels, and specific symptoms like fatigue or pain, and write down questions to ask the doctor.

The Ultimate Baby Diapering Checklist for Everyday Use: Everything You Need

0

The Ultimate Baby Diapering Checklist for Everyday Use: Everything You Need

Introduction

Welcoming a new baby into your home brings an incredible wave of joy, love, and a surprising amount of laundry. It is a central part of newborn care for every family. If there is one constant ritual you will experience multiple times a day, it is changing diapers. Having a reliable baby diapering checklist for everyday use can transform a chaotic chore into a seamless routine. When every second counts during a messy blowout, having your supplies organized and within arm’s reach is an absolute game-changer for new parents.

Why You Need a Solid Diapering Game Plan

Newborns and infants require frequent changes to protect their sensitive skin from irritation and diaper rash. Without a structured plan, you might find yourself frantically searching for wipes while holding a squirming infant with a soiled diaper. Creating a dedicated station with a thorough baby diapering checklist for everyday use ensures you never get caught unprepared. It builds your parental confidence and keeps your baby calm, comfortable, and safe on the changing table.

The Reality of How Many Diapers Babies Actually Go Through

Before your baby arrives, it is easy to underestimate just how many diapers you will actually use. Newborns can easily go through ten to twelve diapers every single day. As they grow into older babies and toddlers, that number drops slightly, but you will still be changing six to eight diapers daily. Multiplying those numbers means you are looking at thousands of changes over the first few years. Preparing ahead of time with the right supplies is essential for surviving the diapering phase with your sanity intact.

The Ultimate Everyday Diaper Changing Station Checklist (At Home)

Setting up your main home diaper station requires careful thought to ensure maximum efficiency. This fits perfectly into a structured daily routine for your baby. You want everything organized logically so you can perform changes efficiently, even in the middle of the night. Here is what your home baby diapering checklist for everyday use should include.

Diapers (Disposable vs. Cloth Basics)

Whether you choose disposable diapers or cloth diapers, stock up on a generous supply near your changing table. If you use disposables, keep at least one full unopened pack nearby so you notice when you are running low. For cloth diapering families, keep a stack of clean pre-folds or pocket diapers alongside a wet bag with a waterproof lining for easy laundering.

Wipes and Wipe Dispensers

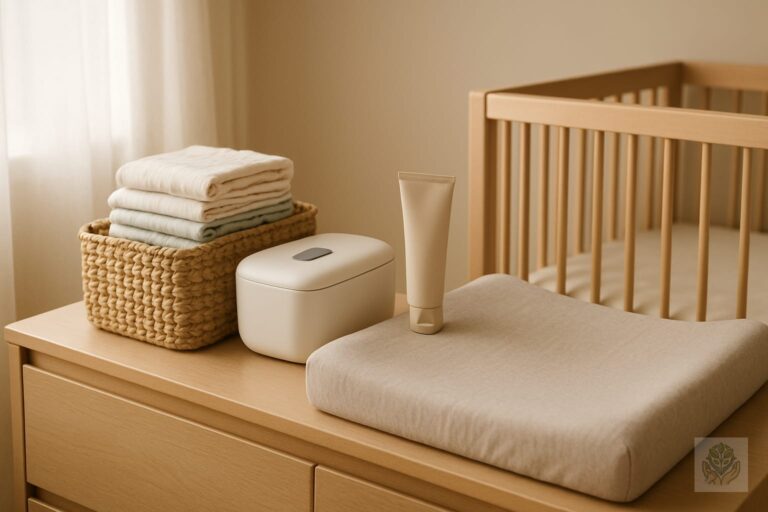
Gentle baby wipes are non-negotiable for cleaning up messes during every single change. Look for sensitive, fragrance-free options to prevent skin irritation. A weighted wipe dispenser is a wonderful addition because it allows you to pull out a single wipe with one hand instead of dealing with the entire plastic package sliding around.

Diaper Rash Creams and Ointments

Prevention is key when it comes to keeping your baby comfortable. Keep a zinc oxide-based diaper rash cream or a soothing petroleum jelly balm handy for every change. If your pediatrician recommends a specific preventative ointment, keep that front and center along with a soft silicone spatula for mess-free application.

Changing Pad and Waterproof Liners

A contoured changing pad provides a secure and comfortable surface for your baby. To save yourself from constant full cover washes, layer the pad with disposable or washable waterproof liners. When accidents happen, you can simply swap out the liner rather than stripping the entire changing pad cover.

Hand Sanitizer and Surface Cleaners

Hygiene is paramount when managing diaper changes multiple times a day. Keep a pump bottle of hand sanitizer right on your station for quick cleanups if you cannot immediately reach a sink. A gentle surface spray and paper towels are also helpful for wiping down the changing pad after a particularly messy situation.

Portable Diaper Caddy Checklist (For Moving Room-to-Room)

Babies spend time all over the house, and running upstairs to the nursery for every single wet diaper gets exhausting very quickly. This is where a mobile nursery setup becomes your best friend and should include the best baby products every new parent needs.

Why a Mobile Caddy is a Lifesaver

A portable caddy allows you to bring your changing station wherever you happen to be hanging out with your baby. Whether you are in the living room playing on a mat or hanging out in the kitchen preparing dinner, your supplies travel right along with you. It saves your energy and ensures you are always prepared.

Must-Haves for Quick-Access Changes

Keep your portable caddy streamlined so it remains lightweight and easy to carry. Your caddy should feature the following essentials:

  • A stack of ten to fifteen diapers in your baby’s current size
  • A travel-sized pack of sensitive baby wipes
  • A small tube of diaper rash ointment
  • One waterproof changing pad liner
  • A small sealable trash bag for dirty diapers
  • Travel-sized hand sanitizer

On-the-Go Diaper Bag Checklist

Leaving the house with an infant requires a bit of strategy, especially when it comes to managing bathroom breaks away from home. Your diaper bag is essentially your mobile nursery.

Compact Changing Mat

Public changing tables can be cold, hard, and questionably clean. A foldable, wipeable compact changing mat provides a hygienic barrier between your baby and public surfaces. Look for a mat that folds easily and has built-in pockets for a few diapers and wipes.

Travel-Sized Wipes and Diapers

Always pack more diapers than you think you will need for your outing, adding a few extra just in case you experience delays. A travel-sized pack of wipes keeps the overall weight of your bag manageable while still providing plenty of cleaning power.

Disposable Diaper Sacks / Trash Bags

When you are out visiting friends or shopping in public spaces, you will not always find a convenient trash can right next to the changing table. Scented, sealable disposable diaper sacks lock away unpleasant odors until you find a proper place to throw them out.

Change of Clothes (At Least Two!)

Blowouts do not respect your schedule or your location. Always pack at least two complete changes of clothes in your diaper bag. Include a bodysuit, pants, socks, and a spare zip-top bag to store the soiled garments so they do not ruin the rest of your bag contents.

Pacifiers and Distraction Toys

Diaper changes in unfamiliar environments can sometimes cause fussiness. Keep a couple of clean pacifiers in a protective case and a favorite small rattle or crinkle toy in your bag to keep your baby happily distracted while you work your magic.

Pro Tips for Staying Organized and Stocked

Organizing your supplies is only half the battle; maintaining that system is what keeps stress levels low during busy parenting days. Following a complete roadmap to healthy newborn care includes staying ahead of these logistics.

The Rule of Thumb for Restocking

Make it a habit to check and restock your portable caddy and diaper bag every evening before you go to sleep. Finding out you are completely out of wipes while standing in a public restroom is an avoidable stressful experience. A nightly five-minute reset keeps every part of your baby diapering checklist for everyday use fully prepared for the next day.

Managing Diaper Sizes as Baby Grows

Babies grow at astonishing rates during their first year of life. Avoid buying massive quantities of a single diaper size too far in advance, as your baby might outgrow them unexpectedly. Keep only one box of the next size up in reserve, and donate or gift any unopened smaller packs to local family shelters if your baby leaps up a size.

Conclusion

Mastering diaper changes is a rite of passage for every parent, and having the right tools makes all the difference. By utilizing a thoughtful baby diapering checklist for everyday use, you can stay calm, organized, and prepared whether you are at home in the nursery, moving room to room, or traveling out in the world. Enjoy these moments with your little one, knowing you are fully equipped for whatever messes come your way.

Frequently Asked Questions

How many diapers do newborns use daily?

Newborns typically go through about ten to twelve diapers every single day. As they grow older, this number decreases to around six to eight daily changes.

What are the essentials for a home diaper station?

A home diaper station should include diapers, sensitive baby wipes, diaper rash ointment, a contoured changing pad with waterproof liners, and hand sanitizer.

Why do I need a portable diaper caddy?

A portable diaper caddy allows you to bring your changing essentials from room to room, saving you from constantly walking back to the nursery.

How many changes of clothes should I pack in a diaper bag?

You should always pack at least two complete changes of clothes in your diaper bag to handle unexpected blowouts or spills while away from home.

When should I restock my diaper bag and caddy?

Make it a habit to check and restock your portable caddy and diaper bag every evening before you go to sleep to avoid being caught unprepared.

Should I buy large quantities of one diaper size in advance?

Avoid buying massive quantities of a single size too far in advance, as babies grow rapidly and can outgrow diaper sizes unexpectedly.

The Ultimate Baby Bath Time Checklist for First-Time Parents

0

The Ultimate Baby Bath Time Checklist for First-Time Parents

Introduction: Conquering the First Newborn Bath

Bringing home a newborn fills your heart with overwhelming joy, but let us be honest—it also brings a healthy dose of anxiety. Among the many new skills you need to learn, the first newborn bath ranks high on the list of things that make parents nervous. Between holding a slippery, delicate infant and wondering if the water is too hot, it is completely normal to feel a bit intimidated.

Here is a comforting secret: your baby does not need a full immersion bath every single day. In fact, until the umbilical cord stump falls off, sponge baths are the safest route to keep your baby clean while protecting the healing navel area. Once the cord heals, bathing your little one two to three times a week is usually plenty to keep them fresh without drying out their sensitive skin.

To help you transition from nervous beginner to confident caregiver, we have put together the ultimate baby bath time checklist. This guide is designed to make your daily or weekly routine safe, calm, and wonderful for bonding with your little one.

The Complete Baby Bath Supply Checklist

Organization is your best friend when it comes to newborn care. Having everything within arm’s reach before you even turn on the faucet is the golden rule of a stress-free bath. Here is your comprehensive baby bath supply checklist to prep your station:

  • Water Safety: A sturdy baby bathtub, preferably with a slanted newborn insert, and a reliable bath thermometer to check the water temperature accurately.
  • Cleansing Essentials: A mild, tear-free, fragrance-free baby soap and shampoo, alongside at least three to four soft washcloths.
  • Post-Bath Comfort: A plush, hooded baby towel to keep their head warm immediately after the bath, plus a clean diaper ready to go.
  • Post-Bath Skincare: Infant lotion or gentle oil (which is optional and best reserved for babies prone to dry skin).
  • Fresh Clothes: A fresh outfit, sleeper, and undershirt laid out flat so you can dress them quickly.

How to Prepare the Room and Water

Before you even think about undressing your baby, you need to set the stage. Newborns cannot regulate their body temperature well, meaning environment preparation is critical for comfort and safety.

First, focus on the room temperature. Keep the bathroom or nursery warm and completely draft-free, aiming for around 75 degrees Fahrenheit. Next, turn your attention to the water. Fill your baby bathtub with just two to three inches of warm water. Always aim for a water temperature between 90 and 100 degrees Fahrenheit, and verify it yourself by dipping your elbow or wrist into the water.

Finally, remember the ultimate rule of baby bath safety: never, ever leave a baby unattended in or near water, not even for a single second. If the doorbell rings or you forget a towel, you must scoop your baby up and take them with you.

Step-by-Step Guide to Giving Your Baby a Bath

With your supplies ready and water tested, you are ready to begin the routine using our step-by-step newborn bath method:

  1. Undress gently: Take off your baby’s clothes smoothly. If they start to fuss or shiver, wrap them loosely in a towel while you wash them one section at a time.
  2. Lower them in: Support their head and neck with one arm and hand while gently lowering them feet-first into the water with your other hand.
  3. Wash the face: Use a washcloth dampened with plain warm water only—no soap yet—to gently wipe around their eyes and face.
  4. Shampoo the hair: Apply a tiny drop of baby shampoo to their scalp, massage gently, and rinse carefully while cupping your hand across their forehead to keep suds out of their eyes.
  5. Wash the body: Cleanse down the body, paying special attention to hidden skin folds where lint and milk residue collect, such as the neck, armpits, thighs, and diaper area.
  6. Rinse and wrap: Give a final gentle rinse with clean water, then lift your baby out immediately and wrap them snugly in the hooded towel.

Drying, Moisturizing, and Dressing

The bath may be over, but your cozy-down routine has just begun. Newborn skin is delicate and prone to chafing, so your post-bath actions matter just as much as the wash itself.

Pat your baby dry gently with the hooded towel rather than rubbing their skin. Pay special attention to drying all skin creases to prevent diaper rash and irritation. If your pediatrician recommends it, or if your baby has naturally dry skin, smooth on a tiny amount of hypoallergenic infant lotion.

Next, slip on a clean diaper and a soft, comfortable sleeper. Dressing your baby warmly right away helps them maintain their body temperature and signals that relaxation time is here.

Pro Tips to Make Bath Time Stress-Free

Even with the best baby bath time checklist, some days will come with tears. Here are a few expert tips to keep the process smooth and enjoyable:

  • Incorporate it into bedtime: Warm water relaxes tired muscles, making bath time a wonderful anchor for your evening bedtime routine.
  • Engage the senses: Talk softly, sing your favorite lullabies, or play gentle acoustic music to soothe your baby’s nervous system.
  • Accept the tears: Do not panic if your baby cries during their early baths. The sensation of open air and water is entirely new to them, and they simply need time to adjust.

Conclusion: You’ve Got This!

Mastering newborn care takes patience, and bath time is no exception. With every splash and cuddle, you and your baby will grow more comfortable with the process. Keep your baby bath time checklist nearby for quick reference until the routine becomes second nature.

Do you have a favorite baby bath product or a clever tip that helped you survive the newborn stage? Share your thoughts in the comments below, or subscribe for more expert newborn care tips straight to your inbox!

Frequently Asked Questions

How often should I bathe a newborn baby?

Until the umbilical cord falls off, stick to sponge baths. Once it heals, bathing your baby two to three times a week is plenty to keep them clean without drying out their skin.

What is the ideal water temperature for a baby bath?

The water temperature should always be between 90 and 100 degrees Fahrenheit. Always verify the temperature using a reliable bath thermometer or by dipping your elbow into the water.

Do I need to use soap during every bath?

No, you do not need to use soap every time. Plain warm water is often enough for newborns, and using mild, fragrance-free soap sparingly helps prevent dry skin and irritation.

How much water should be in the baby bathtub?

You only need to fill the baby bathtub with two to three inches of warm water. This shallow amount is plenty for a newborn and keeps bath time safe and manageable.

Can I leave my baby alone in the bath for a second?

Never leave your baby unattended in or near water, not even for a single second. If you need to grab something, you must scoop your baby up and take them with you.

What should I do if my baby cries during the bath?

Do not panic if your baby cries. The open air and water are new to them. Talk softly, sing lullabies, wrap them loosely in a towel if needed, and give them time to adjust.

Everything You Need to Know About Baby Nutrition Tips: The Ultimate Guide for New Parents

0

Everything You Need to Know About Baby Nutrition Tips: The Ultimate Guide for New Parents

Early childhood nutrition plays a foundational role in shaping your child’s lifelong health, cognitive development, and immune function. From the very first droplet of milk to the messy exploration of family meals at age one, what your baby eats matters deeply; for more, see our guide on planning healthy baby meals. Navigating the world of baby food, however, does not have to be overwhelming. With the right baby nutrition tips and a reassuring approach, you can feel confident every step of the way as your little one grows.

Phase 1: The First 6 Months – Milk is Magic

During the first half-year of life, your baby’s digestive system is uniquely designed for a liquid diet. Whether you choose breast milk, formula, or a combination of both, these milk feeds provide every single calorie, vitamin, and drop of hydration your infant needs to thrive. Having the best baby products can help make this early phase much smoother.

Breast milk and infant formula offer exceptional nutritional benefits, though they have minor differences. Breast milk contains live antibodies and changes composition to match your baby’s needs, while iron-fortified formula provides a consistent, carefully measured blend of nutrients that closely mimics nutritional standards. Regardless of your choice, feeding on demand is essential. Learn to read your baby’s hunger cues, such as rooting, sucking on hands, and making cooing noises, rather than strictly watching the clock.

Pediatricians often recommend specific supplements during this early phase. Exclusively breastfed babies typically require a daily Vitamin D supplement to support bone growth, since breast milk is naturally low in Vitamin D. Around four to six months, iron stores acquired in utero begin to deplete, which may prompt your pediatrician to discuss targeted supplementation, especially for exclusively breastfed infants.

New parents frequently worry about common digestive quirks like spit-up, gas, and frequent feeds. Spitting up is usually normal as the lower esophageal sphincter matures, and gas is simply a byproduct of an immature digestive tract processing air swallowed during feeds. If you ever feel concerned about weight gain or feeding frequency, your pediatrician is your best resource for health and newborn care.

Phase 2: Introducing Solids (Around 6 Months)

Around six months of age, your baby will likely display signs of readiness for solid foods. Key readiness signs include sitting upright with minimal support, holding steady head control, losing the automatic tongue-thrust reflex that pushes food out, and showing a keen interest in what is on your plate.

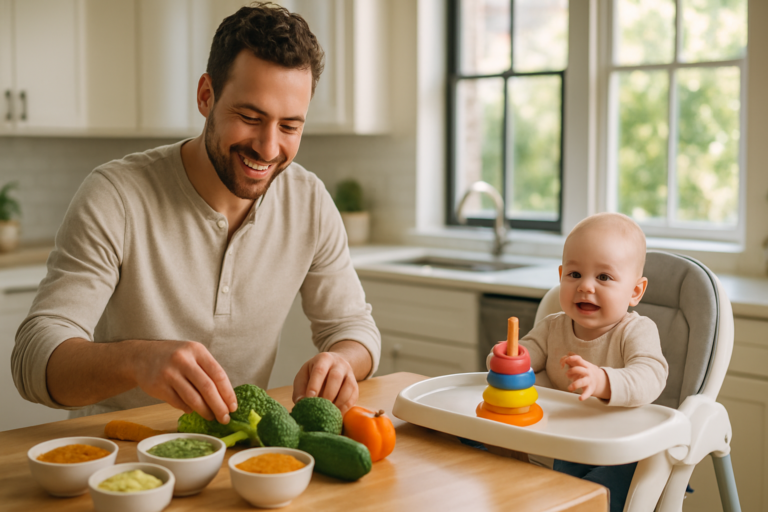
When it comes to introducing solids, parents generally choose between traditional purées and Baby-Led Weaning (BLW). Traditional purées involve spoon-feeding smooth foods and gradually increasing texture, which many parents find comforting for monitoring intake. BLW encourages babies to self-feed soft, graspable pieces of table food from the start, fostering fine motor skills and self-regulation. Both methods are wonderful, and many families adopt a hybrid approach.

Great first foods include iron-fortified single-grain cereals, smoothly mashed avocado, steamed and pureed sweet potato, and gently cooked squash. As you introduce these items, remember that modern baby nutrition tips emphasize early and repeated introduction of common allergens—such as peanut butter thinned out with warm water, scrambled eggs, and dairy. Introducing these foods early, one at a time, helps reduce the risk of developing severe food allergies.

Phase 3: Essential Nutrients Your Growing Baby Needs

As milk alone is no longer sufficient after six months, your baby requires a varied diet rich in specific micronutrients and macronutrients to support their rapid growth spurt.

Iron is perhaps the most crucial nutrient during this transitional window. Because natural iron stores drop around six months, incorporating iron-rich foods like pureed meats, beans, lentils, and iron-fortified grains is vital for healthy brain development and preventing anemia.

Healthy fats are another cornerstone of infant nutrition. The brain develops at an astonishing rate during the first year of life, and fats provide the necessary building blocks. Avocados, full-fat plain Greek yogurt, nut butters, and olive oil are fantastic additions to your baby’s daily meals.

Calcium and Vitamin D work hand in hand to build strong bones and teeth, while zinc and Vitamin C work together to boost the developing immune system. Offering a colorful variety of fruits, vegetables, and protein sources ensures your baby receives a well-rounded profile of these vital elements.

Phase 4: Month-by-Month Feeding Milestones (6–12 Months)

Understanding developmental milestones helps you adapt meal textures and portions as your baby matures:

  • 6 to 8 months: Focus on single-ingredient purées or soft, easily mashable textures. This is also a great time to introduce small sips of water in an open cup or weighted straw cup during meals.
  • 8 to 10 months: Introduce finger foods as the pincer grasp develops. Your baby can now handle soft, small pieces of food, lumpy textures, and finger foods like soft-cooked pasta or small banana pieces.
  • 10 to 12 months: Transition closer to family meals with modified textures and reduced sodium. Your baby can now manage a wider array of table foods and practice drinking water independently from a cup.

While exploring new foods, always keep safety in mind. Certain items must be avoided completely during the first year. Never give honey to an infant due to the risk of infant botulism. Cow’s milk should not be served as a primary drink before age one because it can irritate the infant gut and displace iron absorption. Always avoid choking hazards like whole grapes, nuts, popcorn, and hard, raw vegetables.

Practical Baby Nutrition Tips for Busy Parents

Feeding a baby every day can feel like a full-time job. To make life easier, practical organization makes all the difference. Batch-prepare homemade baby food by steaming large portions of vegetables or fruits, pureeing or mashing them, and freezing them in silicone ice cube trays for quick, grab-and-warm portions.

Picky eating and food refusal are completely normal phases of toddler and infant development. If your baby turns their head away, stay calm and avoid pressuring them. It can take up to fifteen exposures for a baby to accept a new food. Keep mealtimes positive, low-stress, and interactive by eating together as a family whenever possible.

Always prioritize safety. Practice safe food storage by keeping homemade purees in the refrigerator for up to 48 hours or freezing them promptly. Never leave your baby unattended while they are eating, and familiarize yourself with basic infant choking first aid.

Conclusion

Embarking on the journey of feeding your baby is an exciting milestone filled with messy faces and joyful discoveries. By keeping these essential baby nutrition tips in mind, you can provide a strong nutritional foundation for your little one’s future. Remember that every baby develops and eats at their own unique pace—some days they will eat everything in sight, while other days they will barely touch a bite. Trust your instincts, consult your pediatrician with any specific concerns, and share your favorite baby meal idea in the comments below!

Frequently Asked Questions

When should I start introducing solid foods to my baby?

Most pediatricians recommend introducing solids around 6 months of age when your baby shows signs of readiness, such as sitting upright and holding steady head control.

Is breast milk or formula enough for the first six months?

Yes, exclusively breast milk or iron-fortified infant formula provides all the essential calories, hydration, and nutrients your baby needs during the first six months of life.

What are the most important nutrients for a growing baby?

Iron is crucial for brain development, while healthy fats support cognitive growth. Calcium and Vitamin D build strong bones, and zinc and Vitamin C support immunity.

When can I introduce common food allergens like peanuts and eggs?

Modern guidelines suggest early and repeated introduction of common allergens around 6 months, one at a time, to help reduce the risk of developing severe food allergies.

What foods should I avoid giving my baby in the first year?

Never give honey to infants due to the risk of infant botulism. Avoid giving cow’s milk as a primary drink before age one and steer clear of choking hazards like whole grapes and nuts.

How do I handle a picky eater or food refusal?

Stay calm and keep mealtimes positive. It can take up to fifteen exposures for a baby to accept a new food, so continue offering variety without pressure.

Everything You Need to Know About Planning Healthy Baby Meals

0

Everything You Need to Know About Planning Healthy Baby Meals

Introduction

Stepping into the world of solid foods is one of the most exciting milestones in your parenting journey. Watching your little one explore new flavors, textures, and colors marks a major leap toward independence. However, transitioning away from an exclusively milk-based diet can also feel a bit overwhelming for those transitioning out of the newborn care stage. You might find yourself wondering if your baby is getting enough nutrients, or how to juggle preparation without spending hours in the kitchen.

Early nutrition plays a monumental role in shaping lifelong health, metabolic function, and taste preferences. What your baby eats today lays the biological foundation for their future well-being. By focusing on whole foods, diverse flavors, and balanced plates, you help your child build a positive, intuitive relationship with food right from their very first bite.

In this comprehensive guide, we will walk you through everything you need to know about planning healthy baby meals. From recognizing readiness signs and understanding crucial developmental nutrients to mastering batch meal prep and navigating common allergens, you will find practical, reassuring advice every step of the way.

When is Your Baby Ready for Solid Foods?

Before diving into meal preparation, the most important step is determining whether your baby’s digestive and motor systems are mature enough for food. Most pediatric guidelines recommend introducing solids around six months of age. At this stage, breastmilk or formula alone may no longer fully meet their growing nutritional needs, particularly regarding iron.

Look for key developmental signs of readiness rather than just watching the calendar. Can your baby sit upright with minimal support? Have they lost the tongue-thrust reflex that automatically pushes foreign objects out of their mouth? Are they showing active interest in what you eat by reaching for your plate or mimicking chewing motions? If you answer yes to these questions, your baby is likely ready to begin their first foods adventure.

It is easy to get caught up in old-school myths, such as feeding rice cereal in a bottle to help babies sleep through the night. Modern pediatric science strongly advises against this practice due to choking risks and unnecessary empty calories. Instead, trust your pediatrician, follow your baby’s cues, and remember that food before one is mostly for fun, exploration, and practice!

Nutritional Needs: What Essential Nutrients Do Babies Need?

When you start planning healthy baby meals, keeping key nutrients in mind ensures your baby thrives. While breastmilk or formula continues to provide the bulk of their hydration and calories throughout the first year, solid foods fill in crucial nutritional gaps.

Iron tops the list of critical nutrients for infant development. Around six months of age, a baby’s natural iron stores begin to deplete rapidly. Incorporating iron-rich foods like pureed meats, mashed beans, iron-fortified oatmeal, and soft-cooked lentils supports vital brain growth and cognitive function.

Healthy fats are another powerhouse nutrient. Do not shy away from fats; your baby’s rapidly developing brain and nervous system rely on them. Avocado, full-fat plain yogurt, smooth nut butters thinned with water, and olive oil drizzled over steamed vegetables are fantastic additions to your baby’s plate.

Calcium and vitamin D work hand in hand to build strong, healthy bones and teeth. While dairy milk should not be given as a primary drink before age one, yogurt and cheese make wonderful additions to baby meals. Finally, never forget that breastmilk or formula remains a foundational part of their daily intake, usually taking precedence before solid meals until closer to their first birthday.

Approaches to Baby Feeding: Purees vs. Baby-Led Weaning (BLW)

Parents today are blessed with multiple feeding philosophies, allowing you to choose the method that best fits your family lifestyle. Traditional spoon-feeding involves starting with smooth, single-ingredient purees and gradually advancing to chunkier textures over several months. This method allows parents to clearly track volume and minimizes early mess.

On the other hand, Baby-Led Weaning (BLW) skips purees entirely, encouraging infants to self-feed soft, graspable pieces of whole food right from the start. BLW promotes fine motor skills, hand-eye coordination, and natural appetite regulation. Babies learn to chew before they swallow and explore textures at their own pace.

Many modern parents actually find success in a hybrid approach known as responsive feeding. You might offer a pre-loaded spoon of vegetable puree while also placing soft steamed carrot sticks or avocado wedges on the high chair tray. The goal is simple: raise a happy, confident eater by following your baby’s lead.

Step-by-Step Baby Meal Planning Guide (By Age)

As your baby grows, their nutritional requirements, chewing abilities, and appetite evolve quickly. Breaking down your meal strategy by age brackets makes planning healthy baby meals much more manageable.

  • 6 to 8 months: Start slow with one or two meals a day. Offer single-ingredient purees or very soft, mashed foods. Gradually introduce texture progression by leaving tiny soft lumps in their food to encourage tongue lateralization.
  • 9 to 11 months: Increase to three meals a day plus healthy snacks if needed. Introduce soft finger foods, bite-sized table foods, and combination meals like mild vegetable stews or shredded chicken mixed with mashed sweet potato.
  • 12 months and beyond: Your toddler is ready to transition to family meals! They can eat most of what the household eats, provided foods are modified to eliminate choking hazards. Whole cow’s milk can now be introduced as a beverage.

Sample 7-Day Healthy Baby Meal Plan

Having a structured weekly blueprint takes the guesswork out of daily cooking. Here is a balanced, age-appropriate sample meal plan suitable for a baby around 9 to 10 months old who is mastering finger foods.

DayBreakfastLunchDinner
Day 1Mashed banana with oatmealSteamed carrot sticks & shredded chickenMashed sweet potato & soft peas
Day 2Scrambled egg strips & avocado cubesLentil soup (mild, low sodium)Baked squash & flaky white fish
Day 3Whole milk yogurt with pureed berriesSteamed broccoli florets & soft pastaGround turkey & zucchini mash
Day 4Oatmeal with thin almond butterMashed black beans & soft riceRoast beef strips & roasted carrots
Day 5Pancake strips with fruit pureeAvocado toast fingersChicken and vegetable casserole
Day 6Full-fat cottage cheese & peach slicesSteamed sweet potato wedgesSteamed salmon flakes & green beans
Day 7Chia seed pudding with mashed bananaEgg muffin cups (diced veggies)Turkey meatloaf (low sodium) & squash

How to Meal Prep and Store Homemade Baby Food

Cooking separate, elaborate meals for a baby every single day is a fast track to parent burnout. Batch cooking is your secret weapon. Spend an hour or two on the weekend roasting trays of root vegetables, simmering lentils, or baking chicken breasts, then portion them out for the week using these homemade healthy baby recipes.

Invest in high-quality silicone freezer trays with lids, glass storage containers, and travel-friendly feeding bowls. You can freeze purees or cooked soft finger foods in portions, making defrosting quick and effortless. Always label containers with the preparation date.

When reheating homemade baby food, ensure it is heated thoroughly throughout and then cooled down to a safe temperature before serving. Never reuse a bowl or spoon that your baby has already placed in their mouth, as bacteria from their saliva can contaminate leftover food.

Navigating Allergies and Choking Hazards Safely

Outdated parenting advice once suggested delaying common allergens for years. Current pediatric guidelines recommend introducing common allergen foods early and often, usually right around six months when solids begin. Foods like peanut butter thinned with water, well-cooked eggs, yogurt, and fish can be introduced one at a time over a few days to monitor for any adverse reactions.

Equally important is knowing which foods to avoid entirely during the first year. Honey is strictly off-limits due to the risk of infant botulism. Cow’s milk should not be served as a primary drink, and added sugars and excess sodium should be avoided to protect developing kidneys and taste buds.

Parents often worry about choking, but understanding the difference between gagging and choking brings peace of mind. Gagging is a normal, noisy reflex that helps babies push food forward if it moves too far back in the mouth. Choking is silent, dangerous, and requires immediate intervention. Always supervise meals closely and avoid high-risk round foods like whole grapes, nuts, popcorn, and raw, hard vegetables, always prioritizing baby safety.

Conclusion

Embarking on the solid food journey is an incredible adventure filled with messy faces, new discoveries, and wonderful bonding moments. Remember to extend grace to yourself and your baby as you figure out this new phase together. Every child learns at their own pace, and food preferences take time to develop.

By focusing on patience, following your baby’s hunger and fullness cues, and utilizing positive parenting techniques, planning healthy baby meals becomes a natural and joyful part of your routine. Enjoy watching your little one grow into a healthy, enthusiastic eater!

What is your baby’s favorite healthy meal or snack right now? Share your tips and ideas in the comments below to help inspire fellow parents!

Everything You Need to Know About Choosing Baby Feeding Accessories

0

Everything You Need to Know About Choosing Baby Feeding Accessories

Introduction

Walking down the baby aisle for the first time can feel completely overwhelming. New parents are met with endless shelves of colorful bottles, specialized spoons, high-tech sterilizers, and quirky gadgets. Amidst the chaos, you might find yourself wondering what you actually need versus what is just clever marketing. Choosing the right baby feeding accessories is about much more than aesthetics. It directly impacts your baby’s health, safety, and comfort while making your daily routine as a parent smoother and more enjoyable. It is often helpful to see where these items fit within the best baby products every new parent needs to simplify your shopping list.

Whether you are preparing to welcome a newborn or getting ready to introduce your infant to solid foods, having a well-curated set of tools makes all the difference. This comprehensive guide breaks down everything you need to know. We will walk you through each developmental stage, highlight the must-have gear, discuss critical safety factors, and help you avoid buying single-use gadgets that will only clutter your kitchen drawers.

Understanding Your Baby’s Feeding Stages

Babies grow and change at a breathtaking pace, and their nutritional needs dictate the gear you will use. Understanding these milestones helps you purchase items intentionally rather than all at once, saving you money and storage space.

During the newborn stage, spanning from zero to six months, the focus remains entirely on nursing or formula feeding. Your primary purchases will revolve around baby bottles, nursing pillows, and reliable burp cloths. As your baby develops head control and digestive maturity around the six-month mark, you enter the exciting transition stage. This phase introduces solid foods, purees, and the fun world of self-feeding, requiring entirely different equipment.

By the time your child reaches twelve months and beyond, they enter the toddler stage. Now, they want to feed themselves independently using cups, toddler forks, and spoons. Knowing what lies ahead allows you to select versatile baby feeding accessories that adapt as your child grows.

Phase 1: Essential Accessories for Milk Feeding (Bottles & Nursing)

Whether you are exclusively pumping, formula feeding, or combining methods, the newborn milk-feeding phase requires reliable gear. When shopping for baby bottles, you will encounter three main materials: glass, silicone, and traditional plastic. Glass is durable, eco-friendly, and easy to sanitize, though heavier for tiny hands. Silicone bottles are soft, unbreakable, and mimic the feel of skin, while lightweight plastic options are budget-friendly and shatterproof.

Pay close attention to nipple flow rates, starting with slow-flow nipples for newborns to prevent choking and gas. Anti-colic features, such as built-in venting systems or collapsible silicone pouches, are fantastic investments to reduce uncomfortable gas and spit-up. If you are pumping, look for compatible breast milk storage bags and an efficient breast pump. Finally, keep hygiene front and center with a dedicated bottle brush, a spacious drying rack, and an electric sterilizer or microwave sterilizing bags.

Phase 2: Must-Have Gear for Starting Solids (Weaning Essentials)

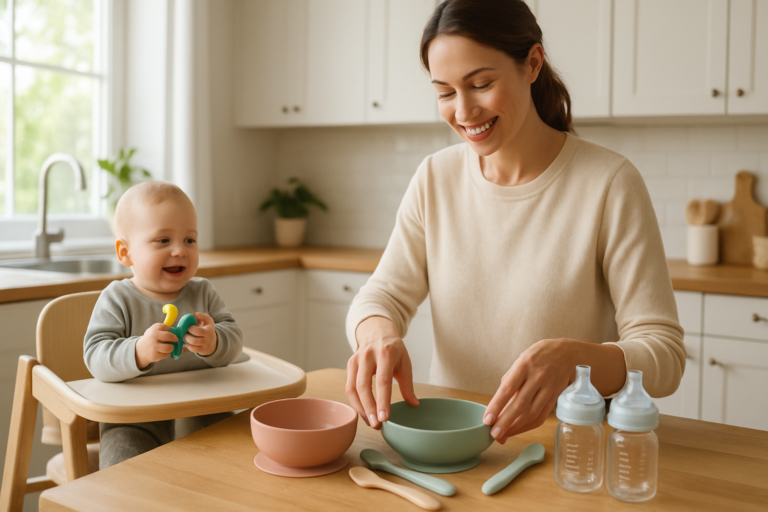
Starting solids is a messy, beautiful milestone that requires a shift in your toolkit. Your baby’s delicate gums need gentle utensils, making soft-tip silicone spoons an absolute must-have. When serving food, standard ceramic or glass plates will likely end up on the floor. Invest in bowls and plates featuring strong suction bases to keep mealtime anchored to the high chair tray. Once you have the gear, you can begin exploring homemade healthy baby recipes to fill those bowls.

Speaking of high chairs, look for models with ergonomic support, a secure safety harness, and easy-to-clean materials like faux-leather or smooth molded plastic. Crevices trap food easily, so a simple wipe-down design will save your sanity. To manage the inevitable mess, silicone catch-all bibs are vastly superior to fabric alternatives because they trap dropped food in a handy pocket and rinse clean in seconds.

Phase 3: Transitioning to Independence (Cups & Utensils)

As your baby transitions toward toddlerhood, encouraging independent drinking and eating becomes the primary goal. When choosing cups, speech therapists often recommend 360-degree cups because they allow babies to drink from any rim while supporting natural oral development, similar to a regular open cup. Straw cups are also fantastic for building oral motor skills, while traditional sippy cups with hard spouts are generally less favored by modern pediatric dental experts.

Introduce training forks and blunt-edge knives once your child shows an interest in copying your table manners. To keep your sanity while running errands, invest in snack catchers with flexible silicone flaps. These let little fingers reach in for puffs or crackers without spilling them all over the car seat or stroller. Using these containers is a great way to serve healthy snacks for kids while on the go.

Key Factors to Consider When Buying Baby Feeding Accessories

With so many products on the market, filtering your choices through a few key safety and practicality criteria will protect your baby and your budget.

  • Safety Certifications: Always verify that plastics and silicone items are explicitly labeled BPA-free, PVC-free, phthalate-free, and lead-free. Learn more in our ultimate guide to baby safety.
  • Ease of Cleaning: Look for dishwasher-safe items, especially for products you will wash multiple times a day like bottles and pump parts. Avoid items with hidden mold traps.
  • Durability and Longevity: Choose convertible high chairs, adjustable cups, and modular storage systems that grow with your child through different developmental milestones.
  • Budget vs. Investment: Splurge on items used daily for long periods, like a great high chair or pump, and save on simple items like bibs and basic spoons.

What to Avoid: Overhyped Feeding Gadgets You Don’t Need

It is easy to fall victim to clever marketing campaigns designed to prey on anxious new parents. However, many specialized items simply create more work. Skip single-use gadgets like dedicated avocado slicers, automatic baby food stirrers, or overly complex bottle warmers with unnecessary digital displays that take forever to program.

Be cautious with cheap plastic containers that warp in the dishwasher or absorb tomato-based stains after a single use. Stick to multi-functional, high-quality basics. A standard pot of warm water or a microwave bowl works just as well for warming milk as an expensive countertop appliance.

Conclusion

Choosing the right baby feeding accessories does not have to be an overwhelming ordeal. By focusing on your baby’s current developmental stage, prioritizing safety-certified materials, and investing in easy-to-clean gear, you set the stage for healthy and happy mealtime habits. Remember that every baby is entirely different. One infant might adore a specific bottle brand while another rejects it, and that trial-and-error process is completely normal.

Focus on what works best for your unique family dynamic and budget. Take a deep breath, trust your parental instincts, and enjoy watching your little one discover the joy of food. Be sure to check out our recommended product lists for vetted favorites, or share your absolute favorite feeding hack in the comments below!

Frequently Asked Questions

When should I start buying baby feeding accessories?

You should purchase newborn milk-feeding essentials like bottles, burp cloths, and a pump before birth. Wait until your baby approaches six months old before buying solid food accessories like suction plates and high chairs.

What materials are safest for baby bottles?

Glass, medical-grade silicone, and BPA-free plastics are the safest options. Glass is durable and easy to sterilize, silicone is soft and unbreakable, and plastic is lightweight and budget-friendly.

Are anti-colic baby bottles actually necessary?

They are very helpful if your baby suffers from excessive gas, painful spit-up, or discomfort during feeds, as the venting systems reduce the amount of air swallowed.

What type of cup is best when transitioning from a bottle?

Speech therapists and pediatric dentists often recommend 360-degree cups or straw cups because they promote natural oral development and motor skills compared to traditional hard-spout sippy cups.

How do I ensure baby feeding accessories are safe?

Always check product labels to ensure items are explicitly certified BPA-free, PVC-free, phthalate-free, and lead-free before using them with your infant.

Which baby feeding gadgets should I avoid?

Skip single-use items like avocado slicers, automatic food stirrers, and overly complex appliances. Stick to versatile basics that are easy to clean and dishwasher safe.

Everything You Need to Know About Homemade Healthy Baby Recipes: The Ultimate Guide

0

Everything You Need to Know About Homemade Healthy Baby Recipes: The Ultimate Guide

Why Choose Homemade Healthy Baby Recipes?

Embarking on the journey of feeding your little one is an exciting milestone. It often follows the initial stages of newborn care as your baby transitions to solids. Preparing homemade healthy baby recipes gives you absolute control over what goes into your baby’s growing body. Unlike store-bought jars, making your own baby food allows you to preserve the vibrant natural flavors and essential nutrients of fresh produce. It is also remarkably cost-effective and sets the stage for a lifetime of adventurous eating.

Many parents worry that cooking for a baby requires professional culinary skills or an overwhelming amount of time. In reality, whipping up a batch of nutritious meals can be as simple as steaming a sweet potato and blending it smooth. By choosing fresh, whole ingredients, you eliminate hidden sugars, excess sodium, and unnecessary preservatives found in some commercial products.

Throughout this ultimate guide, we will explore readiness signs, developmental stages, essential nutrients, easy-to-follow recipes, allergen introduction, and stress-free storage tips. Whether you are leaning toward traditional purees or baby-led weaning, you will find everything you need to nourish your baby with confidence.

Getting Started: When is Your Baby Ready for Solids?

Deciding when to introduce solid foods is a major milestone in your parenting journey, and our guide on starting baby’s first foods provides additional expert tips. According to the American Academy of Pediatrics (AAP), most babies are developmentally ready to start solid foods around 6 months of age. Every baby develops at their own unique pace, so looking for physical cues is far more important than watching the calendar.

Key signs of developmental readiness include the ability to sit up independently with minimal support, good head and neck control, and the disappearance of the tongue-thrust reflex, which causes babies to automatically push food out of their mouths. You might also notice your baby showing intense curiosity about what is on your plate, reaching for your food, or opening their mouth when food comes close.

When starting out, you can choose between traditional smooth purees and baby-led weaning (BLW), where babies feed themselves soft, graspable pieces of whole food. Both approaches are fantastic; many parents even use a combination of the two depending on the meal and their baby’s daily mood.

Key Nutrients Your Growing Baby Needs

During the first year of life, your baby experiences rapid physical and cognitive development. Homemade healthy baby recipes provide an incredible opportunity to pack every spoonful with vital nutrients. Iron is one of the most critical elements for brain development, making iron-rich foods like pureed lentils, well-cooked meats, and iron-fortified oatmeal essential additions to their diet.

Healthy fats are equally important for neurological and brain growth. Incorporating ingredients like mashed avocado, a drizzle of olive oil, or smooth nut butter thinned out with breast milk or formula provides rich caloric density for active little bodies. Brightly colored fruits and vegetables supply essential vitamins and antioxidants that support a strong immune system.

It is equally crucial to know what to avoid during the first year. Honey should never be given to infants under one year old due to the risk of infant botulism. Cow’s milk should not be served as a primary drink until after the first birthday, and you should always steer clear of added sugars, excessive sodium, and dangerous choking hazards like whole grapes, nuts, or popcorn. Awareness of these risks is a key part of baby safety.

Stage 1 Recipes (4–6 Months)

Stage 1 focuses on simple single-ingredient purees designed to introduce your baby to the concept of eating off a spoon. Keep the texture completely smooth and runny by mixing in breast milk, formula, or water. Introduce one new food at a time, waiting a few days before trying another to easily monitor for any potential food sensitivities.

Recipe: Silky Sweet Potato Puree

Prick a medium sweet potato with a fork and roast it at 400 degrees Fahrenheit until completely tender. Scoop out the flesh, discard the skin, and blend with a splash of breast milk or water until smooth and velvety.

Recipe: Creamy Avocado and Banana Mash

Mash half of a ripe avocado and half of a ripe banana together using a fork. The natural sweetness of the banana pairs wonderfully with the creamy, nutrient-dense avocado for a quick, no-cook meal.

Recipe: Simple Steamed Carrot Puree

Peel and chop two carrots into uniform rounds, then steam them until fork-tender. Transfer them to a blender and puree until ultra-smooth, adding small amounts of cooking water to achieve the desired consistency.

Stage 2 Recipes (7–9 Months)

As your baby masters swallowing and shows more enthusiasm at mealtime, you can transition toward Stage 2. This stage introduces thicker purees, combination flavors, and slightly chunkier textures. Introducing complex flavor profiles early helps expand their palate and reduces the likelihood of picky eating down the road.

Recipe: Apple, Spinach, and Oat Blend

Steam apple slices and a handful of fresh spinach until tender. Blend them together with a spoonful of cooked baby oatmeal for a nutrient-packed, naturally sweet meal that introduces greens gently.

Recipe: Zesty Pear and Squash Mash

Roast cubed butternut squash and ripe pears until soft and caramelized. Mash them together roughly with a fork to encourage your baby to experience new, slightly textured sensations in their mouth.

Recipe: Savory Chicken and Sweet Potato Puree

Blend cooked, skinless chicken breast with roasted sweet potatoes and a splash of low-sodium chicken broth. This savory dish delivers a fantastic dose of lean protein and complex carbohydrates.

Stage 3 & BLW Recipes (9–12 Months)

By 9 to 12 months, your baby is likely ready for finger foods, chunkier mashes, and self-feeding adventures. This stage is all about encouraging independence, fine motor skill development, and sharing modified versions of wholesome family meals, eventually transitioning to healthy snacks for kids.

Recipe: Healthy Banana Oat Mini Muffins (BLW Friendly)

Mix mashed bananas, rolled oats, an egg, and a dash of cinnamon. Bake in a mini muffin tin until firm and golden. These make wonderful, mess-free finger foods for self-feeding.

Recipe: Steamed Broccoli Florets with Mild Herb Dip

Steam broccoli florets until they are soft enough to be easily mashed between your fingers. Serve them alongside a mild dip made from plain whole-milk Greek yogurt and a pinch of garlic powder.

Recipe: Quick Lentil and Vegetable Mash

Simmer red lentils with diced carrots and zucchini in low-sodium vegetable broth until everything is completely soft. Mash lightly with a fork to create a hearty, protein-rich textured meal.

How and When to Introduce Common Allergens

Current medical guidelines recommend introducing common allergenic foods early in life, typically around the time solid foods begin (around 6 months). Early and repeated exposure to allergens such as peanuts, eggs, dairy, fish, and wheat can significantly reduce the risk of developing food allergies later in childhood.

Always introduce new allergens one at a time, preferably in the morning so you can monitor your baby for several hours afterward. A safe way to serve peanut butter, for instance, is to thin it out thoroughly with breast milk, formula, or warm water until it is runny, rather than serving it in sticky dollops that pose choking risks.

Watch closely for signs of an allergic reaction, which can include hives, swelling of the lips or face, vomiting, wheezing, or unusual fussiness. If you have a family history of severe food allergies, consult your pediatrician before introducing high-risk foods.

Storage, Freezing, and Meal Prep Hacks for Busy Parents

Meal prepping homemade healthy baby recipes is a game-changer for busy parents. Investing in the right storage gear saves you time and ensures your hard work stays fresh. High-quality glass jars and BPA-free silicone freezer trays with tight-fitting lids are absolute essentials in any baby kitchen, often ranking among the best baby products for new parents.

  • Store freshly prepared purees in the refrigerator for up to 48 to 72 hours.
  • Freeze leftover purees in silicone trays, then pop the frozen cubes into a labeled freezer bag for up to 3 months.
  • Always thaw frozen portions overnight in the refrigerator rather than on the countertop.
  • Ensure reheated food is cooled down thoroughly before serving it to your baby.

Empowering Your Baby’s Palate for Life

Navigating the messy, unpredictable world of homemade healthy baby recipes is a deeply rewarding experience. Preparing nourishing meals with your own hands lays a wonderful nutritional foundation and teaches your child to love wholesome, real food. Celebrate every small victory, embrace the mess on the floor, and use positive parenting techniques to enjoy watching your little one discover the joy of eating.

We would love to hear about your culinary adventures! Share your favorite homemade healthy baby recipe in the comments below or download our free printable baby meal planner to kickstart your weekly prep routine.

Everything You Need to Know Before Starting Baby’s First Foods: The Ultimate Guide for Parents

0

Everything You Need to Know Before Starting Baby’s First Foods

Stepping into the world of solid foods is one of the most exciting milestones in your baby’s first year of life. At the same time, it is completely normal to feel a wave of anxiety mixed in with your excitement. You might wonder if your little one is truly ready, which feeding style to choose, or how to navigate the terrifying world of food allergies and choking hazards. Take a deep breath because you are not alone in feeling this way.

Transitioning from breast milk or formula to baby’s first foods is a gradual journey of exploration, sensory development, and nutritional growth. The primary purpose of this comprehensive guide is to provide you with a stress-free, evidence-based roadmap. We want to help you feel confident, prepared, and ready to enjoy every messy, joyful bite along the way.

When is the Right Time? Recognizing Signs of Readiness

For generations, well-meaning family members might tell you to start feeding your baby rice cereal at four months old. However, modern pediatric guidelines have evolved significantly based on infant development research. The American Academy of Pediatrics (AAP) now recommends exclusive breastfeeding or formula feeding for around the first six months of life, with solid foods introduced alongside milk around that time.

Age alone is never the only indicator of whether your baby is prepared for baby’s first foods. Instead, you need to look for specific developmental milestones that prove your infant’s digestive and nervous systems are ready. Watch closely for these key physical signs of readiness:

  • Your baby can sit up independently with little to no support.
  • They have excellent head and neck control, meaning their head does not wobble or drop backward.
  • The tongue-thrust reflex has faded, which means they no longer automatically push food out of their mouth with their tongue.
  • They show intense interest in what you are eating, often watching your every bite, reaching for your plate, or opening their mouth when food approaches.

Choosing Your Approach: Purees vs. Baby-Led Weaning (BLW)

Once you confirm your baby is ready, you face your first major parenting decision: how do you want to feed them? There are two main approaches to introducing baby’s first foods, and neither one is inherently better than the other. The best choice is the one that fits your family’s lifestyle and comfort level.

Traditional Spoon-Feeding with Purees

Traditional spoon-feeding with purees involves starting with very smooth, runny foods and gradually increasing texture as your baby grows. The pros include feeling more in control of volume, less initial waste, and lower anxiety regarding choking. The cons include the extra time spent prepping purees and the eventual transition phase to textured foods.

Baby-Led Weaning (BLW)

Baby-Led Weaning, commonly known as BLW, skips purees entirely. Instead, you offer soft, graspable pieces of whole foods right from the start, allowing your baby to self-feed. Proponents love that BLW fosters fine motor skills, promotes intuitive eating, and makes family mealtime much easier since the baby eats what the parents eat. Safety considerations include ensuring foods are cut into appropriate shapes and accepting that a massive amount of food will end up on the floor.

Combining Both Approaches

Remember that you do not have to choose just one method. Many parents utilize a combination approach, offering responsive feeding that includes both purees and finger foods depending on the day, time, and menu.

The Best First Foods for Babies

When planning your baby’s first foods, nutritional priorities are crucial. Around six months of age, your baby’s iron stores—which they built up while in the womb—begin to deplete rapidly. Breast milk is an incredible source of nutrition, but it is relatively low in iron and zinc. Therefore, your nutritional priority should be offering iron-rich and zinc-rich foods daily.

Great choices include iron-fortified baby oatmeal, finely minced or pureed meats, poultry, well-cooked lentils, and mashed beans. You can easily pair these nutrient-dense options with gentle fruits and vegetables. Excellent starter produce includes ripe avocado, mashed banana, steamed sweet potato, and soft-cooked apple slices.

Consistency matters just as much as the food itself. If you are starting with purees, aim for a smooth, runny consistency at first, thickening it up over a few weeks. If you are practicing BLW, ensure the foods are soft enough to be easily mashed between your thumb and forefinger and shaped into pieces your baby can grasp with their palm.

How to Safely Introduce Common Allergens

If you grew up hearing that you should wait until your child was a toddler to introduce foods like peanuts or eggs, you can officially let go of that outdated advice. Modern medical guidelines strongly encourage the early and regular introduction of common allergens to help reduce the risk of food allergies later in life.

The top allergens to introduce early include peanuts, tree nuts, eggs, dairy, soy, wheat, fish, shellfish, and sesame. Here is a simple, step-by-step guide to doing this safely:

  1. Introduce only one new potential allergen at a time. This helps you easily identify which food caused a reaction if one occurs.
  2. Offer the allergen during the morning or early afternoon so you have several hours to monitor your baby for any allergic reactions before bedtime.
  3. Start with a very small amount, such as a tiny dab on the lips or a small taste mixed into a food they already tolerate well.
  4. If your baby tolerates the food without any issues, continue offering it regularly as part of their weekly diet to maintain immune tolerance.

Choking Hazards vs. Gagging: What Every Parent Needs to Know

One of the biggest fears parents face when offering baby’s first foods is the thought of their child choking. To manage this anxiety, it is essential to understand the difference between gagging and actual choking. They look and sound very different.

Understanding Gagging

Gagging is a completely normal, protective reflex. When a baby takes a bite of food that is too big or moves too far back in their mouth, their gag reflex triggers automatically to push the food forward. During a gag, your baby’s face might turn red, their eyes might water, and they may cough, sputter, or make retching noises. This can be startling to watch, but it usually resolves on its own within a few seconds without intervention.

Recognizing Choking

Choking, on the other hand, occurs when a foreign object completely or partially blocks the airway. A choking baby is typically silent, may turn pale or blue, cannot cry or cough effectively, and shows signs of panic. To minimize this risk, always avoid high-hazard foods during the first year, including whole grapes, cherry tomatoes, nuts, popcorn, raw hard vegetables, hot dog rounds, and hard candies.

Essential Gear and Supplies for Mealtime

You do not need to spend a fortune on fancy gadgets to feed your baby, but having a few essential items will make mealtime much safer and cleaner. Start with a proper high chair. The most important feature of a high chair is a solid footrest and a 90-degree angle posture. Proper seating support stabilizes your baby’s core, which is essential for safe swallowing and preventing choking.

Next, invest in baby-safe utensils made from soft silicone that won’t hurt delicate gums. Suction bowls and divided plates that stick firmly to the high chair tray will save your sanity by preventing the entire meal from flipping onto the floor. Finally, stock up on long-sleeved waterproof bibs and a washable splat mat to place under the high chair for quick and easy cleanup.

What to Expect: Poop Changes, Water, and Milk Intake

When you start introducing baby’s first foods, expect a dramatic shift in your diaper routine. Because your baby’s digestive system is learning how to process solid food, you will likely notice immediate changes in their bowel movements. Diapers may become firmer, smell significantly stronger, and change colors based on what they ate yesterday. Seeing pieces of undigested carrot or spinach in the diaper is completely normal!

You might also wonder about hydration. Once your baby reaches six months old, you can offer small sips of water in an open cup or a straw cup during mealtime. However, keep in mind the golden rule of the first year: food before one is just for fun. Breast milk or formula remains the primary source of nutrition and calories throughout the entire first year.

Conclusion: Trust Your Instincts and Enjoy the Journey

Embarking on the adventure of baby’s first foods is an incredible milestone filled with messy faces, funny reactions, and new discoveries. Remember to follow your baby’s unique cues, prioritize iron-rich foods, and embrace the mess as a vital part of sensory learning. Patience is your greatest tool during this transition. Trust your instincts, take plenty of photos, and enjoy watching your little one explore the wonderful world of food.