Home Blog Page 3

How to Create a Simple After-School Schedule for Preschoolers (That Actually Works)

0

How to Create a Simple After-School Schedule for Preschoolers (That Actually Works)

The final bell rings, you pick up your little one, and you are ready for a lovely afternoon together. But instead of happy greetings, you are met with tears, screaming, or a complete refusal to cooperate. If this scenario sounds familiar, you are certainly not alone. Many parents find themselves exhausted by the afternoon transition, often wondering why their child behaves so differently at home than they do at school.

Introduction: Why Preschoolers Struggle After School

The transition from a structured classroom environment to the home front is a massive shift for a developing brain. Even if your child loves their preschool program, it requires an immense amount of energy for a three or four-year-old to follow rules, share toys, manage friendships, and listen to teachers all day long. By the time they reunite with you, their capacity for self-regulation is often completely drained.

The ‘After-School Restraint Collapse’ explained

Child development experts often refer to this phenomenon as the after-school restraint collapse. This is not a sign of bad behavior or a lack of discipline. Rather, it is a sign of safety. Your preschooler has held it together all day in an environment where they feel they must perform or follow strict social norms. When they see you, their safest person, they finally feel comfortable enough to let their guard down and release all that pent-up tension. Understanding that this behavior is a compliment to your secure bond is the first step toward managing it effectively.

The 3 Pillars of a Successful After-School Routine

Creating a simple after-school schedule for preschoolers does not mean rigid time-blocking. Instead, it involves building a rhythm that meets your child’s emotional and physical needs. Focus on these three pillars to transform your afternoons. For more ideas on structuring this part of the day, check out our guide on stress-free after-school routine ideas for kids.

1. Connection Before Correction

When you first reunite, avoid jumping straight into questions like, “Did you eat your lunch?” or “Did you play with your friends?” These questions can feel like demands on their already exhausted brain. Instead, prioritize fifteen minutes of undivided, low-pressure attention. Sit on the floor, engage in parallel play, or simply offer a big hug. This reconnection helps replenish their emotional cup, making the rest of the evening flow much more smoothly.

2. Predictability and Visual Cues

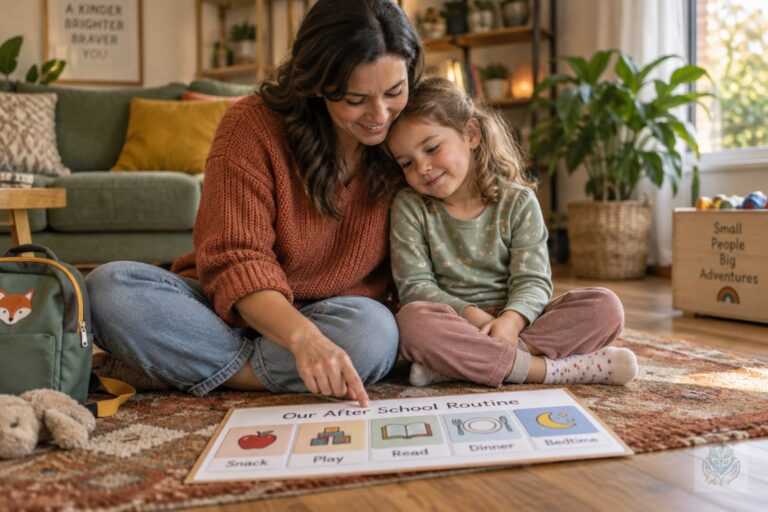
Preschoolers thrive on predictability because they have little control over their own lives. When they know exactly what to expect, their anxiety levels drop. Use visual cues, such as a picture chart, to show the sequence of events. When they can see that playtime follows snack time, they are less likely to fight the transition because the schedule becomes the objective authority rather than your nagging. You can also explore strategies from our guide on setting clear rules without constant arguments.

3. Sensory Regulation

After a day of classroom sensory input, your child may need to either quiet down or burn off energy. Observe your child’s needs. If they come home bouncing off the walls, they need heavy work or movement, like climbing, jumping, or pushing a heavy laundry basket. If they come home lethargic and moody, they likely need a low-stimulation environment with dimmed lights and soft music. You can also incorporate indoor activities that build gross motor skills to help them release excess physical energy.

A Sample Simple After-School Schedule for Preschoolers

Every family is different, but having a general flow helps minimize decision fatigue. Use this framework to design a routine that fits your lifestyle.

The ‘Golden Hour’: Immediate arrival and decompression

Spend the first 20 minutes focusing on deep breathing and low-stakes connection. This is the time for a quick change of clothes into something comfortable and a gentle transition into the home environment.

Fueling Up: Nutrient-dense snacks

Never underestimate the power of ‘hangry.’ Offer a protein-rich snack as soon as possible. Focus on options like apple slices with almond butter, cheese cubes, or yogurt. Stable blood sugar is essential for a stable mood. For more inspiration, take a look at these healthy breakfast ideas for children’s immune support that can easily be adapted for nutritious afternoon snacks.

Active vs. Quiet play balance

Structure the middle of your afternoon based on your child’s temperament. If they need to release energy, head outside or set up an obstacle course in the living room. If they have had a high-stimulation day, prioritize quiet activities like building with blocks, coloring, or listening to an audiobook. You can also encourage independent downtime with toys recommended in our guide on Montessori toys that encourage independent play.

Preparing for bedtime transitions

Start the wind-down process early. Begin dimming the lights, turning off screens, and engaging in repetitive, calming activities like folding laundry together or reading a book. This signals to their brain that the day is coming to a close. To help them settle down for the night, consider tips from our guide on how to create a calm and comfortable sleep environment for kids.

5 Tips for Managing After-School Meltdowns

Even with the best schedule, meltdowns happen. Here is how to handle them with grace:

  1. Remain the calm anchor. Your child is looking to you to see how they should react to their big feelings.
  2. Validate the emotion. Say, “I see that you are feeling frustrated right now. I am here with you.”
  3. Keep it simple. When a child is in the middle of a meltdown, they cannot process complex sentences.
  4. Give them space. Sometimes, they just need to cry or shout for a moment in a safe spot.
  5. Offer comfort, not punishment. A meltdown is a cry for help, not an act of defiance.

Essential Tools to Simplify Your Afternoon

Visual routine charts

Use images to represent tasks like putting away shoes, washing hands, and sitting for a snack. You can find these online or make your own using photos of your child performing these tasks.

Quiet corners for regulation

Create a small, cozy space in your home filled with pillows, stuffed animals, and books. This is a sanctuary for when your child feels overwhelmed and needs to reset their nervous system.

Conclusion: Consistency Over Perfection

Remember that your goal is not to create a military-grade operation but to build a gentle, supportive rhythm that helps your child transition from school to home. You do not need to be perfect. If a day goes off the rails, simply start fresh the next day. Focus on consistency over perfection, and over time, you will notice that the afternoon transition becomes a time of connection rather than conflict. By using a simple after-school schedule for preschoolers, you are teaching your child how to regulate their emotions and setting them up for long-term success.

Call to Action: Download our free printable preschool routine checklist

Ready to get started? Download our free printable preschool routine checklist to customize your afternoon flow today and say goodbye to the after-school chaos!

Frequently Asked Questions

Why do preschoolers have meltdowns after school?

Preschoolers experience after-school restraint collapse because they hold their emotions together all day in a structured environment. When they return to the safety of their parents, they finally release all that pent-up tension.

How can I handle after-school meltdowns?

Remain calm, validate your child’s emotions, keep communication simple, give them safe space if needed, and offer comfort rather than punishment.

How much screen time is appropriate after school for preschoolers?

It is generally recommended to avoid or strictly limit screen time immediately after school, as the high stimulation can make later transitions to dinner and bedtime much harder.

Should my preschooler do extracurricular activities on school days?

If your child is struggling with the transition home, it is best to avoid extracurriculars on school days to prevent burnout and excessive fatigue.

What are the core pillars of a good after-school routine?

The three main pillars are connection before correction, predictability through visual cues, and addressing sensory regulation needs.

How do visual routine charts help preschoolers?

Visual charts give children a clear picture of what comes next, reducing anxiety and making the schedule the objective authority rather than parental nagging.
How to Create a Safe and Comfortable Nursery for Your Baby: A Complete Guide

0

How to Create a Safe and Comfortable Nursery for Your Baby: A Complete Guide

Welcoming a new baby into your home is a transformative experience, and preparing their nursery is one of the most exciting parts of the journey. Beyond the aesthetic appeal of a nursery, the primary goal is to create a sanctuary that fosters both security and serenity. Learning how to create a safe and comfortable nursery for your baby requires a thoughtful balance between evidence-based safety practices and the cozy, nurturing environment your child needs to thrive.

The importance of a sanctuary: Balancing safety and comfort

A nursery should be more than just a place to store baby gear; it should be a quiet refuge where bonding happens during those long middle-of-the-night feeds and soothing lullabies. When we prioritize safety, we remove the anxiety that often keeps new parents awake. By focusing on comfort, we create an environment that helps regulate a baby’s nervous system, encouraging better sleep and calmer play. For more inspiration on designing a soothing space, check out our guide on 10 Best Nursery Color Combinations for a Peaceful and Calming Room.

Setting expectations: A checklist approach to nursery design

To avoid feeling overwhelmed, approach your nursery project in stages. Start by listing your absolute needs—a safe place to sleep, a changing area, and a spot for feeding—before moving on to decor. By tackling the room systematically, you ensure that no critical safety step is skipped in favor of stylistic choices.

Prioritizing Baby Safety: The Foundation

The core of any nursery design must be built upon the current guidelines provided by pediatric experts. When you understand the risks, you can make informed decisions about every item that enters the room.

Adhering to Safe Sleep Guidelines (AAP recommendations)

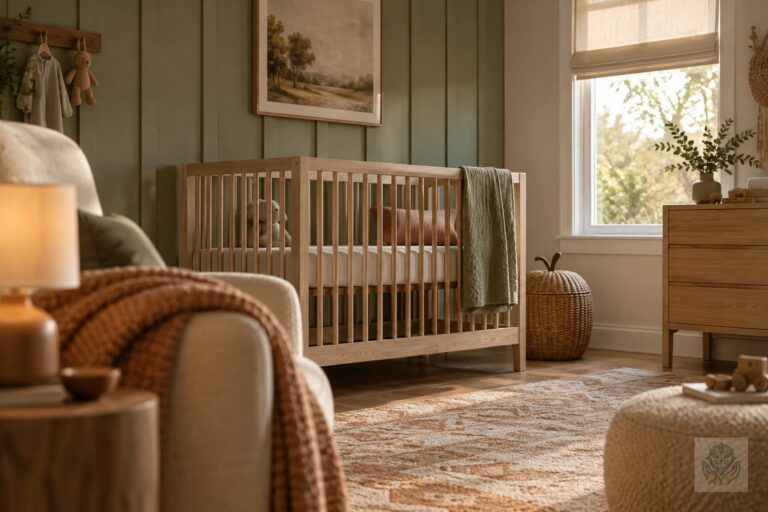
The American Academy of Pediatrics (AAP) provides clear directives to reduce the risk of SIDS. Always place your baby on their back to sleep on a firm, flat surface. The crib should be completely bare, meaning no pillows, heavy blankets, crib bumpers, or stuffed animals. A firm mattress with a tight-fitting sheet is the only bedding necessary for a newborn.

Choosing the right crib: Safety certifications and structural integrity

Always purchase a crib that meets current CPSC (Consumer Product Safety Commission) standards. Avoid drop-side cribs, which have been banned due to structural risks, and ensure the slats are no more than 2 3/8 inches apart to prevent your baby from getting stuck. Second-hand cribs can be risky; if you choose one, ensure it has all original hardware and has not been recalled. You can learn more about making the right choice in our guide on How to Choose a Safe Crib for Your Baby: The Ultimate Parent’s Safety Checklist.

Managing nursery hazards: Secure furniture and window cord safety

Babies grow fast, and their curiosity knows no bounds. Anchor all heavy furniture, such as dressers and bookshelves, to the wall to prevent tip-overs. Additionally, be vigilant about window coverings. Use cordless blinds whenever possible, or tie up existing cords well out of reach to eliminate potential strangulation hazards. To further childproof your space, review our How to Choose Safe Baby Furniture for Your Home: A Parent’s Complete Safety Guide.

Avoiding common nursery dangers: Clutter, bedding, and small parts

Keep the floor clear of excess clutter that could cause trips while carrying your baby. When decorating, keep wall art and shelves far enough away from the crib so that a standing baby cannot reach them. Regularly inspect toys for small parts that could pose a choking risk.

Crafting a Comfortable Environment for Your Baby

Comfort plays a massive role in how well your baby sleeps and how they perceive their environment. A room that is too hot or overly bright can disrupt even the best sleeper.

Temperature control and ventilation tips

Babies regulate their body temperature differently than adults. Aim to keep the nursery between 68 and 72 degrees Fahrenheit. Use a thermometer to monitor the room and ensure there is decent airflow without drafts. A small fan can help circulate air and serves the dual purpose of providing consistent white noise.

Lighting for comfort: Using blackout curtains and soft nightlights

Melatonin production is vital for sleep, and darkness is its best friend. Install high-quality blackout curtains to ensure daytime naps are dark and nighttime sleep is uninterrupted by streetlights. For your own needs, a dim, warm-toned nightlight is essential for navigating the room during late-night diaper changes without fully waking your baby.

Reducing noise: The benefits of white noise machines

The world is a noisy place, and a sudden slam of a door or the neighbor’s dog barking can easily startle a sleeping infant. A dedicated white noise machine creates a consistent sound barrier, mimicking the soothing environment of the womb and helping your baby drift back to sleep more easily.

The role of nursery textiles: Choosing soft, breathable fabrics

When selecting crib sheets, blankets for swaddling, and burp cloths, opt for organic cotton, bamboo, or linen. These materials are breathable and gentle on sensitive newborn skin. Avoid synthetic fabrics that may trap heat and lead to discomfort. For tips on maintaining these items, see our advice on Best Ways to Keep Baby Bedding Clean and Fresh: A Complete Guide.

Health and Wellness: Non-Toxic Nursery Essentials

Creating a safe and comfortable nursery for your baby also means being conscious of the chemicals present in the environment. Choosing high-quality materials ensures a cleaner, healthier space.

Selecting low-VOC paints and eco-friendly finishes

Paint fumes can linger for weeks. Always choose low-VOC or zero-VOC (Volatile Organic Compounds) paints to minimize off-gassing. If you are refinishing old furniture, ensure the paint or stain is non-toxic and lead-free.

Prioritizing organic mattresses and bedding materials

Since your baby spends the majority of their time in their crib, selecting a non-toxic mattress is a wise investment. Look for mattresses made with natural materials like organic cotton, wool, or natural latex that are certified by organizations like GOTS (Global Organic Textile Standard) or GREENGUARD Gold.

Simple ways to improve nursery air quality

Keep the air clean by vacuuming frequently with a HEPA-filter vacuum and dusting surfaces regularly. Avoid using synthetic air fresheners, candles, or diffusers with essential oils in the nursery, as these can irritate a newborn’s developing respiratory system.

Parent-Focused Comfort: Creating a Functional Space for You

Remember that you will be spending a significant amount of time in this room as well. A functional, comfortable space for you directly translates to a calmer experience for your baby.

The importance of a comfortable nursing/gliding chair

You need a place where you can sit comfortably for long periods while feeding or rocking your baby. A high-back glider or rocker with armrests provides excellent support. Test chairs for quiet movement so you don’t accidentally wake your baby when moving to put them back in the crib.

Strategic lighting for late-night feeds

Layer your lighting. While the blackout curtains handle nap time, a small, touch-activated lamp near your glider or a floor lamp with a dimmer switch allows you to see what you are doing during 3:00 AM feedings without flooding the room with bright light.

Organization hacks for diaper changes and essential storage

Keep your diaper changing station fully stocked with everything you need within arm’s reach. Use baskets or drawer dividers to organize wipes, creams, and extra onesies. A well-organized room prevents you from having to leave your baby unattended on the changing table to search for supplies. If you are working with limited square footage, you can find great inspiration in our article on How to Organize Baby Books in a Small Nursery: Creative Storage Solutions for Tight Spaces.

Nursery Maintenance and Long-term Safety

The job isn’t finished once the crib is set up. As your baby moves through developmental milestones, the room will need to evolve.

Periodic safety checkups as your baby grows

Every few months, perform a safety audit. Check that crib bolts remain tight and that furniture anchors are secure. Once your baby starts pulling up, move the mattress to its lowest position. When they start reaching for things, clear the area around the crib entirely.

Cleaning tips for a healthy, dust-free space

Establish a regular cleaning routine that includes washing crib sheets weekly and wiping down hard surfaces with non-toxic cleaners. This helps manage allergens like dust mites, keeping the air fresh for your little one.

Conclusion

Creating a space that is both safe and comfortable is a labor of love that lays the groundwork for your baby’s early growth. By focusing on essential safety standards, non-toxic materials, and thoughtful organization, you are setting the stage for many peaceful nights and precious memories. Take your time, enjoy the process, and remember that the most important element in the nursery is your presence.

Ready to get started? Download our nursery safety checklist to ensure you have covered every detail in your quest for the perfect, cozy, and secure baby room.

Frequently Asked Questions

What are the safe sleep guidelines for a newborn’s nursery?

Always place your baby on their back to sleep on a firm, flat surface in a crib with a tight-fitting sheet. Avoid pillows, heavy blankets, crib bumpers, and stuffed animals.

What is the ideal room temperature for a baby nursery?

The ideal temperature for a baby’s nursery is between 68 and 72 degrees Fahrenheit. Use a room thermometer and a low-speed fan to maintain comfortable airflow.

Why should I use low-VOC paint in the nursery?

Low-VOC or zero-VOC paints minimize harmful chemical fumes and off-gassing, providing a cleaner and healthier indoor air quality for your newborn’s developing respiratory system.

How can I prevent heavy furniture from tipping over in the nursery?

You should anchor all heavy furniture, such as dressers, bookcases, and changing tables, securely to the wall using heavy-duty anti-tip brackets or straps.

Are white noise machines safe for babies?

Yes, white noise machines help block out sudden household noises and soothe babies to sleep. Keep the volume at a safe level and place the machine away from the crib.

When should I lower the crib mattress?

You should lower the crib mattress to its lowest position as soon as your baby begins pushing up on their hands and knees or trying to pull up.

How to Say No Without Creating a Power Struggle: 7 Gentle Parenting Strategies

0

How to Say No Without Creating a Power Struggle: 7 Gentle Parenting Strategies

If you feel like your daily routine consists mostly of saying the word no, you are certainly not alone. Many parents find themselves trapped in a repetitive cycle where every request is met with instant resistance. Knowing how to say no without creating a power struggle is a critical skill for any caregiver who wants to maintain a peaceful, respectful home environment.

The truth is that the word no often acts as a trigger for defiance. When we look at the psychology behind these interactions, we realize that children are not trying to be difficult for the sake of it. Instead, they are asserting their burgeoning sense of self. Our goal as parents is to set firm boundaries while keeping our connection with our children intact.

Why No Often Escalates Into a Battle

To understand why power struggles happen, we have to look at brain science. Toddlers and young children are in a developmental stage where they are discovering their own agency. When a parent says no, the child may perceive it as a direct threat to their newfound independence. This triggers a fight-or-flight response, leading to immediate pushback.

Furthermore, when no becomes our default response, it loses its weight. If we use the word for everything from safety issues to minor preferences, children become desensitized to it. We must prioritize saving the word for actual safety concerns. By reserving our firmest no for things like running into the street or touching a hot stove, we increase the likelihood that our children will actually listen when we really need them to stop.

The Art of Reframing: What to Say Instead of No

Reframing your language is one of the most effective tools in gentle parenting. Instead of focusing on the prohibition, focus on the action you want to see. This subtle shift helps children understand the expectations without feeling controlled.

  • Focus on what they CAN do: Instead of saying, No, don’t jump on the couch, try saying, We walk in the house; the floor is for walking.
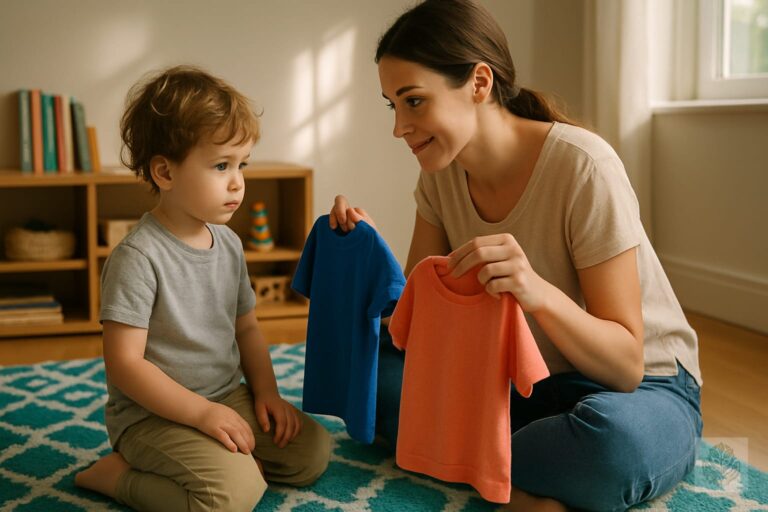
  • Offer two acceptable choices: This provides a sense of autonomy. For example, You can put on your blue shirt or your red shirt for daycare today.
  • Validate feelings first: Use the Yes, and approach. I see that you want to keep playing with your blocks, and it is time for us to put them away so we can have dinner.
  • Use natural consequences: If a child refuses to wear a coat, explain that they will feel cold outside. Allow them to experience the reality of the situation rather than forcing a rule. Read more about outdoor safety and preparation in our beginner hiking tips for families with toddlers.

Strategies to Defuse a Power Struggle in the Moment

When you feel the tension rising and a full-blown meltdown is looming, try the Wait and Pivot technique. Stop, take a breath, and redirect their attention toward a different activity or a different perspective. Playfulness is also a powerful tool; sometimes, turning a chore into a game or a silly race can stop a power struggle before it even begins. You can also explore fun music and movement games for toddlers to burn energy when little ones need a positive outlet.

Finally, adopt a working together mindset. Instead of acting as an authority imposing a rule, invite your child to be part of the solution. You might say, We need to get these toys off the floor so no one trips. How can we solve this together? This shifts the dynamic from parent-versus-child to parent-and-child versus the problem.

Maintaining Boundaries Without Being Punitive

Many parents fear that moving away from strict no’s means becoming permissive. This is a common misconception. Gentle parenting is not about lacking rules; it is about being firm but kind. You can hold a firm boundary while still showing empathy and respect for your child’s feelings. For more insights on establishing order, check out our guide on setting clear rules without constant arguments.

Consistency is the secret sauce. If you say a boundary exists, it must exist every time. If you allow a behavior one day and forbid it the next, it creates confusion and invites testing behavior. Even when the inevitable meltdown happens, hold space for their big emotions. Acknowledge their frustration without backing down from your boundary. Your calmness during their chaos is what helps them regulate.

Practical Examples: Common Scenarios and Scripts

Scenario 1: Refusing to get dressed

Instead of saying, No, you have to wear these pants, try: We need to get dressed so we can go to the park. Would you like to put your pants on yourself, or do you need me to help you put them on?

Scenario 2: Wanting a snack before dinner

Instead of, No, you can’t have a snack, try: I hear that you are hungry. Dinner will be ready in ten minutes. Would you like to help me set the table, or would you like to draw a picture while you wait? For more advice on managing daily nutrition and eating habits, read our guide on how to plan healthy meals for picky eaters.

Scenario 3: Not wanting to leave the park

Instead of, No, we are leaving right now, try: I know it is hard to leave the park because it is so fun here. We have time for two more trips down the slide, and then we have to go home. Should we count them together?

Conclusion

Learning how to say no without creating a power struggle is a journey. It is not about being a perfect parent; it is about being a responsive one. Remember that setting boundaries is an act of love, as it provides the structure and safety your child needs to grow. Be patient with yourself as you practice these new communication strategies. Your commitment to changing the dynamic is the first step toward a more cooperative relationship with your little one. You can also read more about handling toddler resistance in our helpful post on what to do when your toddler says no to everything.

Ready to master your communication? Download our free Cheat Sheet for Setting Limits and sign up for our newsletter for more weekly tips on navigating the joys and challenges of raising children.

Frequently Asked Questions

Why do toddlers power struggle when you say no?

Toddlers view a direct no as a threat to their burgeoning independence and agency, which triggers a natural fight-or-flight response and leads to immediate resistance.

How can I stop saying no all the time?

Reframe your language by focusing on what your child can do instead of the prohibition, offering positive choices, and reserving your firm no for safety issues.

Does gentle parenting mean having no rules?

No, gentle parenting is about being firm yet kind. You hold clear boundaries while simultaneously showing empathy and respect for your child’s emotions.

What is the Yes and approach in parenting?

It is a communication technique where you validate your child’s desires first before stating the boundary, such as acknowledging they want to play longer while noting it is time to clean up.

How do you handle a meltdown when setting a boundary?

Hold space for their big emotions, acknowledge their frustration, and stay calm without backing down from your established boundary.

What should I say instead of no to a child refusing to get dressed?

Offer two acceptable choices instead of a demand, such as asking if they want to put their pants on themselves or if they need your help.

Beginner Hiking Tips for Families With Toddlers: A Stress-Free Guide

0

Beginner Hiking Tips for Families With Toddlers: A Stress-Free Guide

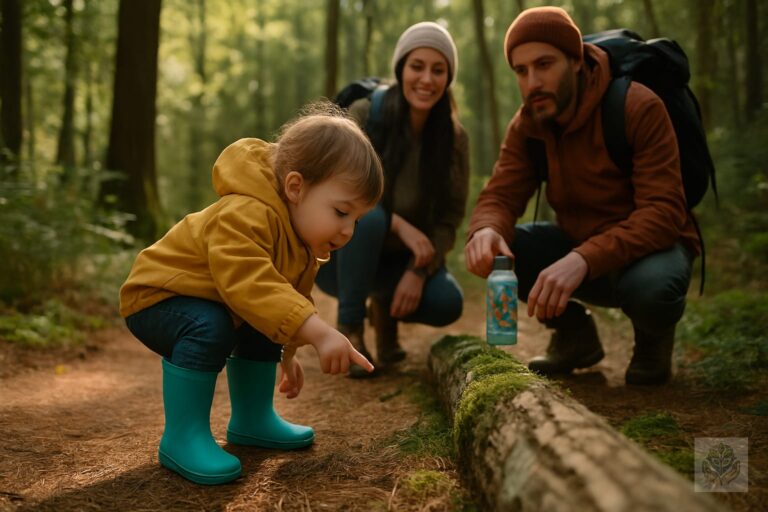
There is something magical about watching a toddler discover the world. From the way they fixate on a single patterned leaf to the joy they find in jumping over a puddle, nature provides a sensory playground unlike any other. However, as any parent knows, transitioning from a peaceful neighborhood walk to an actual trail can feel daunting. If you are looking for beginner hiking tips for families with toddlers, you are in the right place. The goal is to trade the stress of a tight schedule for the freedom of exploration, focusing on the journey rather than the distance.

Family hiking offers incredible benefits for toddler development. It builds physical strength and coordination, stimulates their curiosity, and helps them develop a lifelong appreciation for the outdoors. When you focus on exploration rather than miles, you create a positive environment where your child feels empowered to lead the way, even if that leads you directly to a very interesting-looking rock. You can also explore Easy Hiking Adventures for Families with Young Kids: A Beginner’s Guide for even more inspiration.

Choosing the Right Trail: Setting Yourself Up for Success

The secret to successful outdoor adventures lies in your choice of trail. When you are looking for toddler-friendly hiking trails, keep your expectations modest. Look for paths that are relatively flat and free of treacherous drop-offs or deep mud. A trail that is under two miles is perfect for starters. Whenever possible, choose a loop trail rather than an out-and-back route, as loop trails keep the scenery changing and often keep toddlers more engaged.

To find the best paths, utilize apps like AllTrails or your local park service website. These resources often include filters that allow you to check for stroller-friendly surfaces or indicate if a trail is better suited for a hiking carrier. Before you leave home, always check recent trail conditions. A path that is usually easy can quickly become difficult after heavy rainfall, and knowing what to expect prevents unnecessary frustration.

Essential Gear for Toddler Hiking

Having the right equipment transforms a challenging day into a smooth adventure. When it comes to toddler hiking gear, comfort is king. If your toddler is still young, a high-quality hiking carrier with lumbar support is a game-changer. As they grow, ensure they have sturdy, closed-toe walking shoes to protect their feet from roots and rocks. Check out our guide on How to Choose the Right Shoes for Toddlers: A Parent’s Expert Guide to find the best footwear for tiny feet.

Dress your child in layers to accommodate changing weather. Moisture-wicking fabrics are ideal to keep them dry, and don’t forget a wide-brimmed hat and plenty of sunscreen. Your toddler hiking kit should also include a small first aid kit with bandages for those inevitable scrapes, plenty of bug spray, and a comfort item like a small plush toy or a security blanket to help them feel at ease if they get tired.

Fueling the Adventure: Best Hiking Snacks for Toddlers

Never underestimate the power of a well-timed snack. When hiking with little ones, you need healthy hiking snacks for kids that provide sustained energy without creating a mess. Think of items like apple slices, cheese sticks, dry cereal, or pouches. High-energy snacks like dried fruit or nut-free energy balls can be great for quick fuel. For more ideas on organizing meals when you are on the go, see our The Ultimate Age-Wise Baby Meal Planning Guide: From First Bites to Toddlerhood.

Hydration is equally important, even on shorter treks. Bring a reusable water bottle for your toddler and make regular water stops a natural part of the hike. If you find your little one getting fussy, pull out the secret weapon: a special, high-value snack that they rarely get at home. This can often turn a mid-hike tantrum into a renewed burst of energy.

Managing Expectations and Toddler Temperaments

The most important of all beginner hiking tips for families with toddlers is to adopt a slow-pace mindset. If your toddler wants to stop and inspect a beetle for ten minutes, let them. If they want to pick up every interesting acorn they see, embrace it. This is not a race to the summit; it is a sensory experience for your child.

If a meltdown occurs, stay calm. Take a break, offer a snack, or change the scenery. Sometimes, simply sitting on a log and singing a song can reset the mood, much like the strategies found in our guide on 10 Fun Music and Movement Games for Toddlers to Burn Energy. However, it is also important to know when to throw in the towel. If your child is truly exhausted or consistently distressed, there is no shame in heading back to the car. A successful hike is one where everyone finishes the day with a positive association with nature.

Safety Tips for Families on the Trail

Safety is the foundation of every great outdoor trip. Teach your toddler early that we stay within sight of our grown-ups and that we do not touch plants or animals we don’t recognize. If you are in bear or wildlife country, make noise while you hike to avoid surprising any animals, and keep your dog leashed if you bring one along.

Always stay visible by wearing bright clothing, and ensure your phone is fully charged before you leave. Download offline maps in case you lose cellular service, and always tell someone where you are going and when you expect to return. Being prepared allows you to enjoy the wilderness with peace of mind. For additional safety considerations when heading out on trips, check out our 15 Essential Travel Accessories for Kids to Make Your Next Trip Stress-Free.

Making it Fun: Games to Keep Toddlers Engaged

Keep the momentum going by turning the hike into a game. A nature scavenger hunt is a fantastic way to keep little eyes scanning the trail. Give them a simple list: find a yellow leaf, a smooth rock, a pinecone, or a bird. You can also use a small camera or a pair of kid-friendly binoculars to help them feel like an official nature explorer.

Interactive games like Follow the Leader or playing I-Spy can also keep spirits high, similar to the activities in 10 Creative Follow-the-Leader Games for Kids at the Park. Singing songs or talking about the animal tracks you see makes the time fly by. When you participate in their play, you are not just hiking; you are building memories and nurturing their love for the great outdoors.

Conclusion

Hiking with your toddler is a rewarding way to bond and explore the world at a slower, more intentional pace. By picking the right trails, packing the essentials, and keeping your expectations realistic, you can turn a simple walk in the woods into a cherished family tradition. Remember, the best beginner hiking tips for families with toddlers all lead back to one thing: having fun together.

Don’t be discouraged if your first hike isn’t perfect. It gets easier with practice, and your little explorer will soon be leading you to new discoveries. Do you have a favorite local trail that is perfect for little feet? Share your recommendations in the comments below, or tag us in your hiking photos on social media so we can celebrate your adventures with you!

Frequently Asked Questions

What is the best trail length for hiking with a toddler?

For beginners, look for trails under two miles that are relatively flat. Loop trails are ideal because they keep the scenery changing and hold a toddler’s interest.

What essential gear should I pack when hiking with a toddler?

Pack a sturdy hiking carrier or comfortable walking shoes, moisture-wicking layered clothing, a sun hat, sunscreen, a small first aid kit, bug spray, and plenty of water.

What are the best hiking snacks for toddlers?

Choose mess-free, high-energy snacks like apple slices, cheese sticks, dry cereal, fruit pouches, and a special high-value treat to boost their energy during a meltdown.

How do I keep my toddler engaged during a hike?

Turn the hike into a game by playing I-Spy, singing songs, or organizing a nature scavenger hunt to find items like a smooth rock, pinecone, or yellow leaf.

What should I do if my toddler has a meltdown on the trail?

Stay calm, take a break, offer a snack, or change the scenery. If your child remains distressed or truly exhausted, head back to the car without hesitation.

How can I ensure safety while hiking with small children?

Teach your toddler to stay within sight and avoid unfamiliar plants or animals. Wear bright clothing, fully charge your phone, and download offline maps before you go.

10 Space-Saving Sports Equipment Storage Ideas to Reclaim Your Garage

0

10 Space-Saving Sports Equipment Storage Ideas to Reclaim Your Garage

Does your morning routine involve a frantic scavenger hunt for a lone soccer cleat or a misplaced hockey stick? If you find yourself tripping over piles of athletic gear every time you head to your car, you are certainly not alone. For active families, the garage often becomes a catch-all graveyard for sports equipment, leaving you with little space and a lot of frustration.

Maintaining an organized home is essential for reducing stress and keeping life running smoothly. When your gear has a designated home, you save time, reduce arguments, and preserve your equipment for longer. The good news is that you do not need a sprawling basement or a massive hobby room to keep your gear accessible and orderly. With these 10 space-saving sports equipment storage ideas, you can reclaim your garage floor and restore sanity to your home today. For more inspiration on organizing your space, check out our guide on how to organize kids’ sports equipment at home.

Assessing Your Gear: The First Step to Organization

Before you rush to the hardware store for bins and racks, you must first assess what you actually own. It is common to accumulate gear that is broken, outgrown, or simply no longer used. Start your sports equipment storage project by pulling everything into the driveway. Sort through your items and be ruthless; if a helmet has seen better days or a pair of skates has been sitting in the corner for three years, it is time to donate or recycle them.

Once you have purged the excess, categorize your remaining items by season and frequency of use. Keep items you use daily—like soccer balls or baseball gloves—at eye level or in easy-reach zones. Store out-of-season equipment, such as snowshoes or tennis rackets in the winter, on high shelves or in bins labeled by family member. This categorization makes the actual storage process much more intuitive.

Vertical Wall Storage: Maximizing Floor Space

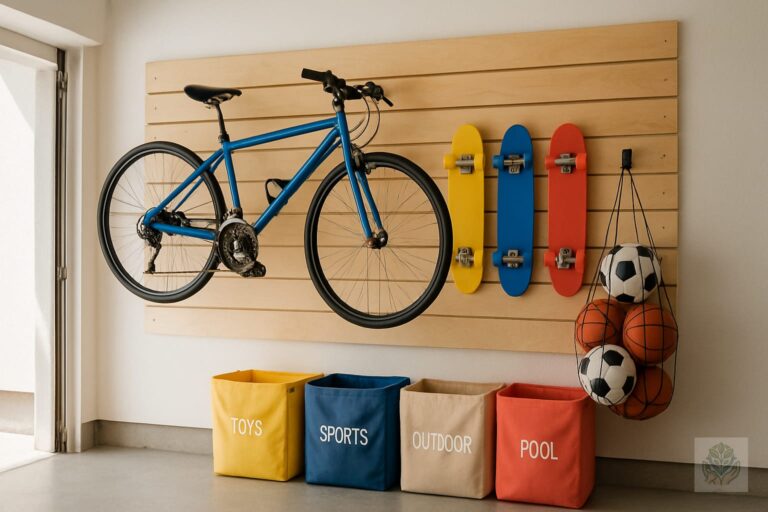
The secret to an organized garage is looking upward. Floor space is precious, so moving your gear onto the walls is the most effective way to clear the path. Installing heavy-duty slat walls or pegboards allows for a customizable layout that you can adjust as your children grow and their sports interests change.

Wall-mounted racks are game-changers for bulky items like bicycles and skateboards. By getting these off the floor, you prevent damage to your equipment and protect your vehicle from accidental dings. Vertical storage not only looks professional but also makes the garage feel significantly larger by creating clear, walkable paths. To keep your family rides running smoothly, you may also want to explore the best bags and storage accessories for family bike rides.

The Best Sports Equipment Storage Ideas for Small Spaces

If you are working with a tight footprint, you need creative solutions that maximize every square inch. Here are a few favorite methods for managing gear:

  • Bungee Cord Ball Corrals: Build a simple wooden frame and crisscross bungee cords from top to bottom. You can easily slide balls in and out, and the open design lets you see exactly what you have.
  • Over-the-Door Mesh Organizers: These are not just for shoes! Hang them on a door or wall to store pads, gloves, and water bottles.
  • DIY PVC Pipe Organizers: Create a vertical rack for bats, lacrosse sticks, or field hockey sticks by securing PVC pipes to a piece of plywood. It keeps long, skinny equipment standing upright and tangle-free.
  • Rolling Utility Carts: If you prefer mobility, a rolling metal cart is perfect for storing smaller items. You can wheel it to the car when it is time to head to practice and tuck it back against the wall when you return.

Creating Dedicated Zones for Each Child

Organization works best when everyone in the family has a clear role to play. Assign color-coded bins or designated wall hooks for each family member to ensure their gear does not end up in a communal pile. When a child knows exactly where their shin guards belong, they are far more likely to put them away without being asked.

We also highly recommend the use of individual go-bags. By keeping a backpack or duffel bag hanging on a designated hook, your child can pack their gear the night before. This eliminates the frantic scramble before practice and ensures that the gear actually makes it back into the house rather than staying in the car trunk. For school days, finding the right carrier is equally important, so be sure to read our ultimate school lunch bag buying guide.

Maintaining Your Storage System

The hardest part of any sports equipment storage plan is maintenance. Establish a strict put-back rule: if you use it, you return it to its designated spot immediately after practice. It helps to host a quick five-minute garage tidy-up session every Sunday evening to reset the space for the week ahead.

Seasonal rotation is another key to success. When the seasons shift, spend an hour swapping your gear. Move the baseball bats to the back shelf and bring the ice skates to the front. This simple habit keeps your most relevant equipment accessible and prevents your storage areas from becoming cluttered with unnecessary items. Keeping children’s gear organized also extends to other areas of the home, such as managing items neatly with genius shelf organization ideas for children’s rooms to reduce clutter.

Budget-Friendly vs. Pro-Grade Solutions

You do not have to spend a fortune to get organized. Upcycling common household items is a great way to start. Old wooden crates can be stacked to create shoe cubbies, and simple hardware store hooks can hold helmets and jackets perfectly. If you are handy with tools, repurposing scrap wood into a cubby system can be incredibly cost-effective.

However, there are times when investing in professional-grade garage systems pays off. If you have expensive equipment that needs to be kept in a specific environment or if you want a system that will last for decades, modular wall units are a great investment. Consider your budget, but remember that the true value lies in the time you save by not having to dig through a messy pile. For parents managing multiple school requirements alongside sports gear, having an essential school accessories checklist can also help streamline family logistics.

Conclusion

Reclaiming your garage does not have to be a daunting task. By purging the unused gear, utilizing vertical wall space, and creating personalized zones for every athlete in your house, you can transform a chaotic storage area into an efficient, organized space. Remember, these 10 space-saving sports equipment storage ideas are meant to serve your family, so feel free to mix and match until you find what works best for your unique needs.

Ready to start? Pick just one project to tackle this weekend—whether it is installing a simple set of wall hooks or purging that bin of broken tennis balls. Once you experience the peace of an organized garage, you will wonder why you waited so long to get started.

Frequently Asked Questions

What is the best way to store bulky sports equipment in a small garage?

Vertical wall storage is the best method for bulky items like bicycles and skateboards. Installing heavy-duty slat walls or pegboards keeps your equipment off the floor, protects your car from dings, and creates a walkable pathway.

How can I organize sports balls so they are easy to access?

You can build a simple bungee cord ball corral using a wooden frame and crisscrossed bungee cords. This open design allows you to easily slide balls in and out while seeing everything you own at a glance.

How do I keep my kids from leaving their sports gear in a messy pile?

Assign color-coded bins or designated wall hooks for each child. When every family member has a specific zone for their equipment, they are much more likely to put their gear away properly.

What are some budget-friendly sports equipment storage ideas?

You can upcycle household items by stacking old wooden crates for shoe cubbies, using simple hardware store hooks for helmets, or creating DIY PVC pipe organizers for bats and sticks.

How often should I reorganize my sports equipment storage?

Perform a quick five-minute tidy-up every Sunday evening, and do a seasonal rotation when sports seasons shift. Moving out-of-season gear to higher shelves keeps current items easily accessible.

Where should I store sports gear that I use every day?

Keep daily-use items, such as soccer balls and baseball gloves, at eye level or in easy-reach zones so you can grab them quickly without digging through a pile.

10 Simple Water Sensory Bins for Toddlers: Easy DIY Ideas for Hours of Fun

0

10 Simple Water Sensory Bins for Toddlers: Easy DIY Ideas for Hours of Fun

Every parent knows the feeling of searching for a quick, engaging activity that will hold a toddler’s attention for more than five minutes. When the toys are scattered and screen time is not the answer, the solution is often simpler than you think. Water sensory bins for toddlers are the ultimate way to turn a boring afternoon into an educational adventure.

Sensory play is a cornerstone of early childhood development, helping children explore their world through sight, touch, and sound. Water bins act as a perfect gateway into this world. They require very little preparation, use materials you likely already have in your kitchen, and offer endless possibilities for creativity. For more ideas on tactile play, check out our guide on 15 fun sensory bin fillers for toddlers. In this guide, we will explore simple, budget-friendly ways to set up water sensory bins today that will keep your little one happily occupied.

Why Choose Water Sensory Bins?

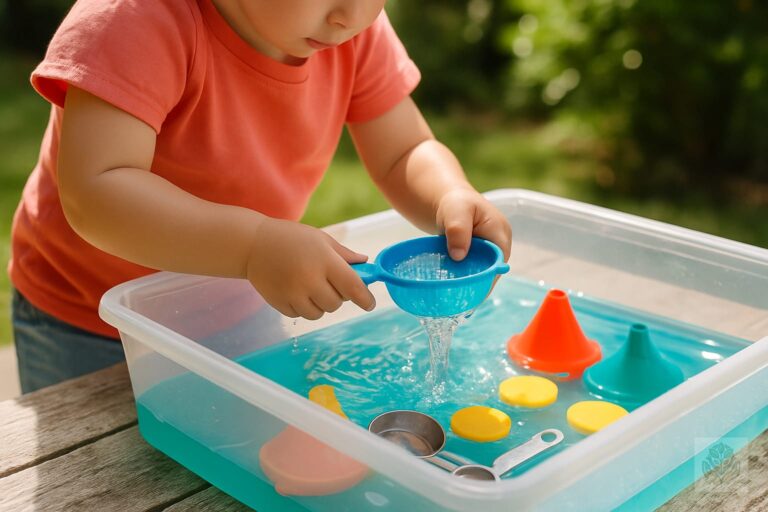
Beyond being a sanity-saver for busy parents, water sensory bins for toddlers offer significant developmental advantages. When a child splashes, pours, and manipulates water, they are actively refining their fine motor skills. Learning to control a dropper, hold a scoop, or manipulate a sponge builds the muscle strength and coordination necessary for later tasks like writing and feeding themselves.

Furthermore, these bins serve as a gentle introduction to early science concepts. Toddlers learn about volume as they pour water between containers, observe cause and effect when items sink or float, and explore temperature through icy experiments. Perhaps most importantly, water play has a naturally calming effect. The repetitive motion of splashing or the soothing sound of pouring can help regulate a toddler’s nervous system, making it an excellent activity for winding down before a nap or transitioning out of a chaotic afternoon.

Essential Supplies for Your Sensory Bin Toolkit

You do not need an expensive craft store haul to create engaging play experiences. A basic bin kit starts with a plastic storage container—the rectangular clear types work best. Aim for a bin with a shallow depth so your child can easily reach the bottom, and if possible, use one with a lid to keep your supplies together between sessions.

To round out your toolkit, look for items you already have on hand:

  • Measuring cups and stainless steel ladles
  • Plastic funnels and sieves
  • Empty squeeze bottles or baby food pouches
  • Turkey basters or child-safe eye droppers
  • Plastic colanders for straining

Always prioritize safety. Even with shallow water, constant adult supervision is non-negotiable. Ensure the water depth remains low, usually just a few inches, to encourage play without unnecessary risk.

10 Simple Water Sensory Bin Ideas

Ready to get started? Here are 10 water sensory bins for toddlers that require minimal setup but provide maximum impact.

  1. Color Reveal: Add a drop of food coloring to your water and let your toddler stir it with a whisk. It is a simple way to introduce color theory and delight your child with the transformation.
  2. The Wash Station: Gather waterproof toy cars, plastic dolls, or kitchen utensils. Provide a small amount of tear-free soap, a sponge, and a scrubbing brush so your toddler can wash their toys clean.
  3. Ocean Rescue: Add blue food coloring and plastic sea creatures. Use a sieve to help your toddler rescue the animals from the deep blue sea.
  4. Iceberg Melt: Freeze small plastic toys inside ice cube trays the night before. Add the frozen blocks to the water and let your toddler watch them melt and “free” the trapped toys.
  5. Kitchen Helper: Fill the bin with whisks, ladles, spatulas, and silicone muffin tins. This mimics real-life tasks and builds great coordination. You can pair this with items from our 10 kitchen pretend play sets guide for even more imaginative fun.
  6. Floral Bath: Gather flower petals or silk flowers from the garden or a craft store. Floating petals create a beautiful, calming sensory experience.
  7. Pouring Station: Focus entirely on volume by providing various sizes of plastic cups, funnels, and pitchers. It is a classic way to teach spatial awareness.
  8. Treasure Hunt: Hide waterproof items like large buttons, plastic coins, or foam letters at the bottom of the bin and encourage your child to hunt for them.
  9. Bubble Foam Bath: Use a tiny amount of tear-free baby wash and a whisk to create a mountain of stable bubbles on top of the water. The tactile experience of the foam is always a hit.
  10. Sieve and Sort: Place a colander inside the bin. Have your toddler use it to separate larger items from the water, focusing on the concept of filtration.

How to Minimize the Mess

One of the biggest hesitations parents have about water play is the potential for a soaked floor. You can mitigate this by choosing the right location. The bathroom floor is the safest bet because it is waterproof and easy to wipe down. If you choose the kitchen, place a large beach towel or a washable floor mat underneath the bin to catch any stray droplets.

Establish simple, clear water rules early on. Explain that the water stays in the bin and that spilling is not allowed. If your child struggles to follow the rules, it is a gentle sign that the activity might need to end for now. Positive reinforcement goes a long way in setting expectations for these sessions. For tips on managing boundaries, see our advice on setting clear rules without constant arguments.

Conclusion

Incorporating water sensory bins into your weekly routine is a simple, effective way to support your child’s brain development while keeping them happily engaged at home. By using these DIY ideas, you turn basic household items into tools for discovery and joy. Whether you are building a bubble mountain or conducting an iceberg rescue, you are providing your toddler with invaluable tactile experiences. We would love to hear which of these ideas your little one enjoys most—leave a comment below or subscribe to our newsletter for more toddler activity inspiration!

Frequently Asked Questions

How do I prevent my toddler from drinking the sensory bin water?

Always supervise closely and use clear, gentle reminders. Adding a tiny drop of food coloring can make the water look less appealing to drink.

How long should a toddler sensory play session last?

Toddler attention spans vary. A session typically lasts anywhere from five to twenty minutes depending on the child’s interest.

Are these water sensory activities safe for one-year-olds?

Yes, provided you use large, non-choking hazard items and maintain strict, hands-on supervision at all times.

What household items can I use in a water sensory bin?

You can use measuring cups, stainless steel ladles, plastic funnels, empty squeeze bottles, and colanders found right in your kitchen.

How can I minimize the mess of indoor water play?

Set up the bin on a bathroom floor for easy cleanup, or place a large waterproof mat or beach towel underneath the bin in the kitchen.

What are the developmental benefits of water sensory bins?

Water play helps toddlers refine fine motor skills, learn early science concepts like volume and buoyancy, and regulate their nervous systems.

The Best Bags and Storage Accessories for Family Bike Rides (2027 Guide)

0

The Best Bags and Storage Accessories for Family Bike Rides (2027 Guide)

Planning a family cycling adventure is one of the most rewarding ways to spend a weekend, but every parent knows that getting out the door is half the battle. Whether you are hauling diapers, extra layers, a mountain of snacks, or repair gear, having the right storage setup can transform a stressful logistics mission into a seamless ride. When you have the right gear, your bike becomes a mobile base camp, allowing you to focus on the joy of the trail rather than worrying about where the extra water bottle is hidden. For older kids joining the ride, you can also check out tips on how to choose the right bicycle size for your child to ensure everyone is comfortable.

The challenge of packing for a family bike ride is finding the balance between having everything you might need and keeping the bike manageable. When you are carrying cargo alongside your children, stability and organization are paramount. In this guide, we explore the best bags and storage accessories for family bike rides to ensure your 2024 adventures are as organized as they are fun.

Must-Have Types of Bike Bags for Families

Choosing the right storage depends heavily on your bike type and the length of your trip. Understanding the different categories of bags will help you distribute weight effectively.

Panniers vs. Saddle Bags

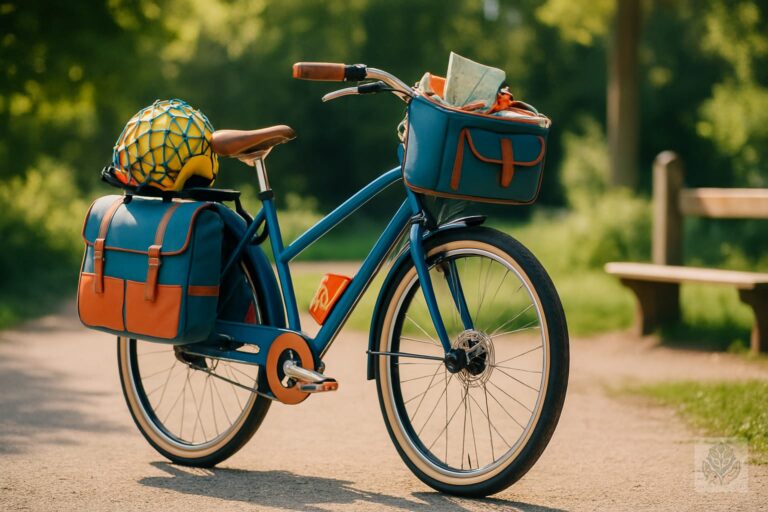
Panniers are the gold standard for family cycling. These large, rectangular bags mount to a rear rack and offer significant capacity. Because they sit low and near the wheel axle, they minimize the impact on your bike’s handling. Saddle bags, in contrast, mount under the seat. While they are great for small items like patches or tools, they lack the volume required for family supplies.

Handlebar Bags

A handlebar bag is a must-have for the parent on the move. Because it sits right in front of you, it is the perfect spot for items you need to access quickly: sunscreen, pacifiers, snacks, or your phone. Look for models with a clear top window if you rely on digital maps to keep your family on track.

Frame Bags

Frame bags fill the empty space inside the main triangle of your bike frame. These are excellent for keeping the center of gravity low and centered. Because they are tucked away between your knees, they don’t affect your steering or balance, making them ideal for heavier items like spare tools, heavy locks, or backup energy bars.

Top Picks: The Best Bags for Family Bike Rides

While gear preferences vary based on your specific bike, certain products consistently rise to the top for families. For long-distance touring, the Ortlieb Back-Roller series remains the industry leader for waterproof, durable panniers that can handle daily wear and tear. If you are looking for a kid-friendly snack bag, the Swift Industries Catalyst bag offers easy access and a wide opening that is perfect for grabbing granola bars while on the go.

For those on a budget, consider the Ibera PakRak series. They offer a reliable quick-release system that makes attaching and removing bags a breeze when you reach a park or cafe. If you live in an area with unpredictable weather, prioritize bags with welded seams and roll-top closures to keep your extra sweaters and tech dry during sudden summer downpours. You can also look into options similar to how to choose a durable school bag for kids if you want extra pointers on picking long-lasting materials for family travel gear.

Clever Storage Accessories Beyond Bags

Sometimes, your bike needs more than just a bag. Clever accessories can help you secure those awkward items that don’t fit into standard compartments.

  • Cargo Nets: These are essential for lashing odd-sized items to the top of your rear rack. Use them for soccer balls, helmets while parked, or an extra jacket.
  • Extended Bottle Cages: Standard cages are rarely enough for a family of four. Look for cages that hold larger bottles or mounts that attach to your seat post to increase your hydration capacity.
  • Phone Mounts: A sturdy, silicone-based phone mount is crucial for navigation. It keeps your eyes on the road and your hands on the handlebars.
  • Clip-on Hooks: A simple carabiner or clip attached to your rack can be a lifesaver for hanging a kid’s helmet or a bag of trash while you head toward a bin.

How to Pack for a Family Ride: Expert Tips

Efficiency is an art form when you are cycling with children. Follow the first-out rule: anything you might need to grab while moving or at a quick stop, such as snacks or hydration, must go in the easiest-to-reach bag, typically the handlebar bag. Items you only need at your final destination, like extra clothing or full meal supplies, should be buried deep in the main panniers.

Weight distribution is another critical safety factor. Always pack heavy items as low as possible and as close to the center of the bike as you can. This prevents the bike from feeling top-heavy or twitchy when you are riding at lower speeds. If you are using standard panniers, consider using internal dry bags for your clothes; this keeps your items organized and guarantees they stay dry even if the pannier exterior gets soaked. For parents planning other kinds of family outings, you might find inspiration in our beginner’s guide to easy hiking adventures for families with young kids.

Safety Considerations When Loading Your Bike

When you are carrying a child, your bike is already handling extra weight and potentially a higher center of gravity. Never overload your bags to the point where they sway, as this can affect your steering. Always double-check that no straps or cords are dangling near your wheels or pedals, as these pose a serious entanglement risk. To build even more confidence on two wheels, review our tips on how to teach your child to brake safely on a bike.

Finally, focus on visibility. Adding reflective strips, neon-colored rain covers, or attaching small flashing LED lights to the rear of your panniers ensures that you remain visible to traffic, even when your bags are heavily loaded. Remember, your cargo should never obstruct your rear light or reflector.

Conclusion

Finding the right balance between necessary gear and bike handling is a process, but it gets easier with every ride. By choosing high-quality storage and practicing efficient packing, you can make family cycling a sustainable and joyful part of your life. Start with the essentials, focus on safe weight distribution, and don’t be afraid to adjust your setup as your kids grow. Getting outside as a family is well worth the preparation, so gear up, load up, and enjoy the ride! Ready to plan your next outing? Sign up for our Family Cycling Checklist newsletter to get weekly tips and gear recommendations delivered straight to your inbox.

Frequently Asked Questions

How do I balance a bike with full panniers?

Distribute weight evenly between the left and right panniers. If one side is heavier, your bike will pull in that direction, making it harder to steer.

What are the best snacks to pack for long family rides?

Focus on high-energy, non-messy foods like trail mix, dried fruit, granola bars, and cheese sticks stored in an easily accessible pouch.

Are there specific storage solutions for cargo bikes vs. traditional bikes?

Yes. Cargo bikes have integrated boxes or specialized rack systems, whereas traditional bikes rely on aftermarket bags and racks.

What should I pack in a handlebar bag?

Keep items you need to access quickly in your handlebar bag, such as sunscreen, pacifiers, snacks, digital maps, and your phone.

Why are frame bags recommended for heavy items?

Frame bags keep the center of gravity low and centered between your knees, ensuring your steering and balance remain unaffected by heavy items.

How can I ensure my loaded bike remains visible to traffic?

Add reflective strips, neon rain covers, or flashing LED lights to your panniers, and ensure your cargo never obstructs your rear light.

How to Choose the Right Bicycle Size for Your Child: The Ultimate Parent’s Guide

0

How to Choose the Right Bicycle Size for Your Child: The Ultimate Parent’s Guide

Finding the perfect bicycle for your little rider is an exciting milestone. Whether they are graduating from a balance bike or upgrading to their first multi-speed model, selecting the correct fit is the most critical step in the process. When you learn how to choose the right bicycle size for your child, you aren’t just buying a toy; you are investing in their safety, confidence, and enjoyment on the road or trail.

Many parents fall into the trap of buying a bike that is too large, thinking their child will eventually grow into it. This is a common and dangerous mistake. A bike that is too big is difficult to maneuver, hard to stop, and intimidating for a young rider. In this guide, we will walk you through the essential steps to ensure your child has the best cycling experience possible.

Why Bike Sizing Matters: Safety and Skill Development

Cycling is a complex motor skill that requires coordination, balance, and quick reflexes. When a bike doesn’t fit properly, your child has to work significantly harder just to keep it upright. An oversized bike makes the frame heavy and the reach to the handlebars excessive, which drastically reduces their ability to steer effectively.

If the bike is too tall, the child cannot easily place their feet on the ground to stabilize themselves during a stop. This lack of control often leads to hesitation and fear, which can quickly extinguish a child’s enthusiasm for riding. By prioritizing the correct fit, you minimize the risk of accidents and ensure that your child feels in command of their vehicle, allowing them to focus on developing their cycling skills. Explore our guide on how to teach your child to brake safely on a bike for additional safety tips.

The Golden Rule: Wheel Size vs. Frame Size

Unlike adult bikes, which are categorized by frame size, children’s bikes are almost exclusively measured by the diameter of their wheels. This measurement, expressed in inches, dictates the geometry of the bike. Understanding this distinction is the foundation of learning how to choose the right bicycle size for your child.

The standard wheel sizes you will encounter on the market include 12, 14, 16, 20, and 24 inches. As the wheel size increases, so does the frame, the distance to the pedals, and the weight of the bike. It is important to remember that wheel size is just a starting point; the physical proportions of your child are the ultimate deciding factor.

Step-by-Step: How to Measure Your Child

To get an accurate fit, you need two primary measurements: height and inseam. Forget the old-fashioned guessing game based solely on age; children grow at different rates, and their leg lengths vary significantly.

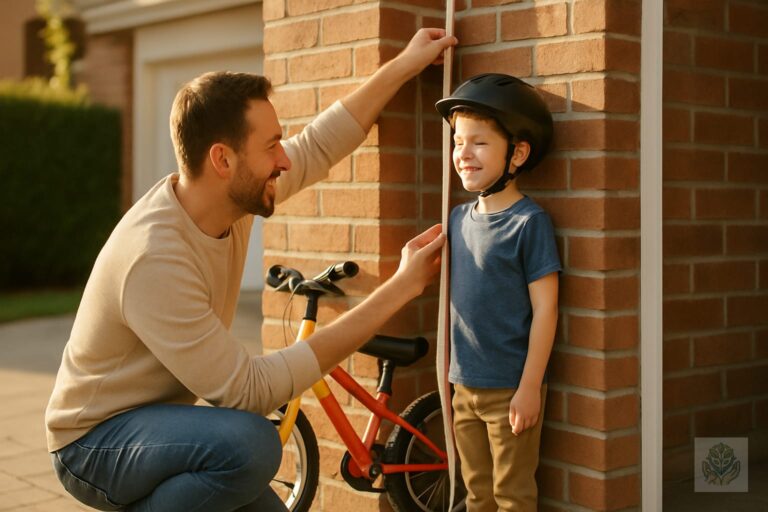
First, measure their total height by having them stand against a wall without shoes. Make a mark at the top of their head and measure from the floor. Second, measure their inseam. Have your child stand against a wall with their feet slightly apart. Place a book between their legs, pushing it gently up until it simulates a bike seat. Measure from the top of the book to the floor. This inseam measurement is the most reliable way to ensure your child can comfortably straddle the top tube.

Kids Bike Size Chart by Age and Height

While measurements vary by brand, the following chart provides a general guideline to help you narrow down your search. Always cross-reference these numbers with the specific manufacturer’s geometry chart, as some bikes are built larger or smaller than others.

Wheel SizeApprox. AgeHeight Range
12-inch2-4 years30-38 inches
14-inch3-5 years36-44 inches
16-inch4-6 years40-50 inches
20-inch6-9 years46-56 inches
24-inch9-12 years52-60+ inches

Note: Age is merely a reference point. Always prioritize your child’s specific height and inseam measurements over their age when selecting a bike.

The Test Ride Checklist

Once you have selected a potential bike, a physical test ride is mandatory. Use this quick checklist to confirm the fit:

  • Stand-over height: Your child should be able to straddle the bike with both feet flat on the ground. There should be at least one to two inches of clearance between their inseam and the top tube.
  • Reach: When sitting on the saddle, your child should be able to reach the handlebars with a slight bend in their elbows. If they are reaching forward with straight, locked arms, the frame is too long.
  • Braking: Ensure their fingers can easily reach and squeeze the brake levers. If the levers are too far away, they will not be able to stop safely in an emergency.

Common Signs Your Child Needs a Bigger Bike

Even if a bike fit you well a year ago, children grow quickly. Watch for physical cues that it is time for an upgrade. If your child’s knees are consistently hitting the handlebars while pedaling, or if they appear hunched and cramped, the bike is now too small. Additionally, if they are losing their sense of stability because their center of gravity is now too high relative to the bike, it is time to move up to the next wheel size.

Expert Tips for Buying Used vs. New

Buying a quality bike is an investment. High-quality, lightweight bikes (often found at local bike shops) offer a much better experience than heavy, budget-friendly steel frames from big-box stores. A lighter bike is significantly easier for a child to pedal and control. Make sure they are also equipped with the right gear, such as the items recommended in our guide on best bicycle gloves for young cyclists.

If you choose to buy used, inspect the bike for structural integrity. Check the brakes, ensure the tires have good tread, and make sure the gears shift smoothly. Always avoid bikes with excessive rust or frame damage, as these can be safety hazards. A well-maintained, high-quality used bike will often perform better and retain more resale value than a cheap new one.

Conclusion

Selecting the right bicycle size for your child is a simple way to set them up for a lifetime of outdoor adventure. By focusing on inseam measurements and ensuring proper reach and stand-over height, you provide them with the security they need to gain confidence on two wheels. Do not rush the process, and remember that a properly fitted bike is the safest bike. Take a moment today to measure your child and see if their current ride is still the right fit for their growing body.

Frequently Asked Questions

Why shouldn’t I buy a larger bike for my child to grow into?

Buying an oversized bike is dangerous because it makes the bike difficult to maneuver, hard to stop, and intimidating, which can lead to accidents and hesitation in young riders.

How are children’s bike sizes measured compared to adult bikes?

Unlike adult bikes that use frame sizes, children’s bikes are categorized primarily by the diameter of their wheels, measured in inches ranging from 12 to 24 inches.

What measurements do I need to find the correct kids bike size?

You need your child’s total height and inseam measurement. Always prioritize height and leg length over age when selecting a bicycle.

How much clearance should there be for stand-over height?

Your child should be able to straddle the bike with both feet flat on the ground, leaving at least one to two inches of clearance between their inseam and the top tube.

What are the common signs that my child needs a bigger bike?

Signs include your child’s knees hitting the handlebars while pedaling, appearing hunched and cramped, or losing stability because their center of gravity is too high.

Should I buy a new or used bike for my child?

Both options work well, but prioritizing a lightweight bike with good structural integrity and working brakes is more important than whether it is brand new.

10 Creative Follow-the-Leader Games for Kids at the Park

0

10 Creative Follow-the-Leader Games for Kids at the Park

There is something magical about a sunny day at the local park. Beyond the fresh air and sunshine, the park serves as a natural gym that fosters physical activity, sharpens social skills, and sparks cognitive growth. While modern gadgets often dominate playtime, one timeless, zero-cost game remains a gold standard for child development: Follow-the-Leader. By integrating these 10 creative Follow-the-Leader games for kids at the park into your routine, you can turn a standard afternoon into an extraordinary learning experience that builds motor skills and self-confidence.

Why Follow-the-Leader Works for Kids

At its core, playing games like Follow-the-Leader helps children develop essential gross motor skills such as balance, coordination, and agility. When a child follows a leader, they are required to observe, process, and replicate movements, which strengthens their vestibular system and spatial awareness. Beyond the physical benefits, the game is a masterclass in social cooperation. It teaches turn-taking, patience, and the importance of paying attention to peers. From a cognitive perspective, it requires sequential memory and rapid decision-making, as children must recall and execute a series of actions provided by the leader. For more inspiration on active play, check out these 15 classic playground games every child can enjoy.

10 Creative Follow-the-Leader Variations for the Park

Ready to level up your outdoor play? Use these creative variations to keep your children engaged during your next trip to the playground.

1. The Animal Kingdom

Start the game by choosing an animal and mimicking its specific gait. Hop like a bunny, stomp like a heavy bear, or slither like a snake. This variation is fantastic for young children who are still learning to control their body movements.

2. The Mirror Master

In this version, the leader performs movements in slow motion. Followers must try to mimic the leader exactly, including facial expressions. This version is excellent for building focus, patience, and controlled movement.

3. Obstacle Course Leader

Turn the playground into a challenge. The leader must navigate around a tree, step over a park bench, and slide down a slide. Followers must mimic the exact path taken, turning the park into a giant obstacle course. You can also try some indoor activities that build gross motor skills for toddlers and kids when you are stuck at home.

4. The Sound-Effect Follower

Combine movement with rhythm. Every time the leader takes a step, they make a specific sound—like a clap, a snap, or a whistle. The followers must mimic both the movement and the sound at the same time. If your children enjoy this, they might also love exploring 10 fun music and movement games for toddlers to burn energy.

5. The Superhero Flight Path

Perfect for high-energy kids, this game involves running, leaping, and landing in a superhero pose. The leader can designate different sections of the park as safe zones or flying zones to add a narrative layer to the physical activity.

6. Nature Explorer

As you move through the park, the leader stops to pick up specific items, such as a dried leaf or a small pebble. Followers must collect the same item before moving to the next spot, teaching children to observe the world around them.

7. The Silly Walk Challenge

Encourage creativity by performing exaggerated, funny gaits. Whether it is walking on tiptoes, crossing legs, or swinging arms wildly, the sillier the walk, the more engaged the children usually become. This is great for core strength and balance.

8. The Shadow Game

This is a test of proximity. The follower must stay as close to the leader as possible without ever actually touching them. This requires immense spatial awareness and careful speed control.

9. Color Chase

The leader calls out a color, such as blue or green. Everyone must race to find and touch an object of that color in the park before the leader moves on. This keeps the game fast-paced and observant.

10. Musical Movement

Hum a tune while you walk. If the leader hums faster, everyone walks faster. If the leader hums slowly, everyone moves in slow motion. This uses auditory cues to manage physical speed and rhythm.

Tips for Successful Gameplay at the Park

Safety is always the top priority. Clearly define the boundaries of your play area before you begin, and keep a watchful eye on high-traffic zones like swings or busy walkways. It is also important to ensure everyone gets a chance to lead. Rotating the leader role builds confidence in quieter children and teaches leadership to those who are more outgoing. For toddlers, keep the movements simple and short, while for older children, feel free to make the sequences longer and more physically demanding.

How to Extend the Fun

If you want to keep the energy going, incorporate simple props like hula hoops, scarves, or even a small ball to carry during the game. You can also weave a story into the play. Instead of just walking, tell the kids they are on a rescue mission to save a toy or an explorer searching for a hidden treasure. This imaginative element transforms physical exercise into an engaging narrative that children rarely get tired of. For more ideas to keep kids entertained, take a look at this guide on the complete guide to pretend play for child development.

Conclusion

Playing creative Follow-the-Leader games for kids at the park is one of the easiest ways to bond with your family while ensuring everyone gets some exercise. Whether you are stomping like bears or embarking on a secret mission, the time spent outdoors is invaluable for your child’s growth. Grab your water bottles, head to the park today, and see which of these variations your children love the most. Be sure to check out our ultimate comfort and safety guide to dress children for outdoor summer play before heading out. Do you have a favorite way to play? Share your experiences in the comments below!

Frequently Asked Questions

What are follow-the-leader games?

Follow-the-leader games are interactive activities where one person acts as the leader and others mimic their exact movements, sounds, or paths, helping children develop motor skills, coordination, and social cooperation.

How do these games benefit child development?

They enhance gross motor skills, balance, agility, and spatial awareness while also teaching important social skills like turn-taking, patience, sequential memory, and active listening.

Are these games suitable for toddlers?

Yes, toddlers can enjoy simpler variations like mimicking animal walks or slow-motion movements, provided the sequences are kept short and easy to follow.

How can I ensure safety during park games?

Clearly define the boundaries of your play area before starting, avoid high-traffic zones like swings or busy walkways, and keep a watchful eye on participating children at all times.

Should children take turns being the leader?

Yes, rotating the leader role is essential because it builds confidence in quieter children, teaches valuable leadership qualities, and keeps the game engaging for everyone.

What props can I use to make the games more fun?

You can incorporate simple items like hula hoops, scarves, or small balls, or weave a fun imaginative storyline such as a rescue mission or hidden treasure hunt.

How to Choose a Safe Crib for Your Baby: The Ultimate Parent’s Safety Checklist

0

How to Choose a Safe Crib for Your Baby: The Ultimate Parent’s Safety Checklist

Welcoming a new baby brings a whirlwind of emotions, preparations, and decisions. Among the most critical choices you will make is selecting a safe crib for your baby. Sleep is the foundation of infant development, and providing a secure environment is every parent’s primary goal. However, with the overwhelming amount of baby gear on the market, it is easy to feel intimidated by technical standards and marketing claims.

The good news is that by focusing on a few essential criteria, you can cut through the noise and create a space that promotes restful sleep while adhering to evidence-based safety practices. Following guidelines established by the American Academy of Pediatrics (AAP) and the Consumer Product Safety Commission (CPSC) will help you make a choice that gives you peace of mind every time you lay your child down for a nap. To explore broader options and styles, check out our ultimate safety & style guide on choosing a baby crib.

The Non-Negotiables: Understanding CPSC Safety Standards

When shopping for a crib, federal regulations are your best friend. The CPSC has implemented strict requirements for manufacturers to ensure that every crib sold in the United States meets rigorous safety benchmarks. These rules are designed to prevent injuries related to entrapment, falls, and structural failure.

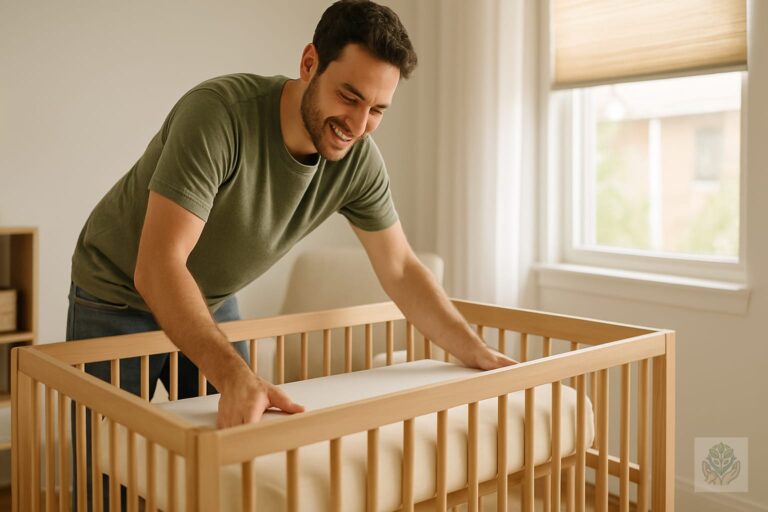
One of the most important rules is to avoid older cribs, particularly drop-side models. These were banned in 2011 because the hardware was prone to malfunction, creating dangerous gaps between the mattress and the side rail. For this reason, experts strongly recommend buying a new crib rather than relying on second-hand gear. If you do accept a hand-me-down, you must verify that the model has not been recalled and still meets current federal standards.

Look for the Juvenile Products Manufacturers Association (JPMA) certification seal. This logo indicates that the product has been independently tested to meet or exceed government safety standards. While this certification is voluntary, manufacturers who display it are signaling a deep commitment to quality and consumer safety. For more insights on evaluating overall home security for infants, read our complete guide on choosing safe baby furniture.

Key Physical Features to Inspect

Once you have selected a model that meets safety regulations, perform a physical inspection of the crib’s design. The spacing of the slats is a critical safety feature. You should never be able to fit a soda can between the bars of the crib; if you can, the gap is wider than 2 3/8 inches and poses a serious entrapment hazard for your baby’s head.

Check the corner posts and hardware for any potential snag points. Clothing items like hoodies or necklaces can easily get caught on decorative corner posts, creating a strangulation risk. Ensure the crib is free of any cutouts in the headboard or footboard that could pose a similar threat.

Structural integrity is just as important as the design itself. A high-quality crib should feel solid and stable. Look for a durable frame that does not wobble when you apply gentle pressure. Finally, always verify that the manufacturer uses non-toxic, lead-free paints and finishes. Babies explore with their mouths, and you want to ensure that no harmful chemicals are present on the surfaces they might chew or touch.

Selecting the Right Crib Mattress

The crib is only as safe as the mattress placed inside it. When it comes to bedding, firmness is the golden rule. While a soft mattress might seem more comfortable to an adult, it is dangerous for infants because it increases the risk of SIDS and can obstruct breathing if a baby rolls onto their stomach.

The mattress must fit snugly against the sides of the crib. Use the two-finger test: if you can fit more than two fingers between the edge of the mattress and the side of the crib, the mattress is too small. A gap this large can lead to a limb or head becoming stuck, which is a significant danger. To learn more about maintaining your nursery’s sleep essentials, refer to our guide on keeping baby bedding clean and fresh.

Prioritize breathability and clean, non-toxic materials. Organic cotton covers or specialized breathable mattress pads can help improve airflow, but avoid any products that claim to completely eliminate suffocation risks. A firm, tight-fitting mattress is the gold standard for a safe nursery. For additional tips on figuring out sheet quantities, consult our guide on how many crib sheets you really need.

Proper Crib Placement and Room Safety

Where you place the crib in the nursery is just as vital as the crib itself. Never position the crib near window blinds or curtains. The cords used to operate these items are major strangulation hazards. Keep the crib at least a few feet away from all cords, electrical wires, and baby monitors to ensure your child cannot reach them. For a deeper dive into room layout, review our crib placement tips for a safe nursery.

Maintain a stable temperature in the room by keeping the crib away from heat sources like radiators, space heaters, and direct sunlight. Avoid placing the crib directly under or in front of air conditioning vents or ceiling fans that might blow directly on the baby.

Adopt a minimalist approach to the nursery. The mantra for a safe sleep environment is truly ‘bare is best.’ Remove all pillows, heavy blankets, crib bumpers, stuffed animals, and positioning devices. These items serve no developmental purpose for a newborn and significantly increase the risk of suffocation or overheating.

Assembly and Maintenance Checklist

Proper assembly is a crucial step in keeping your baby safe. Always follow the manufacturer’s instructions exactly as written, even if you have assembled furniture before. Keep the manual in a safe place, such as taped to the underside of the crib frame or in a nursery file, for future reference.

If you lose hardware pieces, do not attempt to replace them with generic bolts or screws from a hardware store. Contact the manufacturer directly to order the specific parts designed for your model. Tighten all hardware periodically. Cribs endure a lot of wear and tear, and vibrations or normal use can cause bolts to loosen over time. Make it a habit to check the structural integrity of the crib every time you change the crib sheet.

Common Questions Parents Ask About Crib Safety

Many parents wonder if used cribs are ever safe. While it is generally safer to buy new, if you must use an older crib, ensure it was manufactured after the 2011 federal ban on drop-side models. Inspect every inch of the wood and metal for cracks, sharp edges, or loose connections.

Regarding the transition to a toddler bed, most children are ready when they begin attempting to climb out of the crib or when they reach the height limit specified by the manufacturer. This usually happens between the ages of 18 months and 3 years.

If you find that your crib is part of a recall, stop using it immediately. Visit the CPSC website to check your specific model and brand. Manufacturers are required to provide a fix, a replacement, or a refund for recalled products, so take advantage of those protections rather than continuing to use potentially unsafe gear. For further peace of mind regarding standard protective measures, consult our overarching crib safety essentials guide.

Conclusion

Choosing a safe crib for your baby is one of the most proactive steps you can take to ensure a healthy start for your little one. By prioritizing federal safety standards, opting for a firm and snug-fitting mattress, and keeping the sleep environment clear of clutter, you are creating a sanctuary that protects your child while they grow.

Remember that you are doing an incredible job navigating these choices. Safety is a journey that continues long after the crib is assembled. Stay informed by checking the CPSC website regularly for updates, and remember that when it comes to your baby’s sleep, simple and standard-compliant is always the best path forward. For more tips on nursery safety and infant development, subscribe to our newsletter and join our community of supportive parents.

Frequently Asked Questions

Are used baby cribs safe to use?

It is generally recommended to buy a new crib. If you use a used one, ensure it was made after the 2011 drop-side ban, has no recalls, and features sturdy, undamaged parts.

What are the CPSC standards for crib slats?

Crib slats must be no more than 2 3/8 inches apart to prevent a baby’s head from becoming trapped between the bars.

How do I know if the crib mattress is firm enough?

A safe crib mattress should maintain its shape and not depress easily when pressed. Soft mattresses increase the risk of suffocation and SIDS.

How tight should the crib mattress fit?

The mattress should fit snugly against all four sides of the crib. If you can fit more than two fingers between the mattress and the crib wall, it is too small.

When should my baby transition from a crib to a toddler bed?

Most children are ready to transition when they begin trying to climb out of the crib or reach a height of 35 inches, typically between 18 months and 3 years old.

What items should be kept inside a baby crib?

Nothing except a fitted sheet. Pillows, blankets, bumpers, and stuffed animals must be removed to maintain a safe, bare sleep environment.