
Home Blog Page 6

Best Foods That Support Healthy Baby Growth: A Nutrient-Rich Guide

0

Best Foods That Support Healthy Baby Growth: A Nutrient-Rich Guide

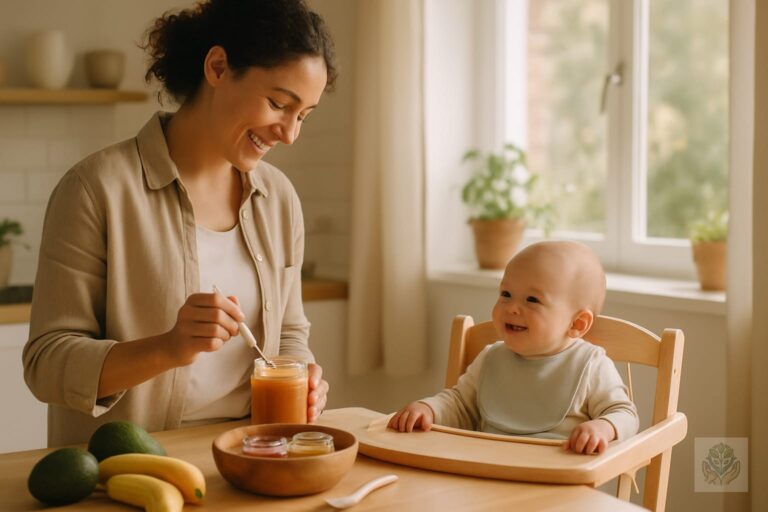
Watching your baby grow from a tiny, milk-dependent newborn into an active, curious crawler is one of the most rewarding experiences of parenthood. During this rapid developmental phase, providing the right fuel is essential. Learning about the best foods that support healthy baby growth helps ensure your child receives the vitamins, minerals, and caloric density they need to thrive during their critical first year of life.

Most pediatricians recommend waiting until around six months of age to introduce solids. By this time, your baby likely shows signs of readiness, such as sitting up with minimal support, good head control, and showing interest in your food. This guide covers how to prioritize nutrient-dense options that support brain development, immunity, and physical growth as you navigate the exciting world of starting solids.

Essential Nutrients for Rapid Infant Development

Infants have tiny tummies but massive nutritional needs relative to their size. To support their rapid physical and cognitive development, focus on these four pillars of infant nutrition.

Iron: The building block for development

Iron is perhaps the most critical nutrient during the second half of an infant’s first year. Iron supports healthy brain development and the production of red blood cells. By six months, your baby’s natural iron stores, built up in the womb, begin to deplete, making it vital to offer iron-rich foods from the start.

Healthy Fats: Crucial for brain and nervous system growth

Unlike adults who need to limit fat intake, infants require healthy fats for their rapidly growing brains and nervous systems. Fats provide a concentrated source of energy, helping your baby gain weight and meet physical milestones. Look for avocados, nut butters (thinned), and olive oil.

Protein: Supporting muscle and tissue repair

Protein is the building block of life. It supports the growth of your baby’s muscles, tissues, and hormones. While breastmilk or formula provides a baseline of protein, introducing lean meats, legumes, and eggs ensures your baby gets the amino acids necessary for steady growth. You can learn more about protein-rich foods for healthy child development in our dedicated guide.

Vitamins and Minerals: Building a strong immune system

A diverse diet filled with colorful vegetables and fruits ensures your baby receives the vitamins A, C, and D, along with minerals like zinc. These micronutrients bolster the immune system and support healthy skin, vision, and metabolic function. Discover ways to support your child’s immune system naturally as they transition to solid foods.

Top Nutrient-Dense Foods for Baby’s Growth

When selecting the best foods that support healthy baby growth, focus on quality over quantity. Small amounts of nutrient-packed ingredients go a long way.

  • Avocados: These are the gold standard for babies. They are rich in healthy fats and fiber, with a creamy texture that is naturally easy for babies to swallow.
  • Iron-fortified cereals and oats: While often a first food, these provide a reliable way to boost iron intake when served with breastmilk or formula.
  • Pureed meats and lentils: Meat offers heme iron, which is absorbed more easily by the body than non-heme iron found in plants. Lentils are a fantastic plant-based alternative that also provides fiber and protein.
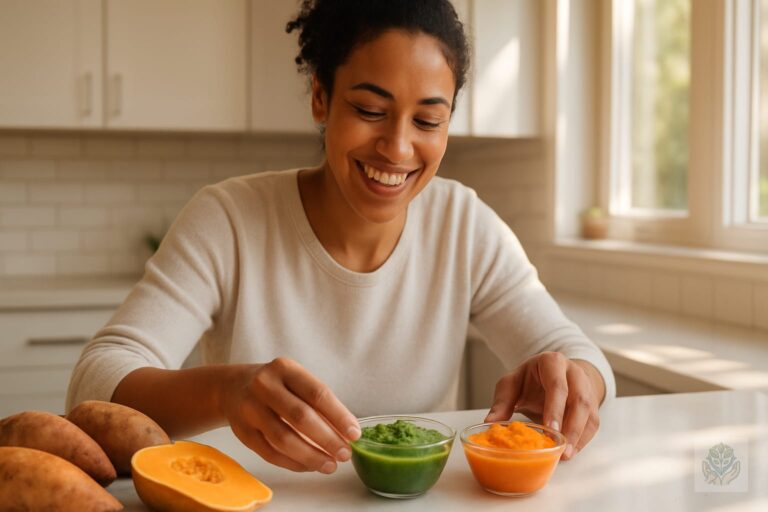
  • Sweet potatoes and squash: These orange vegetables are loaded with vitamin A and beta-carotene, which are vital for healthy skin and immune support. You can browse 5 easy vegetable puree recipes babies will love to get started.
  • Eggs: Eggs are a powerhouse of choline, an essential nutrient for brain health. Once introduced, they are an easy-to-digest source of high-quality protein.

Age-by-Age Nutritional Roadmap

Feeding is a marathon, not a sprint. Follow this timeline to manage expectations and provide the right textures.

6–8 months: Introducing single-ingredient purees and soft textures

Start with thin, single-ingredient purees. As your baby becomes accustomed to swallowing, move toward thicker mashed textures. The goal here is exposure and learning to swallow, not calorie replacement.

9–12 months: Moving toward finger foods and table food

As your baby develops a pincer grasp, offer soft finger foods like cooked pasta, bite-sized pieces of soft-boiled vegetables, and shredded meats. This period is essential for developing oral-motor skills and chewing ability.

The role of breastmilk and formula throughout the first year

Remember that breastmilk or formula remains the primary source of nutrition for the entire first year. Solids should be treated as a complement, not a replacement, for your baby’s main source of hydration and essential nutrients until they approach their first birthday.

Important Safety Guidelines for Feeding

Safety is just as important as nutrition when it comes to the best foods that support healthy baby growth. For complete peace of mind, review our baby safety rules every parent and caregiver should know.

When introducing potential allergens like peanuts, eggs, or dairy, introduce them one at a time and wait three to five days before trying another new allergen. This helps you monitor for any potential reactions. Always avoid honey until after age one due to the risk of botulism, and strictly avoid cow’s milk as a primary beverage until the first birthday.

Choking hazards are a major concern. Always avoid whole grapes, raw carrots, nuts, and large chunks of meat. Always ensure food is soft enough to be mashed between your fingers and cut into appropriate, age-safe sizes.

Practical Tips for Parents

Preparation is key to keeping mealtime manageable. Many parents find success batch-cooking purees and freezing them in ice cube trays for easy portioning. Always pay attention to your baby’s cues—turning their head away or closing their mouth are clear signs they have had enough.

Creating a positive environment is equally important. Sit with your baby during meals, talk to them about the food, and avoid distractions like tablets or television. When your baby sees you eating healthy, colorful foods, they are more likely to be curious and willing to try them, too.

Conclusion

Focusing on the best foods that support healthy baby growth sets the foundation for a lifetime of healthy eating habits. By prioritizing nutrient-dense whole foods and following safe, age-appropriate feeding practices, you are giving your baby the best start possible. Always maintain open communication with your pediatrician regarding your baby’s specific growth patterns and any dietary concerns. Enjoy these messy, beautiful milestones—they grow up faster than you think.

Frequently Asked Questions

When should I introduce solid foods to my baby?

Most pediatricians recommend starting solids around six months of age, when your baby can sit up with minimal support, has good head control, and shows interest in food.

What are the most important nutrients for a growing baby?

Iron, healthy fats, protein, and essential vitamins like A, C, and D are crucial for supporting rapid brain development, immunity, and physical growth during the first year.

Are avocados good for babies?

Yes, avocados are considered a gold standard for babies because they are rich in healthy fats, fiber, and have a naturally creamy texture that is easy to swallow.

How do I safely introduce food allergens?

Introduce potential allergens like eggs or peanut butter one at a time, waiting three to five days before trying another new allergen to monitor for any reactions.

Can I give my baby honey during their first year?

No, you should never give honey to a baby under one year of age due to the serious risk of infant botulism.

Do solids replace breastmilk or formula?

No, breastmilk or formula remains the primary source of nutrition throughout the first year. Solids are meant to complement milk feedings, not replace them.

How to Plan Healthy Meals for Picky Eaters: A Stress-Free Guide for Parents

0

How to Plan Healthy Meals for Picky Eaters: A Stress-Free Guide for Parents

If you find yourself constantly negotiating over a single broccoli floret or preparing a separate meal because your child refuses to touch the main course, you are certainly not alone. Many parents experience the exhaustion that comes with managing selective appetites. Understanding how to plan healthy meals for picky eaters is a journey, not a sprint, and it requires a mix of patience, strategy, and a shift in perspective.

Picky eating is a normal developmental phase that many children pass through as they assert their independence. By moving away from power struggles and toward proactive meal planning, you can significantly reduce the anxiety surrounding the dining table. This guide will provide you with the tools to increase your child’s nutritional intake while keeping the atmosphere light and supportive. If you struggle with defiance, you may also find our expert tips for power struggles helpful.

Understanding the Why Behind Picky Eating

To address selective eating effectively, we must first look at the biology and psychology behind the behavior. It is rarely about being difficult; rather, it is often a developmental milestone involving food neophobia, or the fear of new foods. During toddlerhood and preschool, children naturally gravitate toward familiar, caloric-dense foods as a way to feel safe and secure.

Sensory processing also plays a major role. Many children are hyper-aware of textures, smells, and colors. A mushy pea or a sauce with an unexpected spice can be overwhelming for a child with sensitive sensory needs. Recognizing that these reactions are often physical rather than behavioral is the first step toward empathy.

While most picky eating is harmless, it is important to know when to seek help. If your child is struggling with significant weight loss, extreme fatigue, or a very limited list of foods that leads to nutritional deficiencies, consult your pediatrician. They can rule out medical issues such as allergies, oral motor delays, or sensory processing disorders.

Step-by-Step Meal Planning for Picky Eaters

When you start to plan healthy meals for picky eaters, the goal is to create a predictable environment where the pressure to eat is removed. Start by implementing the one safe food rule. By ensuring that at least one component of the meal—such as plain pasta, bread, or fruit—is something you know your child likes, you reduce the stress level for everyone at the table.

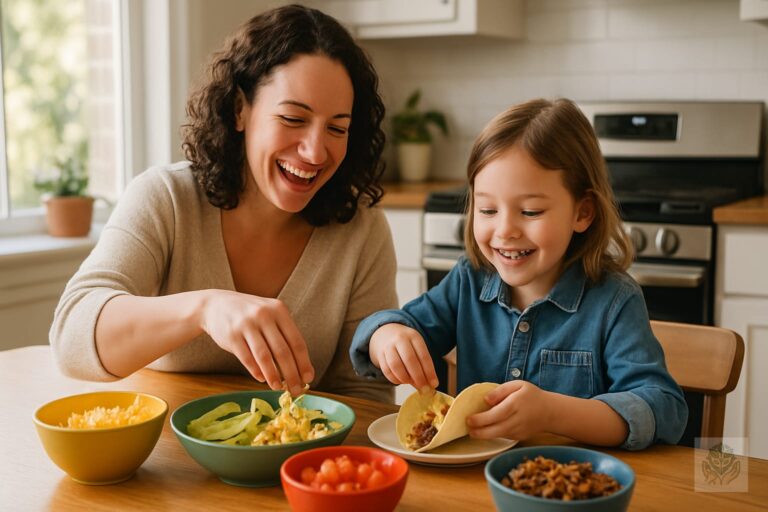
Consistency is your best friend. Rotating themes can make healthy food feel like a fun ritual rather than a chore. Consider designating Taco Tuesdays or Build-Your-Own-Pizza nights. These themes allow for variety while giving your child a sense of autonomy in assembling their plate. For more on creating structure, check out our guide on flexible daily schedules for young children.

Deconstructed meals are another powerful tool. Instead of serving a mixed casserole, serve the chicken, rice, and steamed vegetables in separate piles on the plate. This allows the child to inspect each item individually. For a selective palate, seeing the distinct parts of a meal makes the plate look much less intimidating.

Nutritional Strategies Without the Power Struggle

Feeding experts widely recommend the Division of Responsibility. In this framework, the parent decides what food is served, when it is served, and where it is served. The child, however, is responsible for deciding whether or not they eat and how much they eat. This separation of duties removes the pressure that often turns mealtime into a battleground.

You can also embrace stealthy nutrition without being dishonest. While you should not hide food to trick your child, adding pureed vegetables into a tomato sauce or blending spinach into a smoothie is a great way to boost nutrient density. For inspiration, explore our easy vegetable puree recipes. It is about adding goodness, not hiding the fact that vegetables exist.

Persistence is essential. Studies suggest it can take fifteen or more exposures before a child feels comfortable enough to even taste a new food. Keep offering the food without forcing the bite. The simple act of seeing the vegetable on their plate consistently is a form of exposure that helps build long-term familiarity.

Engaging Your Child in the Process

Children are much more likely to try a food they helped create. Involve your child in the grocery shopping process by letting them choose between two healthy options, such as red apples versus green apples. This small choice fosters a sense of ownership over their nutritional intake.

Bring the kitchen experience to life by cooking together. Even simple tasks like washing lettuce or pressing the button on the blender can increase a child’s food curiosity. When they see the ingredients transform, the food becomes less mysterious and more inviting. If you want to make healthy eating a lifestyle, read our tips on healthy snacks for kids.

Remember to focus your praise on the effort of trying, not the result of finishing. Instead of saying, Eat all your broccoli, try saying, I love how you took a tiny lick of that broccoli to see how it tastes! Positive reinforcement creates a joyful association with the dining experience.

Sample Meal Plan: A Balanced Week for Picky Eaters

Planning for the week helps ensure you have the right ingredients on hand. Here is a sample of how to balance familiar favorites with new challenges:

  • Breakfast: Oatmeal with a side of berries and a sprinkle of cinnamon.
  • Lunch: Deconstructed turkey and cheese rolls, cucumber sticks, and an orange slice.
  • Dinner: Tacos with ground turkey, shredded cheese, and a side of mild salsa.
  • Snack: Greek yogurt with a drizzle of honey or a piece of whole-grain toast.

The key here is that every meal contains at least one familiar item, preventing the child from feeling like the meal is a challenge to be overcome. If they only eat the cheese and the turkey, that is a success. Over time, they will become more curious about the other items on the plate. If you are looking for more comprehensive nutritional advice, see our guide on protein-rich foods for healthy child development.

Conclusion

Learning how to plan healthy meals for picky eaters is an investment in your child’s long-term relationship with food. By reducing the pressure, focusing on the division of responsibility, and staying patient through the phases of sensory development, you are laying the groundwork for a healthy, adventurous eater. Remember, progress is rarely linear. There will be good days and bad days, and that is perfectly okay. Stay consistent, stay supportive, and continue to model healthy habits yourself. For more resources on nutrition and family meal planning, sign up for our weekly newsletter and download our free, customizable meal planner template.

Frequently Asked Questions

Why is my child suddenly being picky about food?

Picky eating is often a normal developmental phase involving food neophobia, where children fear new foods and prefer familiar, safe items. Sensory processing, textures, and a desire for independence also play a major role in this behavior.

How many times should I offer a new food to a picky eater?

Studies suggest it can take fifteen or more exposures before a child feels comfortable enough to taste a new food. Keep offering the food repeatedly without forcing them to eat it.

What is the Division of Responsibility in feeding?

The Division of Responsibility is a feeding framework where parents decide what, when, and where food is served. The child decides whether they will eat and how much, which removes mealtime pressure.

How do deconstructed meals help picky eaters?

Deconstructed meals involve serving components like meat, rice, and vegetables in separate piles instead of mixed together. This makes the plate look less intimidating and allows children to inspect items individually.

When should I consult a pediatrician about picky eating?

Consult your pediatrician if your child experiences significant weight loss, extreme fatigue, or a severely restricted diet that leads to nutritional deficiencies or underlying medical concerns.

How can I involve my child in meal planning?

You can involve your child by letting them choose between two healthy grocery options, having them help with simple kitchen tasks like washing produce, or allowing them to assemble their own plates.

Best Baby Bottles for Breastfed and Formula-Fed Babies: A Parent’s Guide to Stress-Free Feeding

0

Best Baby Bottles for Breastfed and Formula-Fed Babies: A Parent’s Guide to Stress-Free Feeding

Finding the perfect bottle can feel like searching for a needle in a haystack, especially when you are balancing breastfeeding and bottle-feeding. Every baby has a unique preference, and what works for your friend’s little one might not be the right fit for yours. As a parent, you want to ensure your baby is comfortable, satisfied, and getting the nutrition they need without unnecessary stress. You can also explore our complete guide to baby nutrition for healthy growth to ensure your little one is thriving.

Understanding the features of the best baby bottles for breastfed and formula-fed babies is key to a smooth transition. Factors like nipple shape, flow rate, and venting systems play a significant role in how well your baby adapts to bottle feeding. Whether you are prepping for a return to work or simply want the flexibility of sharing feeding duties, this guide will help you navigate the aisles with confidence.

What to Look for in a Bottle for Breastfed and Formula-Fed Babies

Not all bottles are created equal. When your goal is to alternate between the breast and the bottle, certain features become essential to prevent nipple confusion and keep your baby content. For more gear recommendations, check out our complete guide to baby feeding accessories.

Nipple Shape

For breastfed infants, nipple shape is often the deal-breaker. Look for bottles that feature a breast-like, wide-base nipple. This design mimics the natural latch and allows your baby to keep their mouth open wide, which is crucial for maintaining a healthy nursing relationship. A softer, flexible silicone nipple often feels more like skin, making the transition less jarring.

Flow Rate

Flow rate is a common oversight that can lead to frustration. If the flow is too fast, your baby may get overwhelmed and choke; if it is too slow, they may get tired before finishing their meal. Start with a slow-flow or newborn nipple. These are designed to require effort from the baby, similar to how they work for milk during nursing.

Anti-Colic Technology

Gas is a frequent culprit of post-feeding fussiness. High-quality bottles now include sophisticated venting systems, internal valves, or collapsible liners that prevent air from mixing with the milk. By reducing the amount of air your baby swallows, you can significantly decrease the likelihood of colic and gas-related discomfort.

Material

Your choice of material affects both safety and convenience. Glass is excellent for purity and longevity, as it does not retain odors and is easy to clean. High-quality plastic or PPSU is lightweight and shatterproof, making it a convenient choice for busy parents. Silicone bottles offer a soft, squeezable texture that some babies find very comforting.

Top Recommended Bottles for Combination Feeding

Selecting the right bottle depends on your baby’s specific needs. Here are some top-tier options that consistently rank well with parents and pediatric experts. For those just starting their journey, you may also want to review our complete roadmap to healthy newborn care.

  • Best Overall for Breastfed Babies: The Philips Avent Natural Response bottle is widely praised. It features a unique nipple that only releases milk when your baby actively drinks, mirroring the way a breast works and helping to prevent overfeeding.
  • Best for Preventing Nipple Confusion: The Comotomo Natural Feel bottle is a favorite for its soft, skin-like silicone body. Its wide mound and slow-flow nipple are specifically designed to ease the transition between breast and bottle.
  • Best Anti-Colic Bottle: Dr. Brown’s Natural Flow Anti-Colic bottles are the gold standard for babies prone to gas. The internal vent system effectively eliminates vacuum pressure and bubbles, ensuring a smooth flow of milk.
  • Best Glass Option: Evenflo Feeding Glass Bottles are a durable, non-toxic choice. They are easy to sanitize and provide peace of mind for parents who prefer to avoid plastics entirely.
  • Best for Ease of Cleaning: Tommee Tippee Closer to Nature bottles feature a simple, wide-neck design with fewer parts, making them incredibly easy to wash and assemble under pressure.

Pro-Tips for Successful Bottle Transitions

Introducing a bottle is a milestone that requires patience and strategy. Do not wait until the last minute to start this process.

The best time to introduce a bottle is generally between three and six weeks of age, once breastfeeding is well-established. If you wait too long, your baby may become very attached to the breast and reject artificial nipples entirely.

If possible, have someone other than the breastfeeding parent offer the first few bottles. Babies have a keen sense of smell and can identify their nursing parent; if they see or smell mom, they may become confused as to why they are not being breastfed. Paced bottle feeding is another vital technique. Hold your baby in an upright position and hold the bottle horizontally. Let the baby draw the milk out rather than gravity pouring it into their mouth. This mimics the work of breastfeeding and helps the baby control their intake. As they grow, you might also be interested in our ultimate age-wise baby meal planning guide.

Common Challenges and How to Solve Them

It is perfectly normal for your baby to refuse a bottle at first. If they turn their head away, do not force it. Try a different time of day when they are hungry but not yet “hangry.” Experimenting with the temperature of the milk or trying a different nipple flow can also yield different results.

If you notice persistent fussiness during or after feeding, check the vent system. Ensure that all components are properly aligned and that the vent is not clogged. If your baby seems to be struggling to pull milk out, it might be time to move up to the next nipple flow size. Most manufacturers offer a transition guide based on age and feeding speed. Remember that understanding your baby’s signals is part of the broader signs your newborn is healthy and thriving.

Conclusion

Finding the right feeding solution is a journey, not a sprint. Remember that every baby is different, and it is completely normal if the first bottle you try isn’t the winner. Be patient with your little one, and trust your instincts as you explore these options. By focusing on nipple design, flow rates, and comfortable feeding techniques, you will eventually find the best baby bottles for breastfed and formula-fed babies that work for your family. Stay positive, keep trying, and know that you are doing a wonderful job providing for your baby. For more helpful tips, browse our collection of smart parenting tips.

Frequently Asked Questions

When is the best time to introduce a bottle to a breastfed baby?

The ideal time to introduce a bottle is usually between three and six weeks of age, once breastfeeding is well-established, to help prevent nipple refusal later on.

How do I prevent nipple confusion when combining breast and bottle feeding?

Choose bottles with wide-base, breast-like nipples made of soft silicone, and use slow-flow rates to mimic the natural effort required during breastfeeding.

What is paced bottle feeding?

Paced bottle feeding involves holding the baby upright and the bottle horizontally, allowing the baby to control the milk flow and prevent overfeeding.

Are glass baby bottles safe and effective?

Yes, glass baby bottles are exceptionally safe, non-toxic, durable, and do not retain odors or stains, making them a popular choice among parents.

Why is my baby refusing the bottle?

Bottle refusal can happen due to an unfamiliar nipple shape, incorrect milk temperature, or a flow rate that is either too fast or too slow for the baby.

Can the breastfeeding parent give the first bottle?

It is often easier for someone else to offer the first few bottles because babies can smell breast milk and may become confused if the nursing parent holds them.

5 Easy Vegetable Puree Recipes Babies Will Love: A Starter Guide for Parents

0

5 Easy Vegetable Puree Recipes Babies Will Love: A Starter Guide for Parents

The transition from breast milk or formula to solid foods is a major milestone in your baby’s development. It is a period filled with both excitement and a few logistical challenges. You might find yourself scouring the grocery store aisles, wondering which store-bought jars offer the best nutrition, only to realize the ingredients list is longer than necessary. Creating 5 easy vegetable puree recipes babies will love is a game-changer for parents who want to provide wholesome, nutrient-dense, and cost-effective meals at home.

Making your own baby food is far simpler than many new parents anticipate. By preparing these meals in your own kitchen, you control exactly what goes into your baby’s tummy, avoiding unnecessary preservatives or additives. Let this guide empower you to start this culinary adventure with confidence. For more guidance, check out our complete guide on everything you need to know before starting baby’s first foods.

When to Start: Signs Your Baby is Ready for Purees

Before you dive into the kitchen, it is important to ensure your little one is developmentally prepared for solid food. Pediatricians generally suggest that babies are ready for purees between 4 and 6 months of age, though every child develops at their own pace.

Beyond age, look for these physical cues:

  • Your baby can hold their head up steadily without assistance.
  • They can sit upright with minimal or no support.
  • They show a significant decrease in the tongue-thrust reflex, which causes them to push objects out of their mouths automatically.
  • They demonstrate curiosity by watching you eat and reaching for your food.

Always consult with your pediatrician before introducing solids to confirm your baby is developmentally ready for the next step in their nutritional journey.

The Best Vegetables for Baby’s First Bites

When you start introducing solids, simplicity is your best friend. Choosing nutrient-dense vegetables provides the vitamins and minerals your baby needs to thrive while helping them develop a palate for diverse flavors. To expand their diet further, see our guide on the best fruits to introduce as first foods.

Sweet potatoes are an excellent starter because they are naturally sweet and packed with vitamin A. Carrots are another wonderful choice, offering plenty of beta-carotene and a pleasant, mild taste when steamed. Peas provide a great source of fiber and protein, while butternut squash offers a silky, creamy texture that babies find incredibly soothing. Finally, do not be afraid to introduce greens early; broccoli is a powerhouse of nutrients that sets the stage for a healthy diet later in life.

5 Easy Vegetable Puree Recipes Babies Will Love

These recipes are designed to be straightforward and quick. Remember to wash all produce thoroughly and steam your vegetables to preserve their nutritional integrity. For a more comprehensive look at meal planning, refer to our baby meal planning guide for six to twelve months.

1. Silky Sweet Potato Mash

Peel and cube one medium sweet potato. Steam until fork-tender. Blend with a splash of breast milk or formula until you reach a smooth, velvety consistency. The natural sweetness makes this a hit for almost every baby.

2. Steamed Carrot & Ginger Zest

Steam two peeled carrots until very soft. Add a tiny pinch of fresh grated ginger—just enough for a hint of flavor. Blend with a tablespoon of water or broth to achieve a smooth puree that introduces your baby to mild spices early on.

3. Classic Sweet Green Pea Puree

Using frozen or fresh organic peas, steam for about 5 minutes. Blend them until completely smooth, and be sure to pass the puree through a fine-mesh sieve if you want to remove any lingering skins for an extra-smooth texture.

4. Roasted Butternut Squash Delight

Roasting brings out the natural sugars in squash. Cube the squash, toss lightly with a drop of olive oil, and roast at 400 degrees Fahrenheit until caramelized. Blend until creamy, adding a little water to thin if necessary.

5. Creamy Broccoli & Avocado Mix

Steam broccoli florets until tender. Blend with half a ripe avocado. The healthy fats in the avocado make this a nutrient-dense superfood meal that is incredibly satisfying for a growing baby.

How to Properly Store and Freeze Baby Purees

One of the best benefits of making your own food is the ability to batch-cook. Use silicone ice cube trays to freeze your purees; each cube is a perfect portion size for a beginner eater. Once the cubes are frozen, transfer them to a freezer-safe bag, label them with the date, and store them for up to three months.

For daily use, move one or two cubes from the freezer to the refrigerator the night before to thaw safely. Avoid leaving food at room temperature for more than an hour to ensure maximum safety.

Expert Tips for Success

Introducing new flavors is an experiment. Always introduce one single-ingredient vegetable at a time, waiting 2 to 3 days between new foods to monitor for any signs of allergic reactions, such as rashes or digestive upset. Learn more about keeping your child safe with our guide to baby safety for parents.

If your baby seems hesitant, try mixing the vegetable with a small amount of breast milk or formula. This familiar, sweet taste can help bridge the gap between their liquid diet and new vegetable textures. Most importantly, remain patient. It can take up to 10 to 15 exposures for a baby to accept a new flavor, so do not get discouraged if they reject a vegetable on the first try.

Conclusion

Starting your baby on solids is a journey that connects you to their growth in a whole new way. By utilizing these 5 easy vegetable puree recipes babies will love, you are laying the foundation for a lifetime of healthy eating habits. Keep the experience light, fun, and low-pressure. Every baby is unique, so follow their lead and enjoy the process of watching them explore the world of food.

For more expert advice and weekly meal inspiration, sign up for our newsletter and join our community of parents navigating the wonders of early childhood nutrition. You can also explore our complete guide to baby nutrition for healthy growth.

Frequently Asked Questions (FAQ)

Can I add salt or spices to my baby’s food?

It is best to avoid adding salt, as a baby’s kidneys are still developing and cannot process high sodium levels. Mild spices like ginger, cinnamon, or basil can be introduced in small amounts after your baby has tolerated individual vegetables for a few weeks.

Do I need to peel every vegetable?

While you do not need to peel every vegetable, it is recommended for produce with tough skins like potatoes, carrots, and squash, as these can create a gritty texture that might be difficult for a young baby to swallow.

What should I do if my baby refuses a vegetable?

Do not force the issue. Simply try again a few days or weeks later. Babies often change their preferences frequently, and continuous, non-pressured exposure is the most effective way to help them learn to enjoy new tastes.

Frequently Asked Questions

When can I start feeding my baby vegetable purees?

Pediatricians generally suggest introducing purees between 4 and 6 months of age, provided your baby can hold their head steady, sit upright, and shows an interest in food.

Can I add salt or spices to my baby’s food?

Avoid adding salt because baby kidneys cannot process high sodium. Mild spices like cinnamon or ginger can be introduced in tiny amounts after your baby adapts to single-ingredient foods.

Do I need to peel every vegetable before making a puree?

It is recommended to peel tough-skinned vegetables like potatoes, carrots, and squash to ensure a completely smooth texture that is easy for a beginner eater to swallow.

What should I do if my baby refuses a vegetable puree?

Do not force it. It can take up to 10 to 15 exposures for a baby to accept a new flavor, so try offering the vegetable again in a few days.

How long can I store homemade vegetable purees in the freezer?

You can store homemade purees in freezer-safe trays or bags for up to three months. Just remember to thaw individual portions safely in the refrigerator overnight before serving.

Should I introduce single-ingredient foods first?

Yes, always introduce one single-ingredient vegetable at a time and wait 2 to 3 days before offering a new one to easily monitor for any potential food allergies.

Setting Clear Rules Without Constant Arguments: A Parent’s Guide to Peaceful Cooperation

0

Setting Clear Rules Without Constant Arguments: A Parent’s Guide to Peaceful Cooperation

Every parent knows the feeling of the daily power struggle. You ask your child to brush their teeth, and they respond with a defiant no. You request that they put away their toys, and you are met with a chorus of whining. These moments can leave you feeling exhausted, frustrated, and questioning your approach to discipline. If you are struggling with daily conflict, know that you are not alone.

The goal of setting clear rules without constant arguments is to move away from mere compliance—which is often short-lived—and toward genuine cooperation. When we rely on the traditional because I said so approach, we often inadvertently invite more pushback. This creates an adversarial relationship rather than a collaborative one. By shifting our perspective, we can create an environment where children feel heard and respected while still adhering to the necessary structure of the household.

Why Children Fight Back Against Rules

To reduce friction, it is essential to understand the developmental drivers behind your child’s behavior. Children are hardwired to seek autonomy. As they grow, they naturally want to exert control over their environment and their choices. When we impose rules without context or discussion, they perceive it as an attack on their growing sense of self.

Inconsistent expectations often act as fuel for this fire. If the rules change based on your mood or the time of day, children become confused. They begin to view your boundaries as optional suggestions rather than firm guidelines. This uncertainty leads to testing behaviors because they are trying to figure out where the edge actually lies.

Furthermore, we must consider the role of emotional regulation. A child who is overstimulated, tired, or hungry lacks the executive function required to cooperate. Often, what looks like defiance is actually a sign of an overwhelmed nervous system. When we address the child’s internal state alongside the rule, we drastically reduce the likelihood of a power struggle.

The 3 Pillars of Effective Rule Setting

Effective boundary setting rests on three foundational pillars: clarity, consistency, and collaboration. Without these, rules often feel arbitrary.

Clarity: Moving from Vague Instructions

Vague instructions like be good or clean up your mess are difficult for children to process. Instead, use concrete, observable expectations. Instead of saying clean your room, try, please put your blocks in the blue bin and your books on the shelf. When the expectation is specific, the child knows exactly what success looks like.

Consistency: The Foundation of Predictability

Consistency is not about being rigid; it is about being reliable. When rules remain the same regardless of your stress level, children learn that the boundary is firm. This predictability provides them with a sense of security, which ironically makes them more willing to cooperate.

Collaboration: Inviting Children into the Process

Depending on their age, children should have a voice in the rules. When you host a family meeting to discuss expectations, children are more likely to commit to the outcome. You might ask, we have a problem with toys being left in the hallway; how can we make sure everyone stays safe and keeps the house tidy? By involving them, you transform from an enforcer into a partner.

Communication Hacks to Avoid Power Struggles

How we speak to our children determines how they listen. Often, small shifts in language yield massive improvements in cooperation.

Instead of issuing commands that trigger an immediate internal resistance, offer choices within limits. For example, rather than saying get your shoes on right now, try, would you like to put your sneakers on by the door or in the kitchen? This honors their need for autonomy while keeping the goal (getting shoes on) firmly in place.

The power of when/then statements is also transformative. Use this structure to connect a required task with a preferred activity. For instance, when your homework is finished, then you may have your screen time. This shifts the focus from your demand to their incentive.

Finally, practice positive framing. The human brain often glosses over the word don’t. Telling a child don’t run just forces them to picture themselves running. Instead, focus on what you want them to do: please walk slowly.

Implementing Consequences Instead of Punishments

Punishment is designed to make a child suffer for a mistake, which rarely teaches them how to do better next time. Conversely, logical consequences are related, respectful, and reasonable. They teach the child how their actions affect the world around them.

If a child refuses to put their laundry in the hamper, the logical consequence is that their clothes do not get washed, or perhaps they have to spend their own playtime sorting the pile. This is not about shaming; it is about allowing the child to experience the natural outcome of their choice. When you deliver these consequences, do so calmly. Avoid long lectures. A short, neutral statement like, I see you chose not to put the toys away, so we will not be able to play with them until tomorrow, is far more effective than an emotional explosion.

Troubleshooting Common Friction Points

Even with the best strategies, certain times of day remain difficult. Let us look at how to apply these principles to high-stress routines.

  • Morning/Bedtime: Use visual charts or checklists. These serve as the reminder so you do not have to be the nagger.
  • Screen Time: Use a timer. When the timer goes off, it is the objective authority, not you, ending the activity.
  • Chores: Tie chores to specific, non-negotiable family responsibilities rather than bribery. Frame it as: we are a team, and this is how we take care of our home.

When to Renegotiate Rules (The Growth Mindset Approach)

Rules are not written in stone. As your child matures, their capabilities change. Recognizing when a rule has been outgrown is a sign of healthy parenting. If a rule causes constant conflict, it may be time to revisit it during a family meeting.

Ask, does this rule still work for us? What can we change to make it easier for everyone? By teaching your child to negotiate and solve problems, you are preparing them for life outside your home. Loosening the reins on smaller issues shows that you trust them, which encourages them to be more responsible with the big ones.

Conclusion

Setting clear rules without constant arguments is a marathon, not a sprint. It requires patience, consistency, and a willingness to look at your own triggers. By shifting your focus from compliance to connection, you build a foundation of mutual respect that will serve your family for years to come. Remember, every time you choose to communicate calmly and clearly, you are teaching your child how to interact with the world. Stay the course, be patient with yourself, and embrace the process of growth alongside your child. For more tools on managing daily dynamics, subscribe to our weekly parenting newsletter for actionable tips and templates.

Best Fruits to Introduce as First Foods: A Parent’s Guide to Starting Solids

0

Best Fruits to Introduce as First Foods: A Parent’s Guide to Starting Solids

The journey of starting solids is one of the most exciting, nerve-wracking, and memorable milestones in early parenthood. You are opening up a brand-new world of flavors, textures, and sensory experiences for your little one. While it can feel overwhelming to choose the perfect items to put on that high chair tray, fruit is often a natural and favorite starting point for many families. You may also want to explore our ultimate age-wise baby meal planning guide to prepare for the stages ahead.

Fruits provide essential vitamins, minerals, and natural sweetness that babies often enjoy immediately. However, it is always a smart practice to chat with your pediatrician before introducing solids to ensure your baby is developmentally ready. Let us explore the best fruits to introduce as first foods to get your baby off to a healthy start.

When Is the Right Time to Introduce Fruit?

Before you rush to the grocery store, it is crucial to ensure your baby is physically prepared for the complex task of eating. Most pediatricians and major health organizations recommend waiting until around 6 months of age to begin solid foods.

Look for these developmental signs that your baby is ready to start: your baby should have good head and neck control, be able to sit up with minimal support, and show a decrease in the tongue-thrust reflex, which causes them to push objects out of their mouth. If your baby is showing an interest in your food and can hold their head steady, they are likely ready to begin their culinary adventure. For more guidance, check out our complete guide to introducing first foods to your baby.

The 5 Best Fruits to Introduce as First Foods

When selecting the best fruits to introduce as first foods, you want options that are nutrient-dense, easily digestible, and simple to prepare. Here are five top choices for your baby’s first meals:

1. Avocados

Avocados are a gold standard for a baby’s first food. They are rich in healthy fats that are vital for brain development and have a naturally creamy texture that is very easy for babies to swallow. Simply mash a ripe avocado with a fork until it is smooth.

2. Bananas

Bananas are perhaps the most convenient of all first foods. They are soft, easy to digest, and come in their own natural packaging. Their subtle sweetness is generally very well-received by infants.

3. Pears

Pears are exceptionally gentle on a baby’s developing digestive system. They are high in fiber, which can help keep your baby regular. For young babies, opt for ripe pears, steam them until soft, and then mash or puree them to a smooth consistency.

4. Papaya

Often overlooked, papaya is a fantastic choice because it is nutrient-dense and naturally very soft. It offers a unique flavor profile and contains digestive enzymes that can be helpful for little tummies.

5. Peaches

Peaches are packed with vitamins and can be mashed easily once ripe. They offer a great introduction to stone fruits. Always ensure you remove the skin and pit, as the fuzzy skin can sometimes be difficult for a baby to manage early on.

How to Properly Prepare Fruits for Your Baby

How you prepare these fruits depends on your preferred feeding method. Some parents choose purees, while others opt for Baby-Led Weaning (BLW). If you are preparing purees, aim for a thin, smooth consistency. If you are pursuing BLW, ensure the fruit is cut into long, finger-sized strips that the baby can grasp easily. Learn more about preparation methods in our guide on how to make healthy fruit purees for babies.

Safety is the top priority. Always steam hard fruits like apples or pears until they are fork-tender. Never serve whole grapes, cherries, or large chunks of fruit, as these pose a significant choking hazard. Always supervise your baby closely while they are eating. Refer to our baby safety rules guide for more essential tips.

Introducing New Foods: The 3-Day Rule

Many pediatricians recommend the 3-day rule when introducing a new food. This means you serve a single new fruit and wait three days before introducing another new one. This allows you to monitor for any signs of an allergic reaction or digestive sensitivity.

Keep a close eye on your baby for symptoms such as a skin rash, hives, vomiting, or persistent diarrhea. While severe reactions are rare, these signs are your cue to stop the food and consult your pediatrician immediately. Once you have confirmed the baby tolerates the fruit well, you can move on to the next one.

Tips for Success: Building Positive Eating Habits

Do not be discouraged if your baby rejects a food the first time; it can take ten or more exposures for a baby to accept a new flavor. You can mix fruit purees with a little bit of breastmilk or formula to create a familiar taste profile that bridges the gap between liquids and solids.

Remember that fruit is just one part of a balanced diet. As you progress, ensure you are pairing fruit with iron-rich foods, such as iron-fortified cereals, legumes, or meats. Never pressure your baby to eat if they turn their head or fuss. The goal is to foster a positive, low-stress relationship with food. Proper nutrition is key to creating a balanced diet for your baby.

Frequently Asked Questions (FAQ)

  • Can I serve canned fruit? It is best to avoid canned fruit if it is packed in heavy syrup. If you must use canned, choose versions packed in water and ensure there is no added sugar.
  • Should I peel the fruit? Yes, for most fruits like apples, peaches, and pears, the skin can be a choking hazard or difficult to digest for young infants.
  • What if my baby has constipation? Fiber-rich fruits like pears and peaches can help, but ensure your baby is also staying hydrated with their usual milk intake.

Conclusion

Introducing the best fruits to introduce as first foods is an exciting milestone. While the process is guaranteed to be messy, it is also a beautiful time to watch your baby discover the world through taste. Trust your parental intuition, lean on the guidance of your pediatrician, and enjoy these moments of growth. By starting with wholesome, simple fruits, you are setting the stage for a lifetime of healthy eating habits. Explore more about baby nutrition for healthy growth to continue supporting your little one’s development.

Frequently Asked Questions

When can I start giving my baby fruit?

Most pediatricians recommend introducing solid foods, including fruits, around 6 months of age when your baby shows signs of developmental readiness like good head control.

Can I serve canned fruit to my baby?

It is best to avoid canned fruit packed in heavy syrup. If using canned fruit, choose options packed in water with zero added sugars.

Should I peel the fruit before serving?

Yes, for fruits like peaches, pears, and apples, you should peel the skin because it can pose a choking hazard or be hard to digest for young infants.

What is the 3-day rule for new foods?

The 3-day rule means feeding your baby a single new food for three consecutive days before introducing another, helping you monitor for allergic reactions.

What if my baby is constipated?

Fiber-rich fruits like pears and peaches can help relieve mild constipation. Ensure your baby also receives adequate hydration through breastmilk or formula.

How should I prepare hard fruits like apples?

Hard fruits must be peeled, cored, and steamed until they are completely fork-tender before being mashed or pureed to prevent choking hazards.

Essential School Accessories Every Child Needs: The Ultimate Back-to-School Checklist

0

Essential School Accessories Every Child Needs: The Ultimate Back-to-School Checklist

Introduction

The transition back to the classroom can be an overwhelming time for families. Between coordinating schedules, shopping for new wardrobes, and managing expectations, the stress of back-to-school preparation often feels like a full-time job. However, setting the right foundation can change the entire tone of the academic year.

Investing in the right essential school accessories is about more than just checking items off a list. It is about equipping your child with the tools they need to succeed. When a child has a backpack that fits correctly or stationery that is easy to use, their confidence in the classroom grows. They spend less time worrying about broken zippers or missing supplies and more time engaging with their lessons.

This guide serves as your ultimate back-to-school checklist. We have curated these recommendations based on child development needs and practical durability to ensure you are investing in gear that truly supports your student throughout the year.

The Foundation: Quality School Bags and Lunch Gear

Your child’s backpack is the most important item they will carry every day. When selecting a bag, prioritize ergonomic design over trendy patterns. Look for padded shoulder straps and a chest strap to distribute weight evenly, which helps protect developing backs from strain. Check out our best school bags for kids in India (Comfort + Durability Guide) for top recommendations.

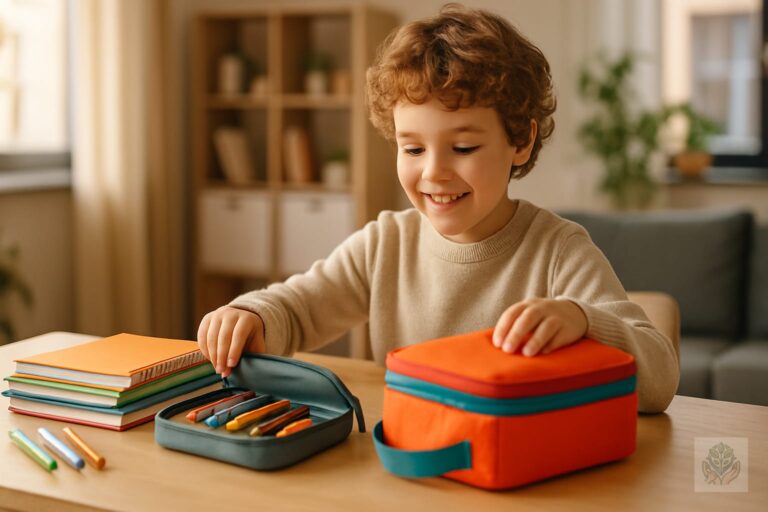
When it comes to nutrition, an insulated lunch box is non-negotiable. Keeping food at a safe temperature ensures your child actually eats what you pack, providing them with the energy they need to power through afternoon subjects. Pair this with a high-quality, leak-proof, reusable water bottle. Staying hydrated is essential for cognitive function and focus during long school days.

Stationery Staples That Make a Difference

The quality of writing tools can significantly impact a student’s willingness to practice handwriting. Ergonomic pencils with a comfortable grip help reduce hand fatigue for younger students, while smooth-flow pens are a great upgrade for middle and high schoolers. For younger children, you can find expert tips and fun activities to improve pencil grip.

Organization is a learned skill, and having the right supplies makes it easier. Invest in a durable, multi-compartment pencil case that keeps items separated. Folders should be color-coded by subject to help your child find documents quickly during transition periods. Finally, look for notebooks with high-quality paper that won’t bleed when using highlighters, and provide a planner for students to track their assignments and test dates.

Tech and Productivity Accessories

In today’s digital classroom, technology is a constant companion. If your child uses a school-issued device, protective cases are mandatory. A rugged, padded sleeve can save you the headache of repair bills and the stress of lost data. You might also want to look at top kids study tables and chairs for better focus to create the perfect home learning environment.

For students engaging in digital learning or quiet reading time, a pair of noise-canceling headphones is a game-changer. These help block out distractions, allowing your child to immerse themselves in their work. For older students managing heavy academic loads, a compact portable power bank ensures their devices stay charged during long study sessions or after-school activities.

Personalized Gear and Labeling

As every experienced parent knows, items have a way of vanishing in the chaos of a school hallway. Labeling everything is your best defense against losing expensive equipment. From backpacks to water bottles, clear identification helps teachers return misplaced items to their owners quickly.

Get creative with personalization to keep your child excited. Using custom labels or fabric patches allows your child to express their unique personality while keeping their belongings identifiable. Just ensure that any personalization method you choose does not compromise the structural integrity of the gear.

Beyond the Basics: Comfort and Hygiene

Beyond traditional supplies, consider the items that keep your child comfortable throughout the day. A small pack of hand sanitizer and travel-sized tissues should be a permanent fixture in every school bag to encourage good hygiene habits. Discover 20 healthy hygiene habits every child should learn to keep them safe.

Footwear is another critical category. Ensure your child has supportive, comfortable shoes suitable for both PE classes and active recess play. Check our guide on comfortable children’s shoes: 7 essential features to look for. Depending on your climate, keeping a set of weather-appropriate outdoor accessories, like a lightweight, packable rain jacket, can save your child from the discomfort of a cold, wet day.

Expert Tips for Staying Organized All Year Long

Buying the gear is only the first step. To keep the school year running smoothly, implement a designated drop zone near your home’s entrance. This provides a consistent place for your child to store their backpack, shoes, and lunch gear the moment they walk through the door. You can also explore 10 stress-free after-school routine ideas for kids that actually work.

Schedule weekly maintenance checks for school supplies. Spend ten minutes every Sunday evening sharpening pencils, clearing out crumpled papers, and washing lunch containers. Most importantly, involve your child in the packing process. When they take ownership of their own bag and supplies, they naturally become more responsible and mindful of their belongings.

Conclusion

Preparing for the new school year is much more manageable when you prioritize quality over quantity. By choosing essential school accessories that are durable, functional, and organized, you set your child up for academic success. Remember that these tools are meant to facilitate learning, not add to the clutter.

Start the year with a positive mindset by focusing on the excitement of new beginnings. With the right gear in hand, your student will be ready to tackle any challenge that comes their way. Download our printable back-to-school checklist today and cross off those final items with confidence!

Frequently Asked Questions

What are the most important school accessories for a child?

The most important accessories include an ergonomic backpack, an insulated lunch box, a leak-proof water bottle, and durable stationery like color-coded folders and a multi-compartment pencil case.

How do I choose the right backpack for my child?

Prioritize ergonomic design over trendy patterns. Look for padded shoulder straps, a chest strap to distribute weight evenly, and a size that fits your child’s back without hanging too low.

Why are insulated lunch boxes and water bottles necessary?

Insulated lunch boxes keep food at safe temperatures so your child eats well. Reusable water bottles ensure proper hydration, which is essential for cognitive function and focus during school hours.

How can I keep my child’s school supplies organized all year?

Establish a drop zone near your entrance, use color-coded folders for subjects, and schedule a ten-minute weekly maintenance check every Sunday evening to clean out bags and restock supplies.

Should I label my child’s school accessories?

Yes, labeling items like backpacks, lunch boxes, and water bottles helps teachers quickly return misplaced items and prevents costly losses throughout the school year.

What tech accessories do students need for school?

Depending on their grade level, students may need a rugged protective case for school-issued devices, noise-canceling headphones for digital learning, and a compact portable power bank.

How to Choose Safe Baby Furniture for Your Home: A Parent’s Complete Safety Guide

0

How to Choose Safe Baby Furniture for Your Home: A Parent’s Complete Safety Guide

Preparing for a new arrival is an exciting time, but it often brings a long to-do list. Among the most important tasks is setting up a nursery that acts as a secure sanctuary. Choosing safe baby furniture is not just about aesthetics; it is about creating an environment where your child can sleep, play, and grow without hidden hazards.

Many parents-to-be are surprised to learn that not all juvenile furniture is created equal. Older items or mass-produced pieces that do not meet current regulatory guidelines can harbor risks such as unstable construction or toxic chemicals. In this guide, we will walk you through the essential criteria for selecting pieces that prioritize your child’s well-being, from industry certifications to the importance of proper setup. You can also explore our essential furniture for a functional nursery for more tips on outfitting your space.

Understanding Safety Standards: What to Look For

When you start your search for safe baby furniture, you will quickly encounter various acronyms and labels. These are not just marketing fluff; they are vital benchmarks. The Consumer Product Safety Commission (CPSC) sets strict mandatory federal standards for items like cribs and playards. These regulations cover everything from structural integrity to the size of openings.

Beyond federal mandates, look for the Juvenile Products Manufacturers Association (JPMA) seal. A product with this certification has undergone independent laboratory testing to ensure it meets or exceeds ASTM standards. These standards are rigorously updated to address emerging safety concerns, such as improved locking mechanisms on crib sides or enhanced stability tests. Always remember to cross-reference your choices with our everything parents need to know about baby safety guide.

We strongly advise against using older hand-me-down furniture that predates these modern benchmarks. Safety regulations for cribs, in particular, changed significantly in 2011 to ban drop-side cribs and require more robust slat testing. If you cannot verify the manufacturing date or the safety history of a piece, it is safer to opt for new, certified equipment.

Material Matters: Non-Toxic and Sustainable Options

The materials used to construct your nursery furniture are just as important as the design. Many conventional furniture items, especially those made from particle board or MDF, use glues and finishes that contain Volatile Organic Compounds (VOCs). These chemicals can off-gas into the air your baby breathes, potentially causing respiratory irritation or other health concerns over time.

To minimize exposure, prioritize solid wood furniture finished with low-VOC or non-toxic paints and stains. When shopping, keep an eye out for GREENGUARD Gold certification. This third-party verification confirms that a product has been tested for chemical emissions and meets strict health-based criteria, making it a safer choice for a nursery environment.

If you are on a budget, consider looking for solid wood pieces that show their natural grain rather than heavily painted items. This is often an indication of higher quality construction and fewer hidden glues or synthetic resins. Whenever possible, let new furniture air out in a well-ventilated room for a few days before bringing the baby home. You may also want to read our advice on how to choose safe skin care products for babies to ensure other items in the room are equally clean and non-toxic.

Deep Dive: Essential Nursery Furniture Safety Checklist

Every piece of furniture requires a different safety approach. Use this checklist to evaluate the items you plan to bring into your nursery:

  • Cribs: Ensure slat spacing is no wider than 2 3/8 inches to prevent head entrapment. The mattress should fit snugly, leaving no gaps where a finger can be inserted between the mattress and the crib side. For more on bedding, see our baby fitted sheets buying guide.
  • Changing Tables: Always choose a table with a safety strap and a guard rail on all four sides. The height should be comfortable for you, but the most important factor is a stable base that will not wobble during a squirmy diaper change.
  • Dressers: Look for drawers with safety stops that prevent them from being pulled out completely. If you are using a dresser as a changing station, ensure it is low enough to prevent falls and wide enough to accommodate a changing pad securely.
  • Gliders and Rockers: Ensure all moving parts are enclosed to prevent little fingers from getting pinched. Test the base for stability to ensure it cannot easily tip backward or sideways while you are holding your baby.

The Importance of Furniture Anchoring

One of the most dangerous and overlooked risks in a home is furniture tip-over incidents. As children become mobile, they naturally reach for drawers to pull themselves up. Even a heavy piece of furniture can tip forward if multiple drawers are opened or if the child climbs on the front.

Every heavy item, including dressers, bookshelves, and armoires, should be secured to the wall using furniture anti-tip kits. These kits are inexpensive, easy to install, and essential for childproofing. Most modern furniture comes with pre-drilled holes or recommended attachment points. If yours does not, purchase a universal strap kit from a hardware store. Always use wall anchors appropriate for your wall type, such as studs or high-quality drywall anchors, to ensure a firm hold. For further protection, refer to our room-by-room safety guide to prevent common household accidents for babies.

Placement Strategy: Where to Put Your Furniture

Where you place your furniture matters just as much as what you buy. Proper layout can significantly reduce safety risks. Always position cribs and toddler beds away from windows, as blind cords and drapery pose a severe strangulation risk. You should also ensure the crib is not near electrical outlets or cords that could be pulled into the sleeping area. For more on creating a secure sleeping space, visit our guide on how to create a safer sleep environment for babies.

Avoid placing furniture near heating vents, space heaters, or radiators. These can cause your baby to overheat and may create a fire hazard if fabrics like curtains or blankets come into contact with the heat source. Finally, aim for a layout that keeps the crib in a central, draft-free spot while maintaining a clear path for you to walk safely through the room during middle-of-the-night feedings.

Smart Shopping: New vs. Used Furniture

While buying secondhand is a great way to be sustainable and budget-friendly, some items should always be purchased new. A new crib mattress is a non-negotiable safety requirement; older mattresses can harbor mold, dust mites, or sagging spots that create an uneven sleeping surface, which increases the risk of SIDS.

If you choose to purchase other nursery furniture used, do your due diligence. Check the CPSC website for product recalls using the manufacturer’s name and model number. Inspect items for structural damage, loose screws, or peeling paint that could be ingested. If a piece of furniture feels shaky or requires significant repairs to be stable, it is better to pass on it. You can browse our top 10 best baby products every new parent needs for reliable alternatives.

Conclusion

Creating a safe nursery is one of the most proactive ways you can prepare for your baby’s arrival. By prioritizing JPMA-certified gear, opting for non-toxic materials, and anchoring every piece of heavy furniture, you are building a secure foundation for your child. Remember, safe baby furniture is a long-term investment in your child’s environment.

You have the power to create a space that is both beautiful and protective. If you feel overwhelmed, remember to tackle one piece of furniture at a time. Once the main items are secured, you will feel much more confident and ready to enjoy those precious early days with your baby. For more help, check out our comprehensive baby-proofing checklist to ensure every corner of your home is just as safe as your nursery.

Frequently Asked Questions

What safety standards should I look for in baby furniture?

Look for mandatory CPSC federal safety standards and the JPMA certification seal, which indicates the product has passed rigorous independent testing for structural stability and safety.

Why are non-toxic materials important for nursery furniture?

Conventional furniture can release VOCs from glues and finishes, which may cause respiratory irritation. Non-toxic, low-VOC finishes and GREENGUARD Gold certified items ensure healthier air quality for your baby.

Is it safe to use second-hand baby furniture?

While some furniture can be bought used if checked for recalls and structural integrity, items like crib mattresses should always be purchased new to prevent SIDS risks and hygiene issues.

How do I prevent baby furniture from tipping over?

Always secure heavy items like dressers and bookshelves to the wall using furniture anti-tip kits or wall straps to prevent dangerous tip-over accidents as your child becomes mobile.

What are the spacing rules for crib slats?

Crib slats must be no wider than 2 3/8 inches apart to prevent your baby’s head from becoming entrapped between them.

Where should I place the crib in the nursery?

Position the crib away from windows, blind cords, electrical outlets, and heating vents to eliminate strangulation, fire, and overheating risks.

10 Best Baby Lotions for Soft and Healthy Skin (2024 Expert Guide)

0

10 Best Baby Lotions for Soft and Healthy Skin (2024 Expert Guide)

Welcoming a new baby into your home brings a whirlwind of joy, but it also brings a new level of awareness regarding your little one’s physical needs. Among these, maintaining the integrity of your baby’s delicate skin barrier is paramount. Infant skin is thinner, more permeable, and loses moisture significantly faster than adult skin. Because of these unique biological differences, standard adult lotions are often too harsh, frequently containing perfumes, alcohols, or preservatives that can irritate a newborn’s sensitive dermis. For more guidance on maintaining health, check out our Everything Parents Should Know About Baby Skin Care: The Ultimate Guide.

Choosing the right moisturizer is more than just a matter of softness; it is an act of protection. When you pick the best baby lotions for soft and healthy skin, you are reinforcing a defensive shield against environmental pollutants and irritants. If you are also preparing for your infant’s grooming routine, be sure to check out our Baby Bathing Essentials guide for a complete approach to hygiene and care.

What to Look for in the Best Baby Lotions

Navigating the baby aisle can feel overwhelming. To make the best choice, prioritize formulas that focus on skin health rather than aesthetic appeal. Look for ingredients that mimic the natural lipids of the skin, such as ceramides, which help restore the barrier. Shea butter is an excellent emollient for long-lasting hydration, and colloidal oatmeal is a gold standard for soothing inflammation and itching. If your baby is struggling with dryness in different seasons, read our The Ultimate Baby Skin Care Checklist for Every Season: A Seasonal Guide.

Equally important is knowing what to leave on the shelf. Avoid products containing parabens, phthalates, and artificial dyes, as these are common allergens for infants. Furthermore, pay attention to labels regarding scent. Fragrance-free means the product contains no masking scents, whereas unscented products may actually contain fragrance chemicals designed to neutralize odors. For the safest experience, fragrance-free is almost always the better choice.

Top 10 Best Baby Lotions for Soft and Healthy Skin

Our expert selection focuses on safety, ingredient quality, and proven effectiveness. Please remember that every baby is unique; always perform a patch test by applying a small amount of lotion to your baby’s inner forearm and waiting 24 hours to check for any redness or reaction. You can also find great general tips in our Top 10 Best Baby Products Every New Parent Needs (India Edition).

  1. Aveeno Baby Eczema Therapy: The best overall pick for daily use, specifically for its ability to balance moisture using high-quality colloidal oatmeal.
  2. CeraVe Baby Moisturizing Lotion: Our top choice for eczema-prone skin, as it contains essential ceramides that strengthen the delicate skin barrier.
  3. Baby Dove Sensitive Moisture: A fantastic budget-friendly option that provides 24-hour hydration without being greasy.
  4. Earth Mama Simply Non-Scents: The premier organic and plant-based choice for parents who prefer a minimalist, worry-free ingredient list.
  5. Aquaphor Baby Healing Ointment: While technically an ointment, this is the gold standard for dry, flaky patches and stubborn skin irritation.
  6. Mustela Hydra Bébé Body Lotion: A lightweight, fast-absorbing formula that is perfect for newborn skin.
  7. Burt’s Bees Baby Fragrance-Free Lotion: A reliable, natural option that leaves skin soft without any residue.
  8. Pipette Baby Lotion: Highly regarded for its clean formulation, utilizing sugarcane-derived squalane to mirror natural skin oils.
  9. Tubby Todd The All Over Ointment: A fan favorite for its plant-based ingredients that tackle dry spots and cradle cap.
  10. Honest Company Face + Body Lotion: An excellent multipurpose choice for busy parents needing a reliable everyday moisturizer.

How to Properly Moisturize Your Baby’s Skin

The timing of your application is just as important as the product you choose. We recommend the soak and seal method. After a bath, gently pat your baby with a soft towel, leaving the skin slightly damp. Applying lotion within three minutes of drying traps that surface moisture, locking it into the skin cells. For more on proper bathing, see Complete Guide to Bathing Your Baby Safely: Step-by-Step Instructions for New Parents.

Use a gentle, circular motion to massage the lotion onto your baby, paying close attention to dry areas like elbows, knees, and cheeks. Avoid over-applying; a thin layer is usually sufficient. If you notice persistent redness, bleeding, or weeping sores, it is time to contact your pediatrician. Skin issues can sometimes signal underlying allergies or conditions like seborrheic dermatitis that require medical-grade treatment.

Common Baby Skin Concerns & Solutions

Many parents worry about cradle cap, which appears as crusty or oily scales on the scalp. While typically harmless, using a gentle moisturizer or baby oil can help soften the flakes before a gentle brushing. For diaper rash, remember that moisturizer is not a substitute for barrier creams containing zinc oxide. Use the moisturizer on the skin surrounding the rash to keep it hydrated, but use a dedicated diaper cream on the irritated area itself. You can find more on general safety and health in our Baby Safety Rules Every Parent and Caregiver Should Know: A Complete Guide.

Infant acne is another common occurrence due to maternal hormones. Usually, this clears up on its own, but sticking to non-comedogenic lotions—those that will not clog pores—is vital during this stage. If you ever see a rash that spreads rapidly or is accompanied by a fever, consult your healthcare provider immediately.

Frequently Asked Questions (FAQs)

  • Can I use coconut oil instead of baby lotion? While natural, coconut oil can be heavy and may clog pores for some babies. Stick to lotions formulated specifically for infants.
  • How often should I moisturize my baby? Once a day, typically after the evening bath, is sufficient for most infants.
  • When can I start using scented lotions on my baby? It is generally recommended to wait until at least six months of age, and only if the skin shows no sensitivities.
  • Is organic always better? Not necessarily. Focus on the ingredient list rather than marketing buzzwords like ‘organic’ or ‘natural.’

Conclusion

Finding the right balance for your little one’s skin takes a bit of trial and error, but focusing on simple, clean ingredients is the best way to ensure your baby stays comfortable. The best baby lotions for soft and healthy skin act as a gentle support system for your baby’s development. Whether you are dealing with seasonal dryness or sensitive eczema patches, consistency is your best tool. Have you found a favorite brand that works wonders for your little one? Leave a comment below or sign up for our newsletter for more expert-backed parenting tips!

Frequently Asked Questions

Can I use coconut oil instead of baby lotion?

While natural, coconut oil can be heavy and may clog pores for some babies. It is generally safer to stick to lotions formulated specifically for infants.

How often should I moisturize my baby?

Once a day, typically after the evening bath, is sufficient for most infants to keep their skin hydrated.

When can I start using scented lotions on my baby?

It is recommended to wait until at least six months of age, and only if the baby’s skin shows no signs of sensitivity or irritation.

Is organic baby lotion always better?

Not necessarily. Focus on the ingredient list and absence of harsh chemicals rather than marketing buzzwords like organic or natural.

Should I use lotion on my baby’s diaper rash?

Moisturizers are not a substitute for barrier creams containing zinc oxide. Use moisturizer on surrounding skin, but use a dedicated diaper cream on the irritated area.

What is the best way to apply baby lotion?

Use the soak and seal method by applying lotion within three minutes after a bath while the skin is still slightly damp to trap moisture effectively.

7 Best Disposable Diapers for Sensitive Baby Skin: A Dermatologist-Reviewed Guide

0

7 Best Disposable Diapers for Sensitive Baby Skin: A Dermatologist-Reviewed Guide

There is almost nothing more distressing for a new parent than seeing their baby in discomfort. You change them, you feed them, and you cuddle them, yet they seem fussy. Upon opening their diaper, you see the telltale signs of irritation—angry red bumps, inflamed skin, or a persistent rash. If you have been struggling to find relief for your little one, you are certainly not alone. Finding the 7 best disposable diapers for sensitive baby skin can be a game-changer for your sanity and your baby’s comfort. For more foundational knowledge, see our complete guide to baby diapering for new parents.

Many standard diapers on the market are packed with hidden chemicals, artificial fragrances, and dyes that can wreak havoc on a newborn’s delicate skin barrier. While these brands are mass-produced for convenience, they often fail the needs of babies with eczema or reactive skin. Understanding what goes into these materials is the first step toward clearing up that rash for good.

What Causes Diaper Sensitivity?

To identify the best disposable diapers for sensitive baby skin, we must first understand why reactions happen. Your baby’s skin is significantly thinner than yours, making it highly susceptible to contact dermatitis. Common culprits include synthetic fragrances, which are often added to mask the scent of chemicals, and chlorine bleaching agents used to turn pulp white. You can learn more about maintaining healthy skin by reviewing our everything parents should know about baby skin care guide.

Phthalates, often used to make plastics flexible, and latex are also frequent irritants. Beyond chemicals, the diaper’s performance matters. If a diaper does not absorb moisture quickly, the skin remains trapped against urine and stool. This environment alters the skin microbiome, raising the pH level and making it easier for bacteria to thrive. A high-quality diaper needs to be both hypoallergenic and incredibly absorbent to maintain skin health.

Key Ingredients to Avoid vs. Seek Out

When you are scanning the back of a diaper package, you might feel like you need a chemistry degree. Let us simplify it with a clear look at what should and should not touch your baby.

The Dirty List

Avoid products containing elemental chlorine, harsh artificial fragrances, parabens, and PVC. These ingredients are often linked to skin sensitization and can trigger immediate flare-ups in babies prone to eczema.

The Clean List

Seek out diapers that prioritize plant-based fibers, such as bamboo or sustainably sourced wood pulp. Look for linings infused with natural emollients like shea butter or aloe, which provide a gentle barrier. A reliable wetness indicator is also a huge plus for parents, helping you keep track of changes without constantly tugging at the tabs.

Top 7 Best Disposable Diapers for Sensitive Baby Skin

Choosing the right diaper is a process of trial and error. Here are our top picks for the best disposable diapers for sensitive baby skin based on absorbency, material safety, and parent satisfaction.

  • 1. Best Overall (Coterie): Coterie is a favorite among dermatologists because of its unparalleled absorbency. By pulling moisture away from the skin faster than almost any other brand, they significantly reduce the risk of irritation.
  • 2. Best Budget-Friendly (Hello Bello): If you want premium ingredients without the premium price tag, Hello Bello is a fantastic choice. They offer a transparent list of materials and are free from fragrances and chlorine, making them a top contender for daily use.
  • 3. Best for Eczema-Prone Skin (Pampers Pure Protection): These are clinically proven to be hypoallergenic. They use a blend of premium cotton and soft, plant-based fibers, which are ideal for babies who react to even the slightest synthetic irritation.
  • 4. Best Eco-Conscious Choice (Dyper): For parents concerned about their environmental footprint, Dyper is a leader. Their bamboo-based diapers are naturally antimicrobial and breathable, which is excellent for babies who tend to get sweaty or overheated.
  • 5. Best for Newborns (Huggies Special Delivery): Newborn skin requires extreme softness. These diapers are specifically designed with a velvety-soft liner that feels gentle against sensitive umbilical cord areas.
  • 6. Best Chlorine-Free (Seventh Generation): If you want to strictly avoid chlorine bleaching, this brand has been a long-time industry standard. Their design is simple, effective, and free from the additives that commonly cause contact dermatitis.
  • 7. Best High-End Luxury (The Honest Company): Known for their commitment to transparency, Honest diapers offer peace of mind. They are free from known irritants and feature adorable prints that do not sacrifice safety for style.

How to Test a New Diaper Brand

We know the temptation to buy in bulk is strong, especially when you find a sale. However, when switching to one of the best disposable diapers for sensitive baby skin, perform a one-pack trial first. Every baby has a unique body chemistry, and what works for one child may not work for another.

Keep a close eye on your baby for 48 hours. Check for any new redness, small bumps, or dry patches after each change. If the skin remains clear and your baby seems comfortable, you have found a winner. If irritation persists, it might be time to look for a different material blend. For more tips, check out our newborn care first-time parent guide.

Pro-Tips for Preventing Diaper Rash

The best diaper in the world cannot fix a rash if the hygiene routine is lacking. Prevention is just as important as the product you choose. Aim to change your baby as soon as you notice wetness. Even high-tech diapers are not magic; keeping the skin dry is your primary defense. If you struggle with messes, our article on how to prevent diaper leaks may offer additional solutions.

During every change, try to give your baby a few minutes of air-out time. Let them lay on a towel and kick freely. If you do notice redness, reach for a high-quality zinc oxide cream to create a breathable barrier. When it comes to wipes, avoid those with alcohol or heavy scents. Stick to water-based wipes to ensure you aren’t adding more irritants to the area.

Conclusion & Frequently Asked Questions

Finding the right diaper is a journey, but you do not have to settle for products that irritate your baby’s skin. By prioritizing plant-based materials and avoiding known chemicals, you can ensure your little one stays happy and rash-free. Whether you choose one of the options above or continue your search, remember that your baby’s comfort is the ultimate metric for success. You can also explore our everything parents need to know about baby safety guide for more tips on keeping your little one secure.

Do I need to buy expensive diapers if my baby doesn’t have a rash?

Not necessarily. If your baby has robust, non-reactive skin, standard diapers may be perfectly fine. However, many parents prefer cleaner options to prevent potential issues before they start.

How can I tell if the diaper is too tight or irritating?

If you see red marks around the thighs or waist after changing, the diaper is likely too tight. If the skin looks chapped or has a sandpaper-like texture, the material itself may be causing the irritation.

Are overnight diapers different for sensitive skin?

Overnight diapers are generally more absorbent to last 10-12 hours. If your baby has sensitive skin, look for overnight versions from brands that are already fragrance-free and hypoallergenic to ensure the added absorbency does not come at the cost of chemical exposure.

Frequently Asked Questions

Do I need to buy expensive diapers if my baby doesn’t have a rash?

Not necessarily. If your baby has robust, non-reactive skin, standard diapers may be perfectly fine. However, many parents prefer cleaner options to prevent potential issues before they start.

How can I tell if the diaper is too tight or irritating?

If you see red marks around the thighs or waist after changing, the diaper is likely too tight. If the skin looks chapped or has a sandpaper-like texture, the material itself may be causing the irritation.

Are overnight diapers different for sensitive skin?

Overnight diapers are generally more absorbent to last 10-12 hours. If your baby has sensitive skin, look for overnight versions from brands that are already fragrance-free and hypoallergenic to ensure the added absorbency does not come at the cost of chemical exposure.

What ingredients should I avoid in baby diapers?

You should avoid elemental chlorine bleaching, synthetic fragrances, parabens, phthalates, lotions, and latex. These common additives can strip the natural moisture barrier and trigger contact dermatitis or eczema flare-ups.

Are bamboo diapers better for sensitive skin?

Yes, bamboo-based diapers are naturally breathable, antimicrobial, and softer than standard wood-pulp diapers. They help regulate temperature and reduce moisture buildup, making them fantastic for babies prone to rashes.

How often should I change a sensitive skin baby?

You should change your baby as soon as they are wet or soiled, ideally every 2 to 3 hours during the day. Keeping urine and stool away from the skin is the most effective way to prevent irritation.